

If you have an old customer base from a previous system (a legacy POS, or a paper membership book) complete with tiers and point balances, you can import all of it into DeepBLOK yourself via Settings > Existing Member Migration with a single CSV upload. Takes about 20 minutes.
📌 Good to know: when you import existing customer data, the data is held in the system. The member account will not be usable until the customer registers with the same phone number.
⚡ Quick Path:
Settings→Existing Member Migration→Existing member management→Migrate Datatab → switch on the fields you want in the top 2 panels →+ Migrate Existing member data→ download the template → fill it in →Browse File
Requirements before you start
- An account with the Admin Role — you need access to
Settings > Existing Member Migration. - Your existing customer file, matching the 15-column template — download it from the upload page (step 4).
- Every customer's mobile number, correct and exactly 10 digits. It's the only thing the system uses to match old data to the new account a customer will eventually register with. A wrong number, or a customer signing up with a different one, means the data never gets attached.
- Understand up front that importing is not the same as creating an account — re-read the note above if you're not sure yet.
💡 Tell your customers to register with the same phone number you already have on file for them, before you import. If you can, announce the migration window and say plainly: "your old points are waiting — just sign up with your usual number." Until someone registers with a matching number, the imported data isn't attached to anyone.
Import your existing customer base in 5 steps
Step 1: Open Existing Member Migration
In the left sidebar, click Settings to expand the submenu, then click Existing Member Migration.
On a first visit, the system asks: "Do you have existing member data that needs to be migrated into the system?" Select Have existing member data to be migrated, then click the blue Existing member management button that appears.
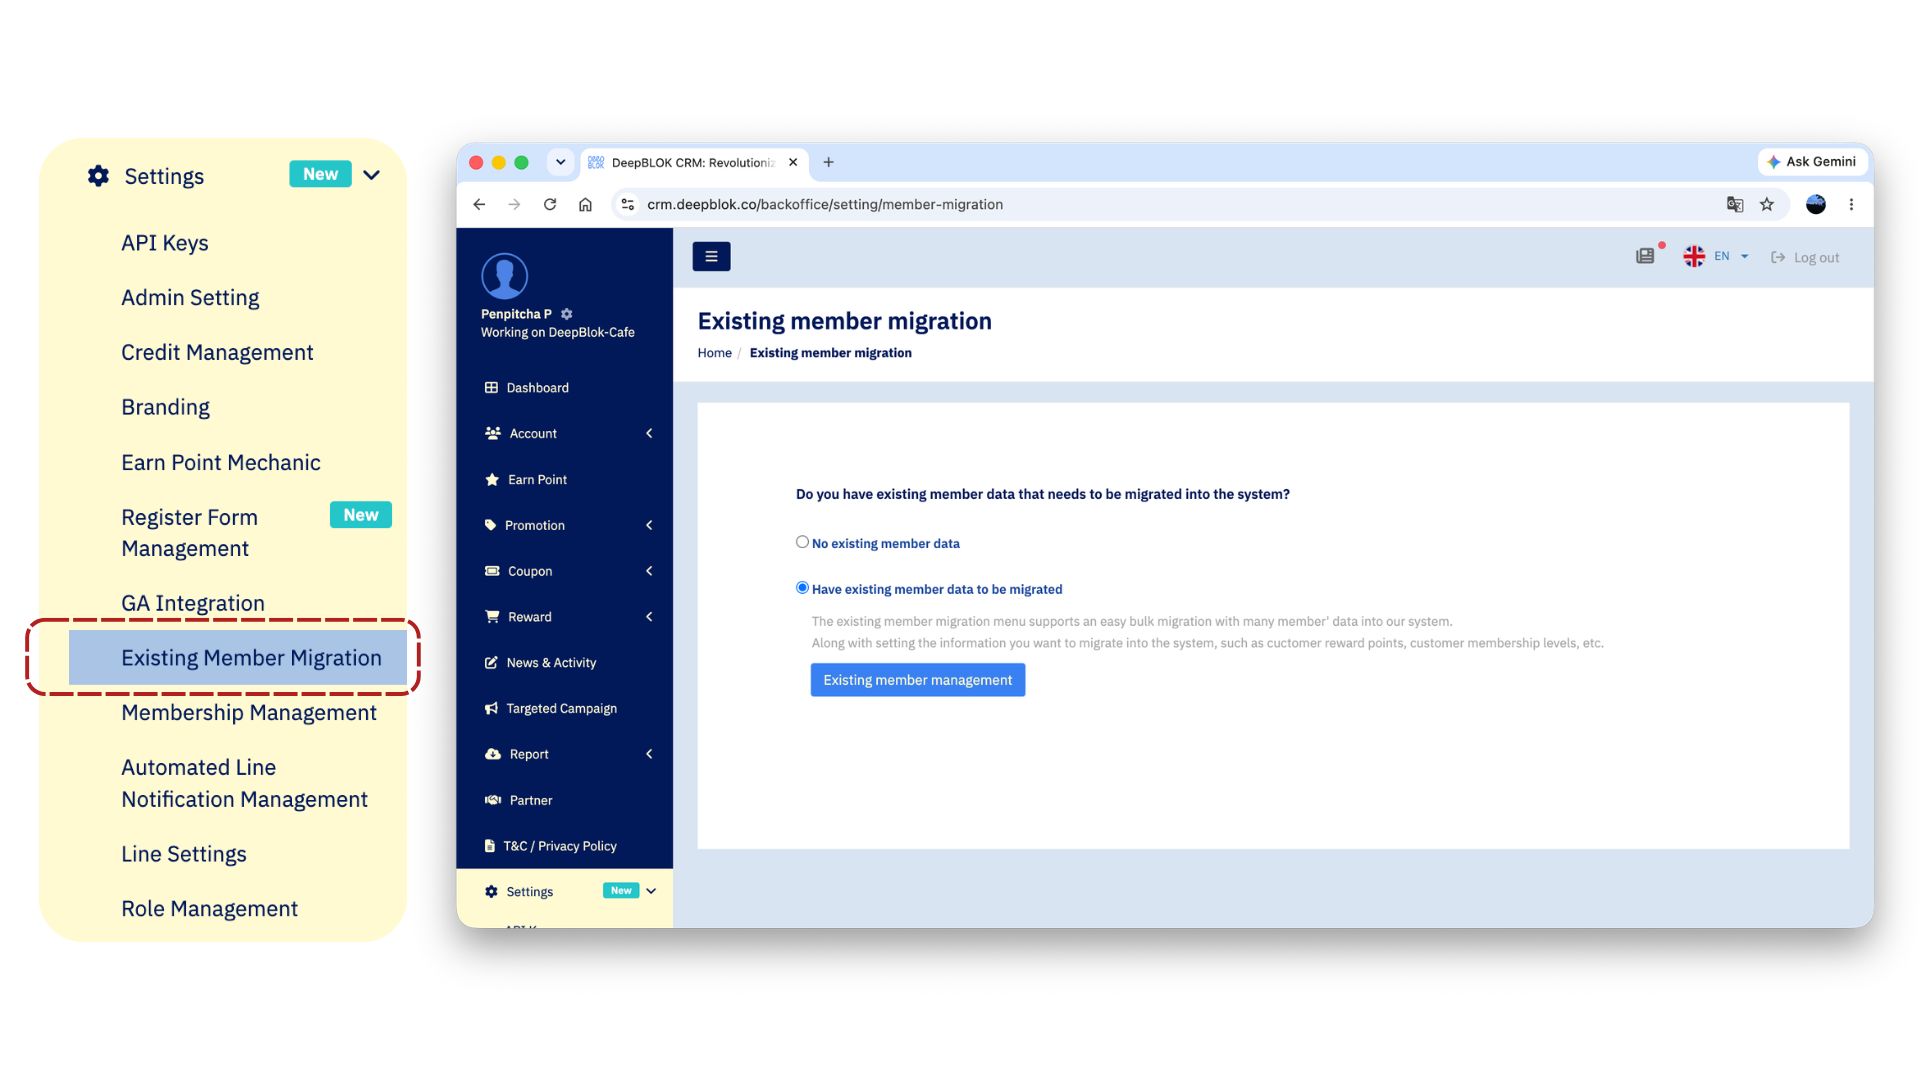
Step 2: Get to know the 3 tabs of Existing member management
This page has 3 tabs, each with a different job:
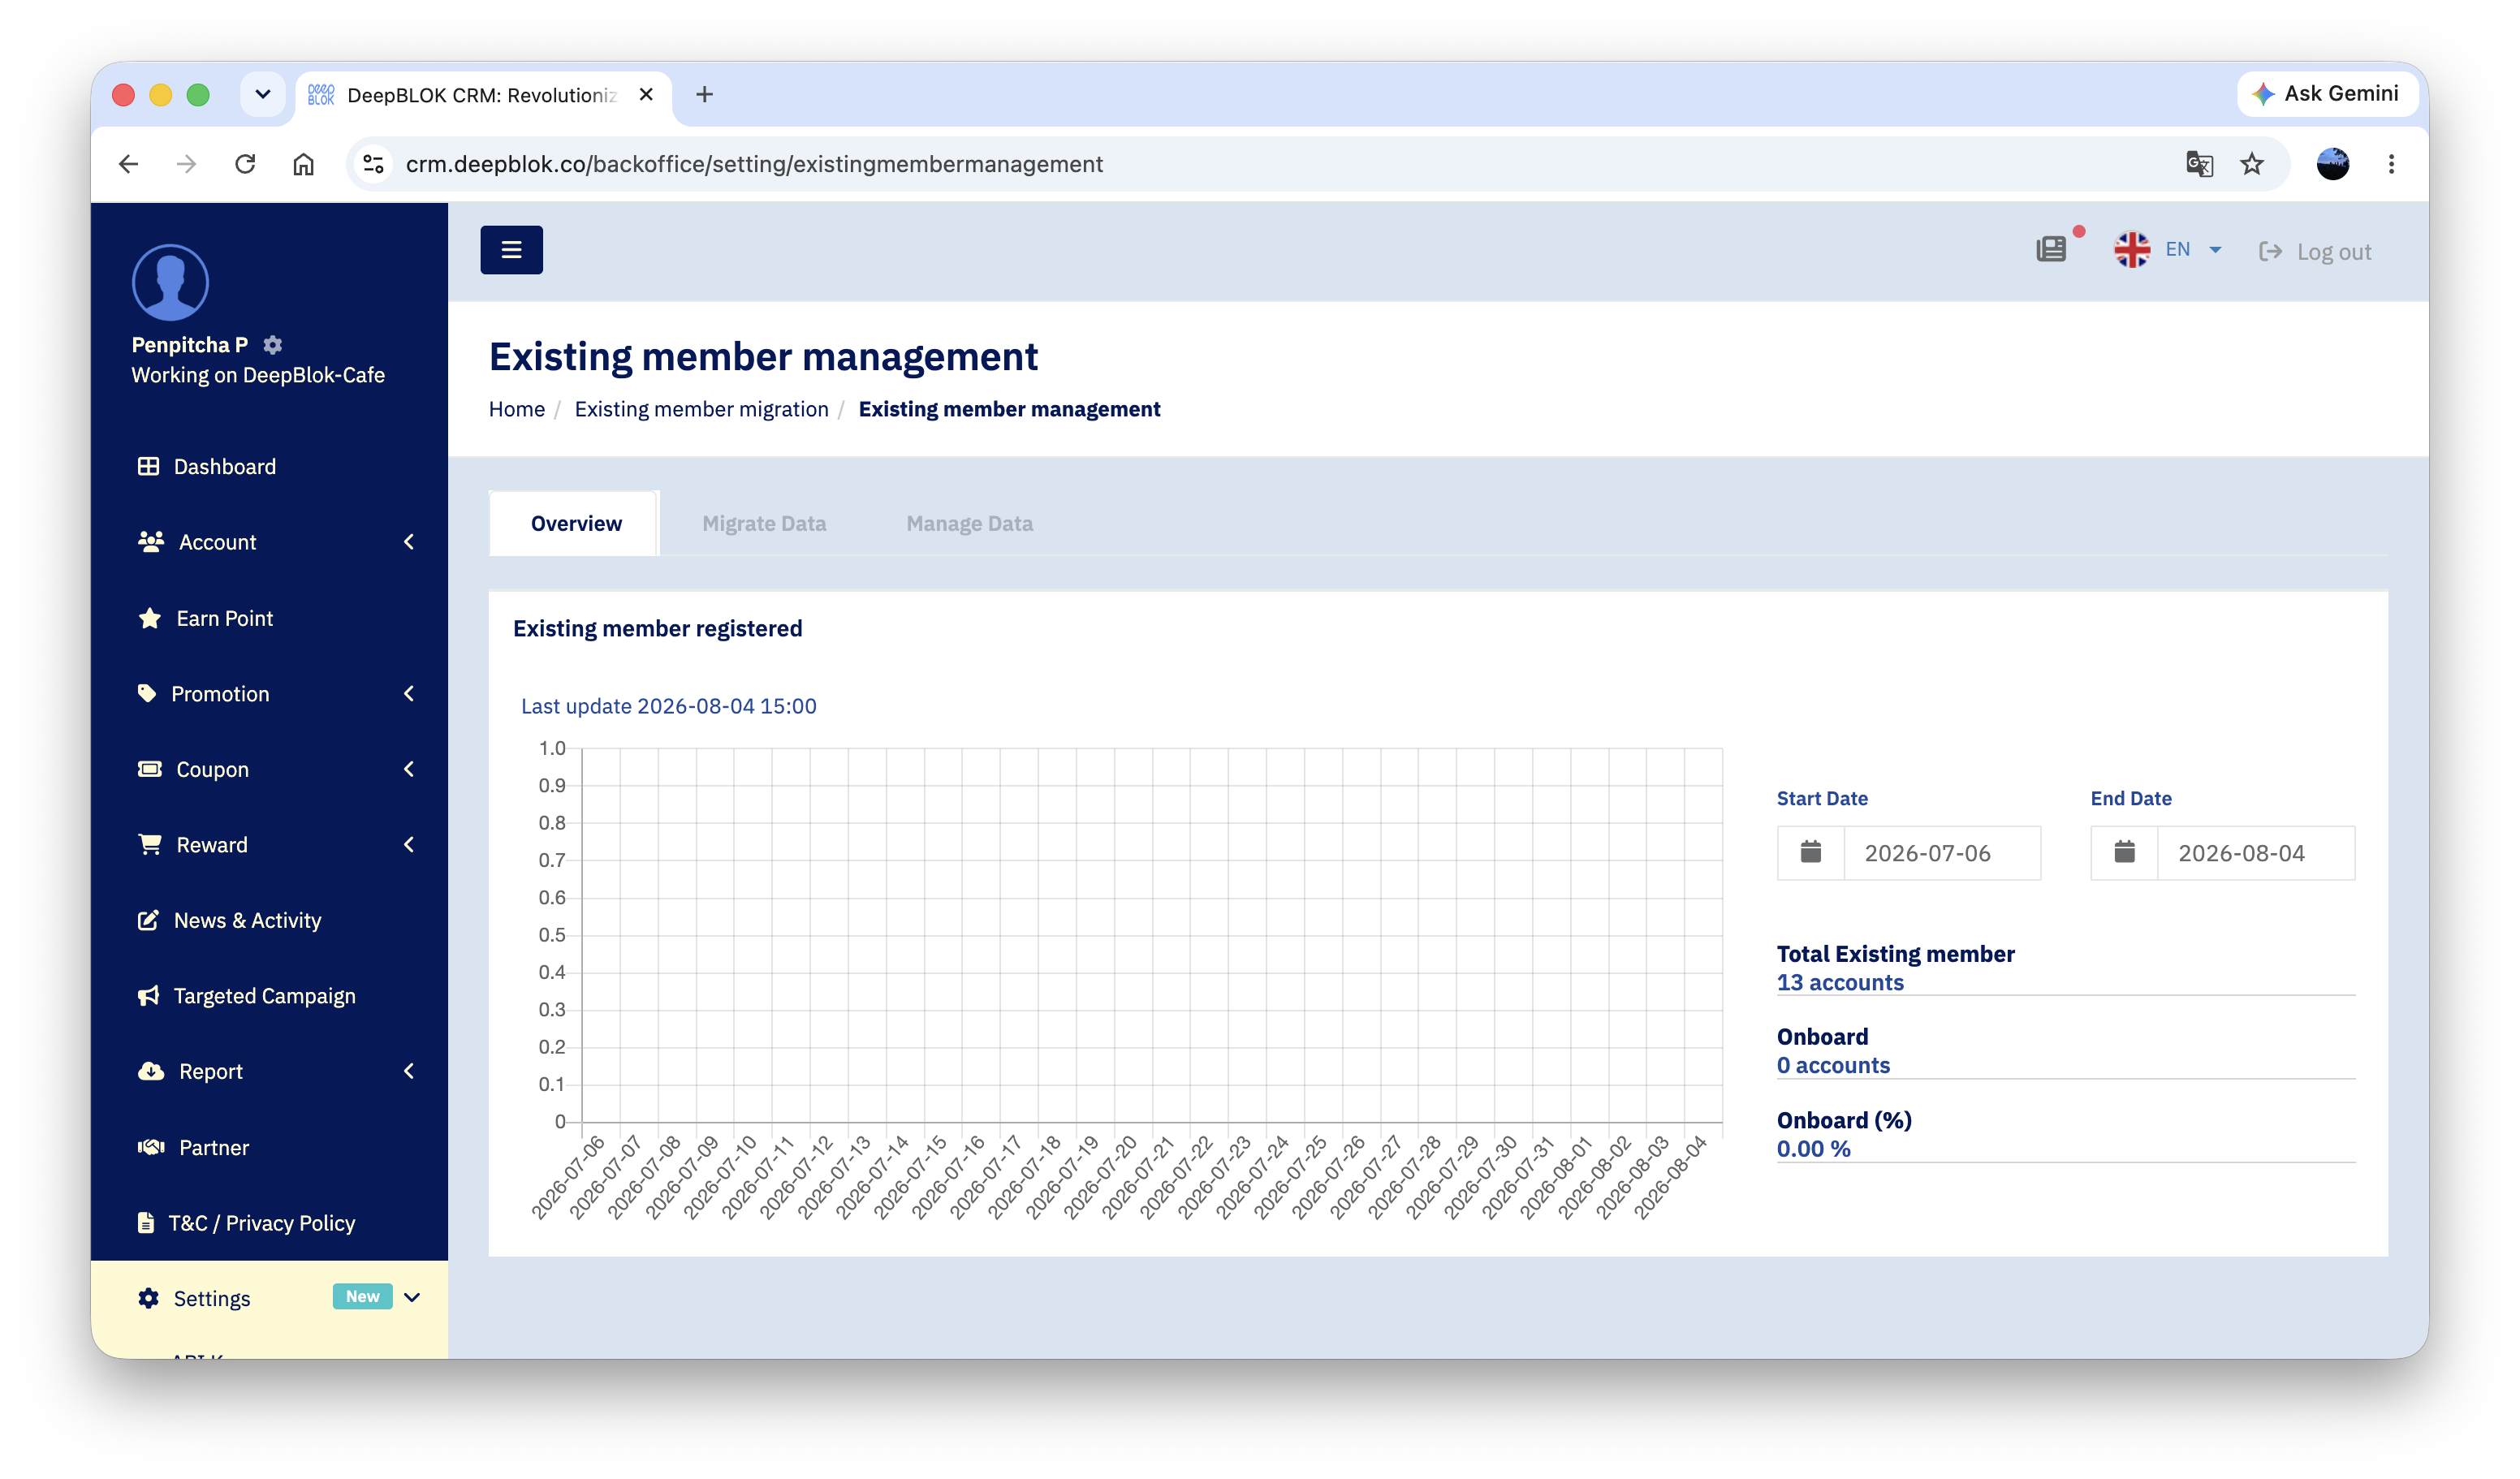
Step 3: Choose what the system actually imports
This step is important. Go to the Migrate Data tab. At the top, under the heading Existing member information setting, sit 2 panels you need to configure first — click each heading (chevron on the right) to expand it.
Each panel is a table of data fields with an on/off switch per row on the right, plus a Select all switch to turn everything on at once.
Panel 1 — Member status migration setting (6 rows) controls whether tier and point balances come across.