

If you run more than one location and want to know where each member signed up, turn on the Register Branch field in Settings > Register Form Management and add your branches. Customers then see a branch dropdown (with a built-in search box) when they sign up in the LINE app. This setting affects the registration form only — no existing member records or point balances are touched.
⚡ Quick Path:
Settings→Register Form Management→ turn onRegister Branch→Manage List→+ Add New Branch→ fill in andSave
Requirements before you start
- An account with the Admin Role — you need access to
Settings > Register Form Management. - Your branch list prepared in advance. Each branch needs 3 things:
- A branch code — English letters and digits only, and it must be unique, e.g.
BKK001 - An English branch name, e.g.
Central Silom Complex - A Thai branch name, e.g.
เซ็นทรัล สีลม คอมเพล็กซ์ - A system requirement: at least one branch must exist before this field can be used, as the note under the field states.
💡 Agree your branch-code format with your team before you start. This code stays attached to every member who signs up from now on, and it shows up in the reports you'll read every month. A consistent pattern (
BKK001,BKK002,CNX001) sorts and filters far more easily than ad-hoc names.
Set up branches in 5 steps
Step 1: Open Register Form Management
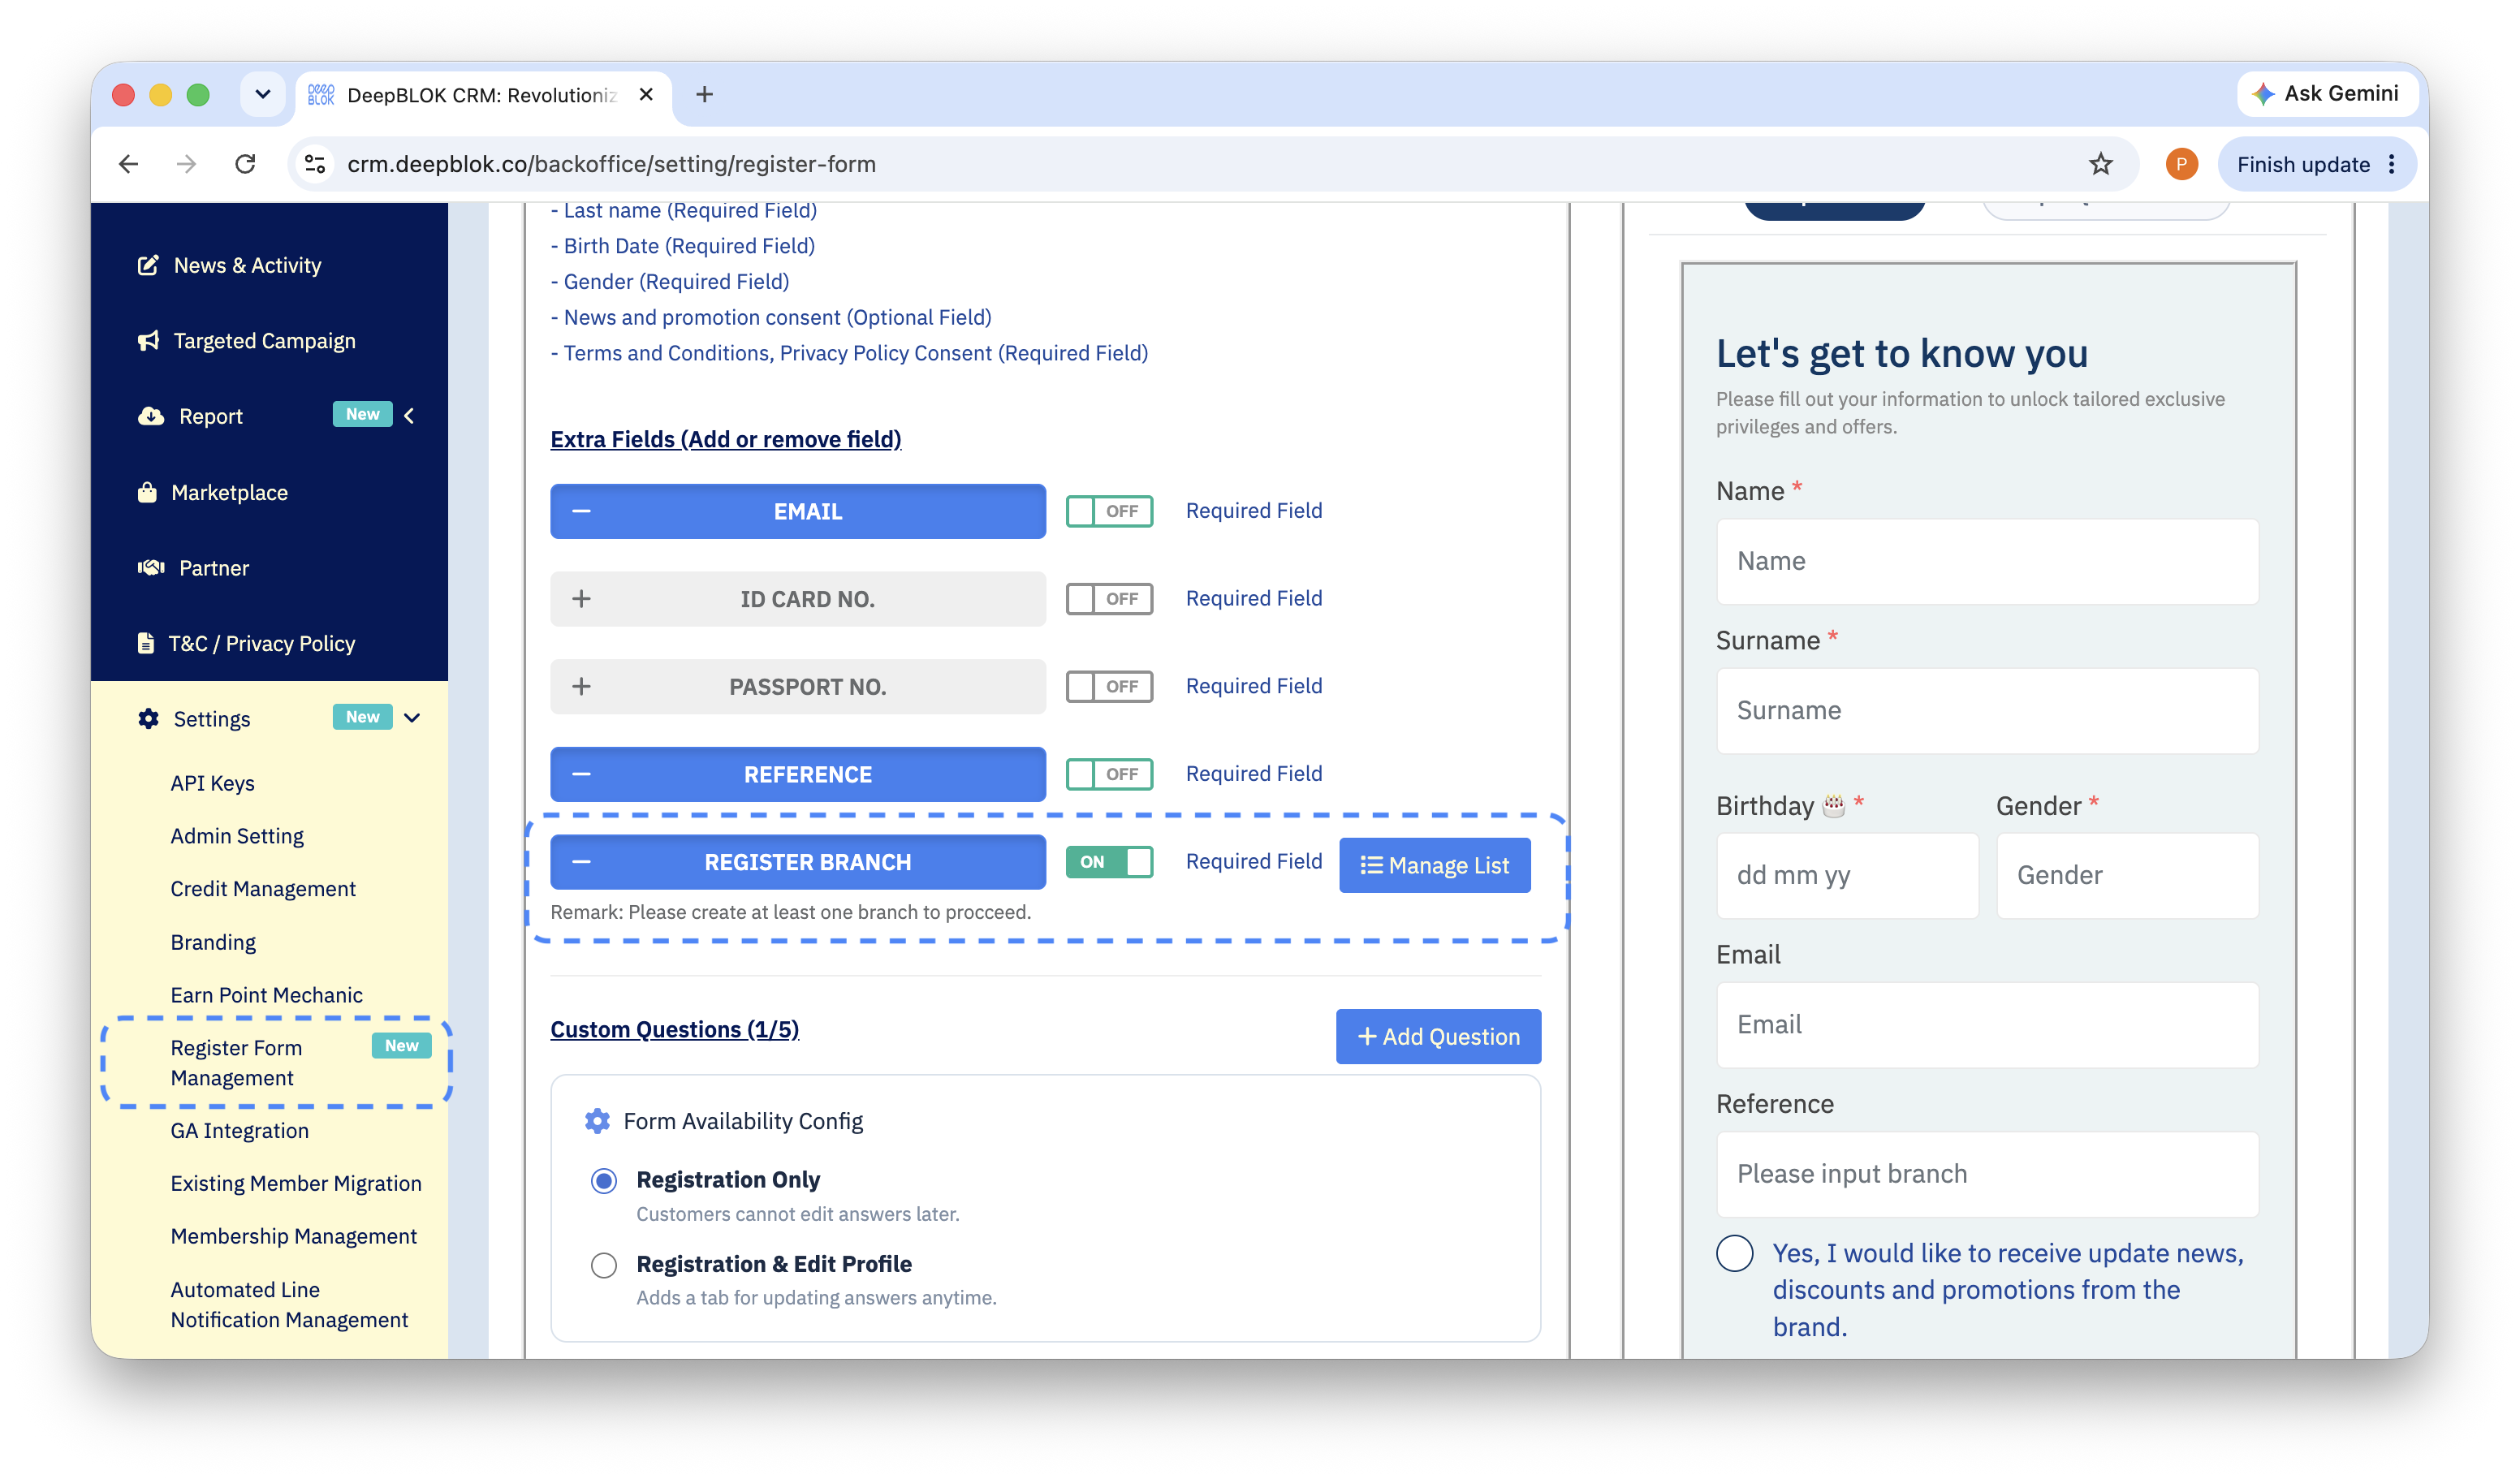
In the left sidebar, click Settings to expand the submenu, then click Register Form Management.
This page has 2 sections that behave differently — worth telling apart, since it's easy to mix them up:
- Default Field — the base fields (First name, Last name, Birth Date, Gender, News and promotion consent, Terms and Conditions/Privacy Policy Consent), shown as a plain list, no switch, can't be turned off
- Extra Fields (Add or remove field) — further down, a full-width bar per field that you can turn on and off. Blue bars are fields already turned on; grey bars aren't. Register Branch lives in this section.
Step 2: Turn on the Register Branch field
Scroll to the bar labelled Register Branch and click it to enable the field on the registration form. Once on, the bar turns blue and extra controls appear to its right.
A grey note under the bar reminds you that at least one branch has to exist before the field will work — which is what step 3 takes care of.
Step 3: Decide whether it's mandatory
To the right of the Register Branch bar sits an ON / OFF switch labelled Required Field. This switch decides whether customers have to pick a branch.
📌 Note: this switch chooses between Required and Optional — it isn't the field's own on/off. Whether the field is enabled is shown by the bar's colour (blue = on, grey = off). So a field can legitimately be enabled with the switch set to OFF, meaning customers see it but aren't obliged to fill it in.
Step 4: Build your branch list with Manage List
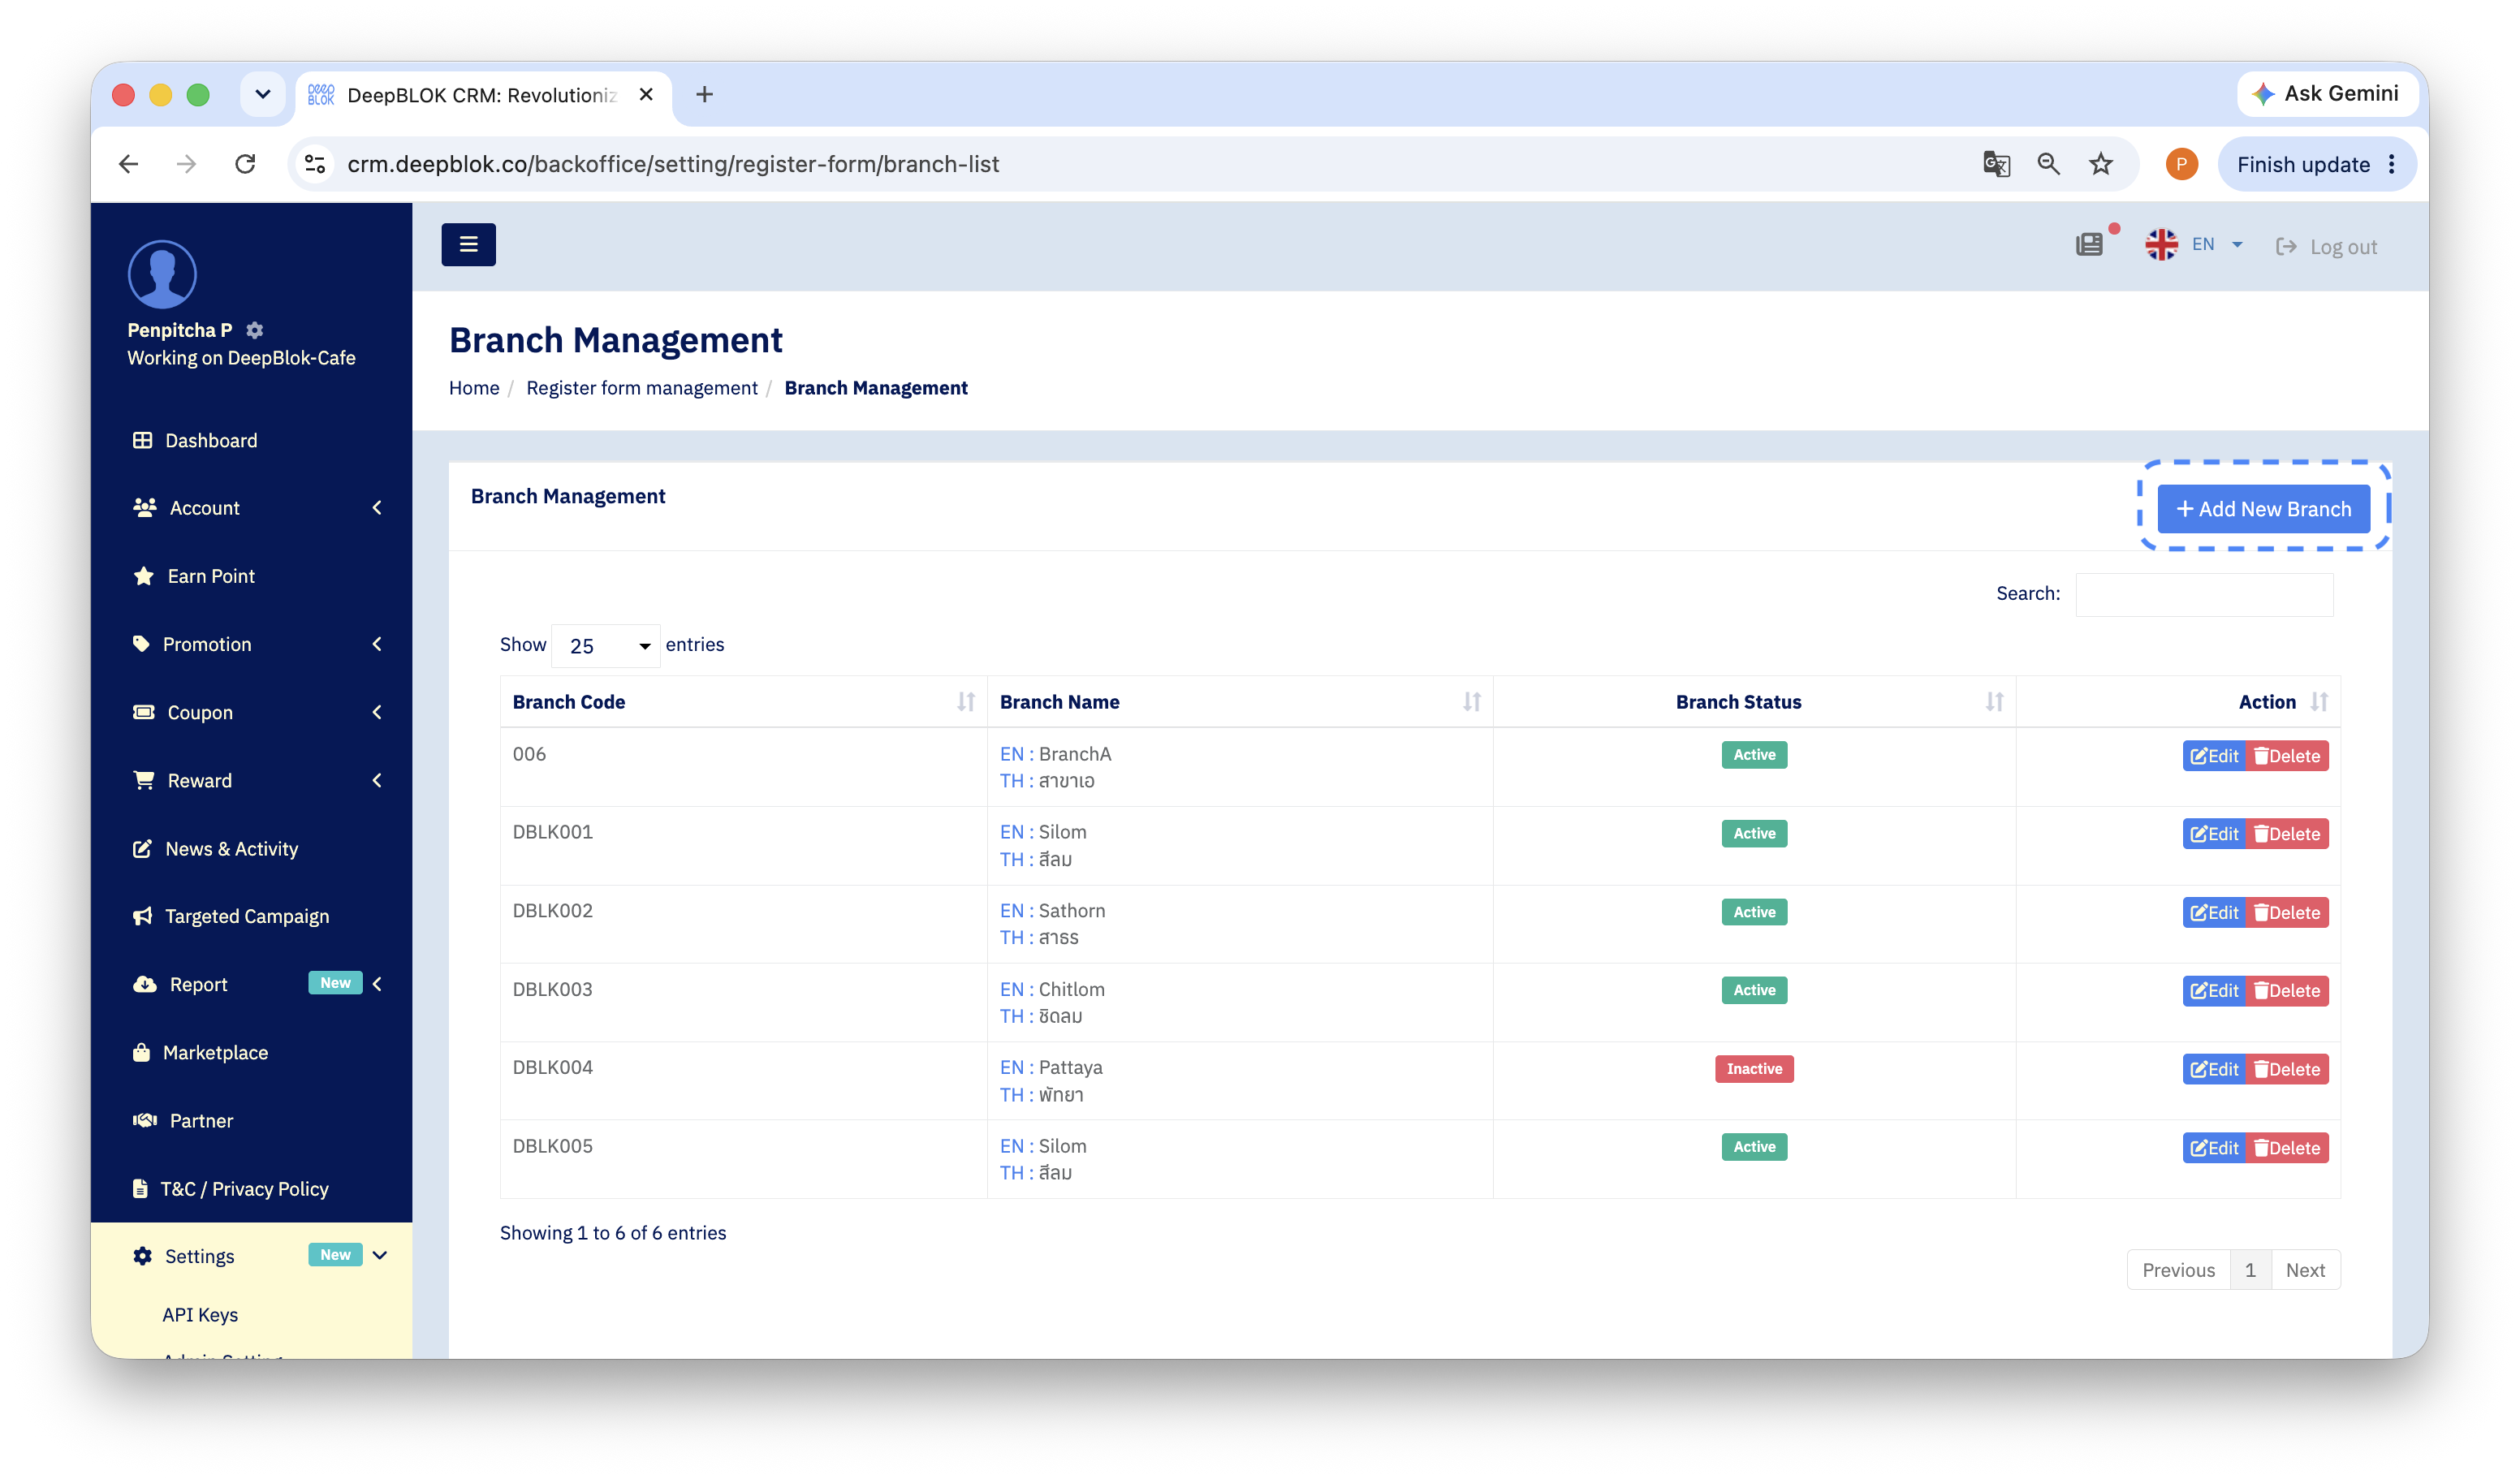
Click the blue Manage List button at the end of the Register Branch bar. The branch-list page opens — its Thai-mode title is confirmed as "หน้าจัดการสาขาร้านค้า" (store branch management page); the English-mode title hasn't been captured live yet, so this article still refers to it by its manual name, Register Branch List.
It shows all your branches in a 4-column table (column headers stay in English):
Click the blue + Add New Branch button at the top right of the table to add one.
Step 5: Fill in the branch details and save
The branch entry window opens. Complete all 4 fields:
Click the blue Save button at the bottom right. (The orange Cancel button beside it discards the entry.)
Repeat for each branch, then go back to Register Form Management and click the Save button at the bottom right of that page as well, to store the field setting.
✅ Confirm it worked: open the real registration link in the LINE app yourself and walk all 4 screens —
เริ่มใช้งาน(Get started) → enter a phone number → enter the 6-digit OTP → the "Let's get to know you" form. Scroll to the branch field and open the dropdown. If every branch you just created appears there with its Thai name, it's genuinely live.
⚠️ Note on the Preview tab: the
Preview EN/Preview THtab on the settings page is a rough layout aid and does not match the real form customers see — in the Preview, the branch field is folded into the Reference field, which isn't what actually happens. Always verify against the real form in the LINE app; never sign off on the Preview tab.