

Logging in for the first time and meeting a long list of menus down the left-hand side is disorienting, and that's normal. This article is the map of the whole system — what each menu is for, where to start based on your role, and where to find the 2 things people most often look for in the wrong place. By the end you'll know which menu holds the job you came to do.
⚡ Quick Path: Want the business overview →
Dashboard· Looking up one customer →Account· Configuring the system or adding teammates →Settings
Requirements before you start
- A Backoffice account you can already log in with. (If you can't get in yet, read the article on logging in to Backoffice for the first time first.)
- No special permissions needed — this tour only looks around, it doesn't change anything.
- Keep Backoffice open beside this article and click along as you read. It sticks far better than reading alone.
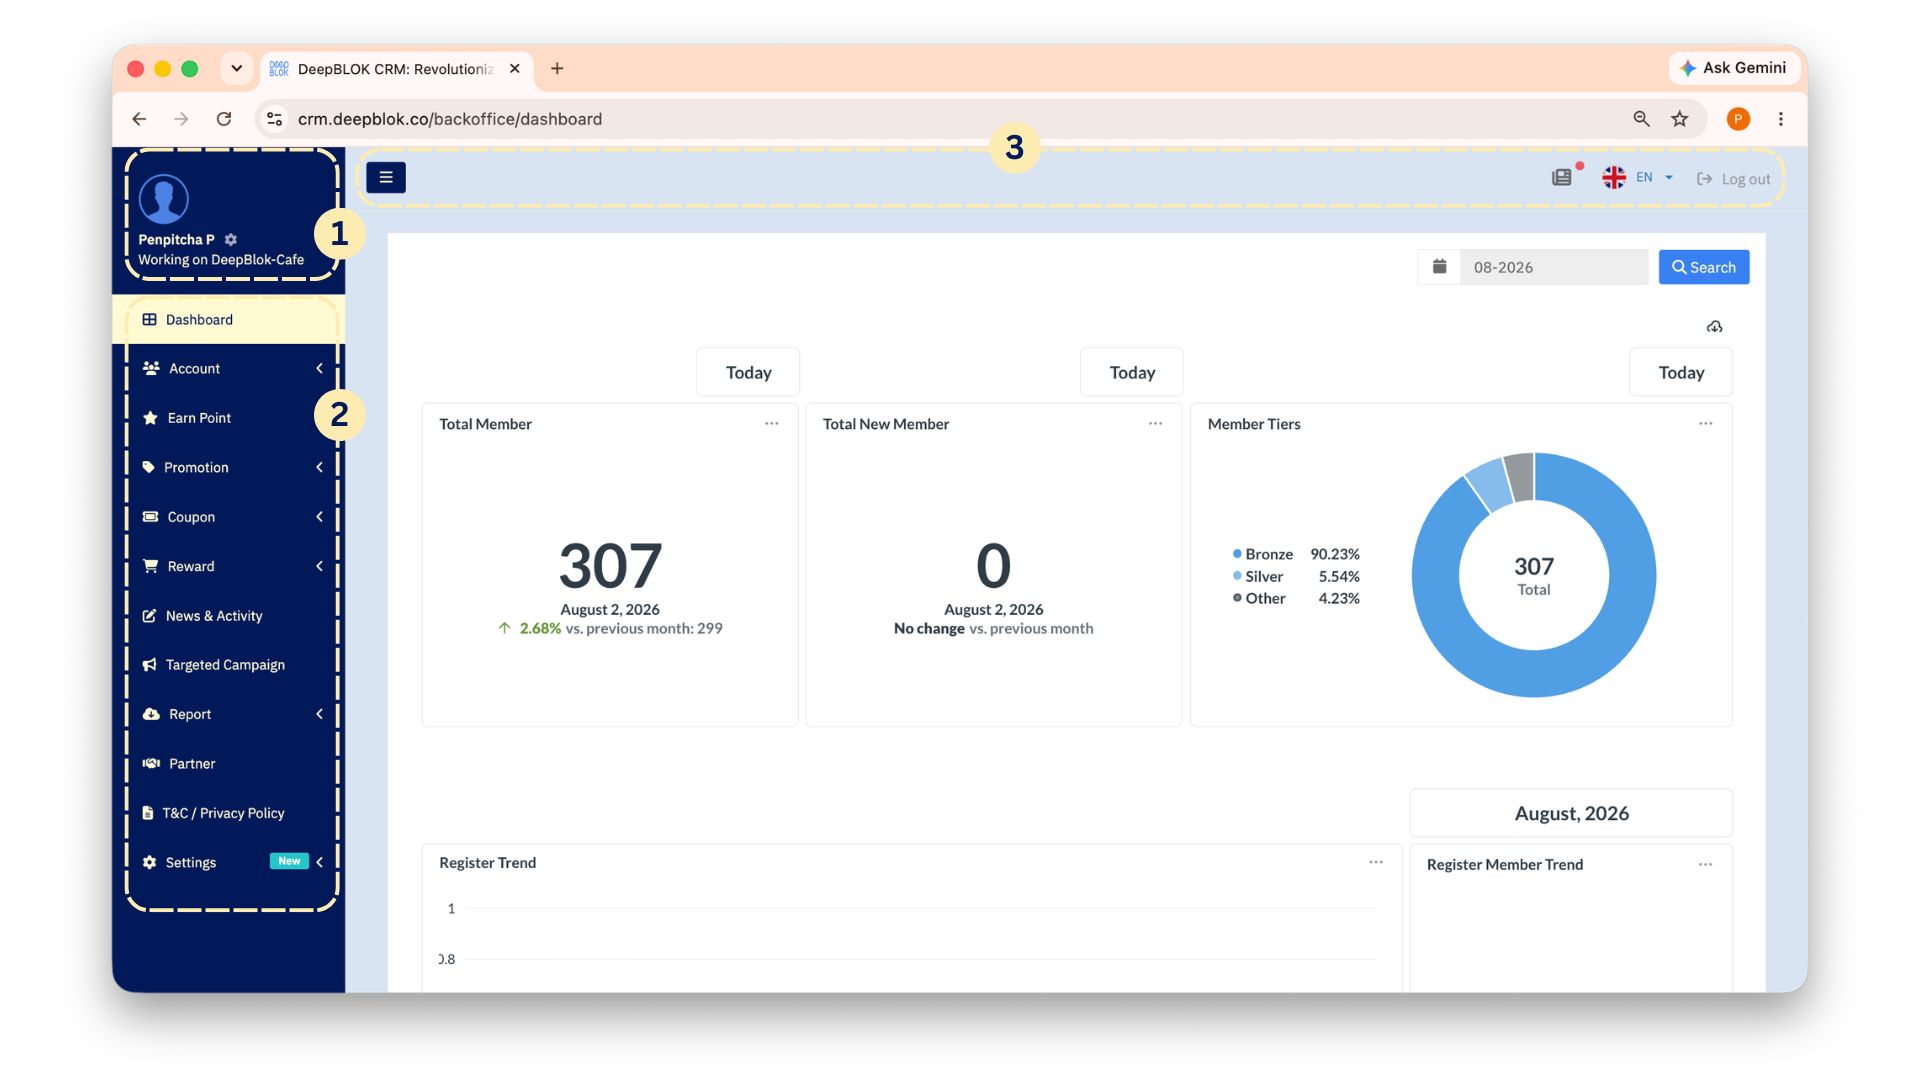
The screen has 3 parts
Before walking through the menus, get the layout straight. Every page in the system uses the same frame.
Everything to the right is the working area, and its contents change with the menu you pick. Every page also carries a breadcrumb at the top — for example Home / Account / ManageTools / AccountDetail — showing how deep you are. You can click any part of it to step back.
What the 14 menus do
Listed top to bottom, in the order the system shows them.
1. Dashboard Your monthly business overview — total members, new members, tier breakdown, registration trend, points earned and burned, sales trends, and rankings of your top customers, branches, items and redeemed rewards. It's the natural page to open at the start of every day.
2. Account Search for and view individual members: personal details, cards, addresses, contact numbers, billing history, points balance and marketing consents. Open it when a customer calls about their points or asks you to correct their details.
3. Earn Point Award points to members, including awarding them in bulk by uploading a .csv file. Open it when you need to backdate points or issue them in batches.
4. Promotion Run your promotions, split into transactional promotions, activity promotions, redemption codes and receipt uploads. Open it when you're building a campaign to drive sales.
5. Coupon Manage your coupon-code stock (buckets) and see how many codes are left. Open it when you're preparing codes to give away or to feed a game.
6. Reward Manage the rewards members redeem with their points, including each item's images and conditions. Open it when you're adding or editing what's available in the app.
7. News & Activity Manage the content and banners customers see in the LINE app, including the entry points to activities and games. Open it when you want to announce news or launch an activity.
8. Targeted Campaign Send campaigns to specific customer segments. Open it when you're trying to win back lapsed customers.
9. Report The downloadable summary reports such as EOD_Customer_All and EOD_Customer_Registration. Open it at month-end, or whenever management wants numbers.
10. Marketplace Connect your marketplace shop accounts so customers earn points on the orders they place there. The page summarises orders, points awarded, coupons awarded and connected accounts for each channel. Lazada is working today; Shopee and TikTok still read coming soon.
11. Partner The details of partners connected to the system. Open it when you're working with partner merchants.
12. T&C / Privacy Policy The terms of use and privacy policy customers see when they sign up. Open it when legal asks you to update the wording.
13. Settings Every configuration option for your brand — covered in detail in the next section. Open it for first-time setup, or when you need to add teammates.
14. Billing The invoices and receipts for what your brand pays for DeepBLOK, in 3 sections — the billing details used on the documents (company name, address and tax ID), your invoices, and your receipts and tax invoices. Open it when finance asks you for a document. It is the newest menu, which is why it carries a New badge. The billing panel itself is supplied in Thai only, whichever language the Backoffice is set to.
Inside the Settings menu
Click Settings and the submenu expands in place, with a pale-yellow highlight showing it's open. This is the menu new users visit most in their first week.
💡 If you've just been given a new brand, the recommended order is
Admin Setting(add your team) →Register Form Management(set up the signup form) →Earn Point Mechanic(set the points rules). All 3 should be done before you start accepting real members.
Things Worth Knowing
1. The menus you see depend on your access rights
Menu lists differ between brands, because the system only shows menus that are enabled for your brand and that your Role has permission to reach. Some brands see extra items like Branch Report, Privileges Card or Member App Manage; others don't.
What that means for you: if you can't find a menu an article refers to, you're not clicking in the wrong place. Check these 2 things instead:
- Does your Role have access to it? Ask whoever holds the Admin Role on your team.
- Is the feature enabled for your brand? Ask the DeepBLOK team.
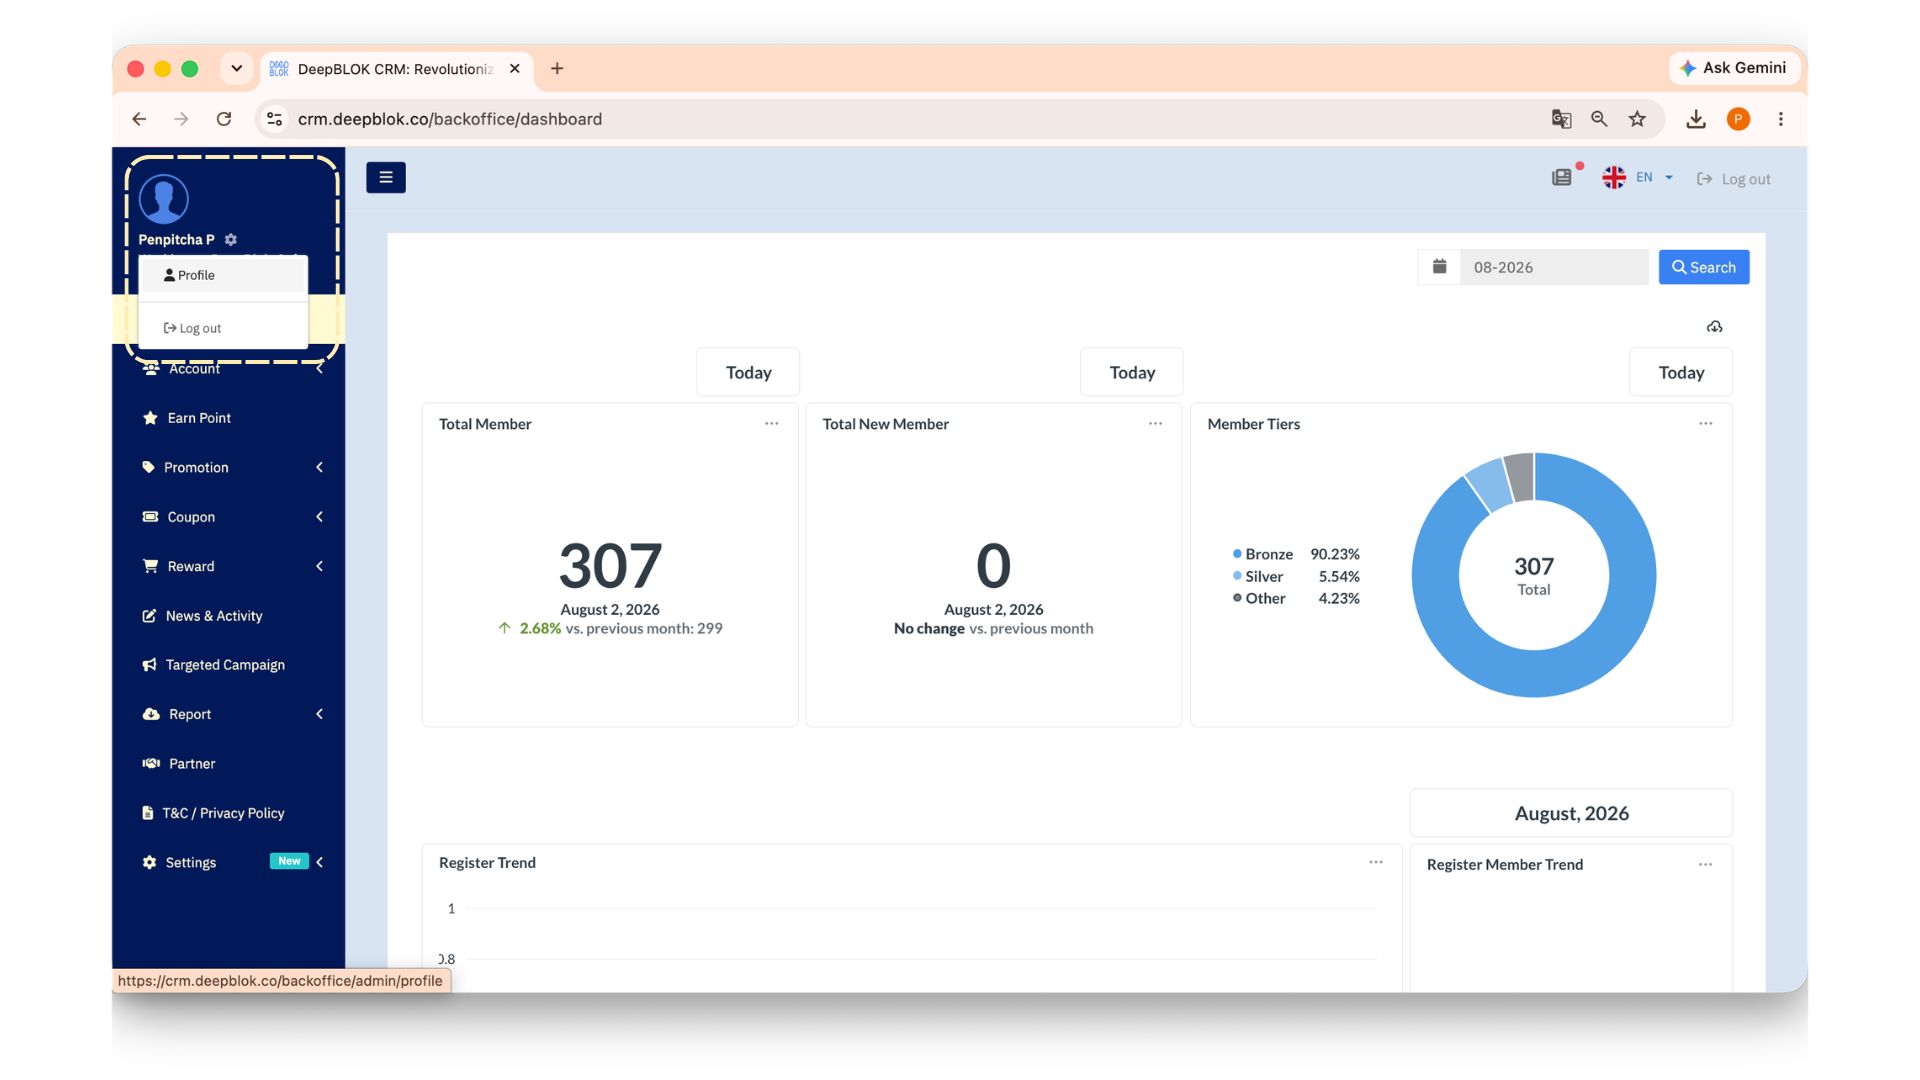
2. Profile isn't in the left sidebar
Click your user name in the top-left corner (there's a small gear icon beside it). A 2-item submenu appears — 👤 Profile and Log out.
Start with the work you're responsible for
There's no need to spend time working through every menu. You can start from the ones that relate to your own job.
Common Problems
Frequently Asked Questions
Q: Can I break anything just by clicking around the menus?
A: No. Opening pages doesn't change any data — the system only saves when you click that page's save control (Save, Update or Create). So explore freely while you're learning. The one thing to leave alone is any red Delete button.
Q: A teammate has more menus than I do. Why?
A: Different Roles. The system only shows menus your Role can reach. If you need one you can't see, ask whoever holds the Admin Role on your team to adjust your permissions.
Q: I clicked ☰ and the left sidebar disappeared. How do I bring it back?
A: The ☰ button in the top bar collapses and expands the left sidebar — click it again and the menu returns. It exists to give wide tables more room, such as the member list. If you ever hit a table whose right-hand columns you can't scroll to, try this button first.