

When a teammate needs access to Backoffice, create a separate account for them rather than sharing yours. You can do it yourself under Settings > Admin Setting in under 3 minutes. The system emails them a temporary password automatically — you never set a password for them, and you never need to contact the DeepBLOK team.
⚡ Quick Path:
Settings→Admin Setting→ blue+ Create Admin→ enter email, first name, last name, select Brand → chooseSelect Role→ blueCreate & Send Invitation
Requirements before you start
- An account that can see
Settings > Admin Setting— if you open Settings and Admin Setting isn't listed, your account doesn't have this permission. Ask an Admin on your team to create the account instead. - Your teammate's real email address — they must be able to open it right away, because the temporary password goes there, and this email becomes their login username.
- Their first and last name — shown in the admin list and in the record of who changed what.
- The user's role, set in advance — see the "Which Role Should You Pick" comparison below before you start filling in the form.
Create an Admin Account in 5 Steps
Step 1: Open Admin Setting
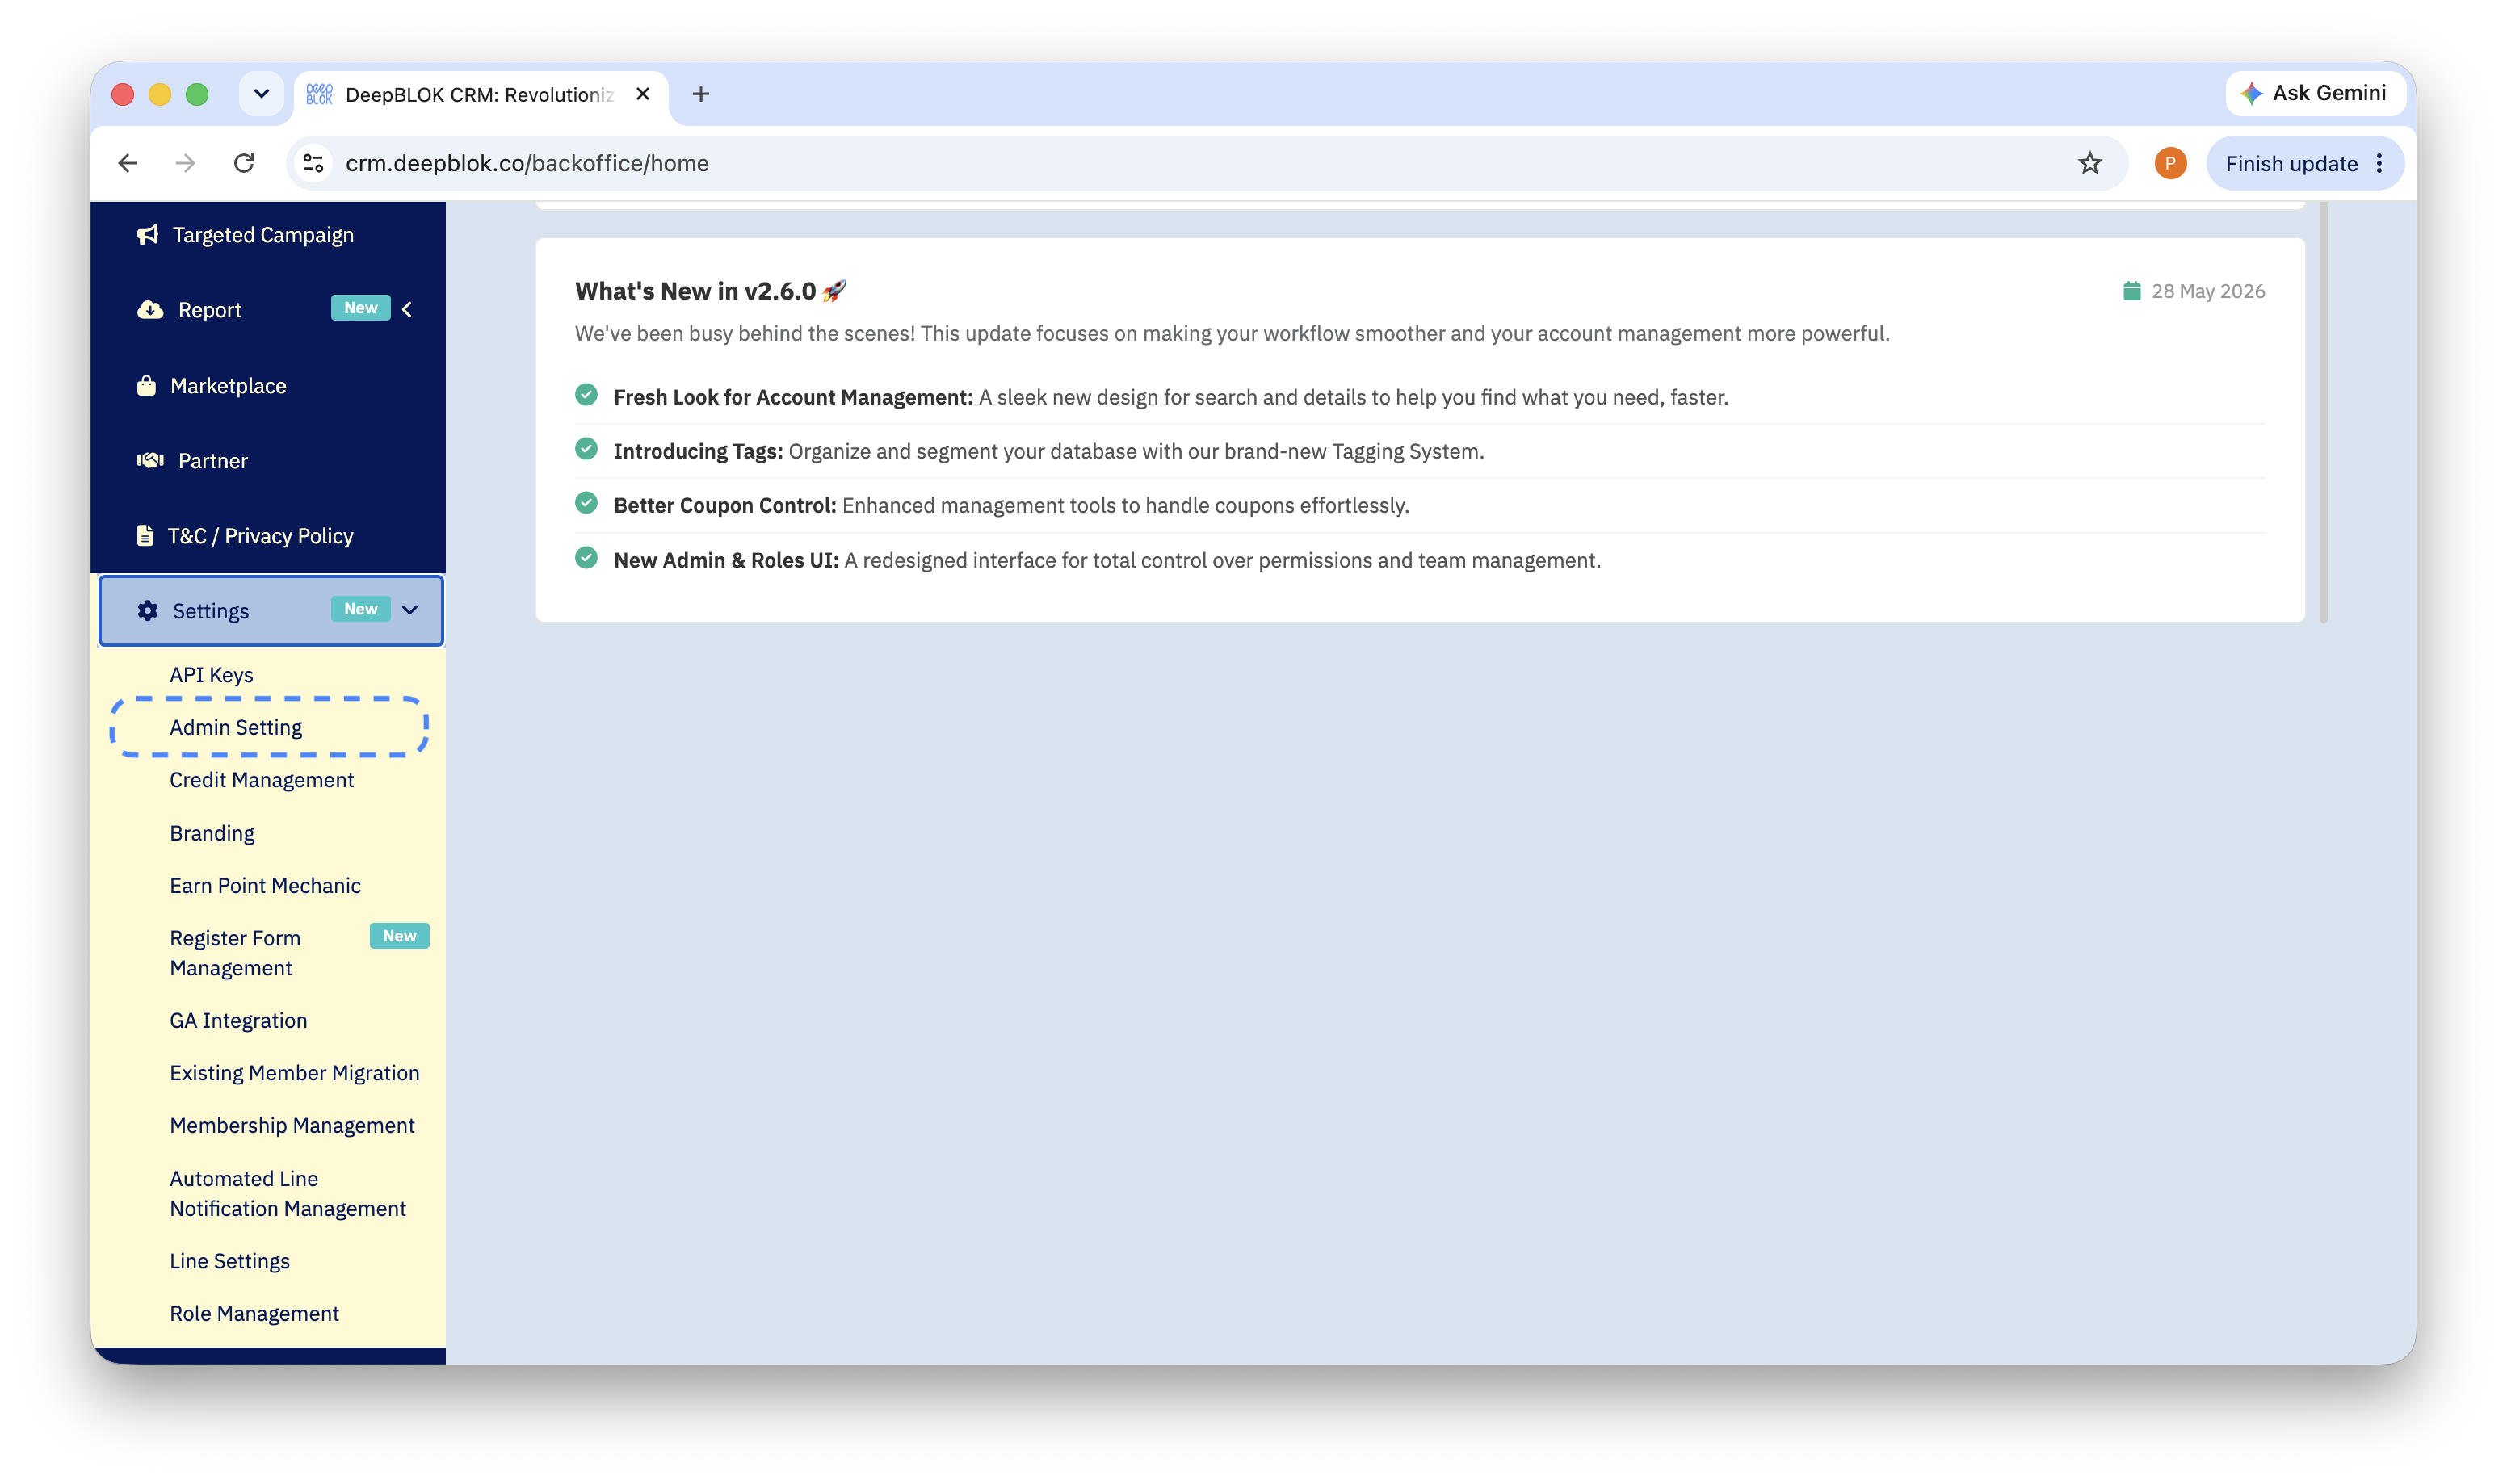
In the left sidebar, scroll to the bottom and click Settings. The menu expands into a sub-list — click Admin Setting.
📌 Note: the live product spells this menu Settings (with an s), while some manual pages write "Setting". They are the same menu.
Step 2: Click Create Admin
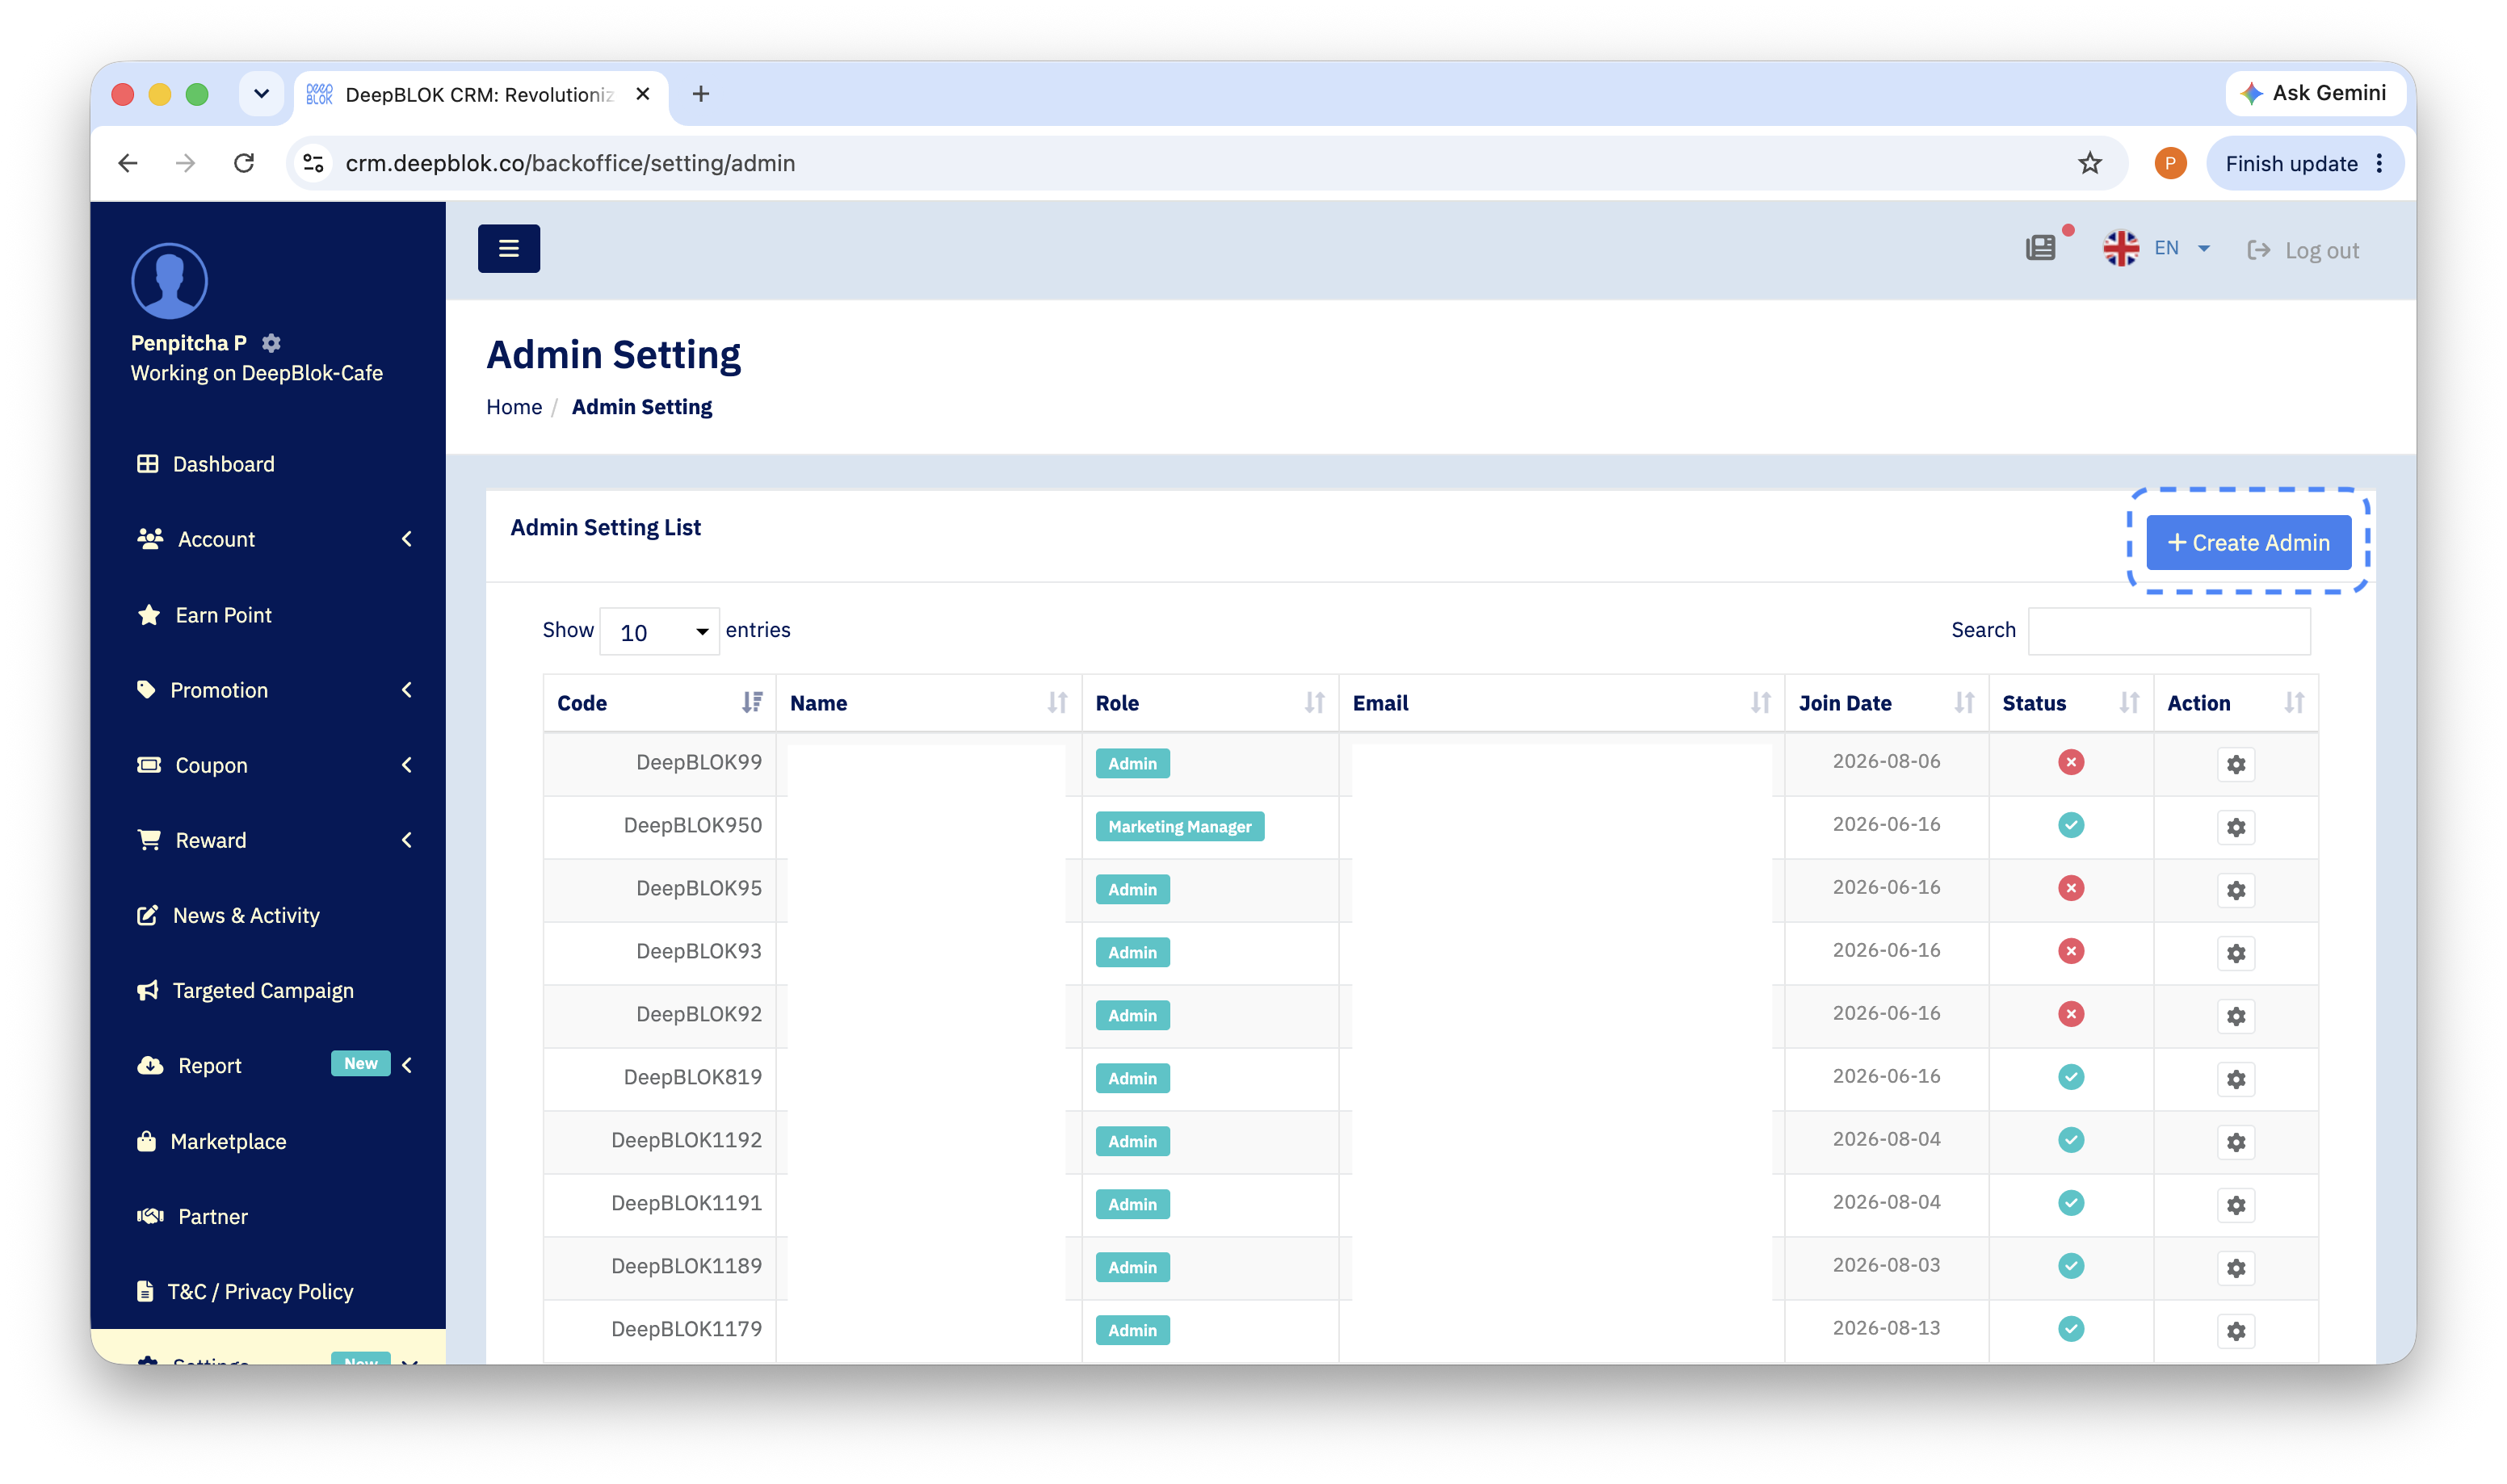
The Admin Setting page shows an Admin Setting List panel with every admin in your brand. In the top-right corner of that panel is a blue + Create Admin button — click it.
Step 3: Fill in the User's Details
The Admin Create page opens. In the Admin Profile Information panel, complete all 4 fields — each carries a red *, meaning all are required.
💡 Brand Assignment defines the data they will see. Assign one brand and they see only that brand's members and campaigns. Assign only what they actually need.