

The point history page is called Points History and sits inside each customer's profile. It shows the current point balance and every point transaction over time, which makes it the page you use to answer whether the points a customer says are missing have reached the system. Working through one transaction takes about 2 minutes, and it works for any login that can open a member profile.
⚡ Quick Path:
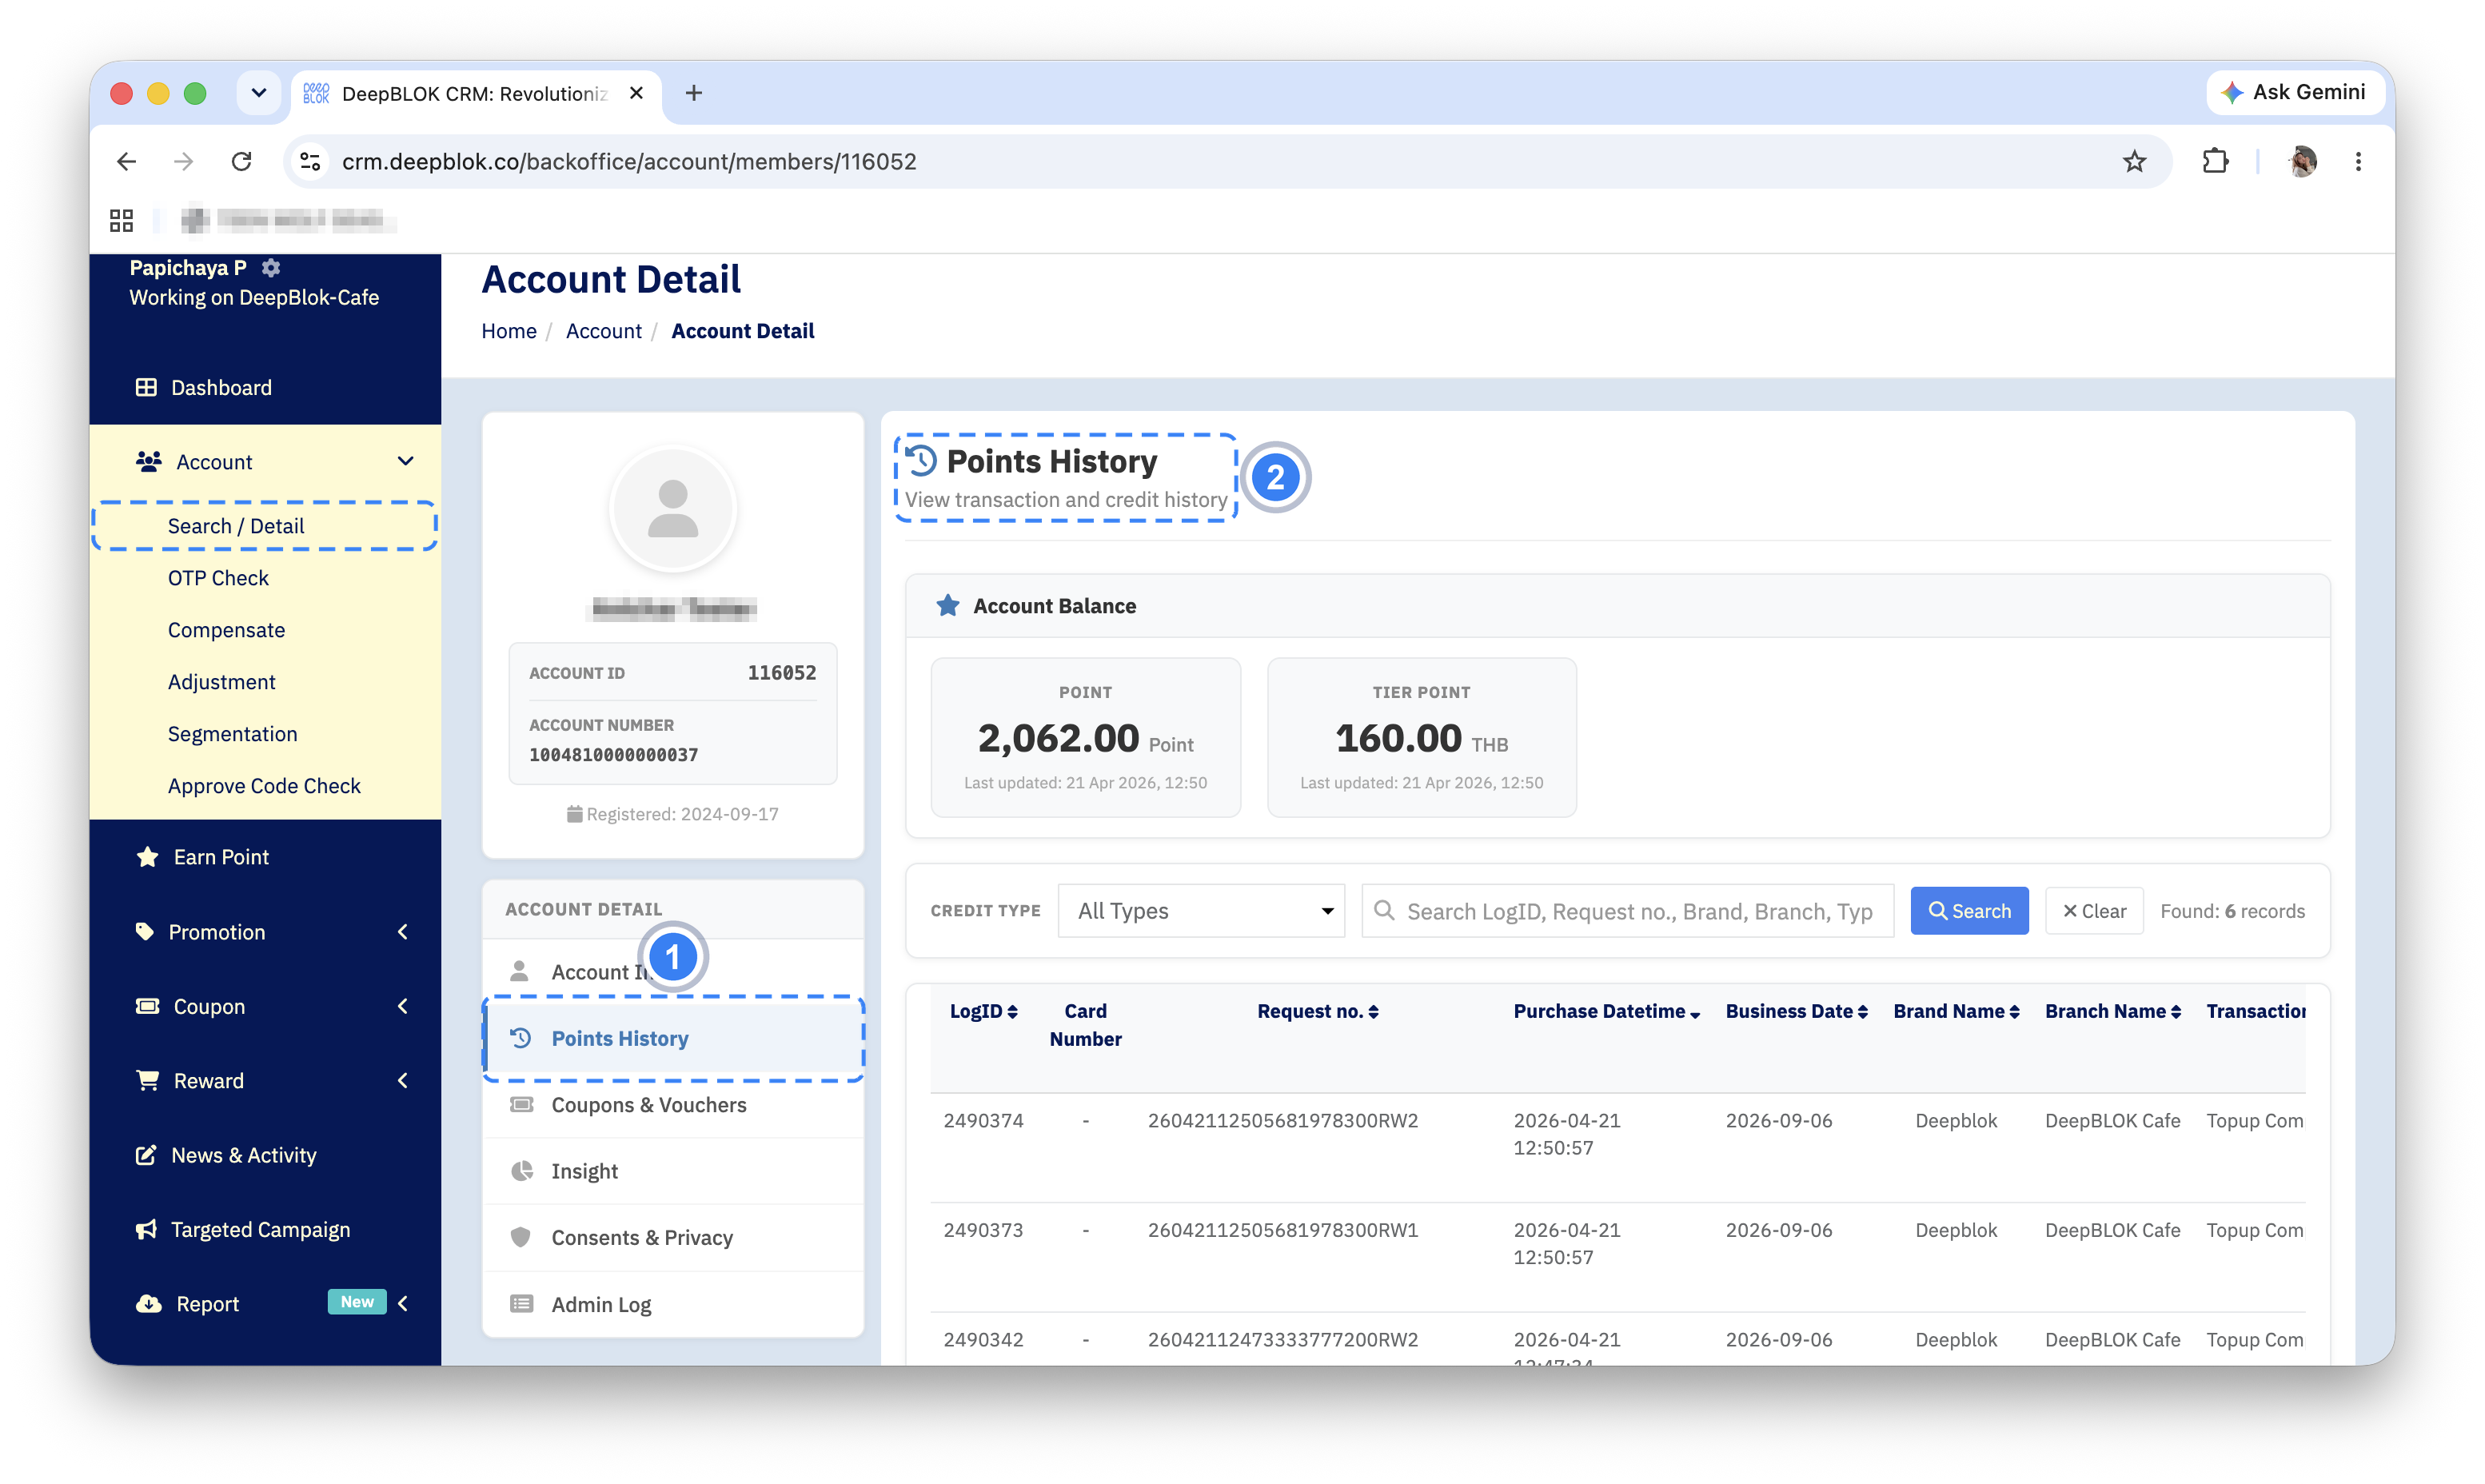
Account→Search / Detail→ search for the customer →person icon →
Points Historytab
📌 Read this before you start — this page reads data, it does not adjust points. Opening the history, filtering it and opening a transaction's detail affect nothing about the customer's points. If the check shows points genuinely missing and the customer needs them credited, that is separate work done from the Compensate or Adjustment menus, which is outside this article. We recommend asking an administrator on your team before going ahead.
Requirements before you start
- The right customer's profile already open — the name on the card at the top left must be the customer you are speaking with. How to Search for a Member covers opening it, and The Meaning of Each Section in a Member Profile covers reading the profile.
- At least one reference from the customer — the date they bought, the branch, or the request number on their receipt. Any of these can filter the table, and will find the transaction faster than reading the whole list.
- A wide enough screen, or the willingness to scroll the table right — the table on this page is wider than the area showing it, so the last columns, including the detail button, sit off the right edge when the page first opens.
The 2 routes into Points History
1. From the tab rail on the profile Open the customer's profile, then click the Points History tab in the list headed ACCOUNT DETAIL on the left. This is the route to use when the profile is already open.
2. From the link in Loyalty Performance On the Account Info tab, scroll down to Loyalty Performance and click the View History link under the TOTAL POINTS figure. This is the more convenient route while you are already reading the customer's balance, because it sits right beside the figure.
Both routes open the same page. If you see the heading Points History with the line View transaction and credit history beneath it, you are on the right page.
Checking the point history in 4 steps
Step 1 Read the balance in Account Balance
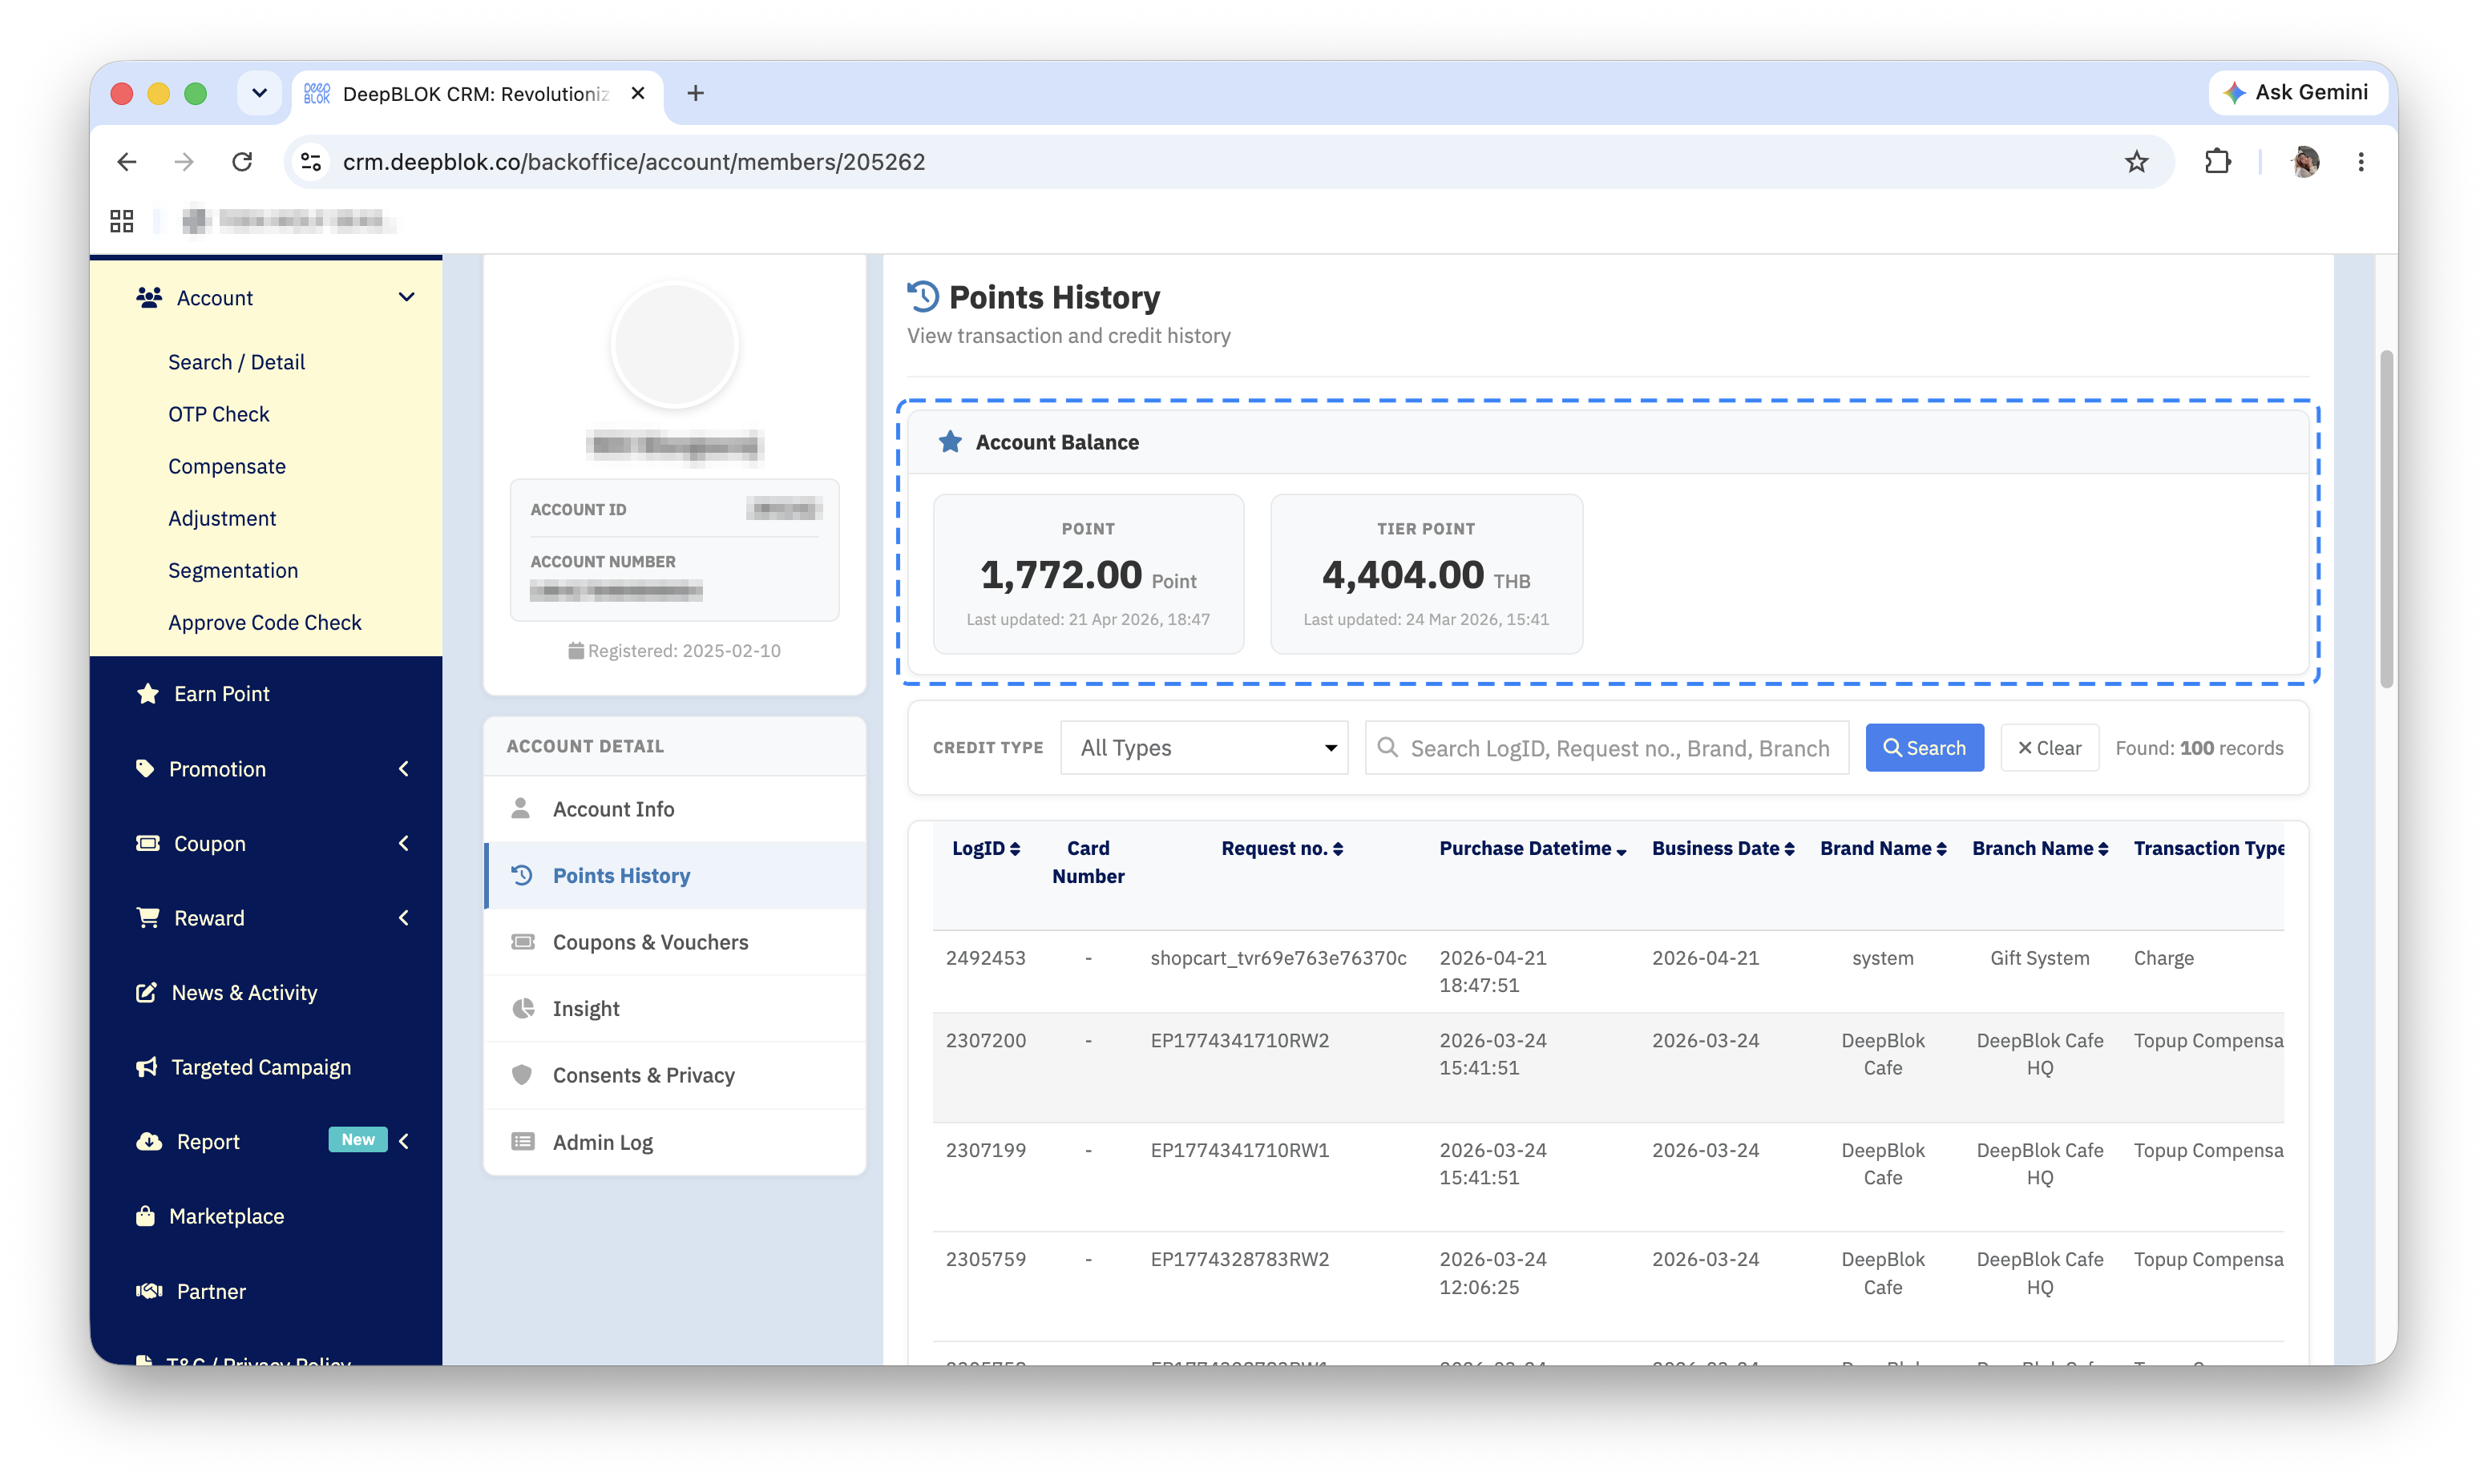
At the top of the page is the Account Balance section, holding 2 cards side by side. The left one is labelled POINT and carries the redeemable balance with Point as its unit; the right one is labelled TIER POINT and carries the tier figure with THB as its unit, which is why it is so often mistaken for accumulated spend. Each card ends with a Last updated: line and the date and time that figure was last refreshed.
We recommend reading this figure before working through the rows, because it is the number you compare with what the customer told you. If it matches what they said, the problem is usually one particular transaction in the table rather than the total.
📌 Good to know: the figure in Account Balance is the current balance, not the sum of the rows shown in the table below, because the table shows only what your filter allows through. The Last updated: line tells you when this data was last refreshed — if the customer bought something moments ago, we recommend checking that line before concluding the points did not arrive.
Step 2 Filter with CREDIT TYPE and the search field
Below Account Balance is a row for searching and filtering, with 3 parts left to right: the CREDIT TYPE dropdown, which defaults to All Types and offers 4 more values — Reward Points, Spending, Tier Points and Stamp; a search field whose placeholder reads Search LogID, Request no., Brand, Branch, Type..., so a LogID, a request number (Request no.), a brand, a branch or a transaction type — but not a member card number, even though the table has a Card Number column; and then the blue Search button and a ✕ Clear button for clearing the conditions. On the right of the row is a counter reading Found: followed by the number of matching records.
If the customer has given you a request number or a branch name, we recommend typing it into the search field and clicking Search. That is faster than scrolling the whole table.
⚠️ One thing to watch: you have to click Search every time, and while a CREDIT TYPE is selected the results stay limited to that type. The transaction the customer is asking about may not appear even though it exists. If fewer records come back than you expected, we recommend pressing ✕ Clear to drop every condition, then reading the number after Found: again.