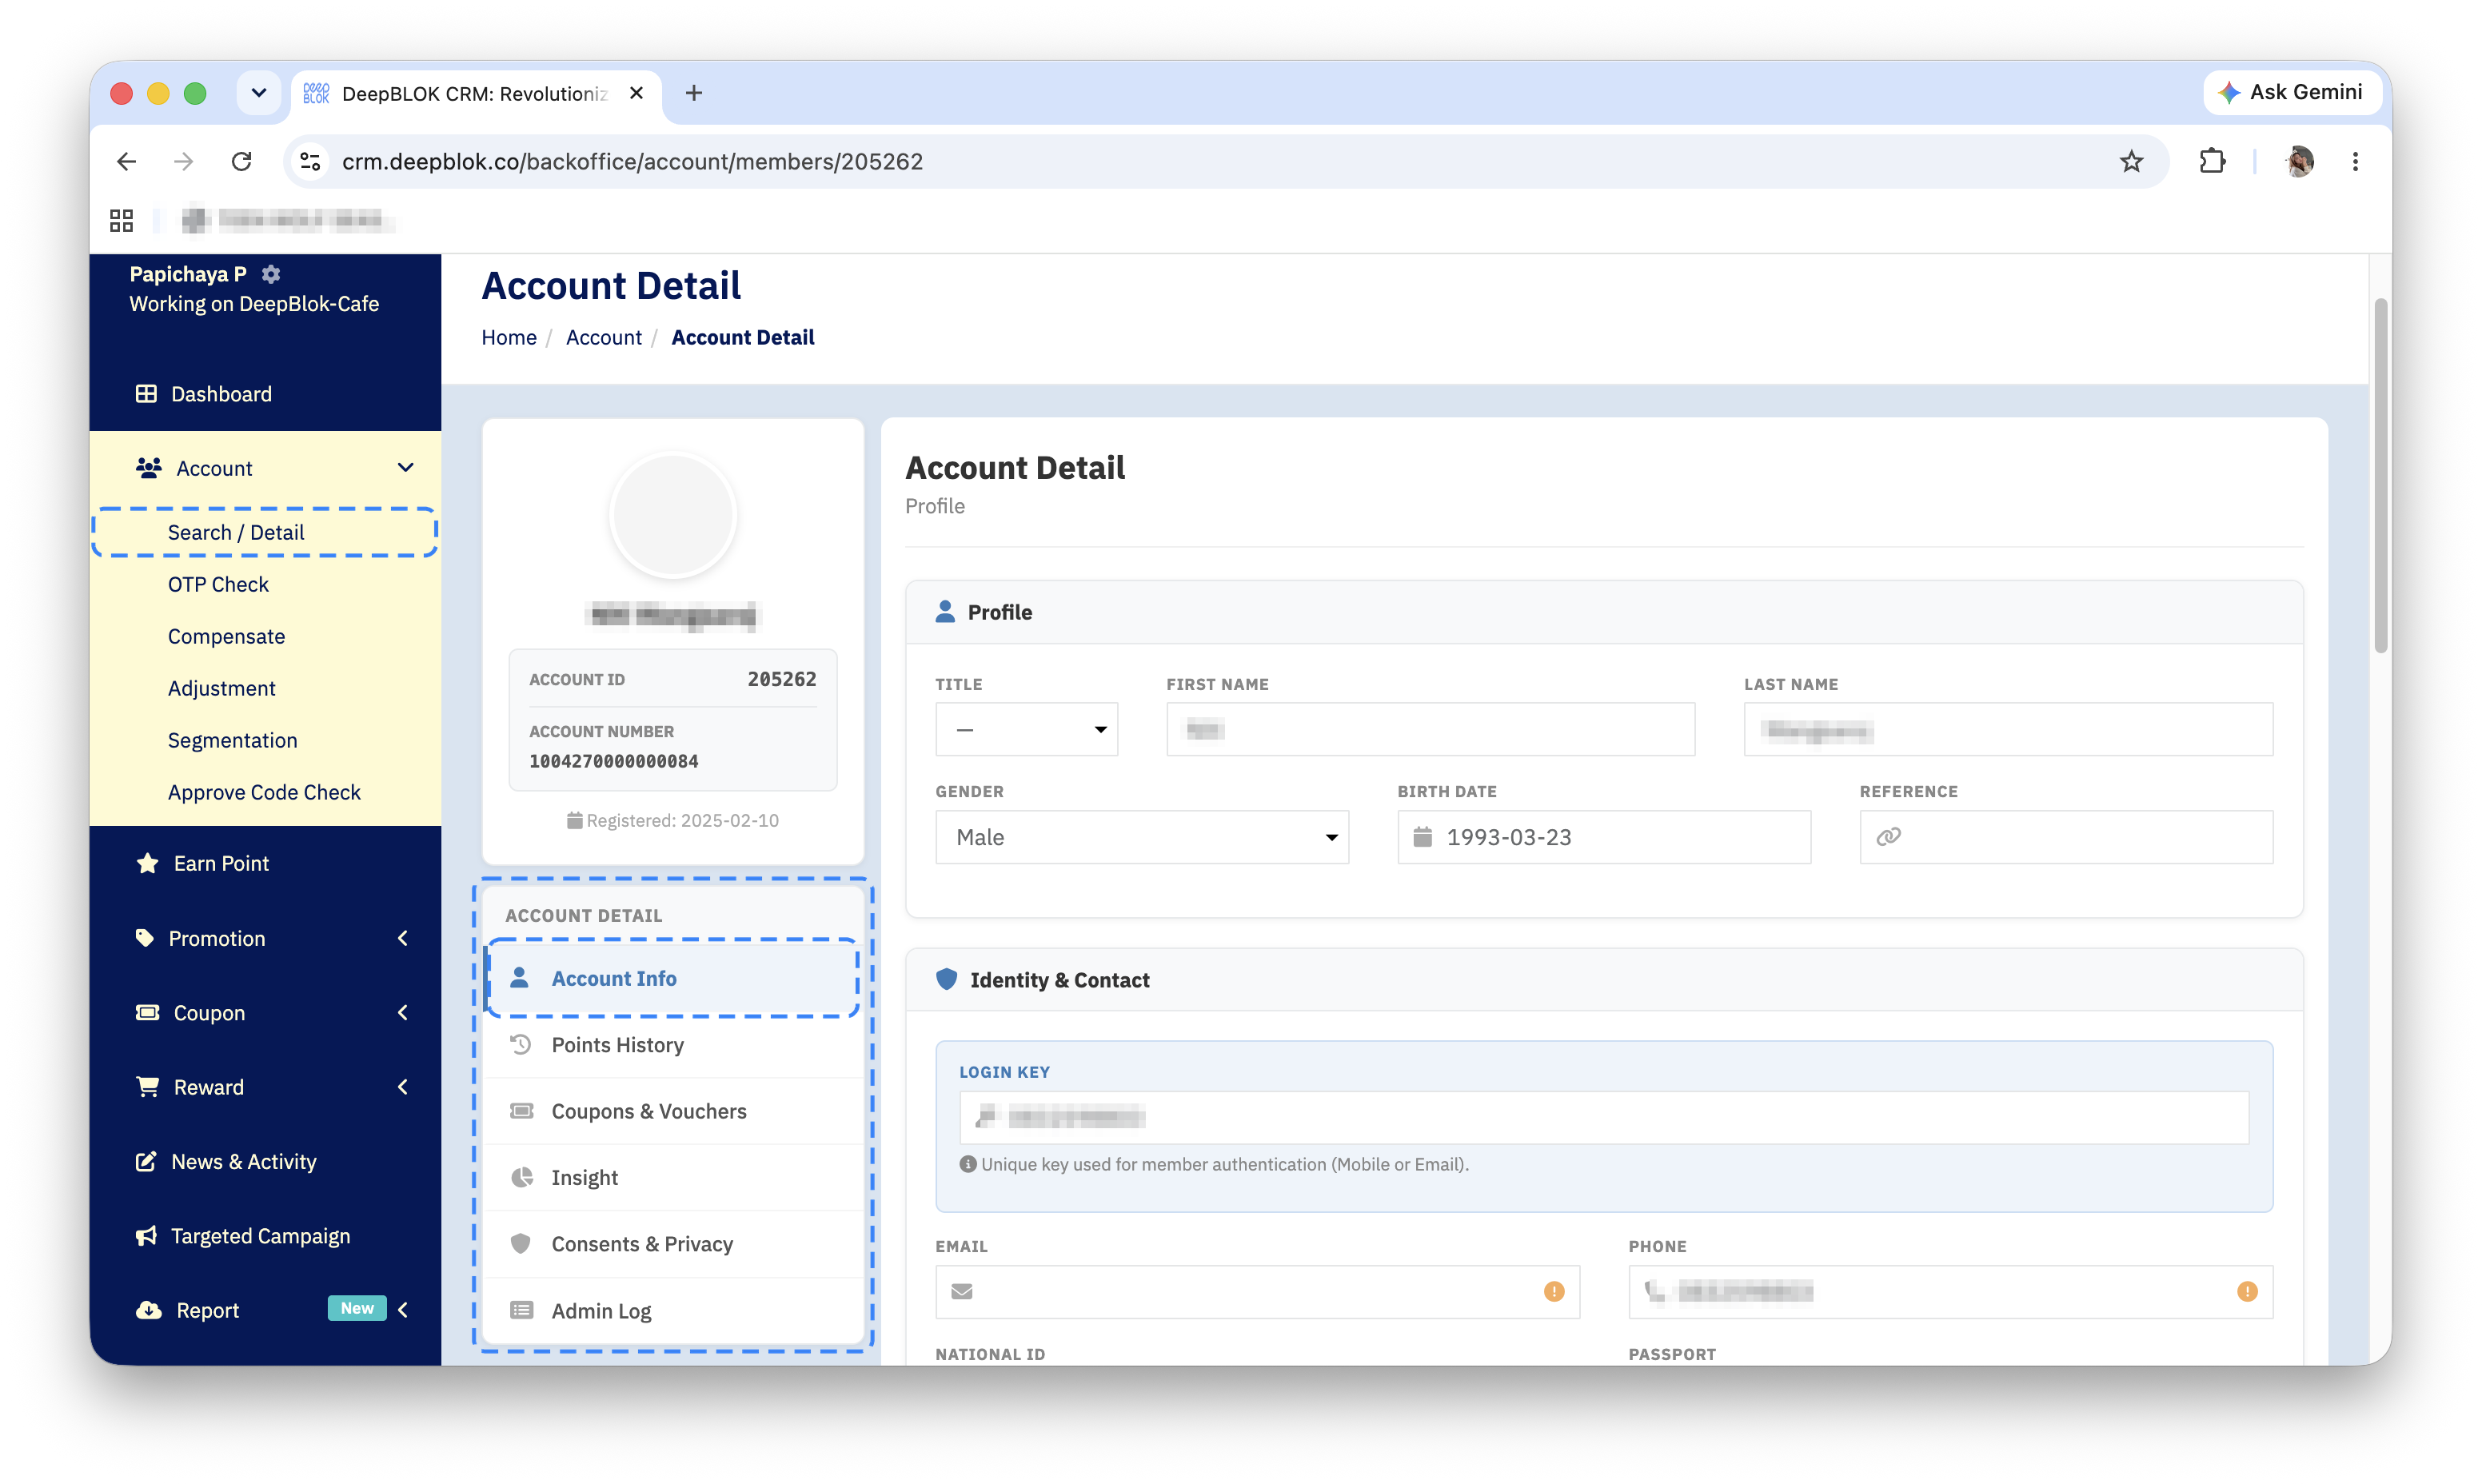
The member profile page is called Account Detail, and it opens from the person icon in the Actions column of the member search results. It holds everything recorded about one customer: personal details, contact channels, point balance, membership tier, and the internal notes your team has written. Reading it end to end takes about 3 minutes, and works for any login that can reach the member search page.
⚡ Quick Path:
Account→Search / Detail→ search for the customer →person icon →
Account Infotab
📌 Read this before you start — this page is editable, not read-only. The fields on this page are input fields you can change. Opening the page to read it affects nothing, but typing over a value or picking a new one by accident can change it. We recommend reading with your eyes rather than your cursor, and not clicking into a field unless you mean to edit it.
Requirements before you start
- The right customer's profile already open — the name on the card at the top left must be the customer you are speaking with. If you are not certain you opened the right record, we recommend going back and searching again first, as covered in How to Search for a Member.
- A clear question from the customer — this page carries a lot of information. Knowing whether they are asking about points, tier or contact details lets you go straight to that section instead of reading the whole page.
- Care with personal data — this page shows the customer's date of birth, national ID and passport number. We recommend looking only at what the task needs, and not screenshotting the page into a team chat.
The customer card: confirmation you opened the right record
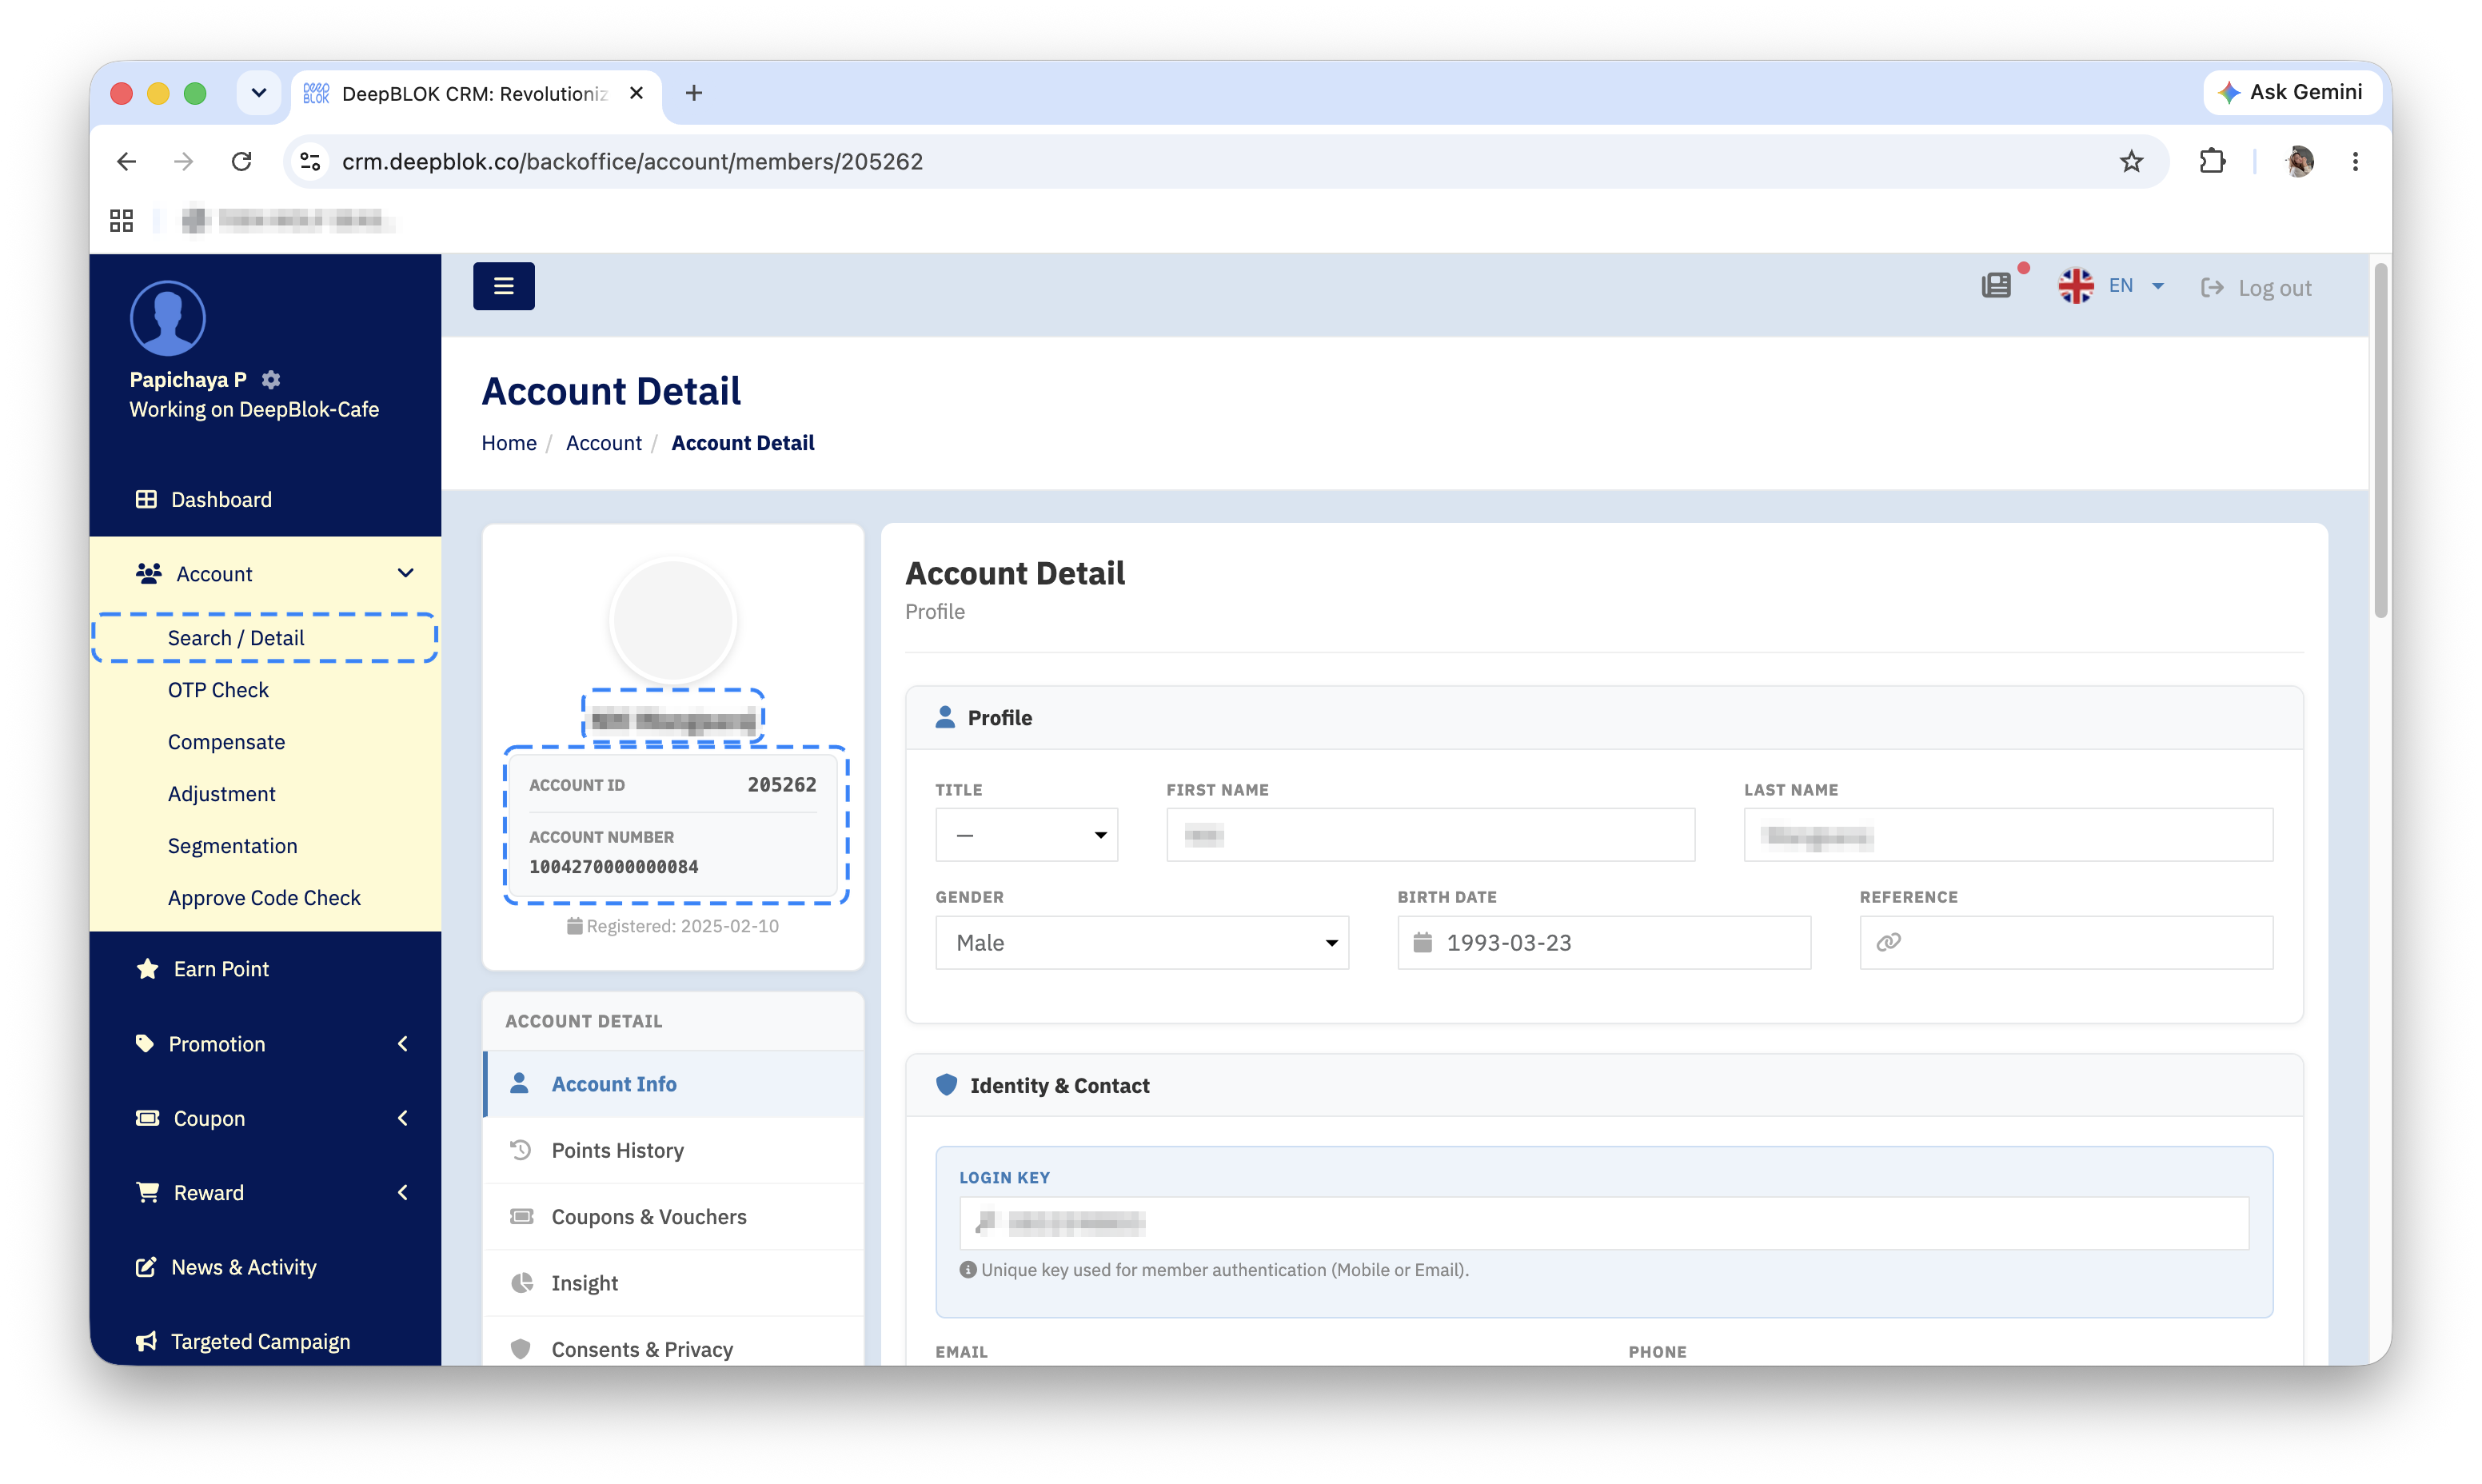
The top left of the page holds a customer card: an avatar and the customer's name, then 2 numbers inside one box — ACCOUNT ID and ACCOUNT NUMBER — and on the bottom line Registered: followed by the date the customer signed up.
The 2 numbers are used differently. ACCOUNT NUMBER is the long one and is what to quote when you talk to the customer or raise a support ticket. ACCOUNT ID is the shorter one, a second reference the system keeps. When you need to give someone a number, use ACCOUNT NUMBER.
The 6 tabs on the ACCOUNT DETAIL rail
Below the customer card is a list of tabs headed ACCOUNT DETAIL. The tab you are on carries a blue bar down its left edge. All six are:
The 6 sections of the Account Info tab, top to bottom
The Account Info tab is longer than one screen. Its contents fall into 6 sections, in this order.
1. Profile The customer's basic details: title (TITLE), first name (FIRST NAME), last name (LAST NAME), gender (GENDER), date of birth (BIRTH DATE), and a REFERENCE field holding this customer's ID in another of the brand's systems.
2. Identity & Contact Contact channels and identity details. The section opens with a highlighted blue box holding LOGIN KEY, with helper text beneath saying it is the value the customer authenticates with — either a mobile number or an email. Below that come EMAIL and PHONE side by side, then NATIONAL ID, PASSPORT and LINE UID.
3. E-COMMERCE LINKING Whether the customer has linked their online-store accounts: SHOPEE ID, LAZADA ID and TIKTOK ID. All 3 carry a padlock icon, meaning they cannot be edited here. Where no account is linked, the field reads Not linked.
4. Loyalty Performance Points and tier, as 2 cards side by side. The left card is TOTAL POINTS, the current balance shown as a large figure, with 2 links beneath it: Upcoming Expiring Points, for points about to expire, and View History, which opens the point history. The right card is CURRENT TIER, the customer's tier today, together with a TOTAL SP figure and a progress bar showing how much further to the next tier.
5. Loyalty Settings The values that set the customer's membership status: ACCOUNT TYPE, which holds the tier; TIER EXPIRY, the expiry date of the current tier; REGISTER BRANCH, the branch where the customer signed up; and MEMBER TAGS, the tags your team assigns for grouping customers into campaigns.
6. Internal Comments Your team's internal notes about this customer. Each note shows who wrote it, the text, and the date and time it was saved. Below the list is a field for a new note and an Add Comment button.
⚠️ One thing to watch: the last 4 sections are not tabs — they are all inside Account Info. E-COMMERCE LINKING, Loyalty Performance, Loyalty Settings and Internal Comments are reached by scrolling down the page, not from the rail on the left. If you cannot find one in the rail, keep scrolling down the Account Info tab to the bottom.