

When a customer's points don't match the conditions, or landed at all on a bill that was later voided, you can correct it yourself under Account → Adjustment. This menu differs from Compensate in 2 ways: it can take points away as well as add them, and every adjustment must carry a transaction reference so anyone can trace which bill the change belongs to. Budget about 10 minutes, most of it spent finding the reference. As with Compensate, submitting the request is not the adjustment itself — the points change only once someone with approval rights approves it.
⚡ Quick Path:
Account→ open the customer's profile →Points History→ copy the value in theRequest no.column →Adjustment→Create New Request→ fill inCard Number+Reference No.→ chooseHow to adjust?→Submit Request→ an approver clicksView Detail→Approve
Pick the right menu for your job first
There are 3 ways to correct points after the fact, and picking the wrong one means redoing the whole thing, approval step included. Compare before you start.
Adjustment is the only one of the 3 that can take points back into the system, which makes it the standard fix when points were over-awarded, or when a bill that earned points is voided later.
Requirements before you start
- The customer's member card number (
Card Number) — a 16-digit number you can find by searching for the member by name or phone number. See the How to Search for a Member article. - The reference number of the transaction you're adjusting (
Reference No.) — without it the form won't let you proceed. Step 1 below walks you through finding it; having it ready before you open the form is much faster. - Permission to create requests — your account needs the
Request/Createpermission underAccount → Adjustment. If you can reach the list page but don't see theCreate New Requestbutton, your permissions are incomplete. - A second person with approval rights — every request has to be
Approved by an account holding theApprovepermission on the same item.
Adjust points in 6 steps
Step 1: Find the transaction's reference number in the customer's point history
This step is important, because the form validates the reference against a real transaction in the system. A number you make up will not pass.
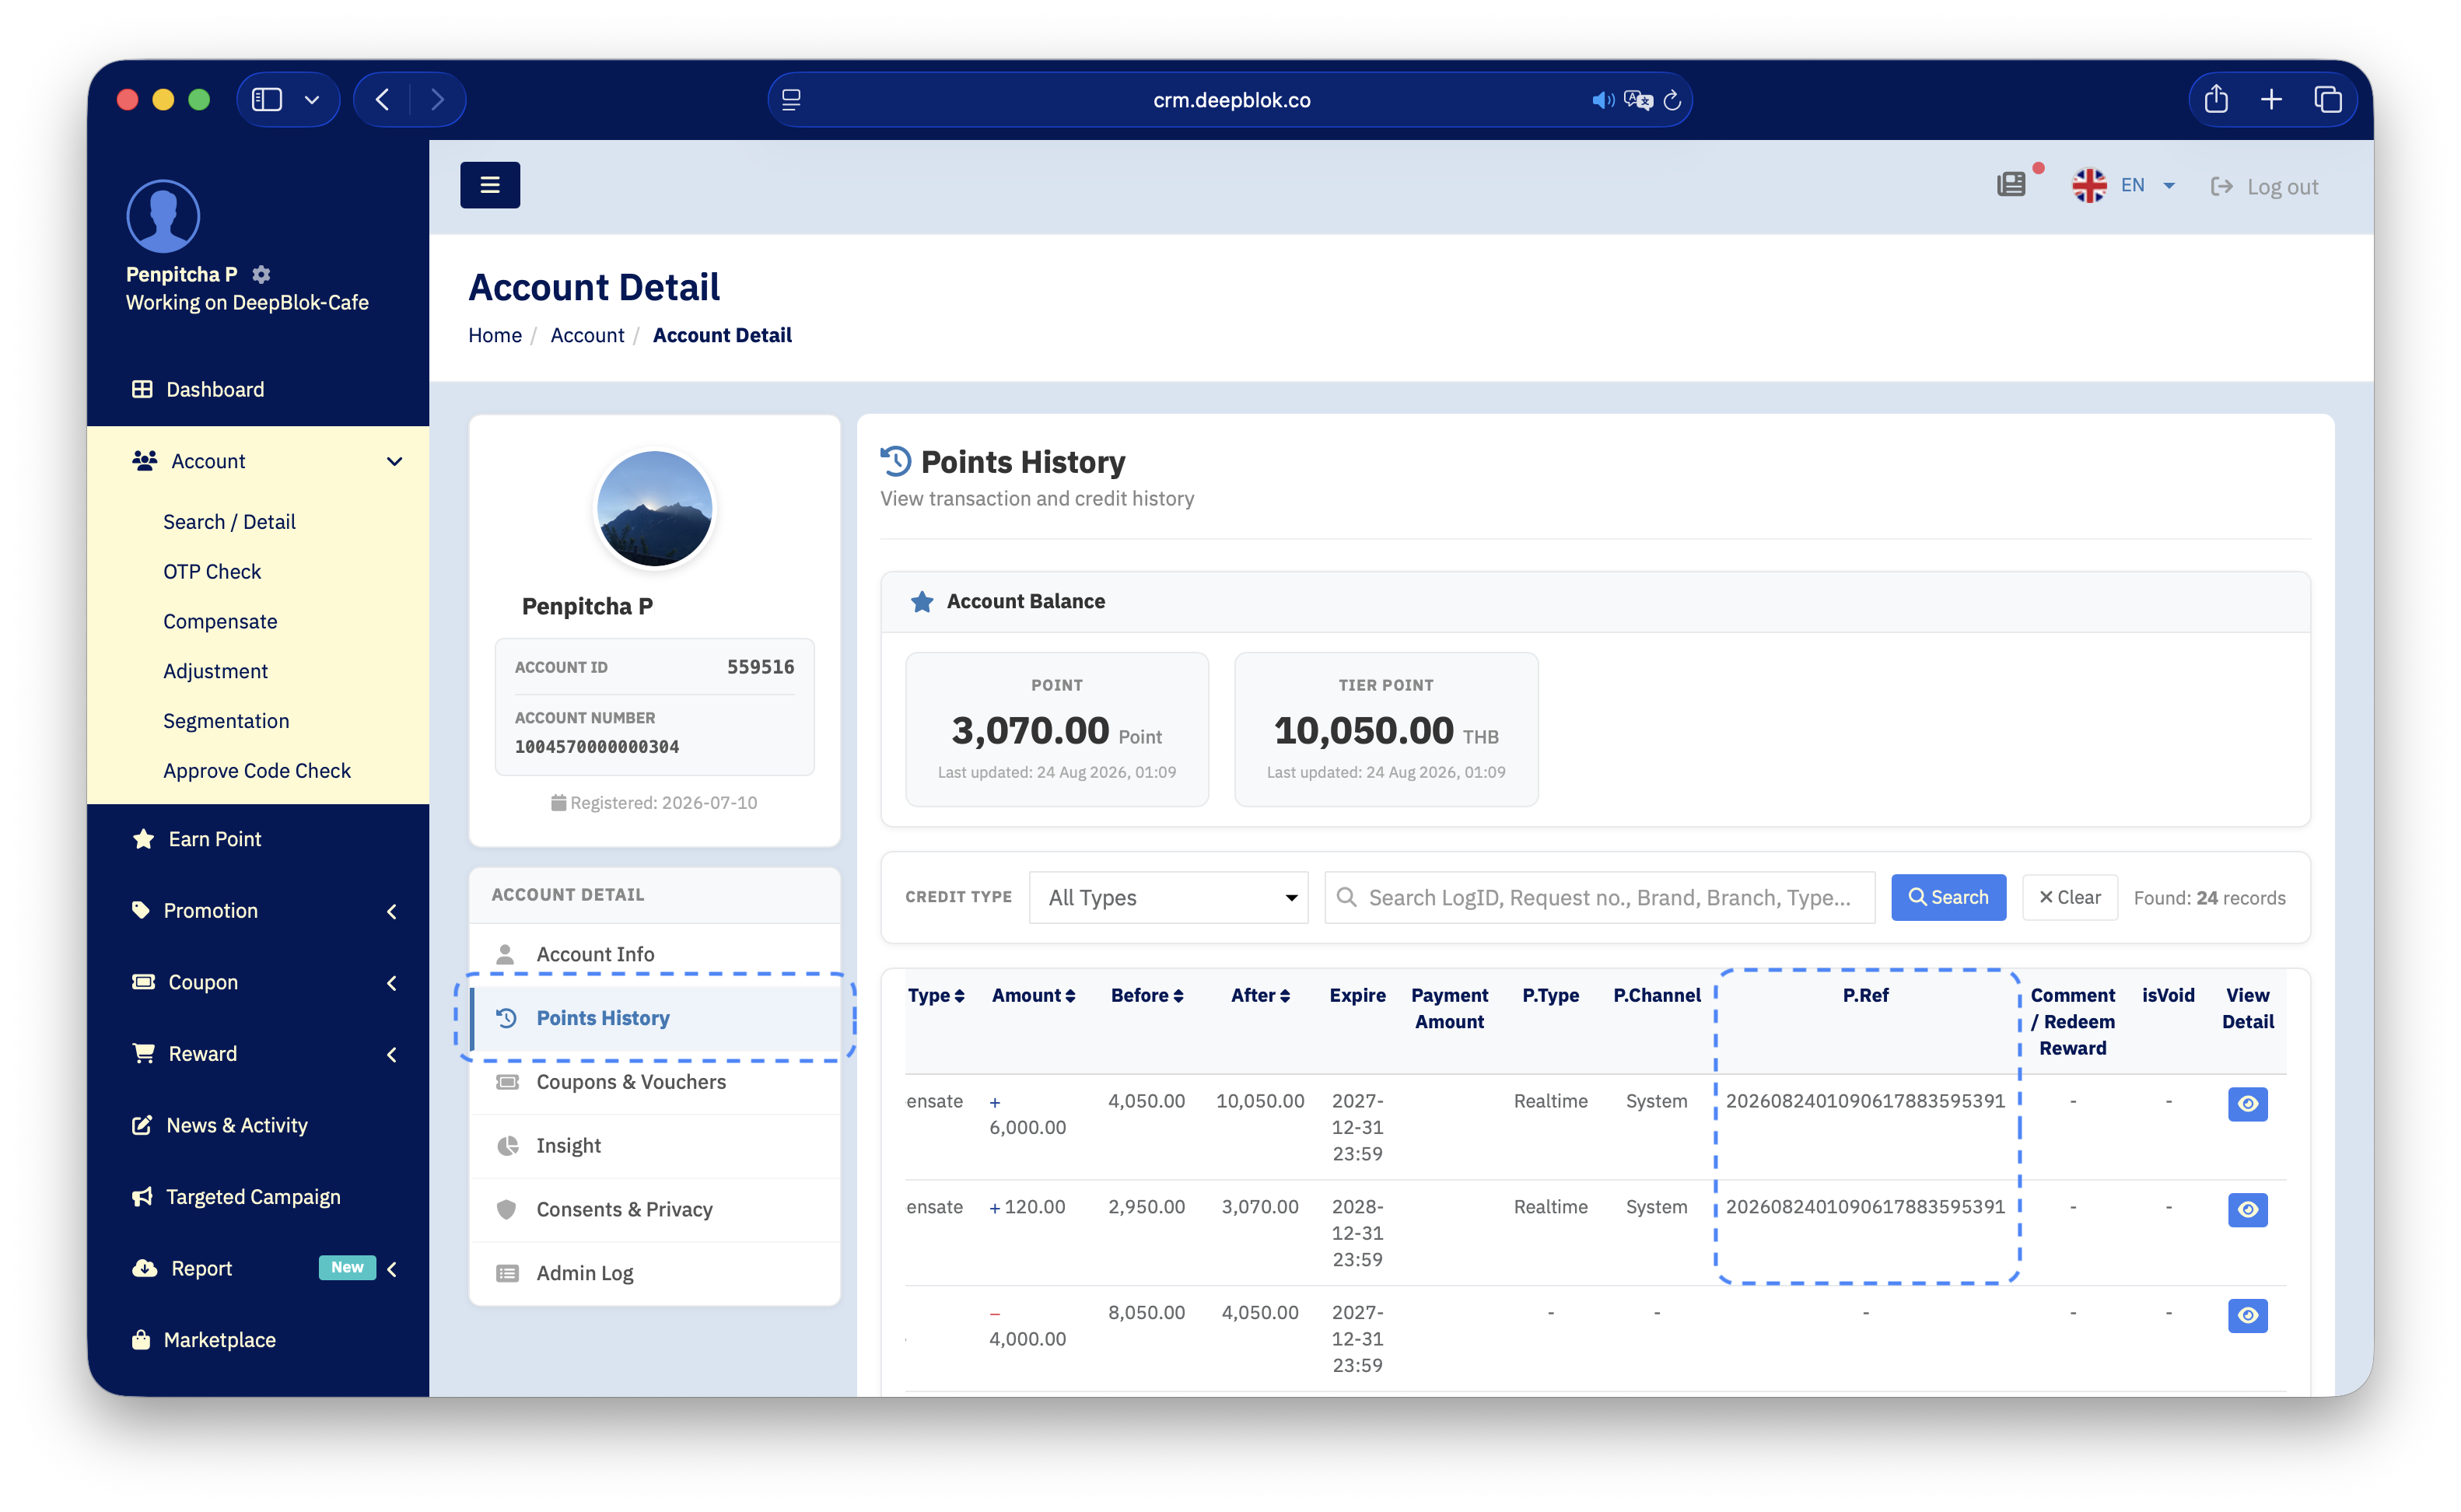
- Open the Account menu, search for the member whose points you're adjusting, and open their
Account Detailpage. - In the left-hand card under the
ACCOUNT DETAILheading, clickPoints History. - The system shows the member's remaining balance in the
Account Balancebox, with a table of every earn and burn transaction below it. - Find the row for the transaction you're correcting — match it on the
Purchase Datetime,Business DateandBranch Namecolumns — then copy the value from theRequest no.column.
The value is a long string, for example 202603061534318191800000COMP. Copy the whole thing, including the trailing letters.
💡 Tip: if the table is too long to scan, use the
Search LogID, Request no., Brand, Branch…box above it to search by branch name or part of the reference, and use theCREDIT TYPEdropdown to filter by type. The number next toFound:tells you how many rows are left to look through.
Step 2: Open the Adjustment page
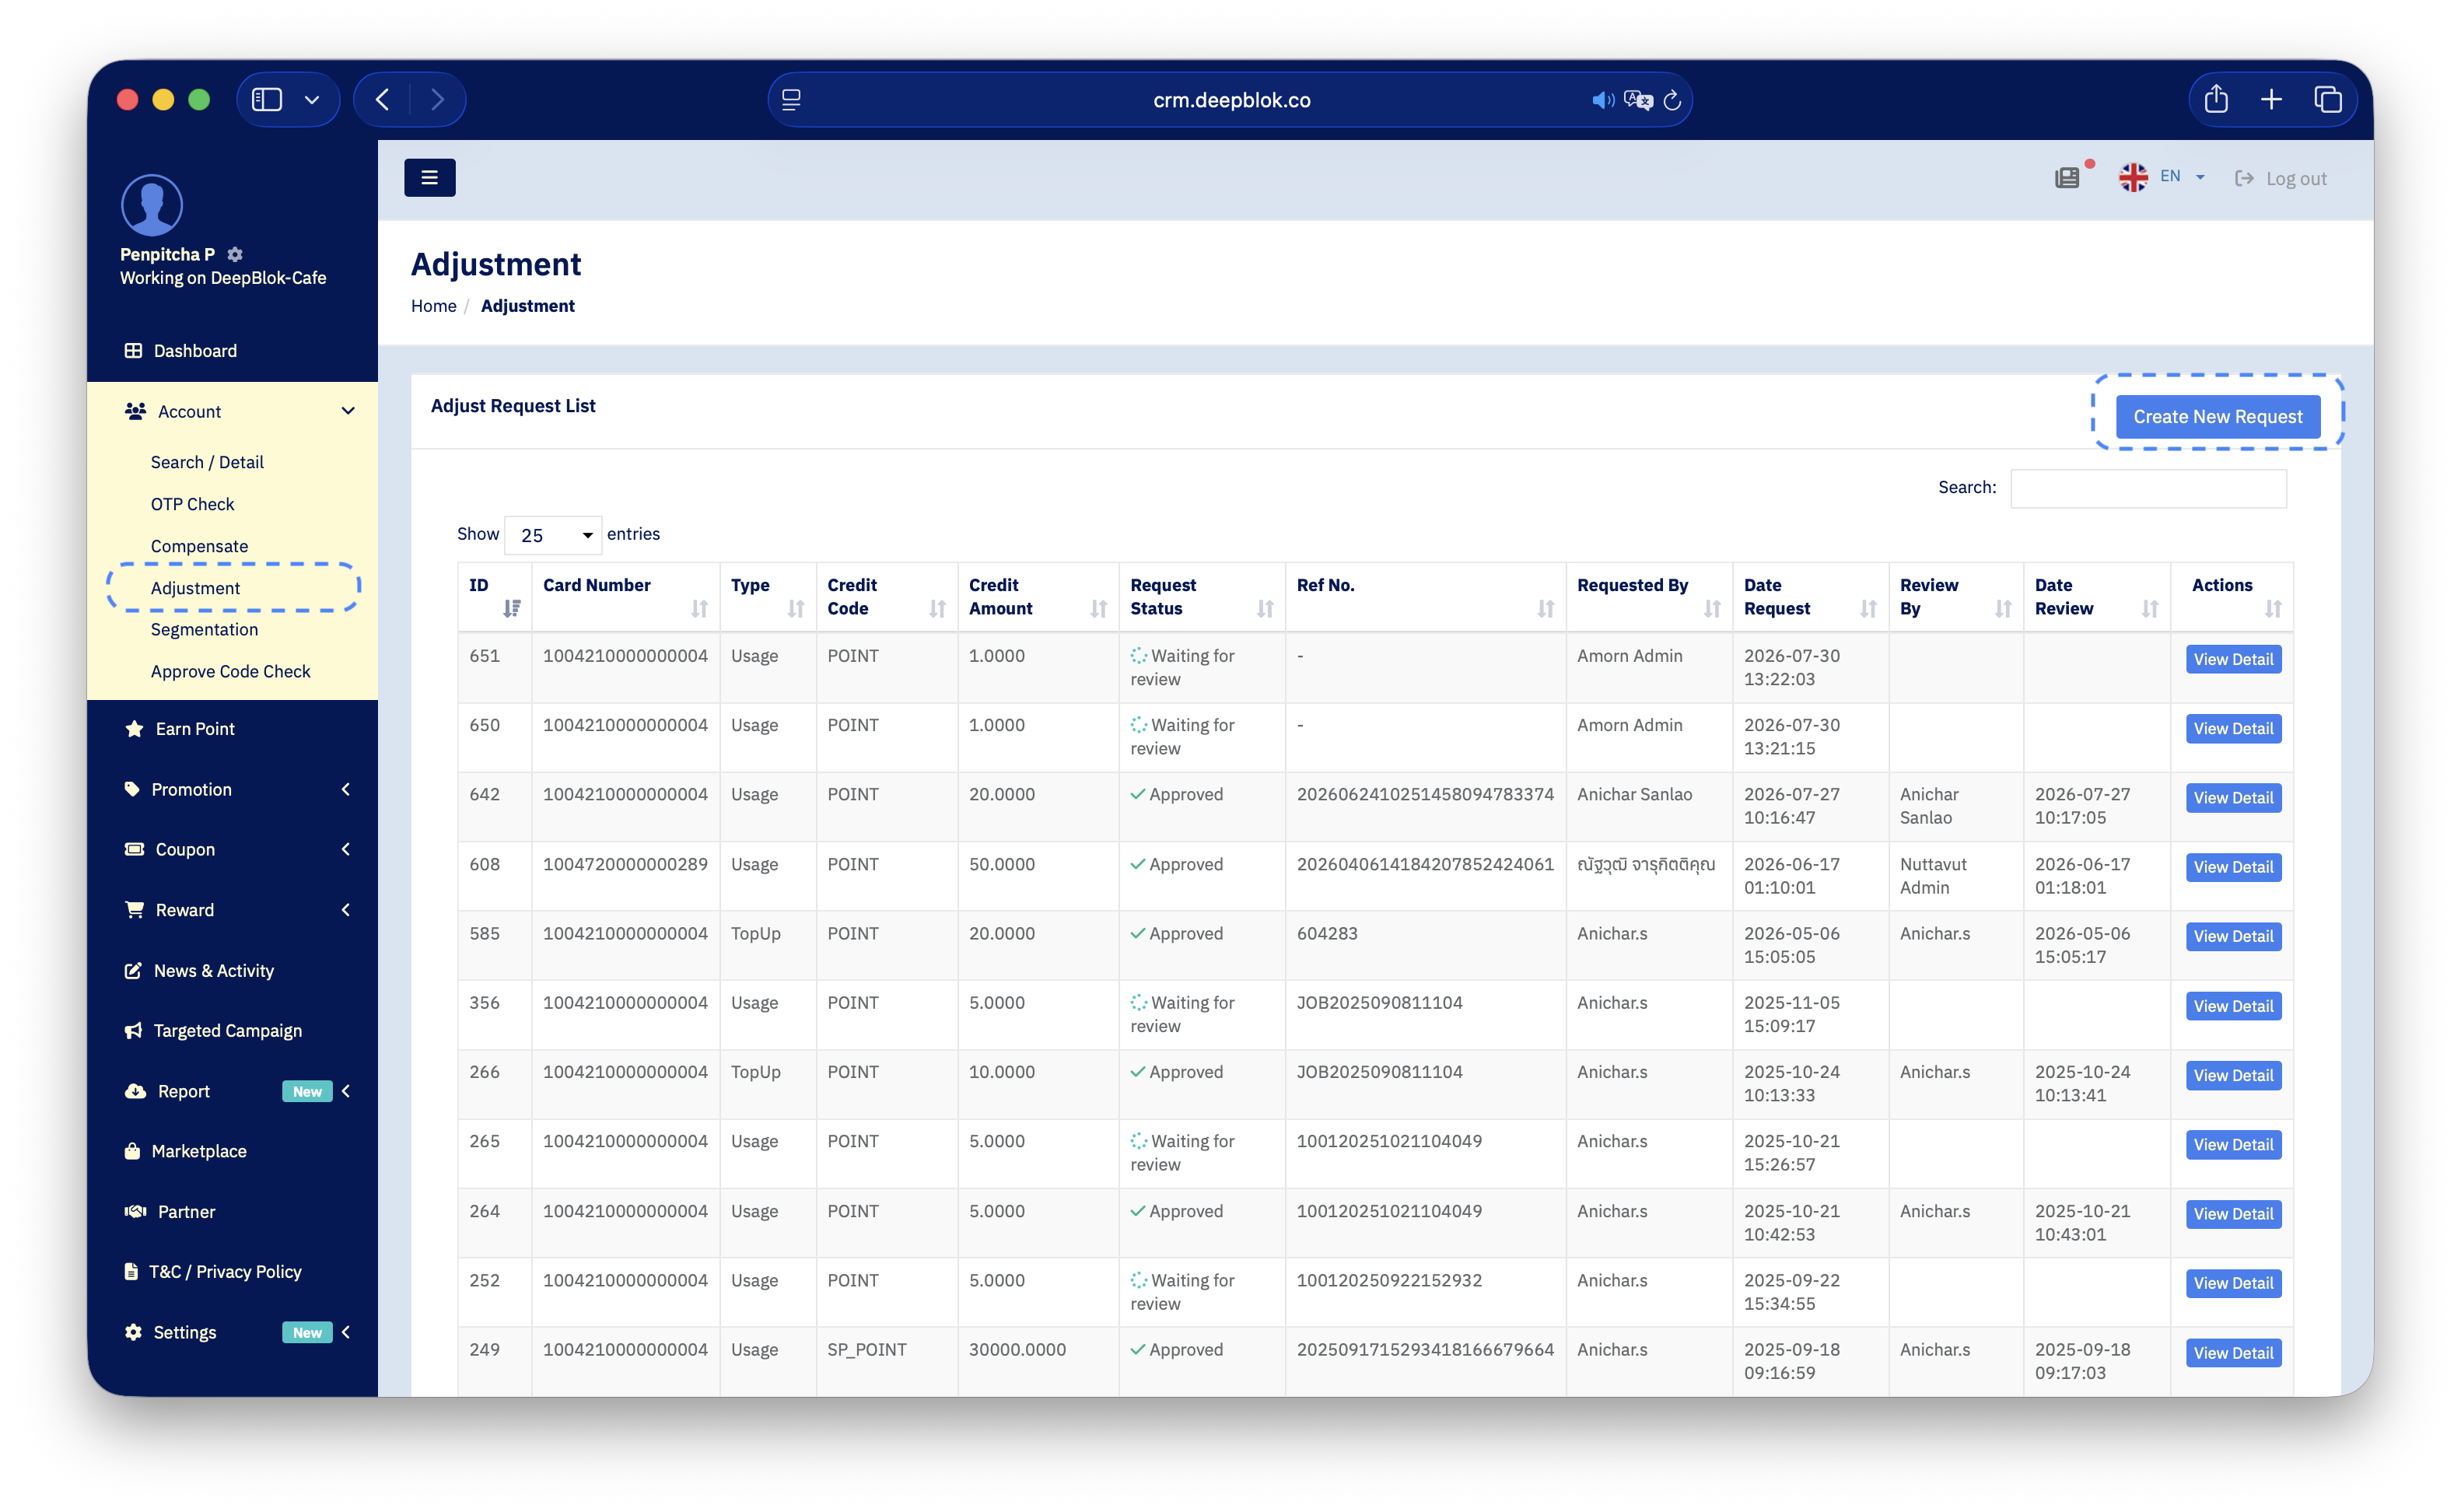
In the left sidebar, click Account. The menu expands into its sub-items; click Adjustment.
The system opens the Adjust List page — every adjustment request for your brand, newest at the top. This table has a Ref No. column that Compensate does not have, so if you can see that column, you're on the right page.
Step 3: Start a new request
Click the blue Create New Request button in the top-right corner of the table. The system opens a form page titled Adjust Request, with the panel inside headed Adjust Request Create.
Step 4: Enter the card number and reference, and wait for both confirmations
The form validates the first 2 fields as you type, and both confirmations appear as small green text under the field.
- Enter the 16-digit number in the
Card Numberfield. When it's valid, the system shows the green messageCard Number valid.beneath it, along with aUser's Infobox on the right showing that member'sName:andPhone:. - Paste the reference you copied in step 1 into the
Reference No.field. When it matches a real transaction, the system shows the green messageReference Number valid.beneath it.
Read the name and phone number in the User's Info box against the customer you're actually helping before you fill in anything else. A single digit's difference in the card number is a different person.
⚠️ Watch out: if either green message doesn't appear, fix that field before moving on. A request pointing at an invalid reference leaves the approver with no way to check which bill the change belongs to.