

When your brand wants to add points to a customer's balance itself, you can do it under Account → Compensate. Enter their card number, choose the point type, enter the amount and submit the request. One thing to know up front: submitting the request does not award the points — they only reach the customer's balance once someone with approval rights has approved it.
⚡ Quick Path:
Account→Compensate→Create New Request→ enterCard Number→ chooseCredit Code→ enterCredit Amount+Comment→Submit Request→ an approver clicksView Detail→Approve
Pick the right tool for the job first
There are 3 ways to add points to a customer after the fact, and picking the wrong one means redoing the work. Compare before you start.
Compensate only adds points, and it has no field for a bill number. It fits case-by-case customer care — apologising for points that never landed, or awarding points from an in-store activity.
Requirements before you start
- The customer's
Card Number— a 16-digit number you find by searching for the member by name or phone. See the How to Search for a Member article. This form has one lookup field, so have the number ready before you open it. - Permission to create a request — your account needs the
Request/Createaction onAccount → Compensate. If you can open the list page but theCreate New Requestbutton is missing, that permission is not granted yet. - A second person who can approve — every request has to be approved by an account holding the
Approveaction on the same feature. Telling your approver in advance is the single biggest thing that gets points to the customer faster. - An agreed amount and reason — the
Commentfield is the only record of why these points were granted, and your approver reads it before deciding.
Give points to a customer in 6 steps
1. Open the Compensate menu
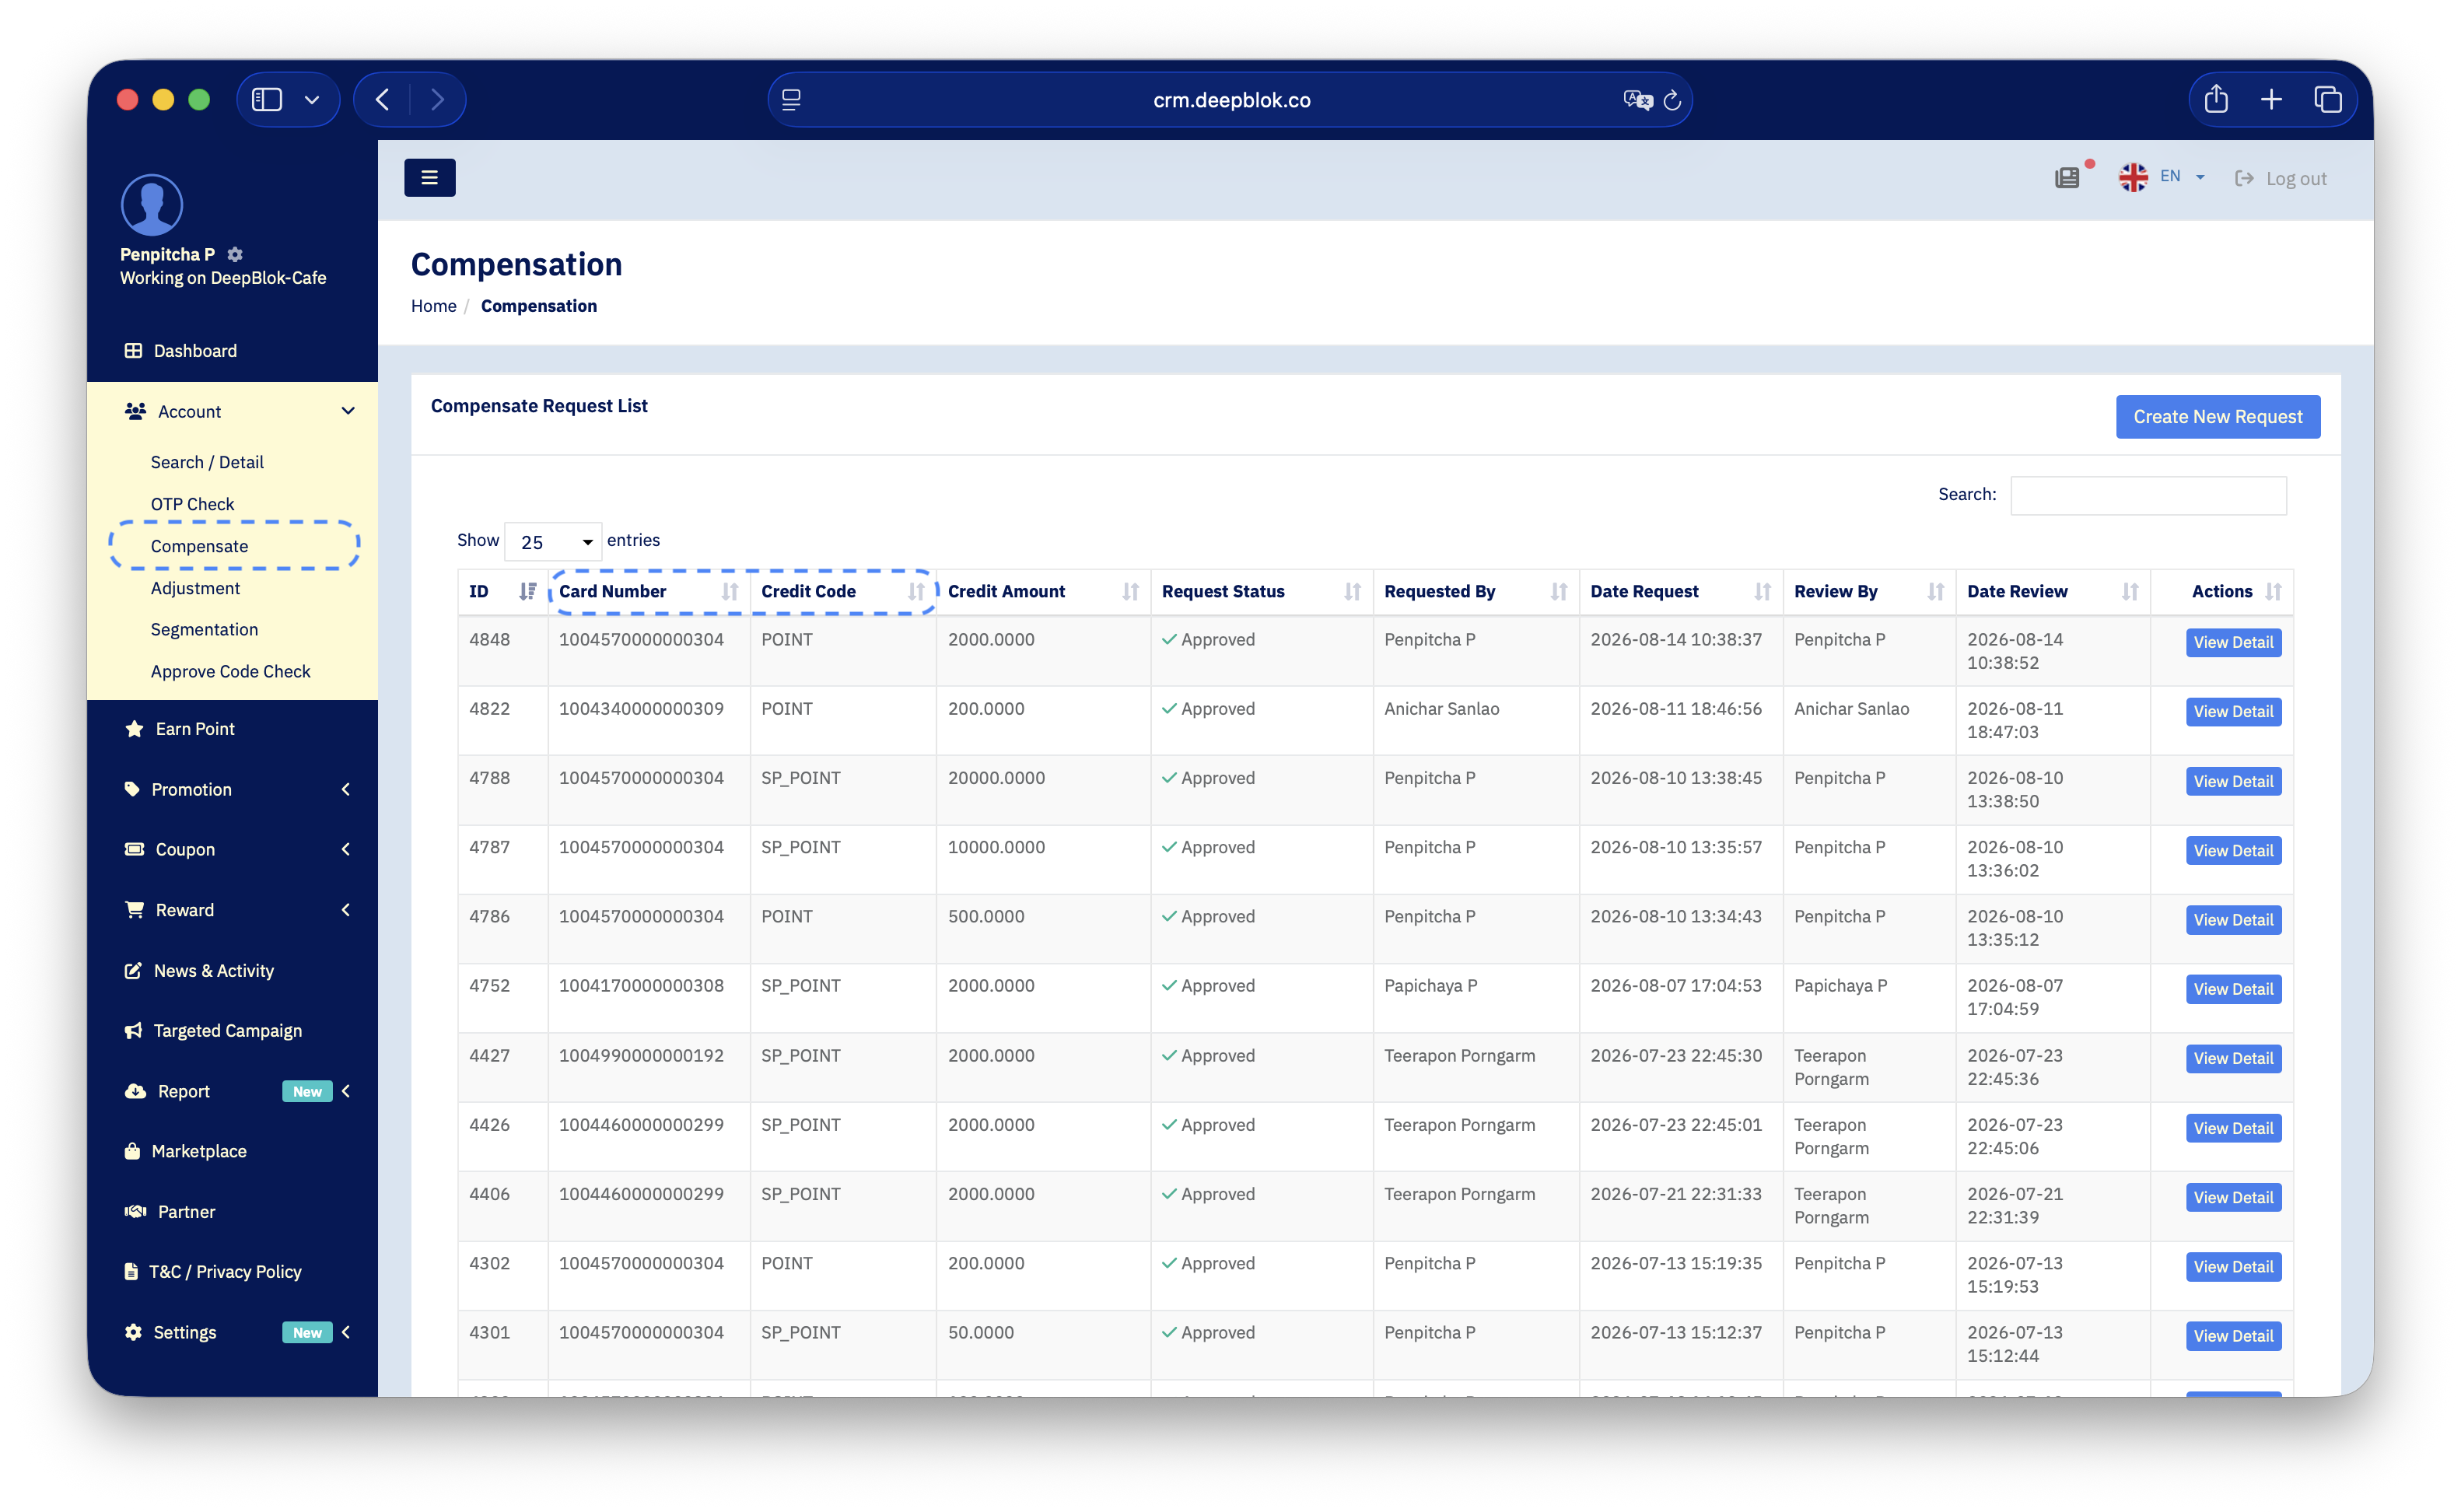
In the left menu, click Account. The menu expands into its sub-items — click Compensate.
The Compensation Request List page opens, showing every compensation request for your brand with the newest at the top.
📌 Note: this screen says
Compensationin the page heading andCompensatein the table heading inside it. Both refer to the same place. Look at the table columns — if you can seeCard NumberandCredit Code, you're on the right page.
2. Start a new request
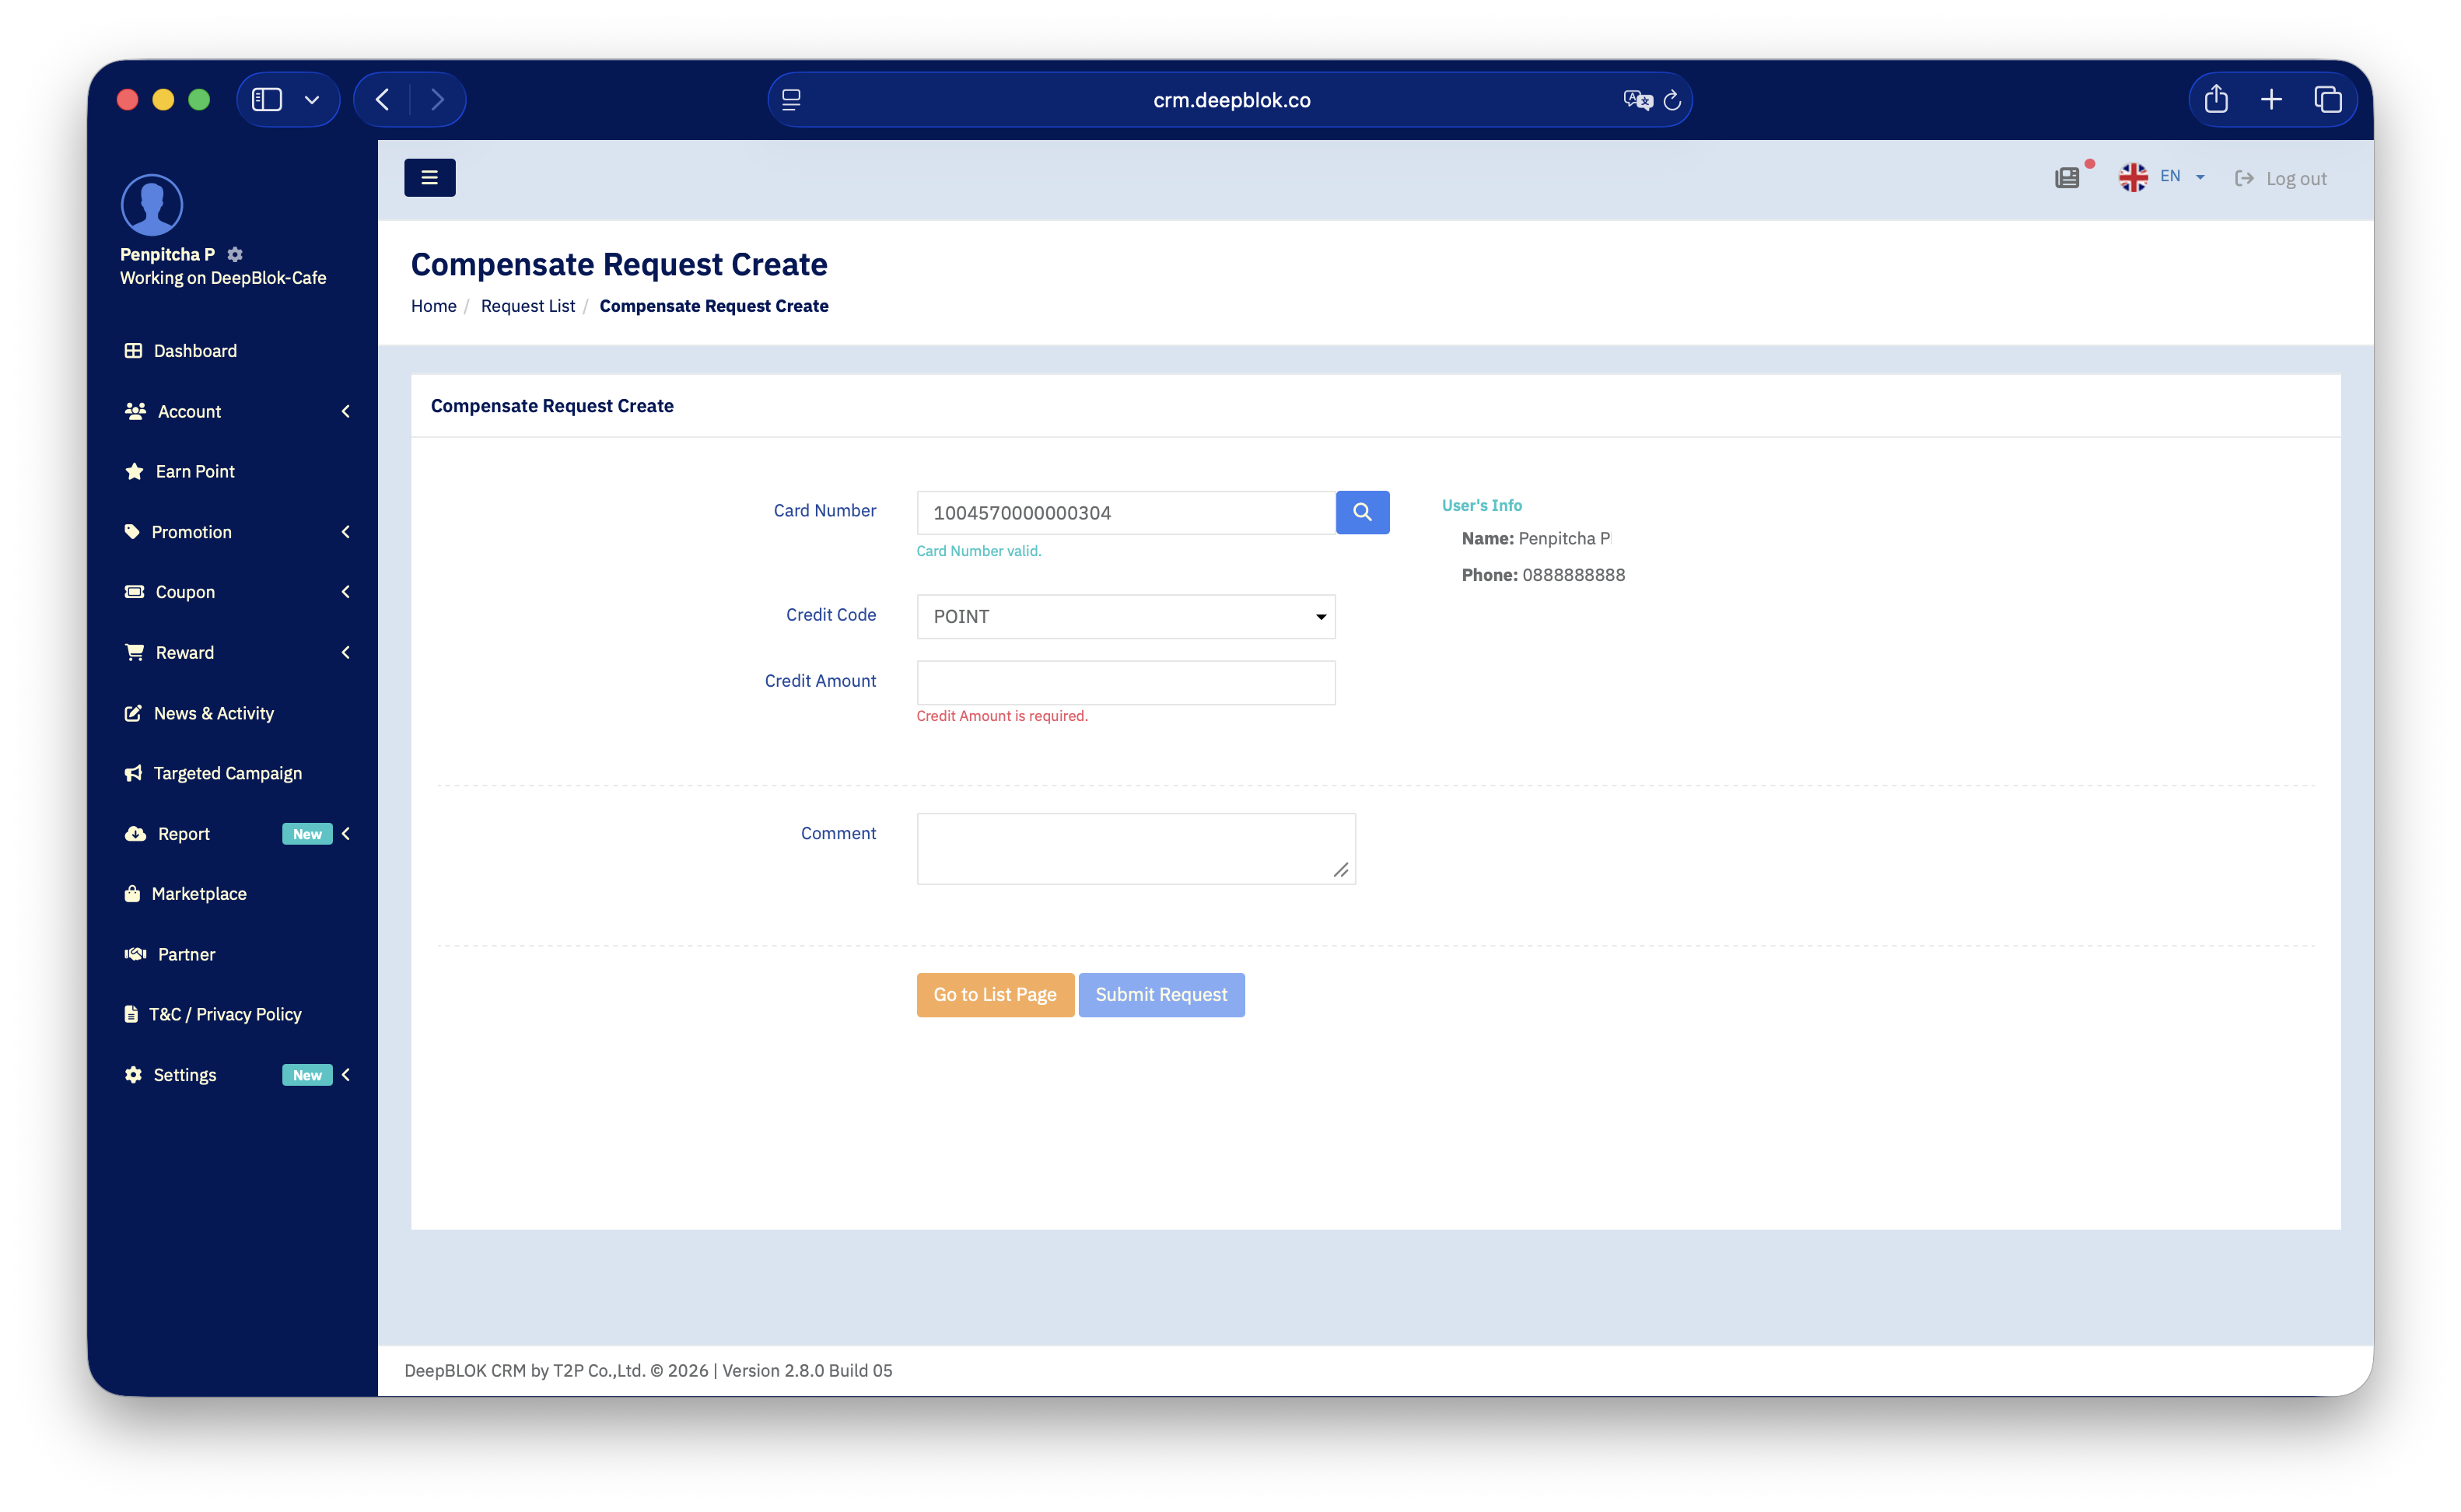
Click the blue Create New Request button at the top right of the table. The form page opens, titled Compensate Request Create.
3. Enter the card number, then check you have the right person
Type the 16-digit number into the Card Number field.
When the number is valid, a green Card Number valid. message appears beneath the field, and a User's Info box renders on the right showing that member's Name: and Phone:.
This step is important. Read the name and phone number in the User's Info box against the customer you're helping before filling in anything else. A card number that differs by one digit is a different person, and points that have already been approved have to be corrected through the Adjustment menu.
4. Choose the point type, the amount, and write your reason
The form has 4 fields. Work top to bottom.
5. Submit the request
Click the blue Submit Request button. You return to the Compensation Request List, and your request appears as the top row with the status Waiting for review.
Worth knowing: the Review By and Date Review columns on that row stay empty. That's correct — both fill in once someone approves it.
The other button on the form is the orange Go to List Page. It takes you back to the list without submitting — use it if you change your mind or want to start over.