

The question support hears most about promotions isn't "how do I set this up?" — it's "I set it up, so why isn't the result what I expected?" Almost every time, the answer isn't a typo in the form. It's the way the system interprets the conditions and rewards inside a single promotion, which differs from what most people assume. This article collects every limit worth knowing before you open the promotion form. It takes about 7 minutes to read and removes most of the after-the-fact rework.
This isn't a click-by-click guide; it's what to read before the clicking starts. For the step-by-step walkthrough, read the How to Create Advanced Rule-Based Promotions article next.
⚡ Quick Path: the limit that catches people out most is the first one —
Promotion→Promotion Create→ the2. Conditiontab is the gate for the whole promotion, not for each individual reward on the3. Rewardtab
Requirements before you start
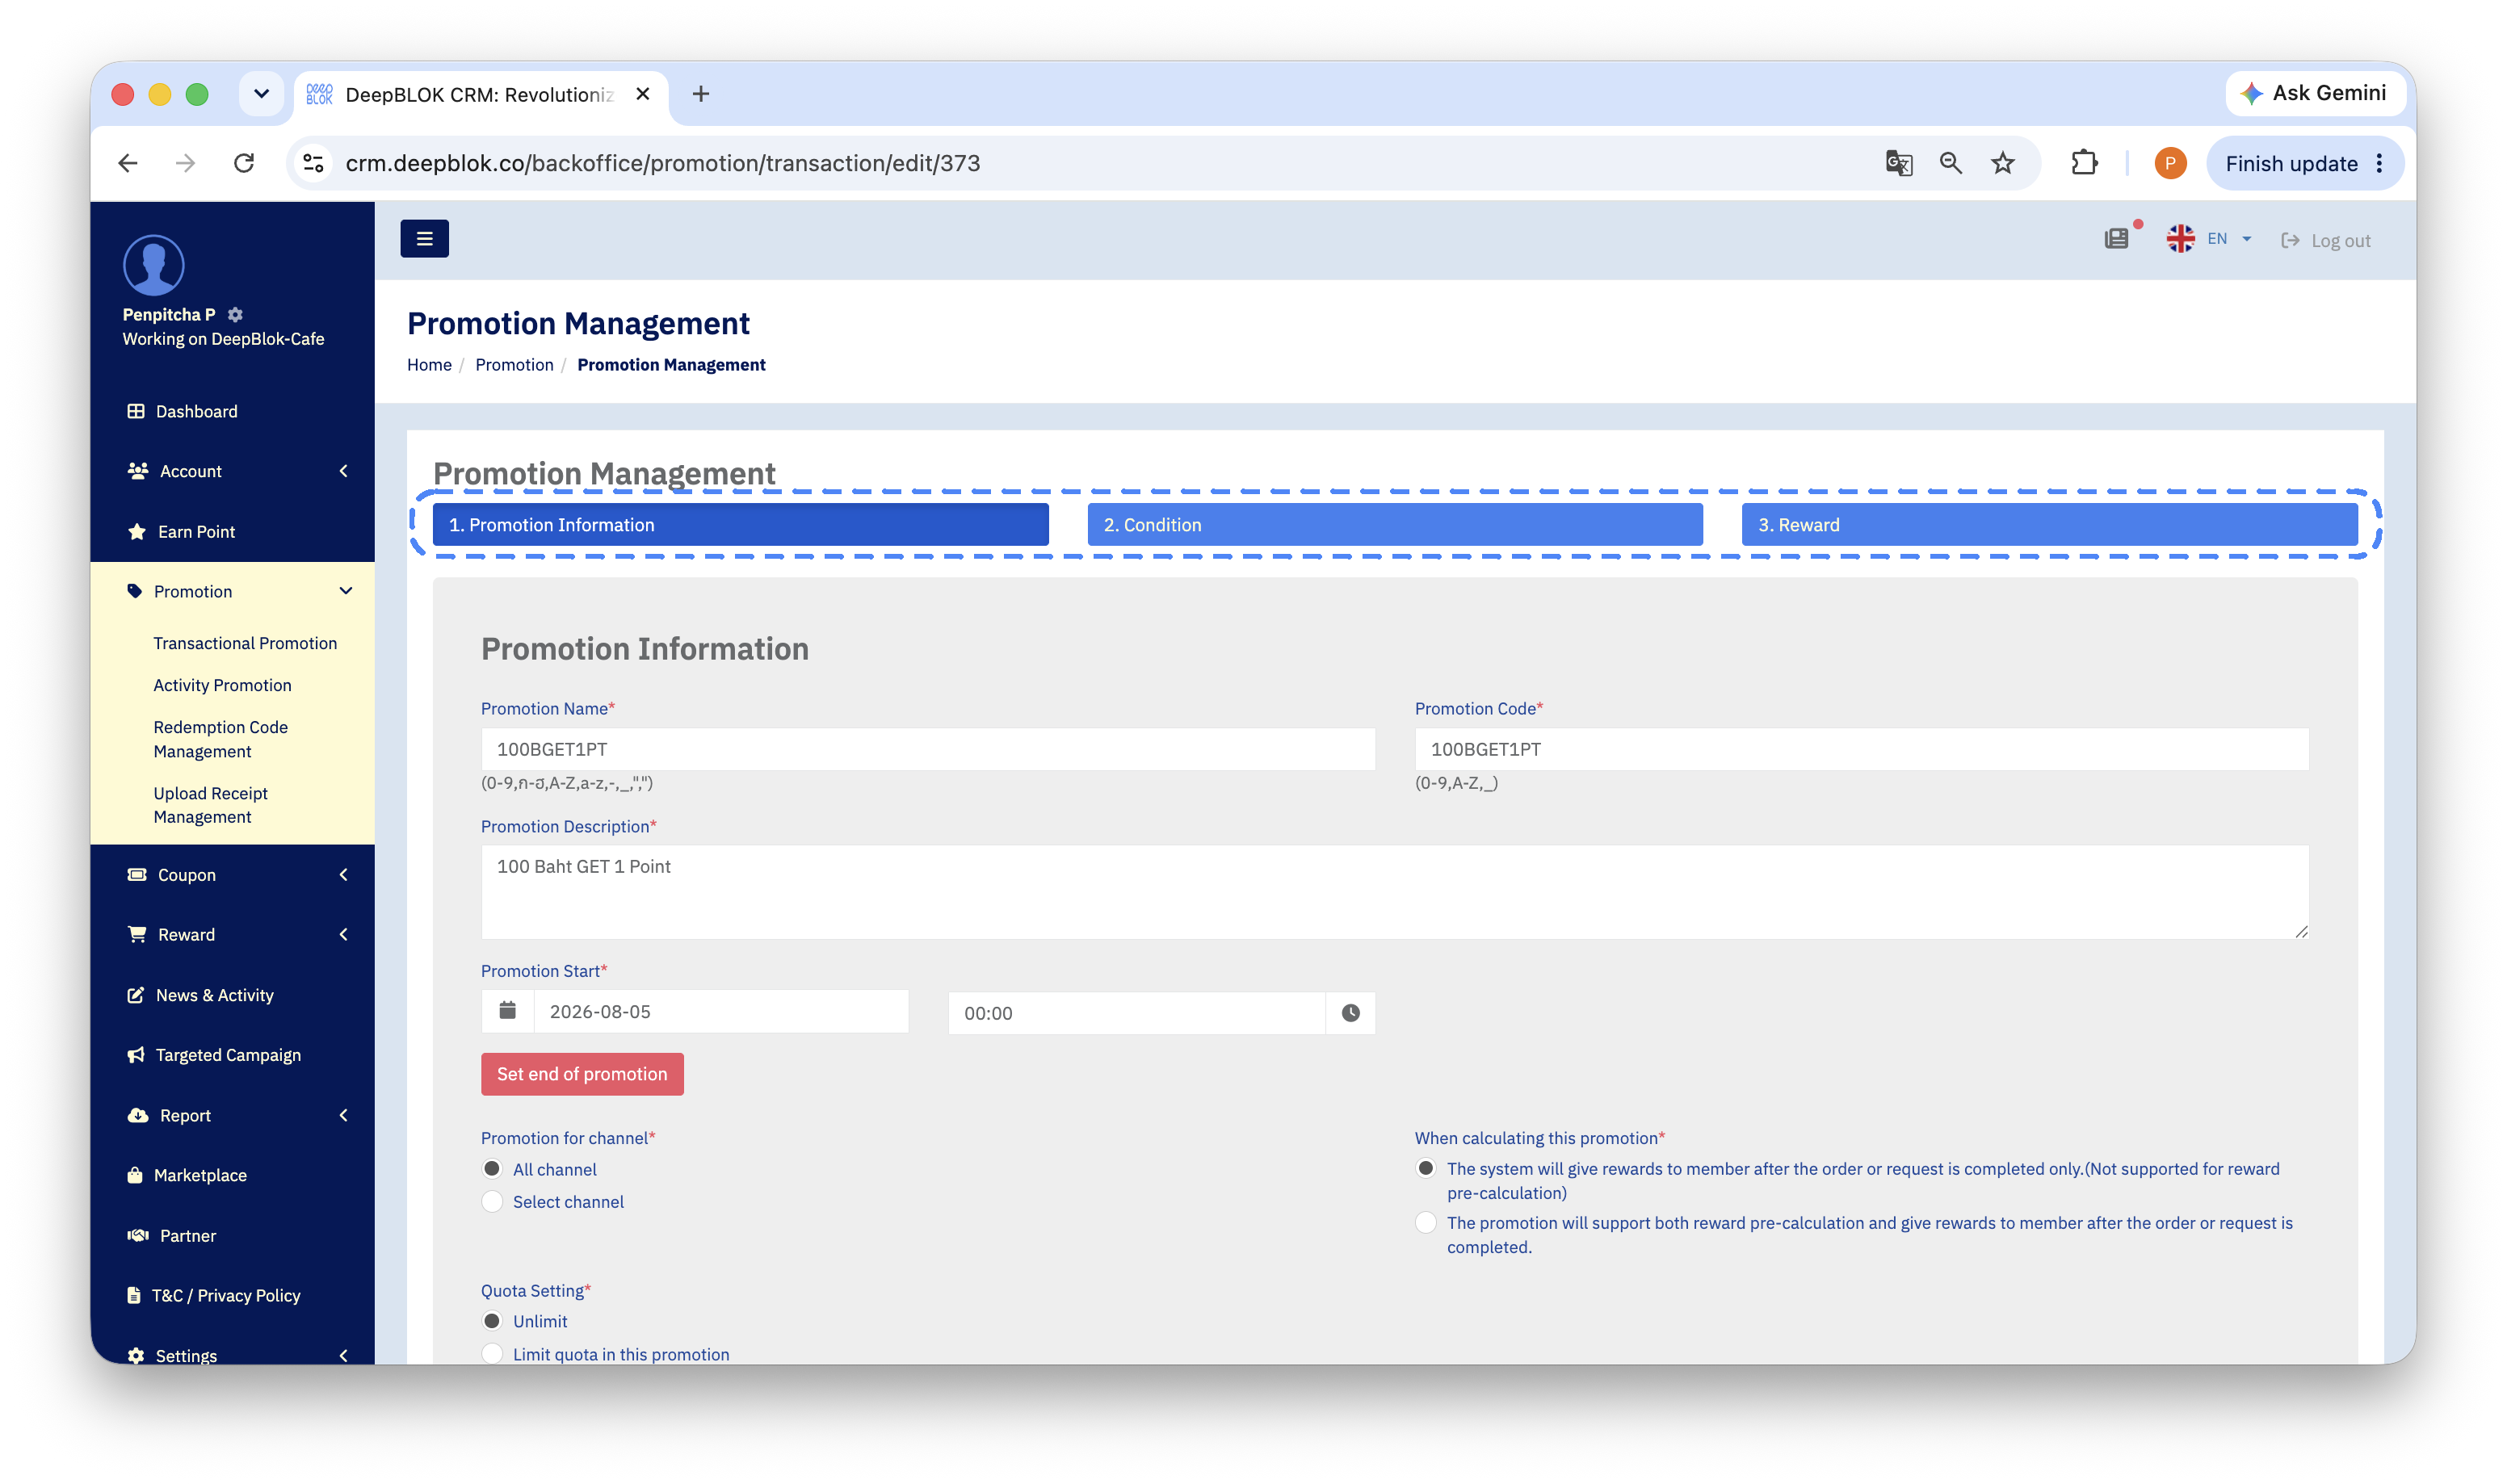
- The 3-tab structure of the promotion form —
1. Promotion Information,2. Conditionand3. Reward. If you've never opened it, start with the How to set point-earning rules article, which walks through all three. - Access to the
Promotionmenu — you can only verify these limits for yourself if you can open the promotion form. If it isn't in your left sidebar, ask an Admin on your team to grant it. - The conditions you want to set — for example "spend ฿50, earn 1 point".
Understand the shape of each promotion first
Almost every limit follows from the same structure. One promotion has 3 parts, and they do 3 different jobs.
1. Promotion details (1. Promotion Information) Name, code, date range, channels and quota. This part decides when and where the promotion applies.
2. Conditions (2. Condition) Which transactions qualify. This part is the gate for the whole promotion. If a bill can't get through the gate, nothing in the promotion runs.
3. Rewards (3. Reward) What the customer gets once they're through the gate. You can put several rewards in one promotion — points and spending balance together, for instance.
The one sentence that explains the most important limit: conditions live in part 2, rewards live in part 3, and part 2 gates all of part 3 at once — not reward by reward.
The 7 limits to know before you configure
1. The condition gates the whole promotion, not each reward This is the limit behind most unexpected results. If a bill fails the condition on the 2. Condition tab, the customer receives none of that promotion's rewards — not just one of them — even where a reward looks like it should have applied. The next section has a worked example.
2. Remainders that don't complete another full tier are never rounded up Your threshold works in tiers. The system counts how many full tiers a bill clears and awards for each one; the remainder doesn't count. With a rule of 1 point per ฿50, a ฿99 bill earns exactly the same as a ฿50 bill.
3. Every promotion needs at least one condition The system won't let you leave the 2. Condition tab empty. If you intend to award points on every bill with no minimum, add the broadest condition you're comfortable with — a payment amount of ฿1 or more, say — rather than leaving it blank.
4. A promotion only applies to transactions after its start time The system doesn't go back and recalculate older bills. Set it up today and yesterday's receipts earn nothing. To award points retroactively you have to do it separately, with Compensate for one customer (see the How to give points to a customer manually article) or a CSV import for many at once (see the How to award points to many customers at once with a CSV file article).
5. Promotion Code accepts only digits, capital letters and underscores This differs from the Promotion Name field right next to it, which accepts Thai characters and lower case. The system prints each field's accepted characters in small text beneath it — reading that before you type is faster than fixing it afterwards.
6. When the system calculates the reward is a choice, and it affects the shop floor The first tab has a When calculating this promotion setting: award only after the order or request is completed, or also support pre-calculation before it closes. The first option explicitly states that it does not support reward pre-calculation. If your shop floor needs to show customers the points they're about to earn before they pay, choose the option that supports both.
✅ Confirm it worked: open the promotion list and look at the row you just created. The
Rewardcolumn must show the credit code you meant to give —POINT, say — and theConditioncolumn must show the same number of conditions you entered. If both match, the promotion is ready to switch on.
7. Coupon rewards need the coupon to exist first If you choose to award a coupon, the system only lets you pick from coupons already created under Reward Management. Building the promotion first and the coupon second means coming back to edit the promotion. The right order is coupon first, then the promotion that references it.
An example of setting reward conditions
- Reward 1 — spend ฿50, earn 1 point (
POINT) - Reward 2 — spend ฿1, earn 1 spending point (
SP_POINT)
Why: a ฿40 bill hasn't reached reward 1's ฿50 rate, so it earns 0 points, while reward 2 is set at ฿1 and so accumulates the full 40 spending points.
Recommendation: if you want every reward to stop together when a bill is too small, put the minimum on the 2. Condition tab. If you want each reward to run at its own rate, set the rate on each reward on the 3. Reward tab instead.
![3.4.2 the Reward List panel on the 3. Reward tab with 2 rewards saved in one promotion. Both lines must be visible, each carrying its own rate — for example [100 Baht] and [200 Unit].](https://cdn-icrm.deepblok.co/HELP_CENTER/20260827/1bcd2b70-4122-42cf-8fd9-136d8dce1911-3.4.2-en.png)
When you do need 2 separate promotions: when the 2 rewards need different conditions on the 2. Condition tab — say one is for Silver members only and the other is for everyone. A condition governs the whole promotion, so those 2 cannot sit together.