

When something goes wrong for dozens or hundreds of customers at once — say the connection to your point-of-sale system dropped for half a day — opening the compensation form one customer at a time takes longer than they'll wait. There's a much faster route: the Earn Point menu accepts a CSV file of up to 2,000 rows per upload and calculates points automatically using your brand's earning rules. It takes under 10 minutes if the file is prepared correctly, and unlike Compensate and Adjustment it has no approval step.
⚡ Quick Path:
Earn Point→ theEarn points by purchase amounttab →Import file→Download the upload template Here→ fill in the file →Browse File→ check theSuccess transaction noandFailed transaction nocolumns
Requirements before you start
- A list of the affected customers with 10-digit phone numbers and each person's purchase amount — both are mandatory. If you only have customer names, pull the phone numbers from your point-of-sale system or sales report first.
- Every customer in the file must already be a member of your brand — this tool awards points to numbers that are already members. It does not create member accounts. Rows for people who never signed up are counted as failed.
- Your brand's point-earning rules already configured — the tab this article uses calculates points from the purchase amount using your earning rules, not from a points figure you type in. If you haven't set any rules yet, start with the How to set point-earning rules article.
- Something that can save a CSV file — Excel, Numbers or Google Sheets all work, as long as you export as
.csv. - Access to the
Earn Pointmenu — if you can't see it in the left sidebar, ask an Admin on your team to grant it.
📌 Good to know: this import awards points retroactively based on the purchase amounts you supply, but it doesn't modify the original transactions in the system. If you need to correct the points on a transaction that already exists, in a way that can be traced back to it, use the
Adjustmentmenu instead — see the How to adjust points against a bill reference article.
Pick the tab that matches the data you have
The Earn Points page has 2 tabs. Each has its own file format and its own import history. Picking the wrong one means preparing the file all over again.
How to get this right first time: if what you're holding is a sales report showing what each customer spent, use the first tab. The system then calculates points using the same rules everyone else earns under, which keeps the result fair without you having to do the arithmetic.
Award points to many customers in 5 steps
Step 1: Open the upload page
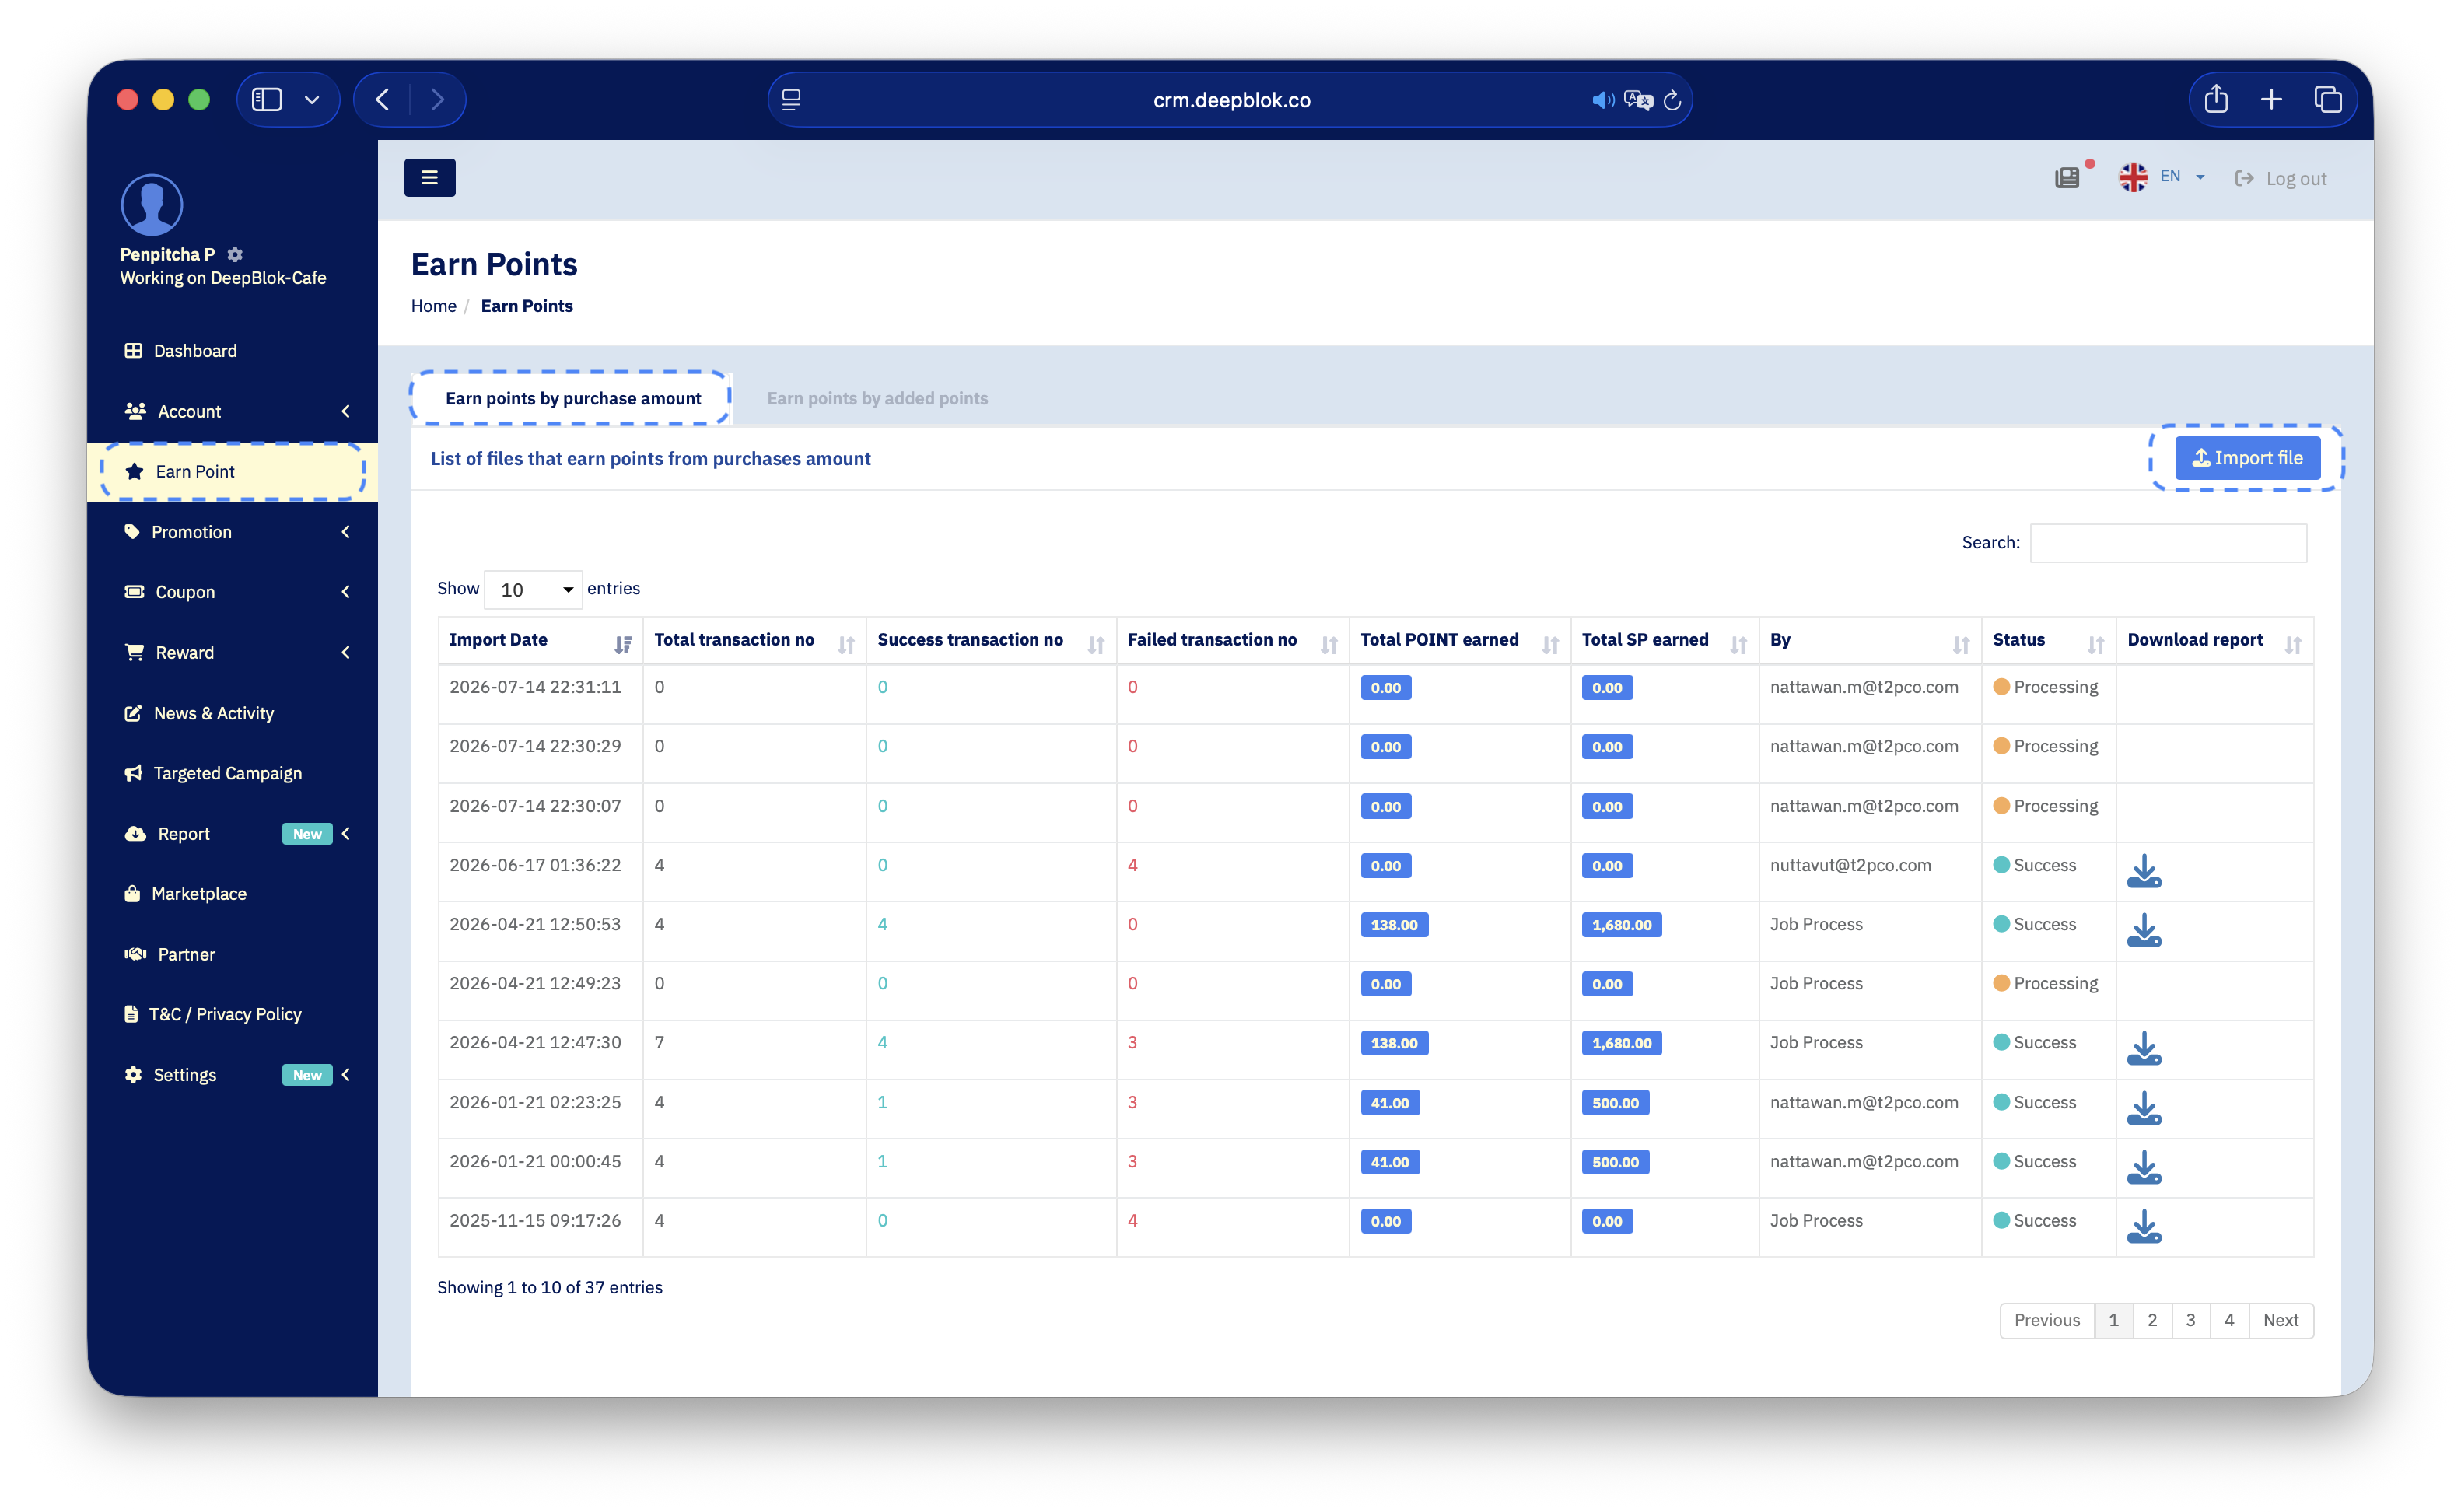
In the left sidebar, click Earn Point. It's a top-level item sitting between Account and Promotion, with no expand arrow — one click takes you straight there.
The system opens the Earn Points page showing every past import. Check that the selected tab is Earn points by purchase amount, then click the blue Import file button in the top-right corner of the table.
📌 Good to know: this button opens the upload page for whichever tab is selected at that moment. Switch tabs before clicking and you get a different upload page. Check that the next page's heading says
purchase amountto confirm you're in the right place.
Step 2: Download the template
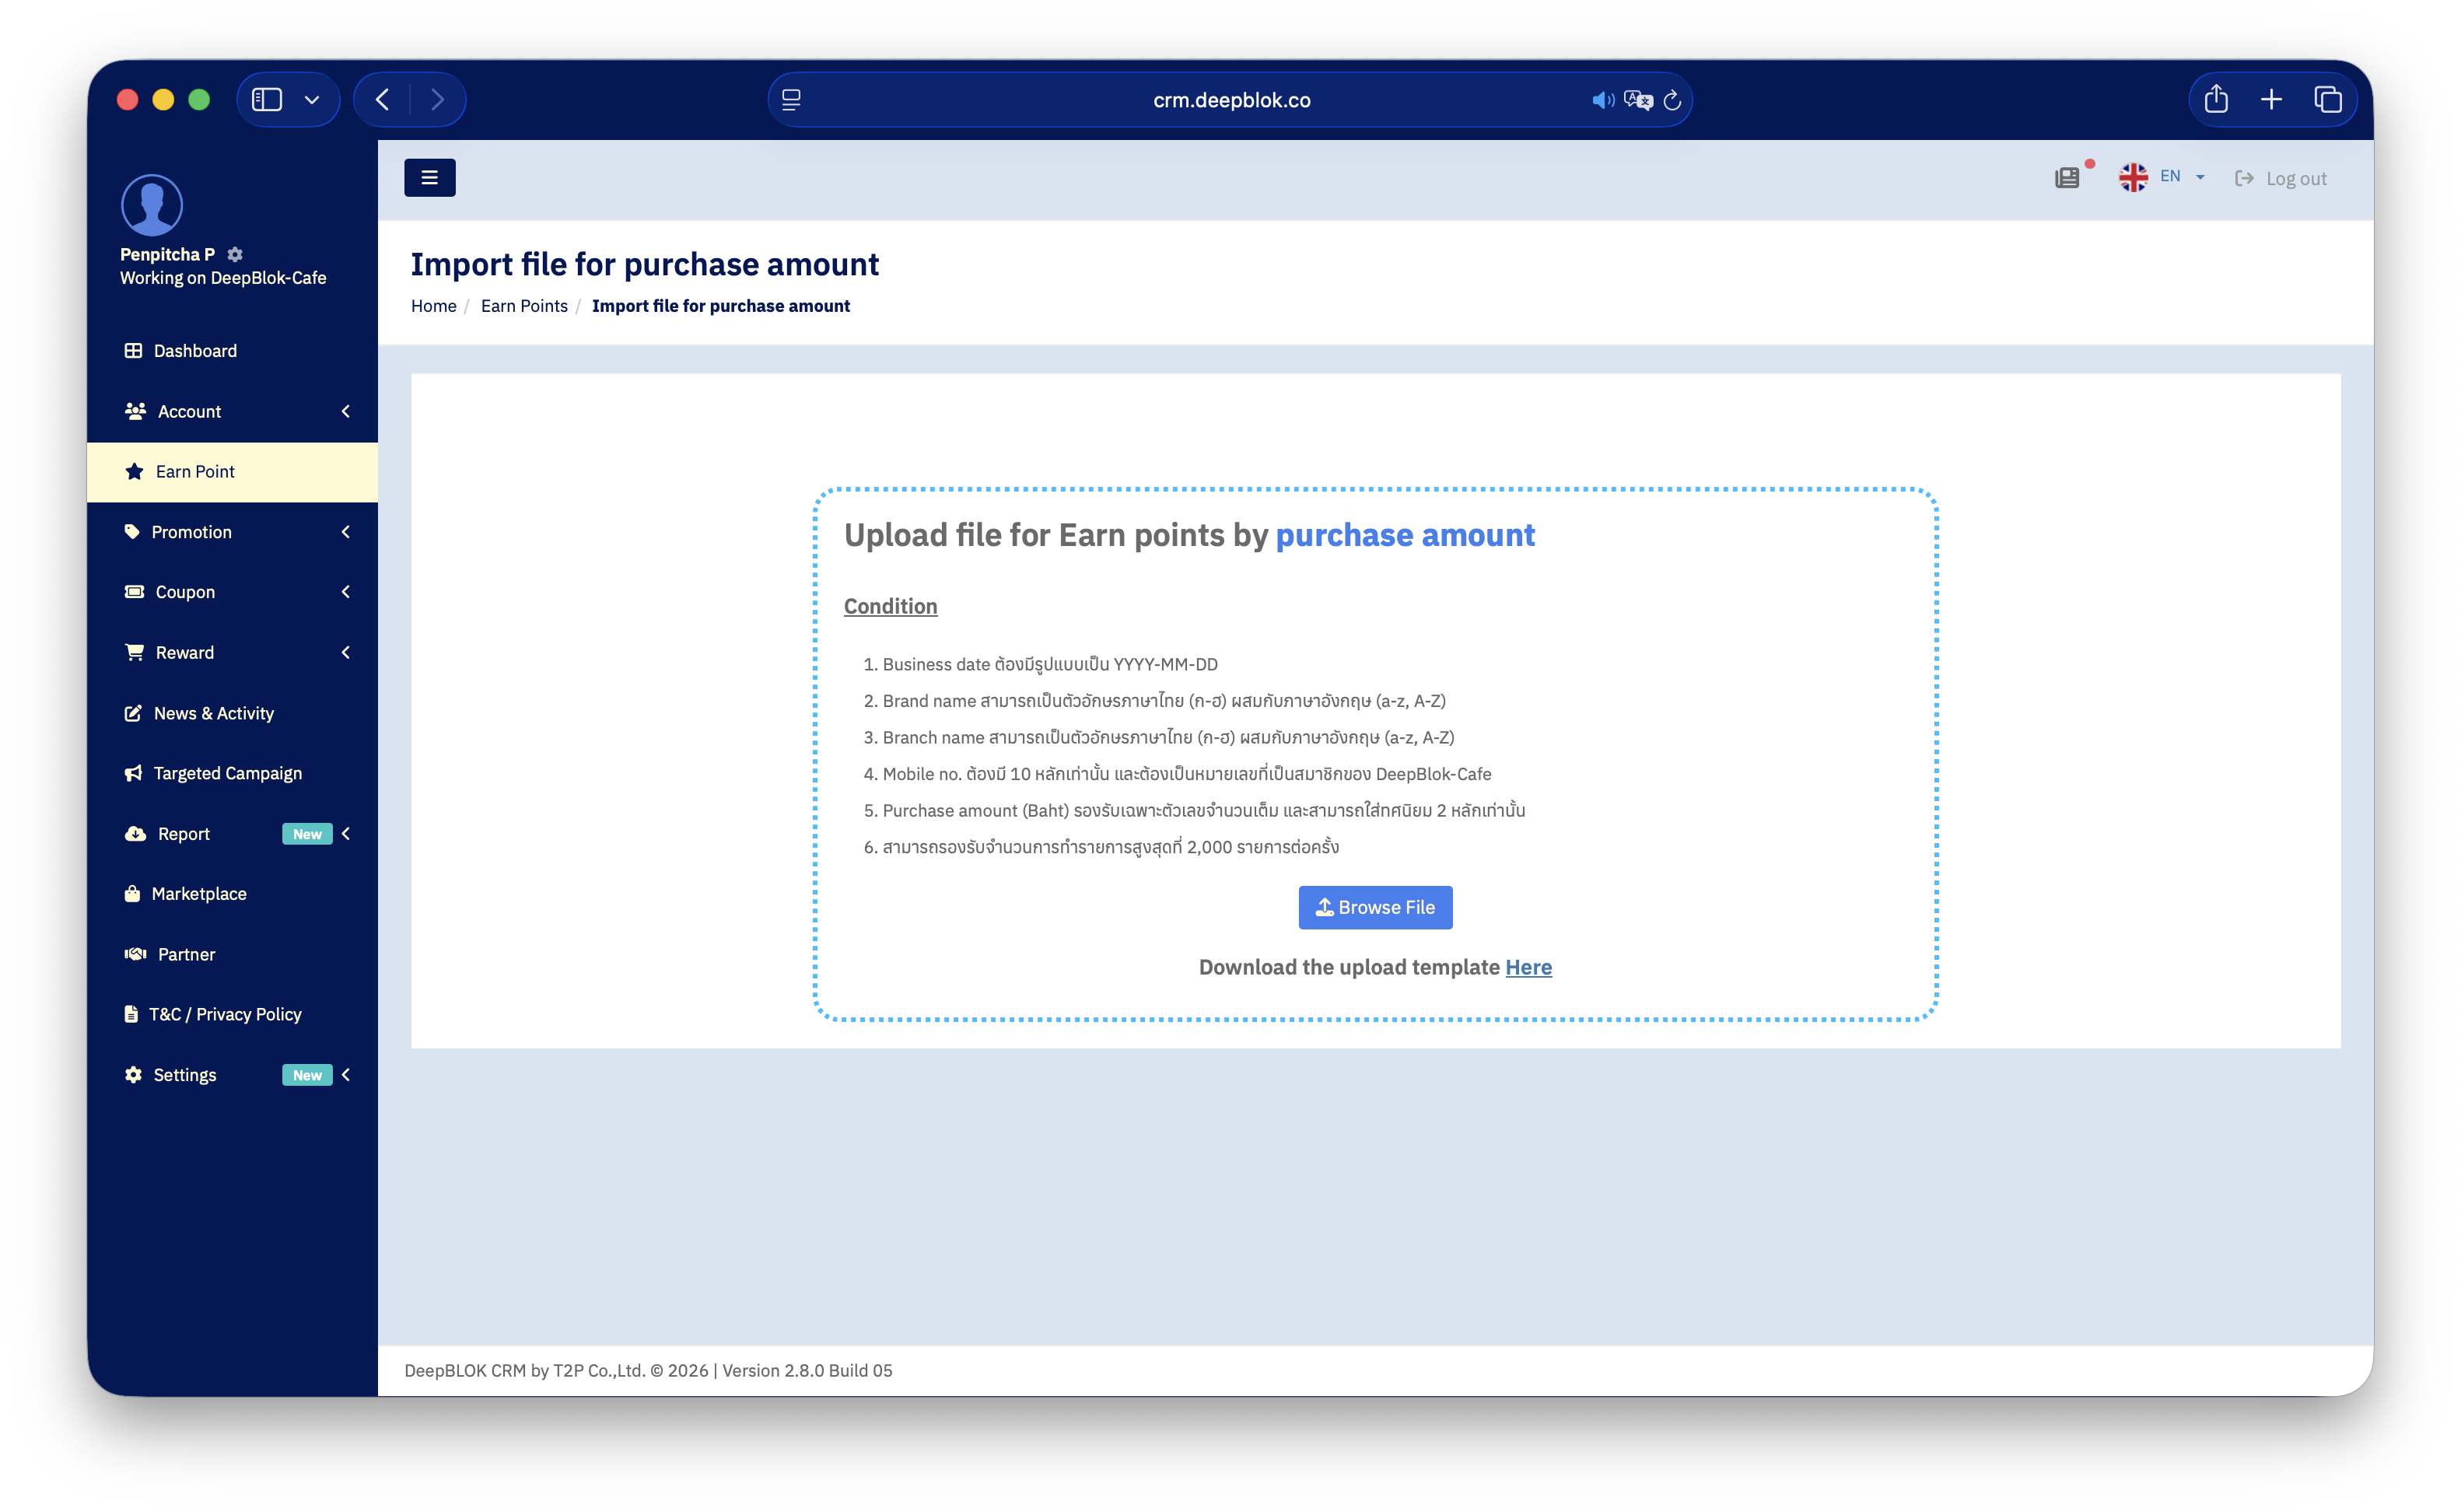
The upload page is headed Upload file for Earn points by purchase amount. Below it is a Download the upload template Here link, or download the template here.
Always start from this template rather than building a blank file yourself — the column headers have to match what the system expects character for character, spaces and full stops included.
The same page lists 6 file conditions, which match the table in the next step.
📌 A quick heads-up on this page's language: those 6 conditions are always shown in Thai, even when the system is set to English mode. If you don't read Thai, use the table in step 3 of this article instead — it covers exactly the same conditions.
Step 3: Fill in every column
The template has 7 columns. Use one row per transaction — if a single customer has several bills to compensate, give them several rows.
⚠️ Watch out: the limit is 2,000 rows per upload. If your incident affected more than that, split it across several files and upload them one at a time. Each file appears as its own row in the history table, so you can check the results separately.
Step 4: Upload the file
Back on the upload page, click the blue Browse File button and choose your completed file.
The system returns you to the Earn Points page and your job appears as the top row of the history table with the status Processing, shown as an orange dot. Rows still processing don't have a report download icon yet.