

The Line Settings page asks for a Channel ID and a Channel Secret, twice over — 4 boxes in all. None of those values are created in DeepBLOK. Every one of them is copied across from the brand's own LINE side. Connecting is a job the DeepBLOK team does together with the brand, at no extra charge.
⚡ Quick Path: the values come from 2 places —
Messaging APIin LINE Official Account Manager → theLine Reply Message Setupsection · aLINE Loginchannel in the LINE Developers Console → theLine Liff Setupsection
🔑 You need access to 2 LINE systems first — LINE Official Account Manager and the LINE Developers Console. Without admin rights on both, none of the LINE-side steps can be done; get the access before booking time with the team.
📌 Good to know: the brand presses the buttons on the LINE side; filling the values into the Backoffice is the DeepBLOK team's job. The team books a time and walks you through it step by step while your system is being set up.
Requirements before you start
- A live LINE Official Account — it does not need to have passed LINE's verification. Opening the account is enough to connect.
- Administrator access to LINE Official Account Manager and the LINE Developers Console — both belong to LINE rather than DeepBLOK, and you need both, because the values live in 2 different places.
- A provider in the LINE Developers Console — this is where the brand's channels are kept. If there isn't one yet, create it first.
- Permission for the
Settingsmenu in the Backoffice — for whoever will type the values in, which is normally the DeepBLOK team.
The 2 channels behind the 4 values
The Line Settings page splits into 2 sections of 2 fields each. That count matches the number of channels the brand needs on the LINE side exactly: 2 channels, 2 values apiece.
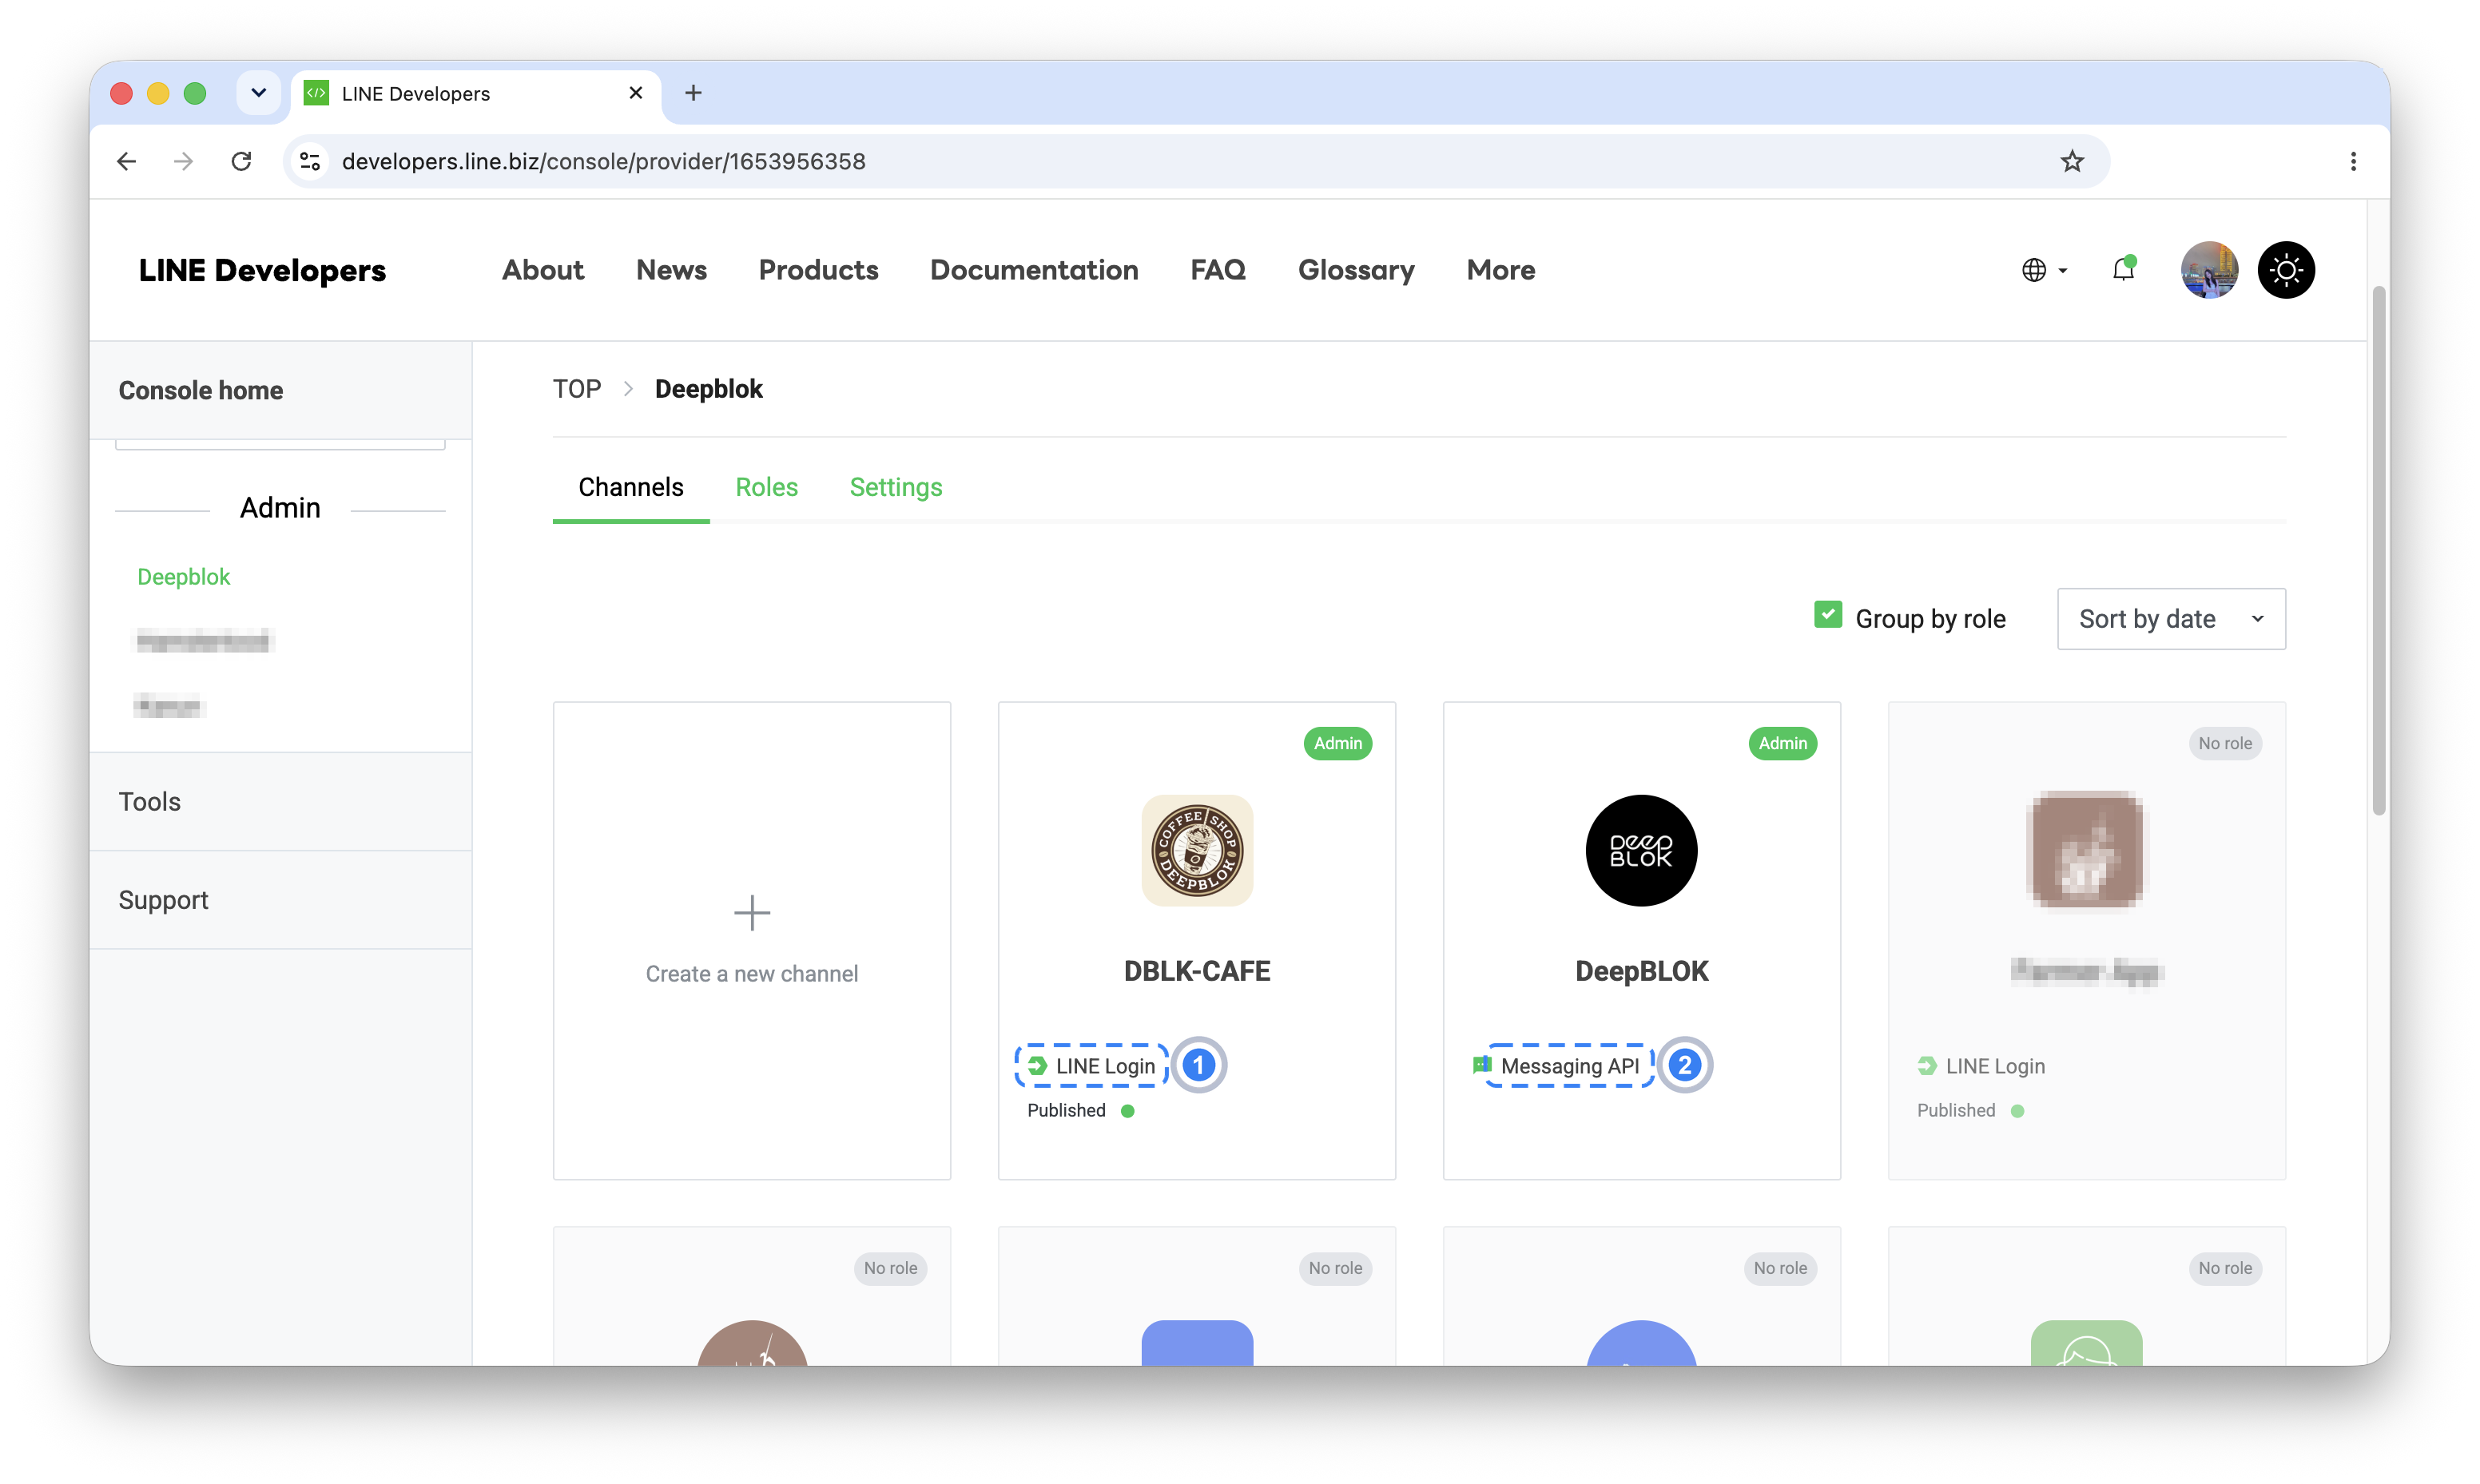
The 2 channels do different jobs and are kept in different places. The first is a Messaging API channel, which sits with the LINE OA and has to be switched on before it has values to copy. It handles sending and replying to messages. The second is a LINE Login channel, which has to be created, and which powers the screens customers open inside the LINE app.
⚠️ One thing to watch: use the channel type to decide which pair goes where — never the Channel ID numbers. They are not issued in the same order for every brand, and some brands end up with numbers that look very much alike. Reading the type label on the channel card works in every case.
Collecting the values on the LINE side
The DeepBLOK team walks through this on the call, but it can be prepared in advance. The whole thing takes about 5 minutes and splits into 2 stretches, one per channel.
The first pair, from the Messaging API page
1. Open LINE Official Account Manager and go to Settings The gear icon sits in the top-right corner of the page.
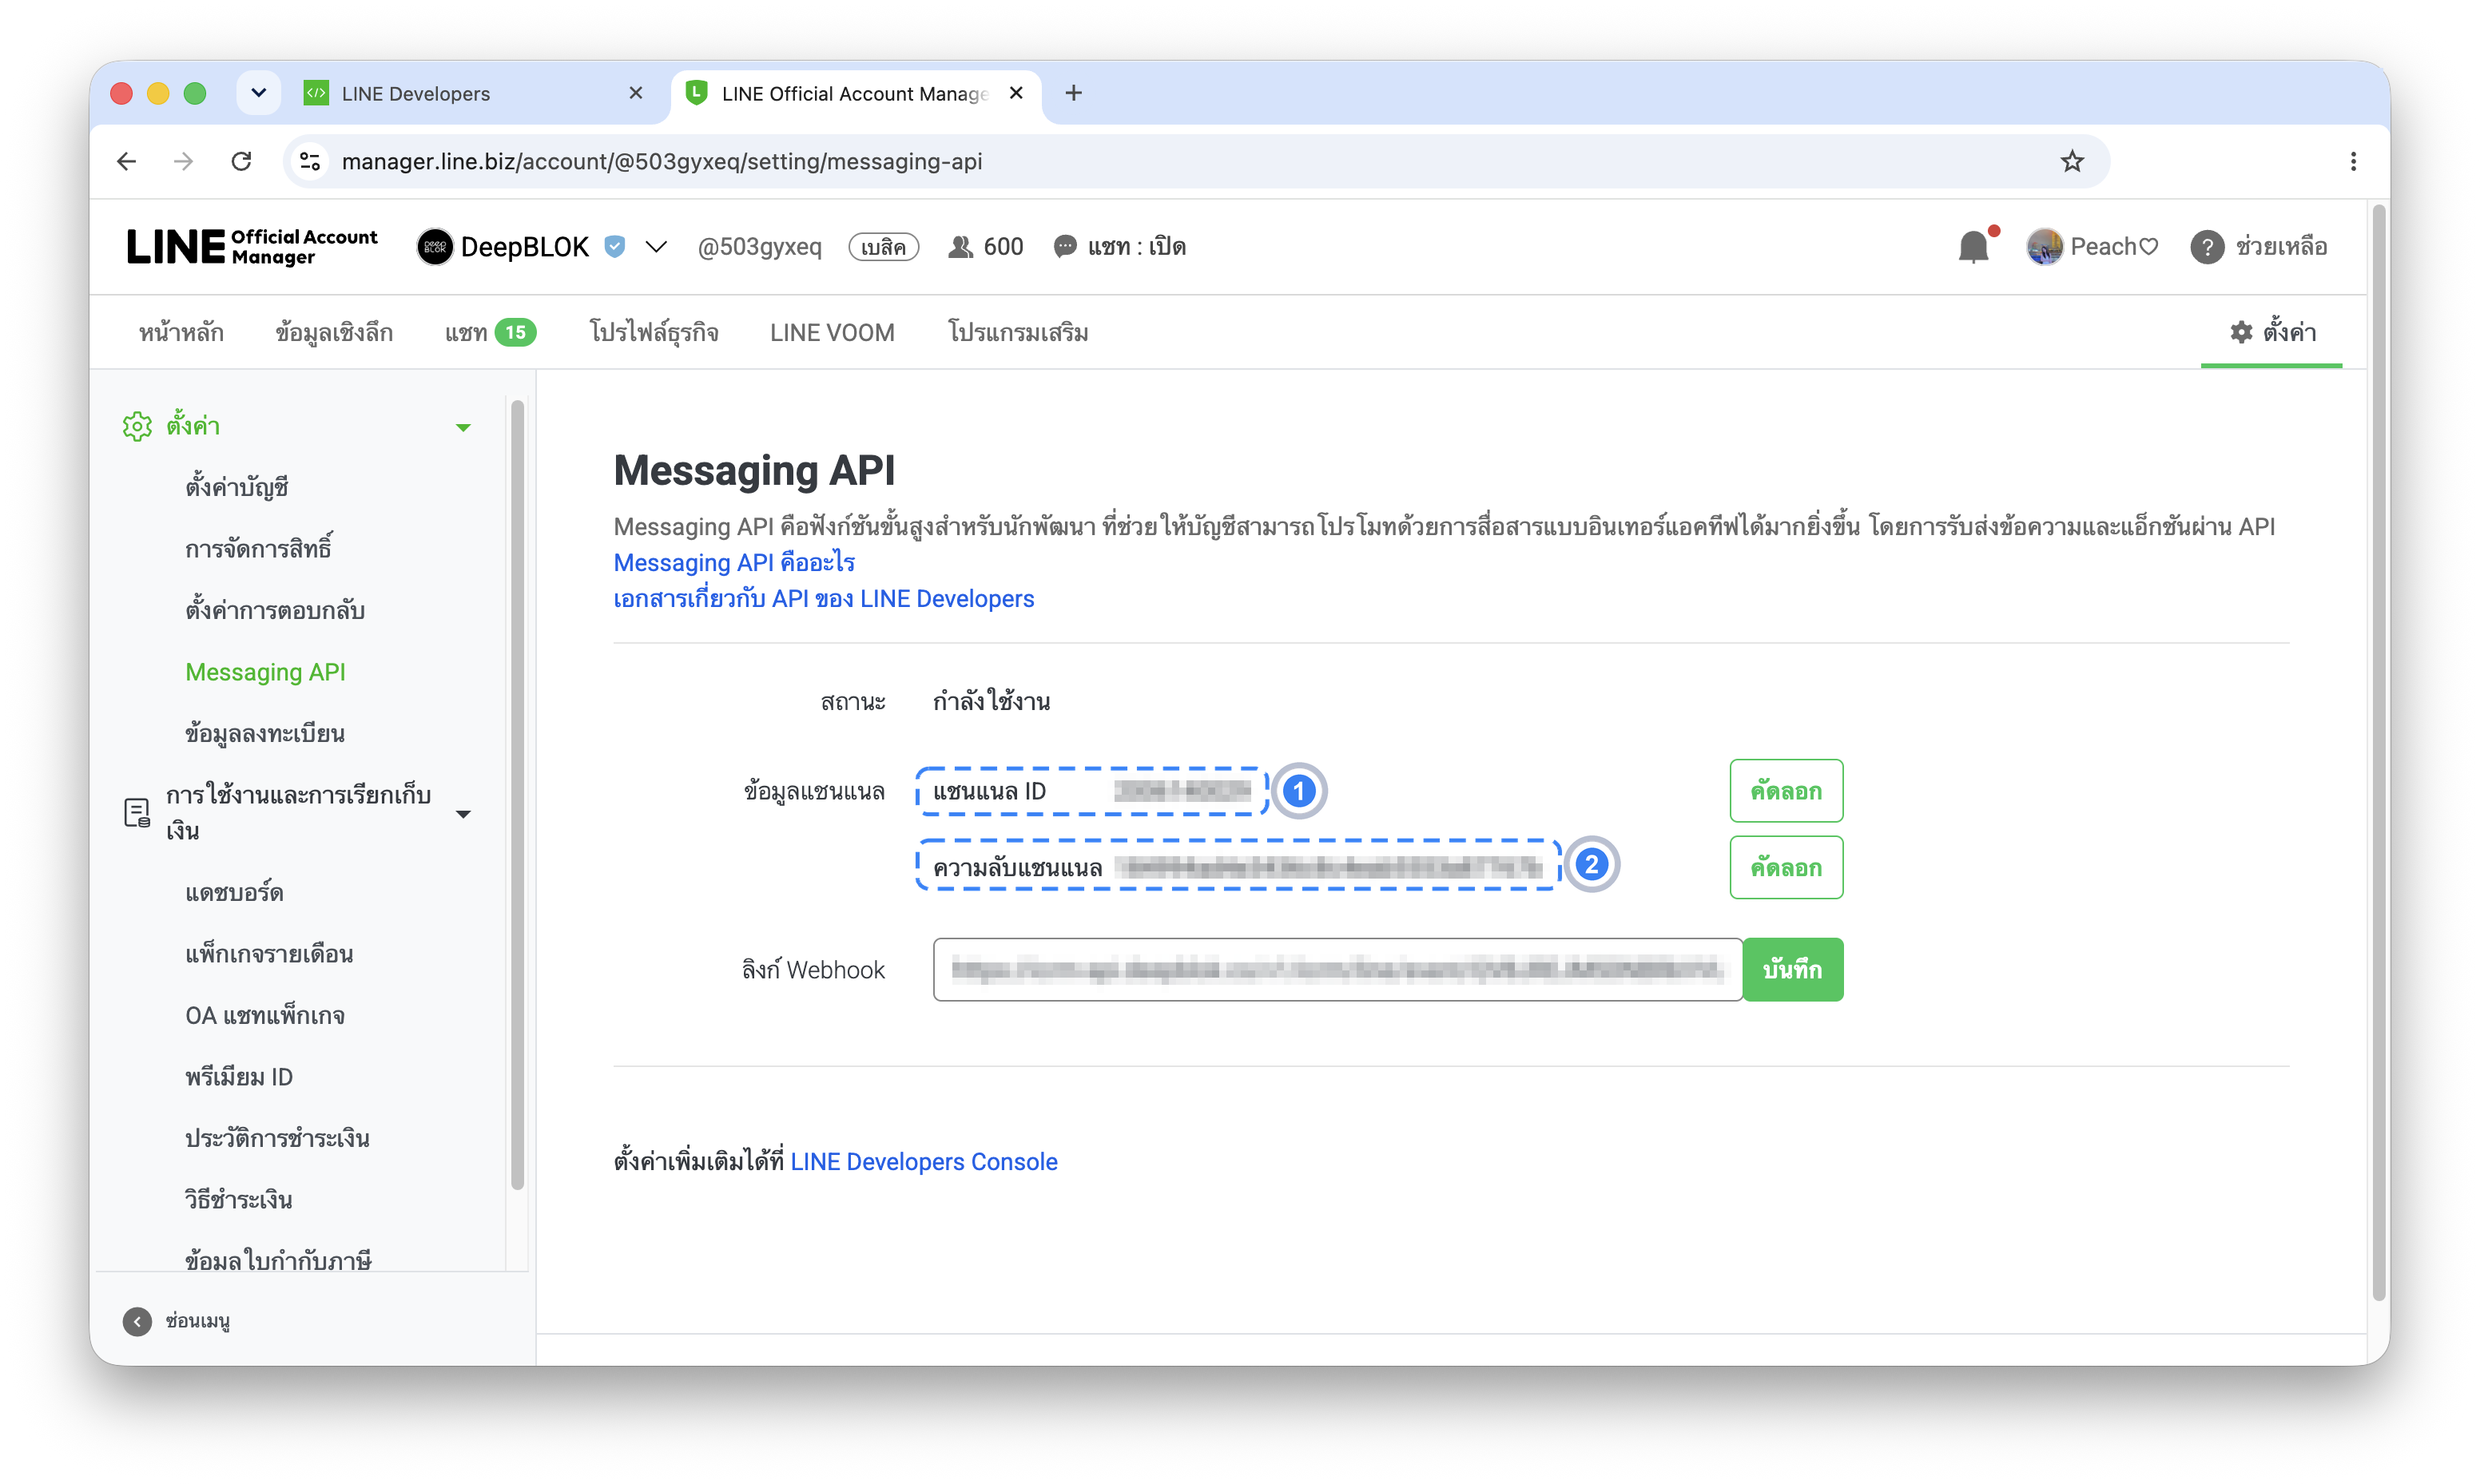
2. Choose Messaging API from the left menu and copy 2 values This screen shows the Channel ID and Channel Secret belonging to the Messaging API channel, with a copy button beside each. Copy both and send them to the DeepBLOK team. The page belongs to LINE and follows the language set on the account, so the labels read แชนเนล ID and ความลับแชนเนล on a Thai account — the same 2 values.
If the page shows no values yet, the account has not switched Messaging API on. Enable it on this same page and the 2 values appear.
The second pair, from a LINE Login channel
3. Open the LINE Developers Console and select the brand's provider The Messaging API page carries a link straight through to the console. Once inside, select the provider you created earlier, then press Create a new channel.
4. Set the channel type to LINE Login When the dialog asks which type of channel to create, choose LINE Login. This is the channel that supports the screens customers open in the LINE app.
5. Set both country fields Region to provide the service and Company or owner's country / region are both set to Thailand.
6. Fill in the name and pick the app types Channel name and Channel description both take the brand name. Under App types, tick both Web app and Mobile app. Ticking only one is a common cause of customer screens failing to open later.
7. Accept the agreements, then press Create There are 2 agreement checkboxes at the foot of the form. Tick both, then press the green Create button.
8. Switch the status to Publish, then copy 2 values A newly created channel shows a Developing status. Change it to Publish first, then copy this channel's Channel ID and Channel Secret and send them to the team.