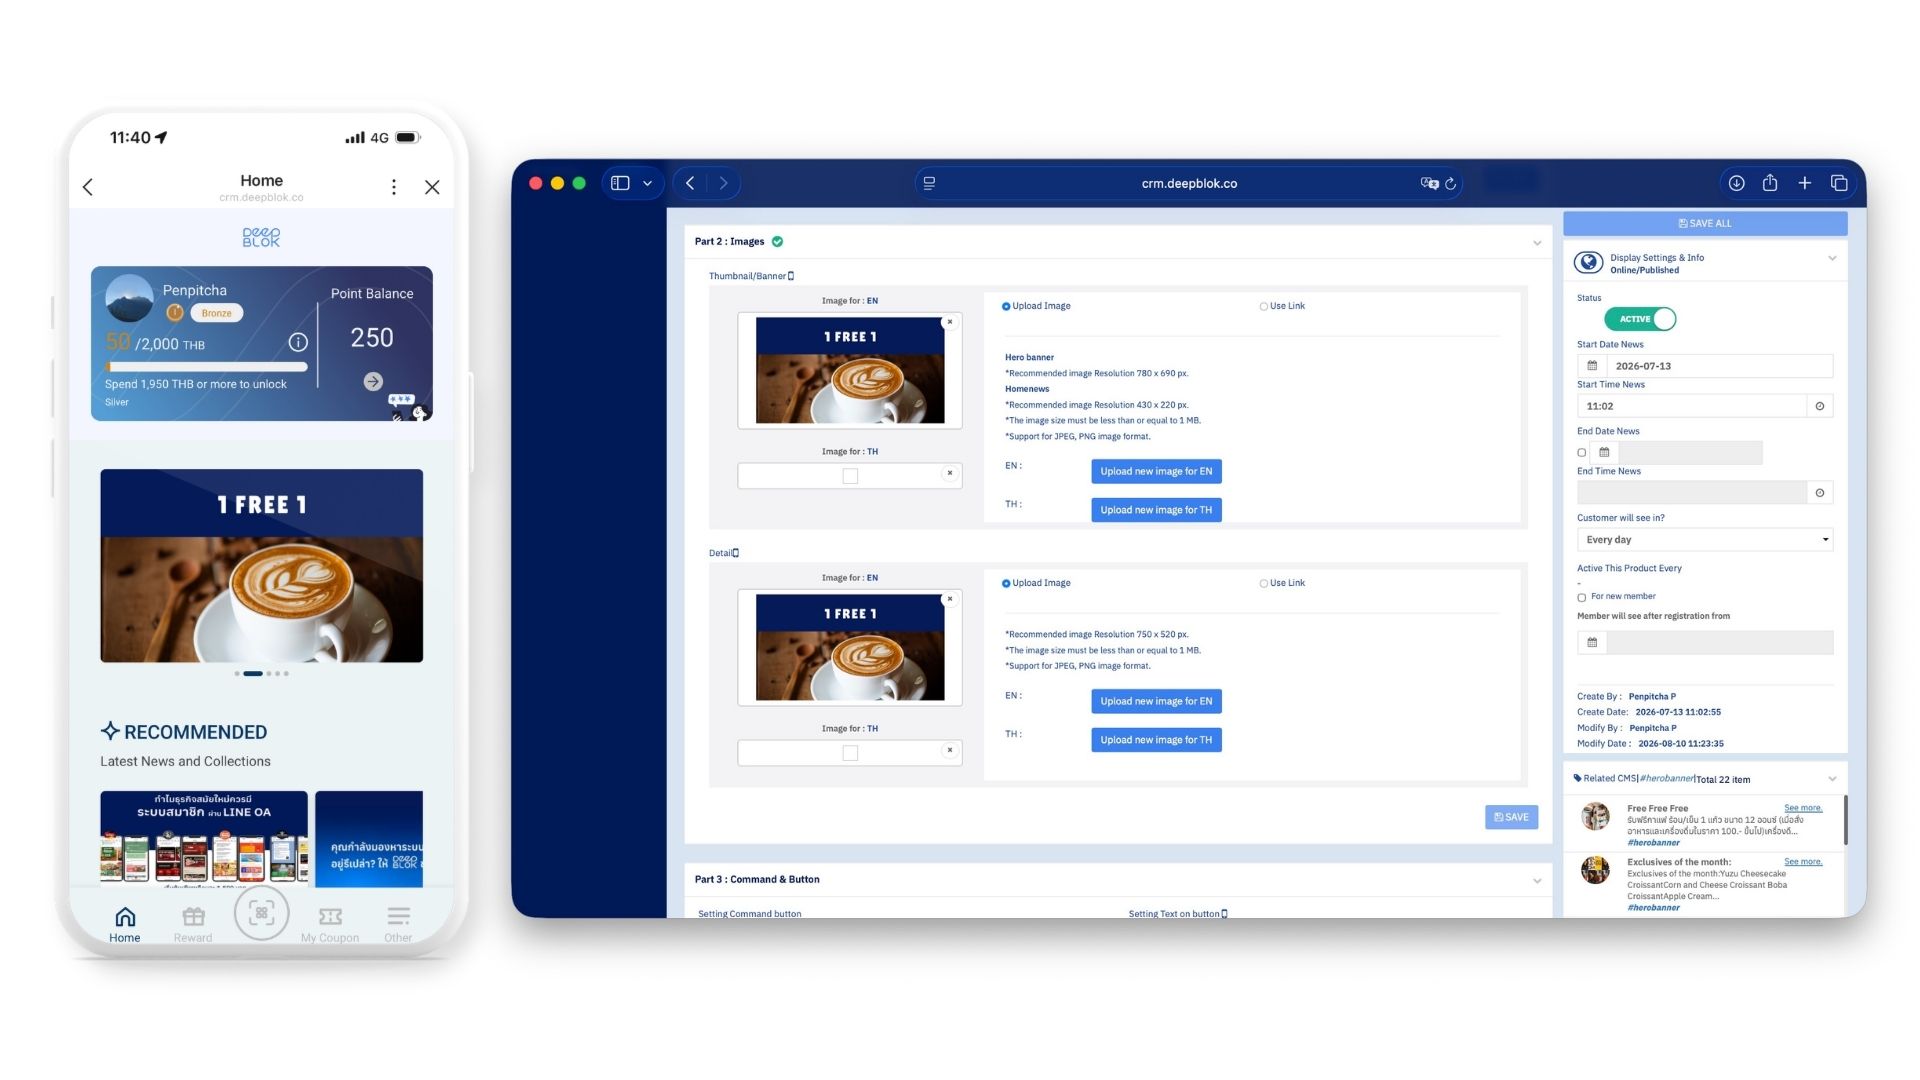
The news and promotions your customers see on the member screen are built from News & Activity in the left sidebar. One item is made of 4 panels filled in separately — the copy, the artwork, the button on the detail page, and the display settings — and it takes about 15 minutes once your text and images are ready. Creating an item doesn't touch points, coupons or rewards you've already configured; news is display only.
⚡ Quick Path:
News & Activity→+ Add New Content→Part 1fill in both theEnglishandไทยtabs →Part 2upload the artwork →Part 3choose aCommand Actionand fill in the fields it opens →SAVEeach panel →SAVE ALL
Requirements before you start
- Access to News & Activity — if it isn't in your left sidebar, ask an Admin on your team to grant it first.
- Copy in both languages — title and body have to be filled in in English and Thai. The system picks the version to show from the language the customer has set on their own device, not from the one you expect them to use.
- 4 image files — a cover (English + Thai) and a detail image (English + Thai). Every slot states 1 MB maximum, JPEG or PNG.
- A decision about what the customer should do next — read and move on, open a web page, land on a reward, or run a check-in mission. That choice is what
Part 3configures, and it decides whether you need a reward or a destination link ready beforehand.
📌 Good to know: you can create and save an item before the artwork exists and come back for the images later. Just don't switch it on for customers in the meantime — an item with no cover renders as an empty frame on the member screen.
Create a news item in 6 steps
1. Open News & Activity
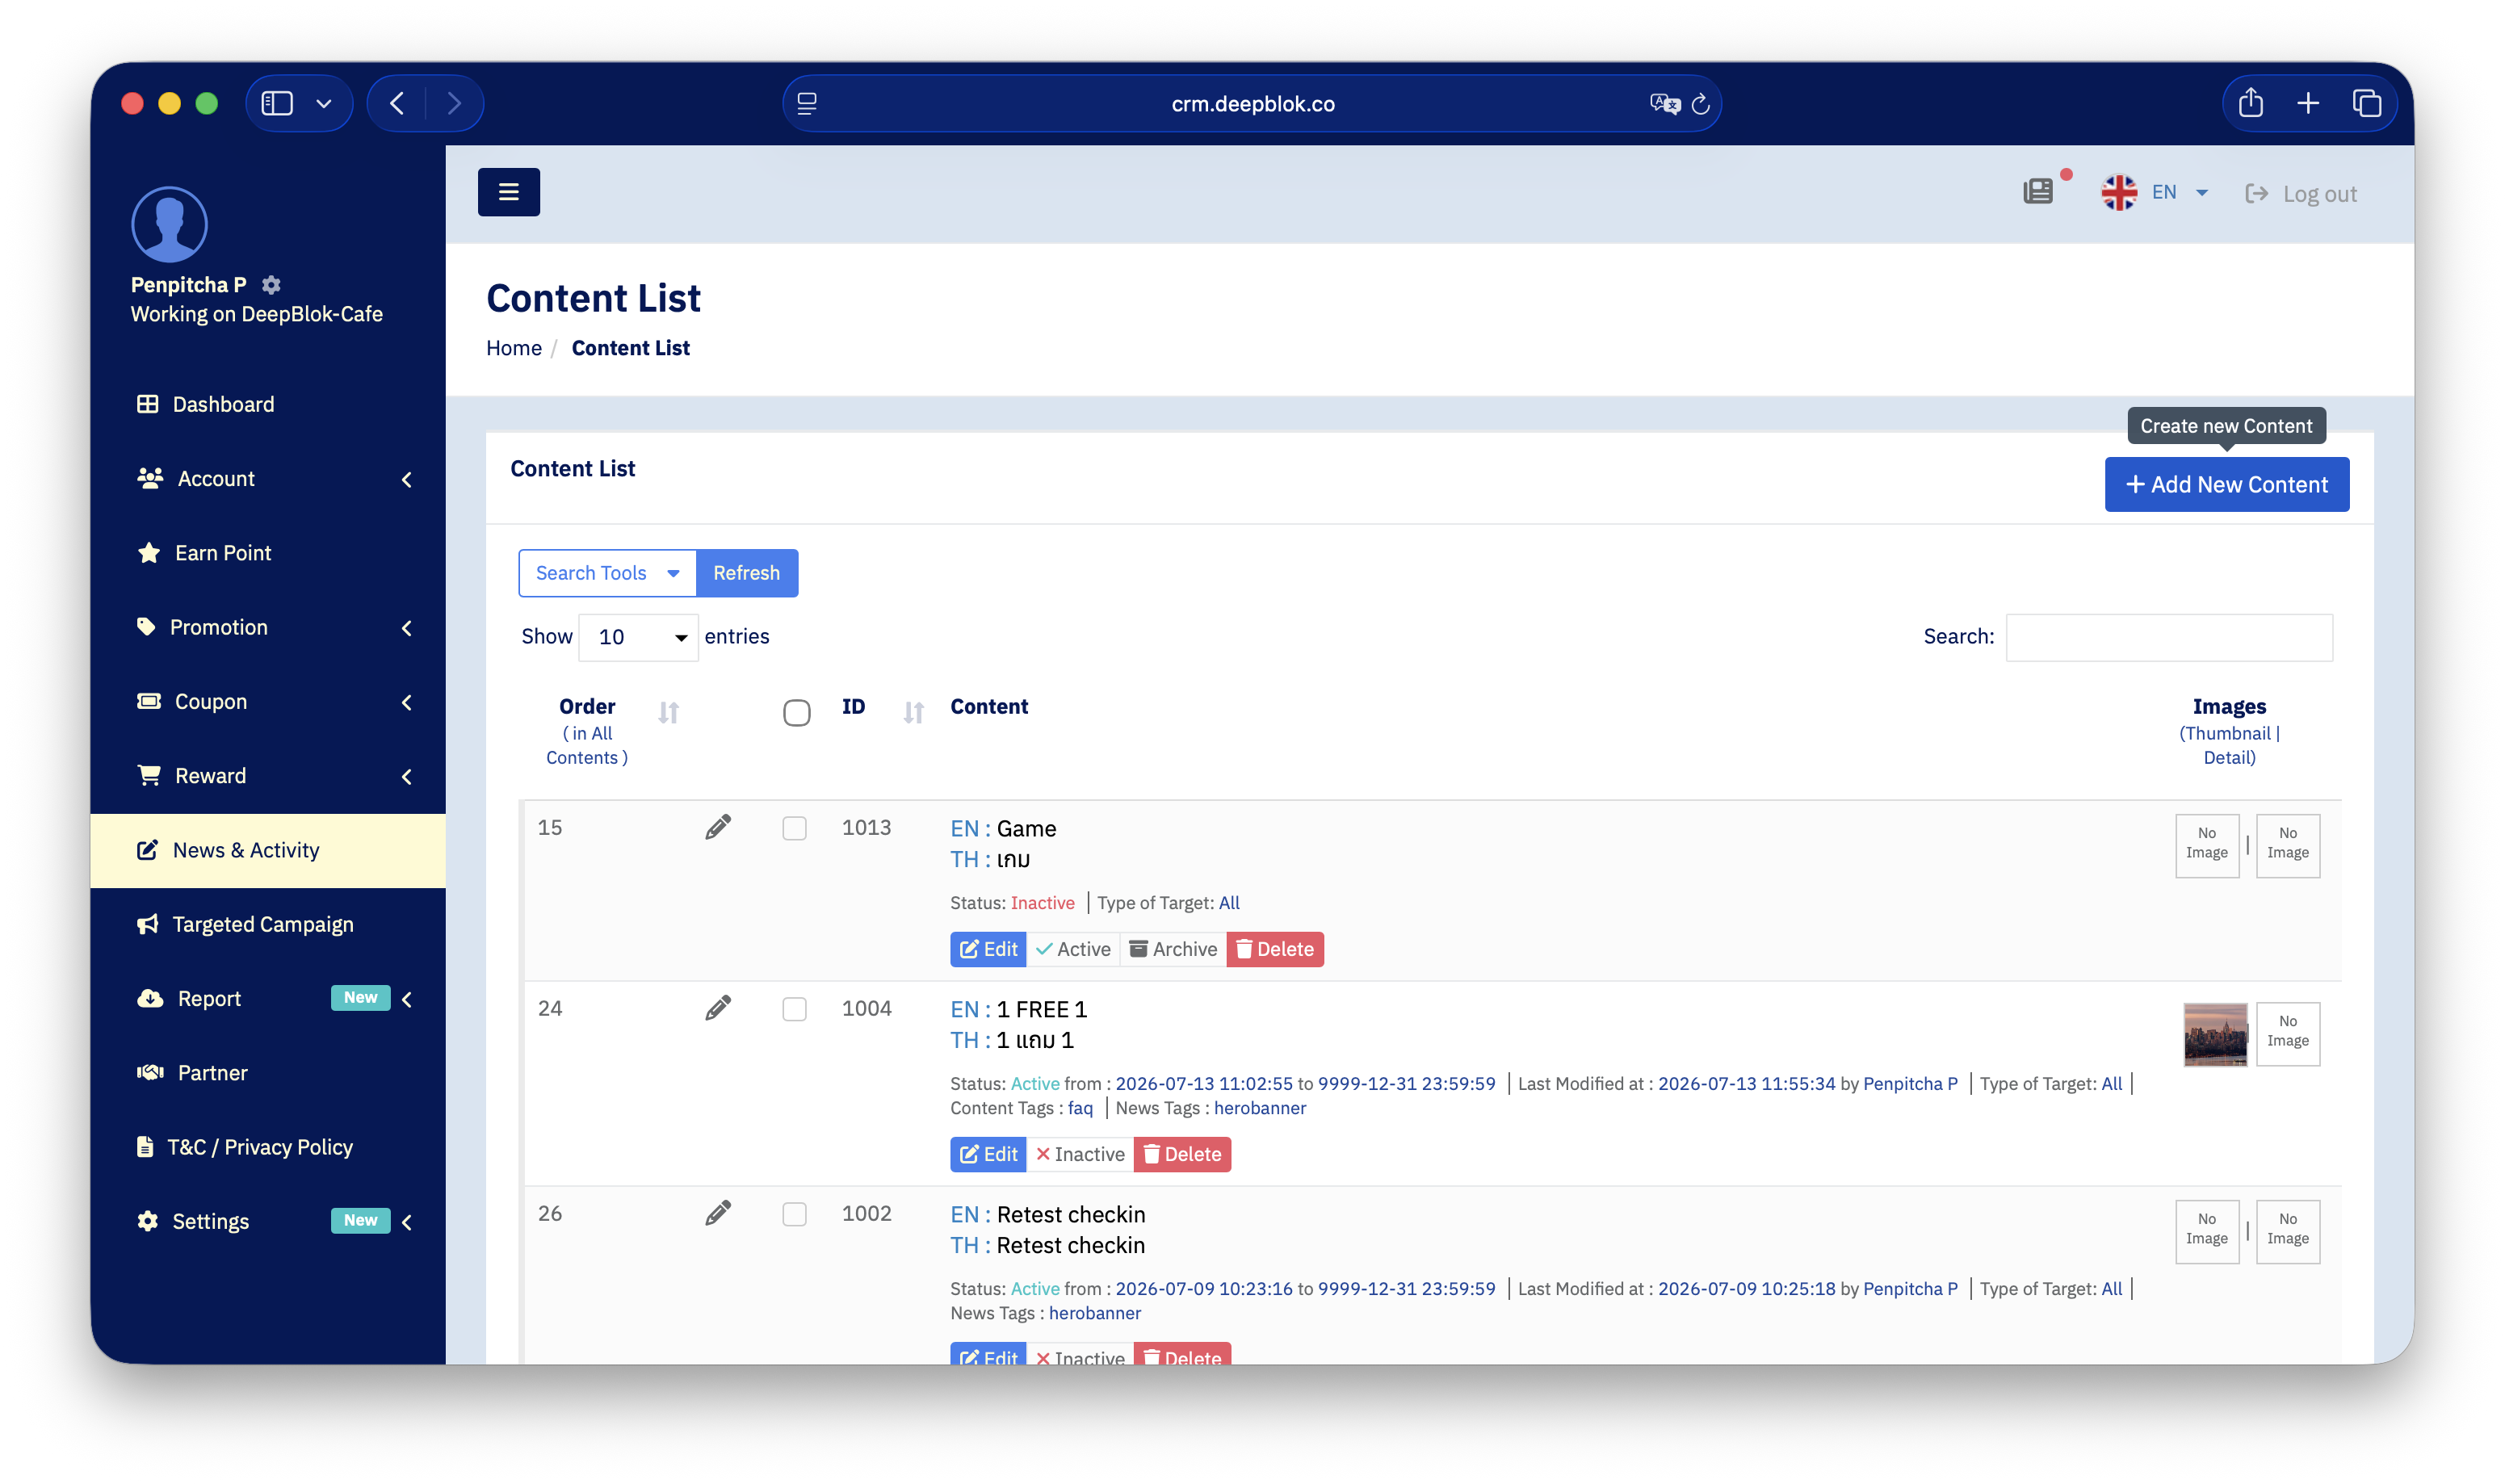
In the left sidebar, click News & Activity. You land on the Content List page, which holds every content item your brand has.
📌 Note: older manuals call this menu
Content Management, while the running product calls it News & Activity. They're the same menu. The page that opens is what confirms it — if the card is titledContent List, you're in the right place.
2. Press Add New Content
At the top right of the table, click the blue + Add New Content. The editor opens as 4 panels stacked top to bottom.
1. Part 1 : Title and Content The item's title and body, filled in per language.
2. Part 2 : Images The cover and the detail image.
3. Part 3 : Command & Button The button on the detail page and where it takes the customer.
4. Part 4 : Display Info Where the item appears and which customers see it.
Down the right-hand side runs the Display Settings & Info rail, which controls the item's status and its date range. That rail and Part 4 are covered in the article on setting the start and end dates and the position.
3. Fill in Part 1
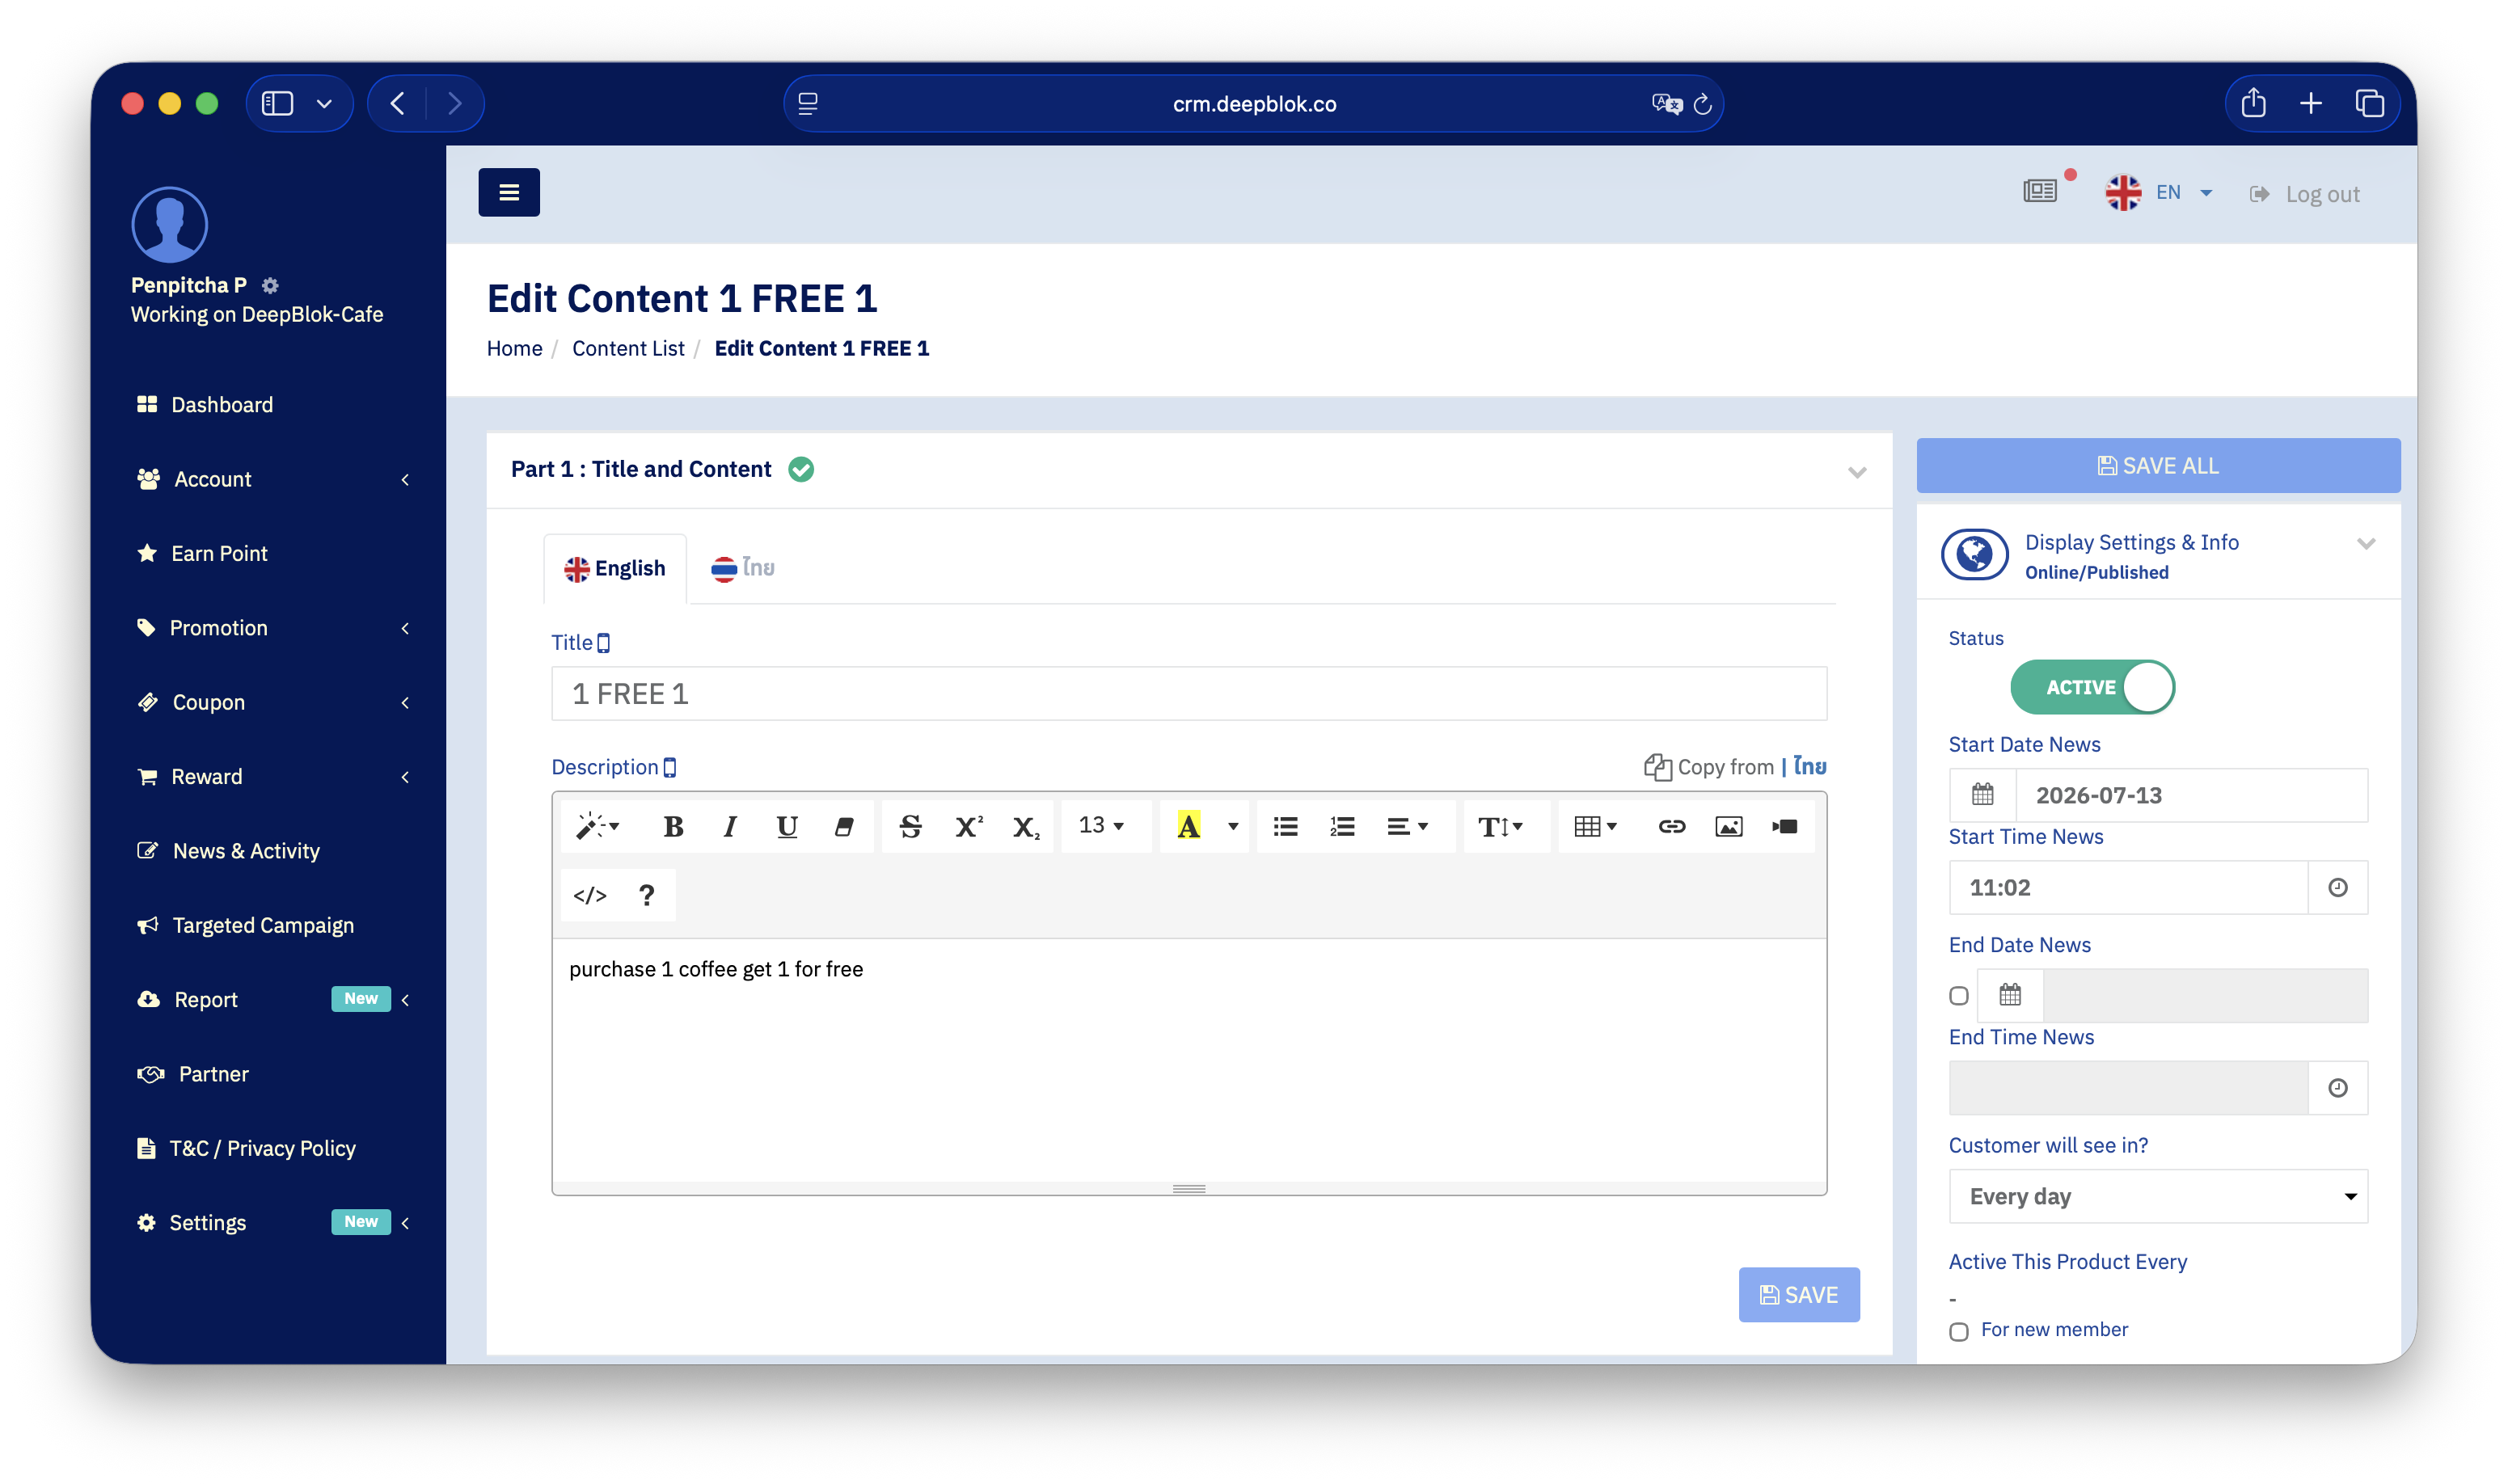
Part 1 : Title and Content opens with 2 language tabs — English and ไทย. Both have to be filled in.
Each tab holds 2 fields.
1. Title The headline customers see both in the list and at the top of the detail page. Make it land in one line — a phone shows far less of a title than your desktop preview suggests.
2. Description The body, with a full formatting toolbar: bold, italic, underline, highlight, lists, tables, links, images and video.
To the right of the Description label sits a Copy from | ไทย link that pulls the other language's body across. Use it as a starting point and translate over the top — much faster than pasting again from scratch.