

Notifying a chosen group of customers happens in Targeted Campaign in the left sidebar. The message arrives as a Flex message inside your brand's LINE account, carrying an image and a button whose destination you set. One campaign takes about 20 minutes once the artwork and the group are ready. A notification doesn't issue coupons and doesn't touch anyone's points — to attach a coupon, see the article on sending coupons to a customer segment.
⚡ Quick Path:
Targeted Campaign→+ Create Campaign→ pickSend Notification→OK→ name the campaign →Save→ choose the group underTarget User→Save→ switch onSend notificationand fill in the message, image and button →Update→Publish
Requirements before you start
- Access to Targeted Campaign — if it isn't in your left sidebar, ask an Admin on your team to grant it first.
- The group you're sending to — 2 routes: pick a ready-made segment, or name customers individually by account number.
- A rich-message image at 1,040 × 1,040 px — PNG or JPEG. It's a square, not the landscape shape you use for member-screen banners.
- A title line and a button label — both fields cap at 100 characters.
- A destination for the button — a page inside the member system, or an external URL.
📌 Good to know: whatever you type into
Notification Titleis what shows on the phone's notification bar and in the LINE chat list. A lot of customers decide whether to open it on that line alone, so write the benefit plainly rather than naming the campaign.
Send a notification in 5 steps
1. Create the campaign and pick its objective
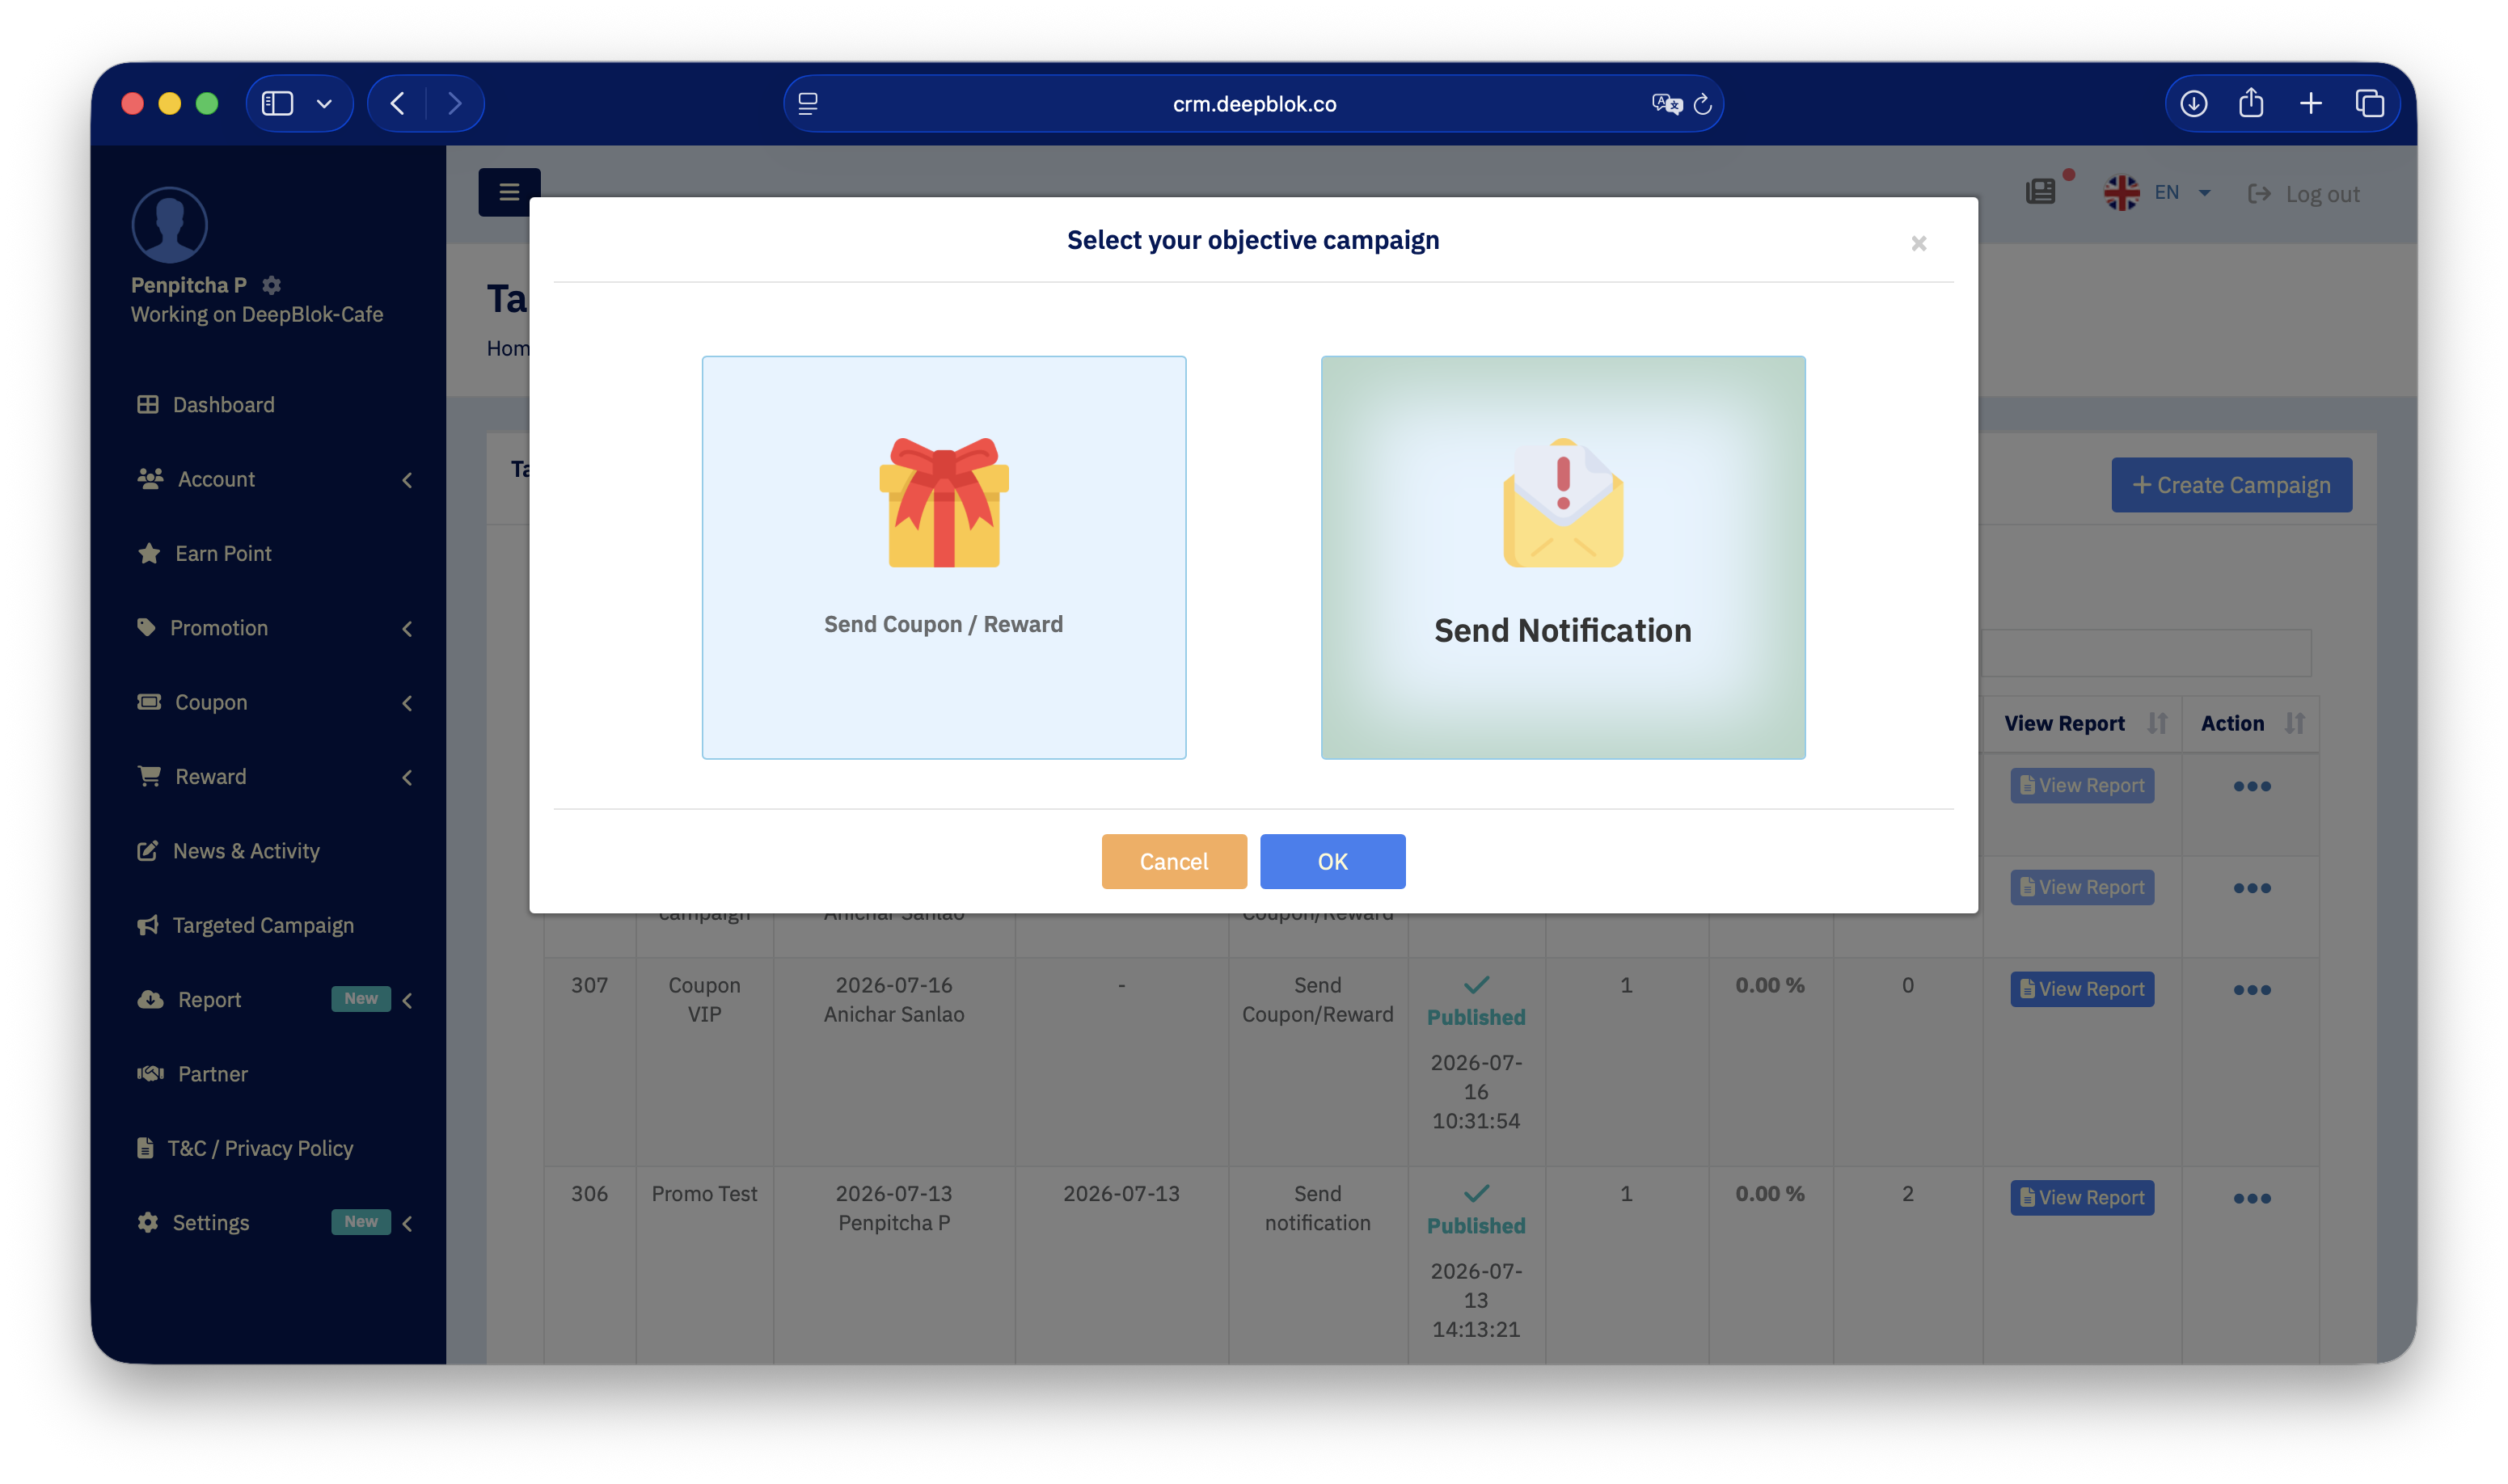
In the left sidebar, click Targeted Campaign. You land on Targeted Campaign List. Press the blue + Create Campaign at the top right.
A dialog opens titled Select your objective campaign, offering 2 tiles side by side.
1. Send Coupon / Reward Puts a coupon or reward into customers' coupon page.
2. Send Notification Sends a LINE message only, with no coupon attached.
Click the Send Notification tile so it highlights, then press OK. The orange Cancel beside it closes the dialog without creating anything.
⚠️ Watch out: the objective you choose here becomes a read-only chip on the next page. If you realise later you picked the wrong one,
Save as draftand start a fresh campaign — it's faster than hunting for a way to change it.
2. Name the campaign and press Save
The Create Campaign page opens as 3 stacked sections. The top one holds the fields to fill in.
1. Targeted Campaign Name The campaign name, capped at 100 characters with a live counter beneath. The helper text says numbers and some symbols — a period, a hyphen — are allowed. This is an internal name for finding the campaign in the list; customers never see it, so put the month or the round in it, like End-of-month promo alert - Aug.
2. Campaign Objective A chip showing the objective you chose. Read-only.
Press Save at the bottom right of the section.
📌 Note on the order of the form: before you press
Savein the first section, theTarget UserandSend notificationsections below show a red line readingPlease update Target Campaign first.instead of any fields. That's how the page is meant to work — it unlocks top to bottom. Once the first section is saved, the other 2 open up immediately.
3. Choose the group under Target User
The Target User section offers 2 tabs.
1. Target List / Segmentation Pick from the segments that already exist. Press the teal Select Segmentation button and choose from a table listing each segment's name alongside how many customers it holds. The article on sending coupons to a customer segment walks this through in full.
2. Upload Target Name customers individually by account number — typed in, comma-separated, up to 1,000 accounts, or uploaded as a CSV up to 99,999. The article on sending coupons to named customers walks this through in full.
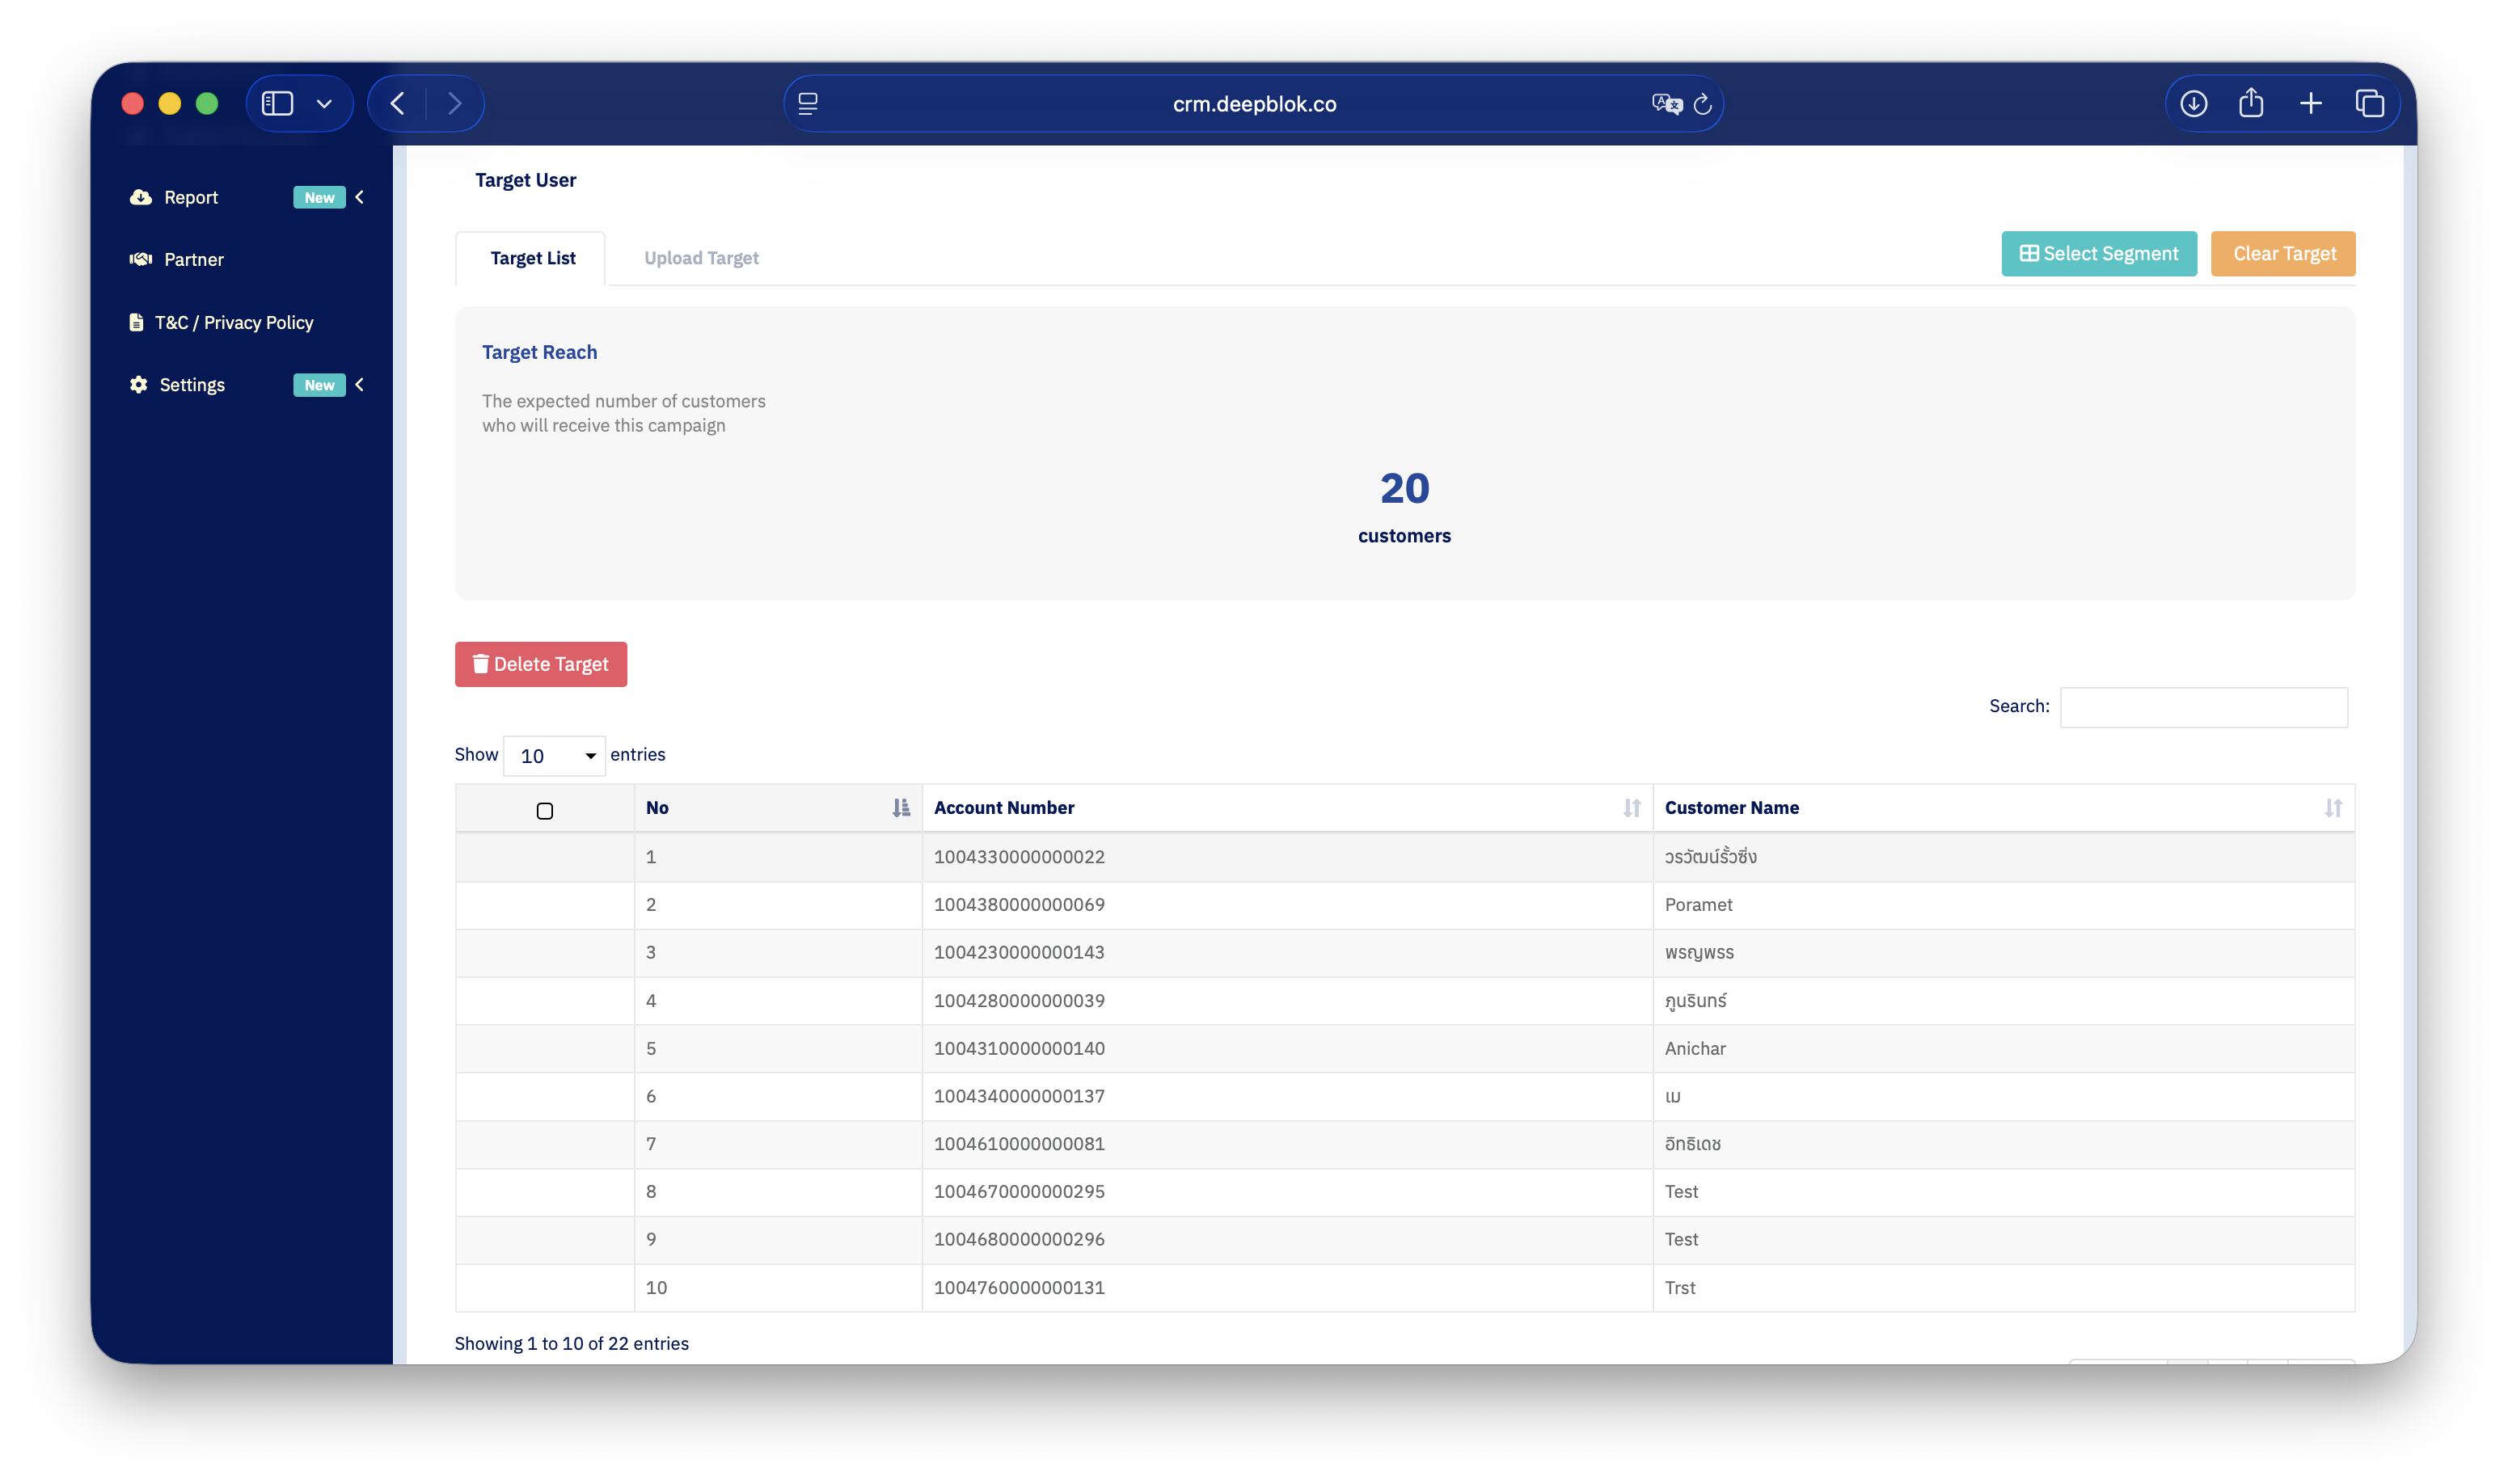
Once a group is chosen, the section shows Target Reach with the number of customers expected to receive the campaign. Read that number every time before moving on — it's the only thing telling you how many people this really goes to.
Then press the section's Save.
4. Switch on Send notification and build the message
Scroll to the bottom section and switch on Send notification. It's off by default; switched on it turns green and the full set of fields appears.
Press Update at the bottom right of the section when it's complete.
⚠️ Watch out: the button fill and the button text are 2 separate colour boxes on 2 separate lines — the first sits under
Button color, the second to the right ofButton text. Pick 2 dark colours and the label becomes unreadable on a phone. Check the live preview beside the image upload before you send, every time.