

Every news image lives in the Part 2 : Images panel of the content page, under the News & Activity menu. One news item can use 2 kinds of image — the banner customers see in the list, and the detail image they see after tapping in — and each kind has a separate file for Thai and English, so 4 files per news item. Allow about 10 minutes if your artwork is ready. Uploading images does not affect the news title, the body copy, or the publishing dates you have already set. But the banner's dimensions depend on the tag you pick in Part 4, so read the next section before you start making files.
⚡ Quick Path:
News & Activity→+ Add New Content→Part 2 : Images→ uploadThumbnail/Banner(EN + TH) → uploadDetail(EN + TH) →SAVEin the panel →Part 4pickNews Tags→SAVE ALL
Requirements before you start
- An account that can see the
News & Activitymenu — if it isn't in your left sidebar, ask an Admin on your team to grant access first. - Decide where this news item will appear on the customer's home page — the big banner at the top, or the news list below it. The 2 use different image dimensions, and choosing wrong means remaking the file.
- 4 image files per news item — banner (Thai + English) and detail image (Thai + English). Every field accepts JPEG or PNG, up to 1 MB per file.
- If you don't have English artwork yet, prepare a file with no text on it and use the same file in both fields for now. That beats leaving either field empty.
Every image size you need to prepare
Every field states that the file must be 1 MB or less and in JPEG or PNG format, and every field has separate EN and TH versions.
Decide first: Hero banner or Homenews
This is the decision to make before you open your design tool, because the 2 aspect ratios are very different.
1. Hero banner — 780 × 690 px (nearly square) The large image at the top of the home page, part of a carousel customers can swipe. It's the first thing they see when the member app opens. Use it for your headline promotion of the month, a major campaign, or a game you want played.
2. Homenews — 430 × 220 px (wide landscape, roughly 2:1) A news card in the list below the banner. Use it for general news, announcements, a new branch, or a secondary promotion that doesn't need to compete with your main campaign.
⚠️ Watch out: one news item can carry more than one tag, but
Thumbnail/Bannerhas a single field per language. Tag it with both and the system uses the same file in both positions, so the image gets stretched or cropped in one of them. If you want the image to fit properly in both places, split it into 2 news items — one tag each.
Upload your artwork in 5 steps
1. Open the content page you want
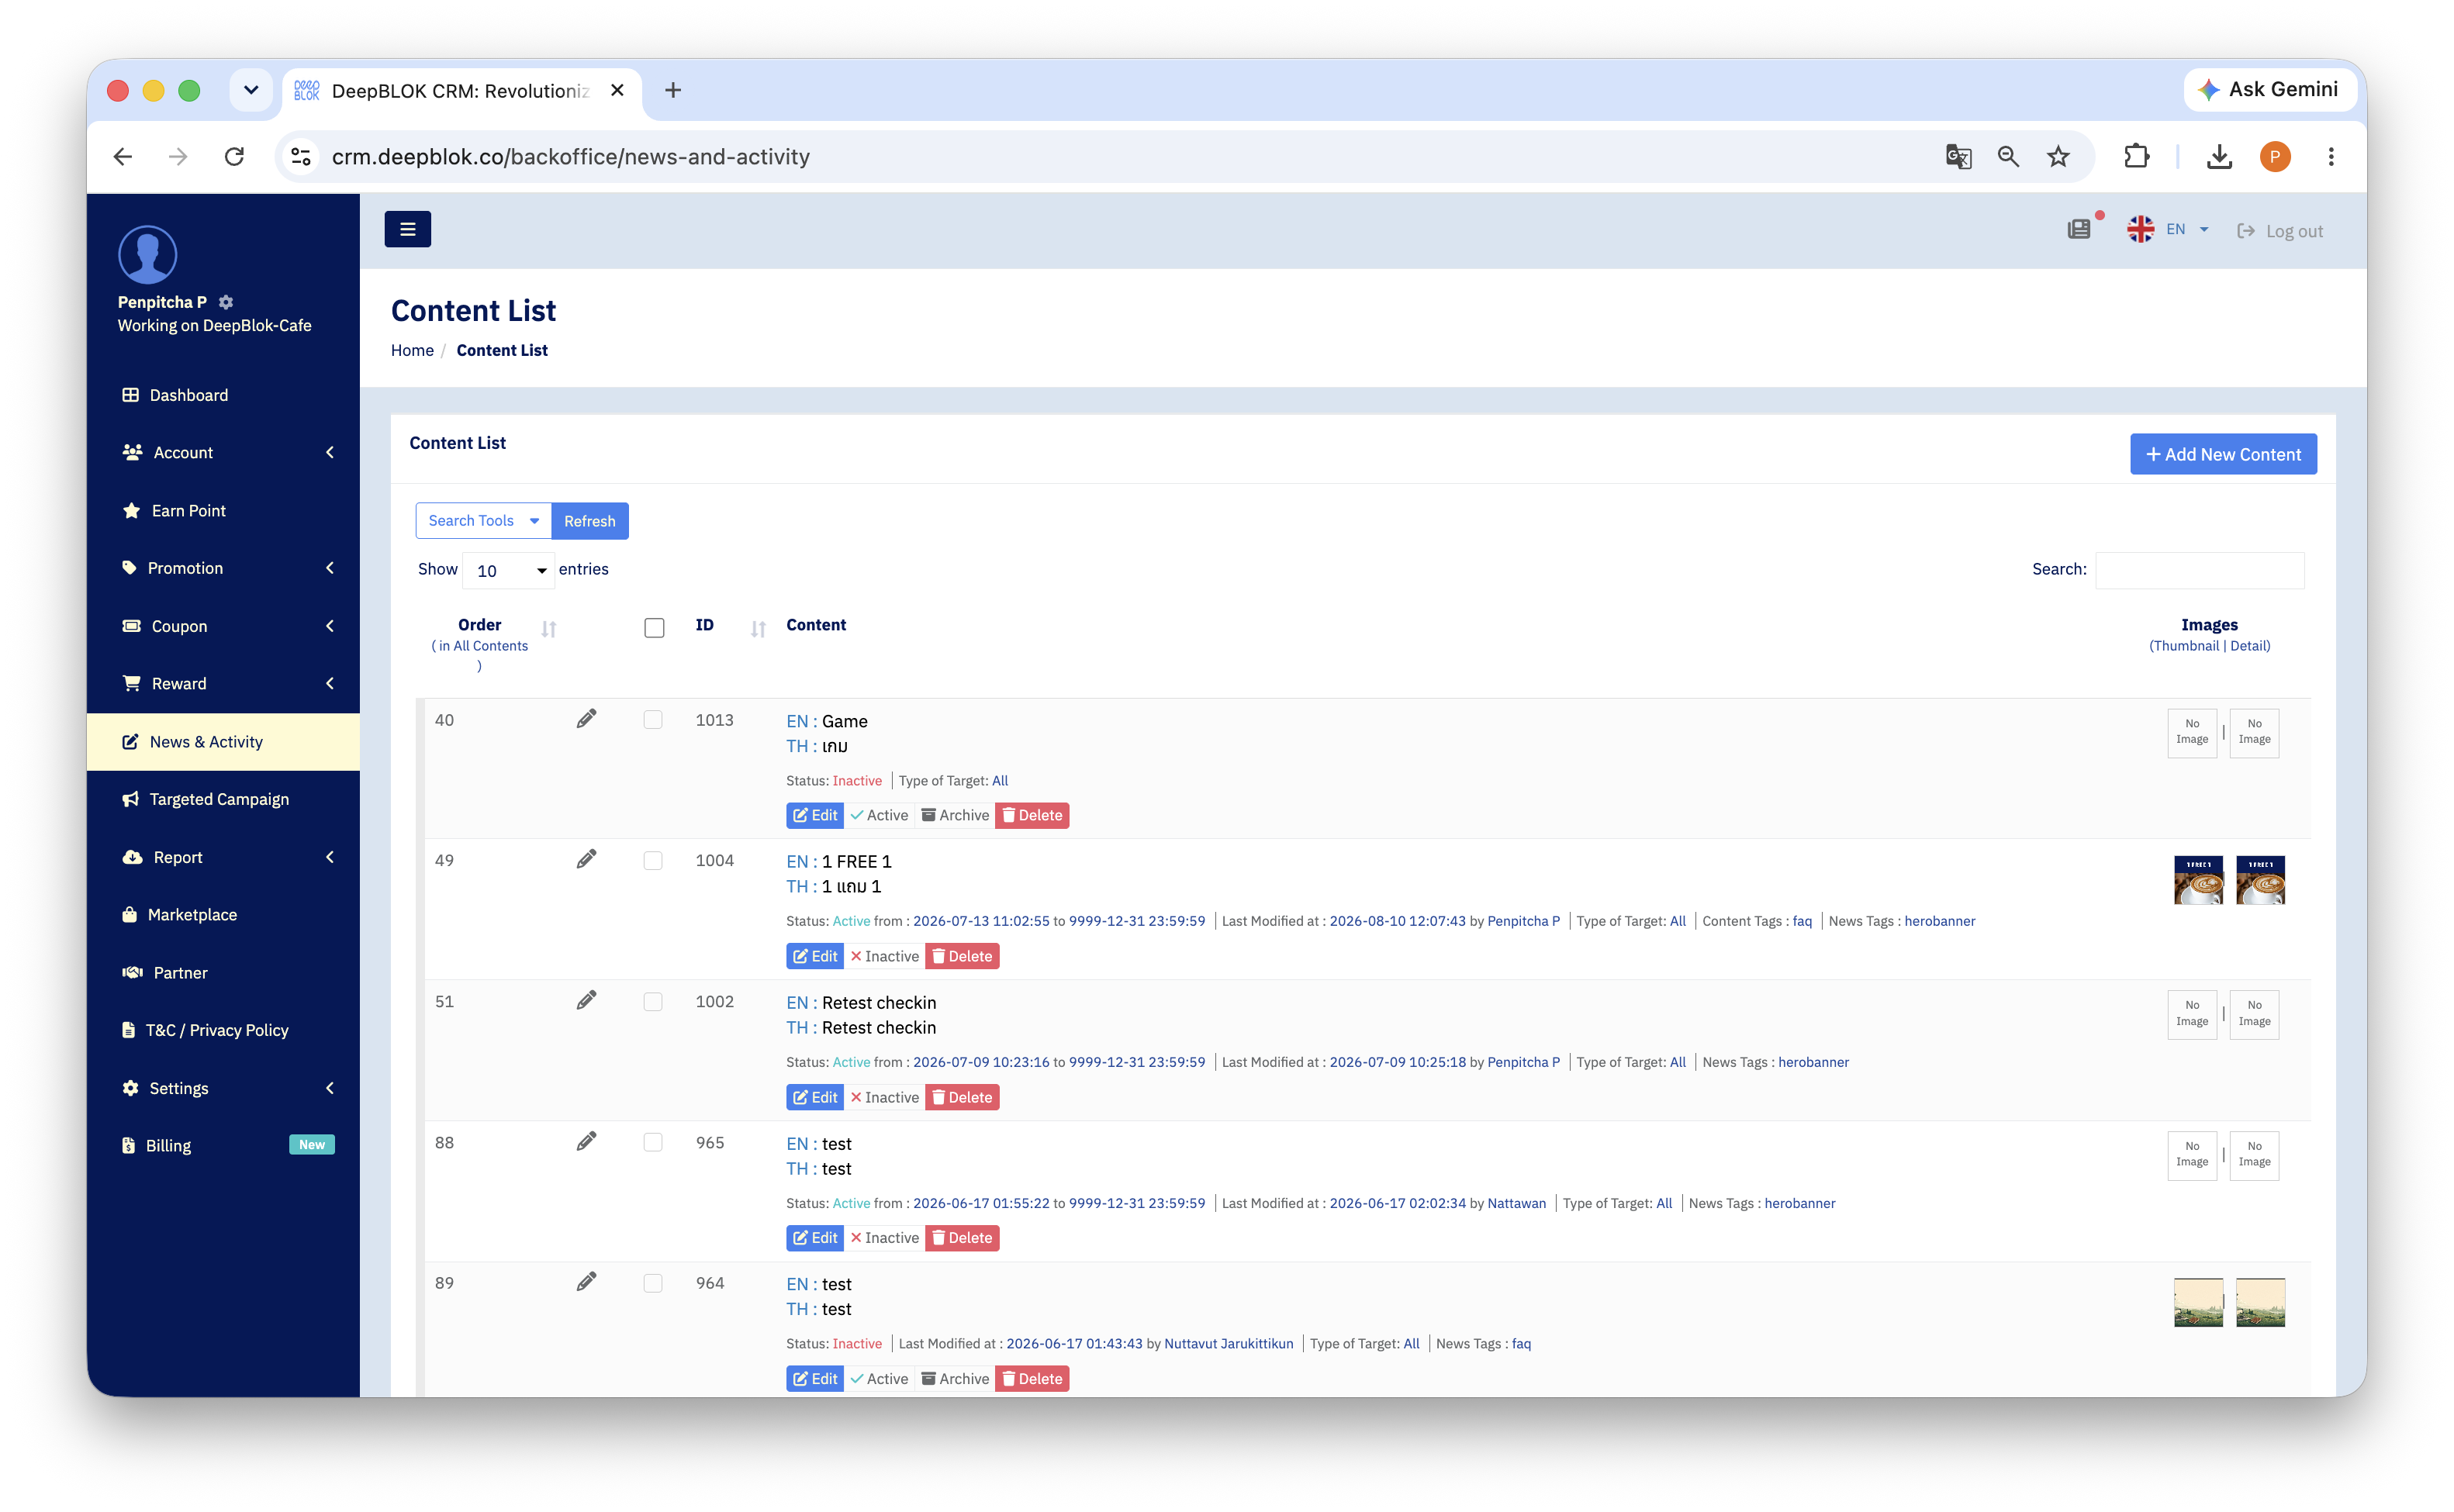
In the left sidebar, click News & Activity. This opens the Content List page.
- For a new news item, click the blue
+ Add New Contentbutton in the top right. - For a news item that already exists, find its row and click the blue
Editbutton in that row. The row also carriesActiveorInactivefor turning display on and off,Archivefor filing it away, and a redDelete—Editis the only one that takes you to the image fields.
The Images column on the far right of the table is the fastest way to check your work. It's subtitled Thumbnail | Detail and shows a thumbnail of both fields; any empty field reads No Image. One pass down that column tells you which news items are still missing artwork, without opening them one by one.
2. Scroll down to Part 2 : Images
The content page is divided into 4 collapsible sections, stacked in order.
1. Part 1 : Title and Content — the news title and body, on separate English and Thai tabs
2. Part 2 : Images — every image upload field. This is the section this article covers.
3. Part 3 : Command & Button — the button customers tap on the detail page
4. Part 4 : Display Info — tags, audience, and publishing
Click the Part 2 : Images heading to expand it. Any section that still has an empty field carries an orange ! marker on its heading, which makes a handy progress check for what you haven't finished.
3. Upload the banner in both Thai and English
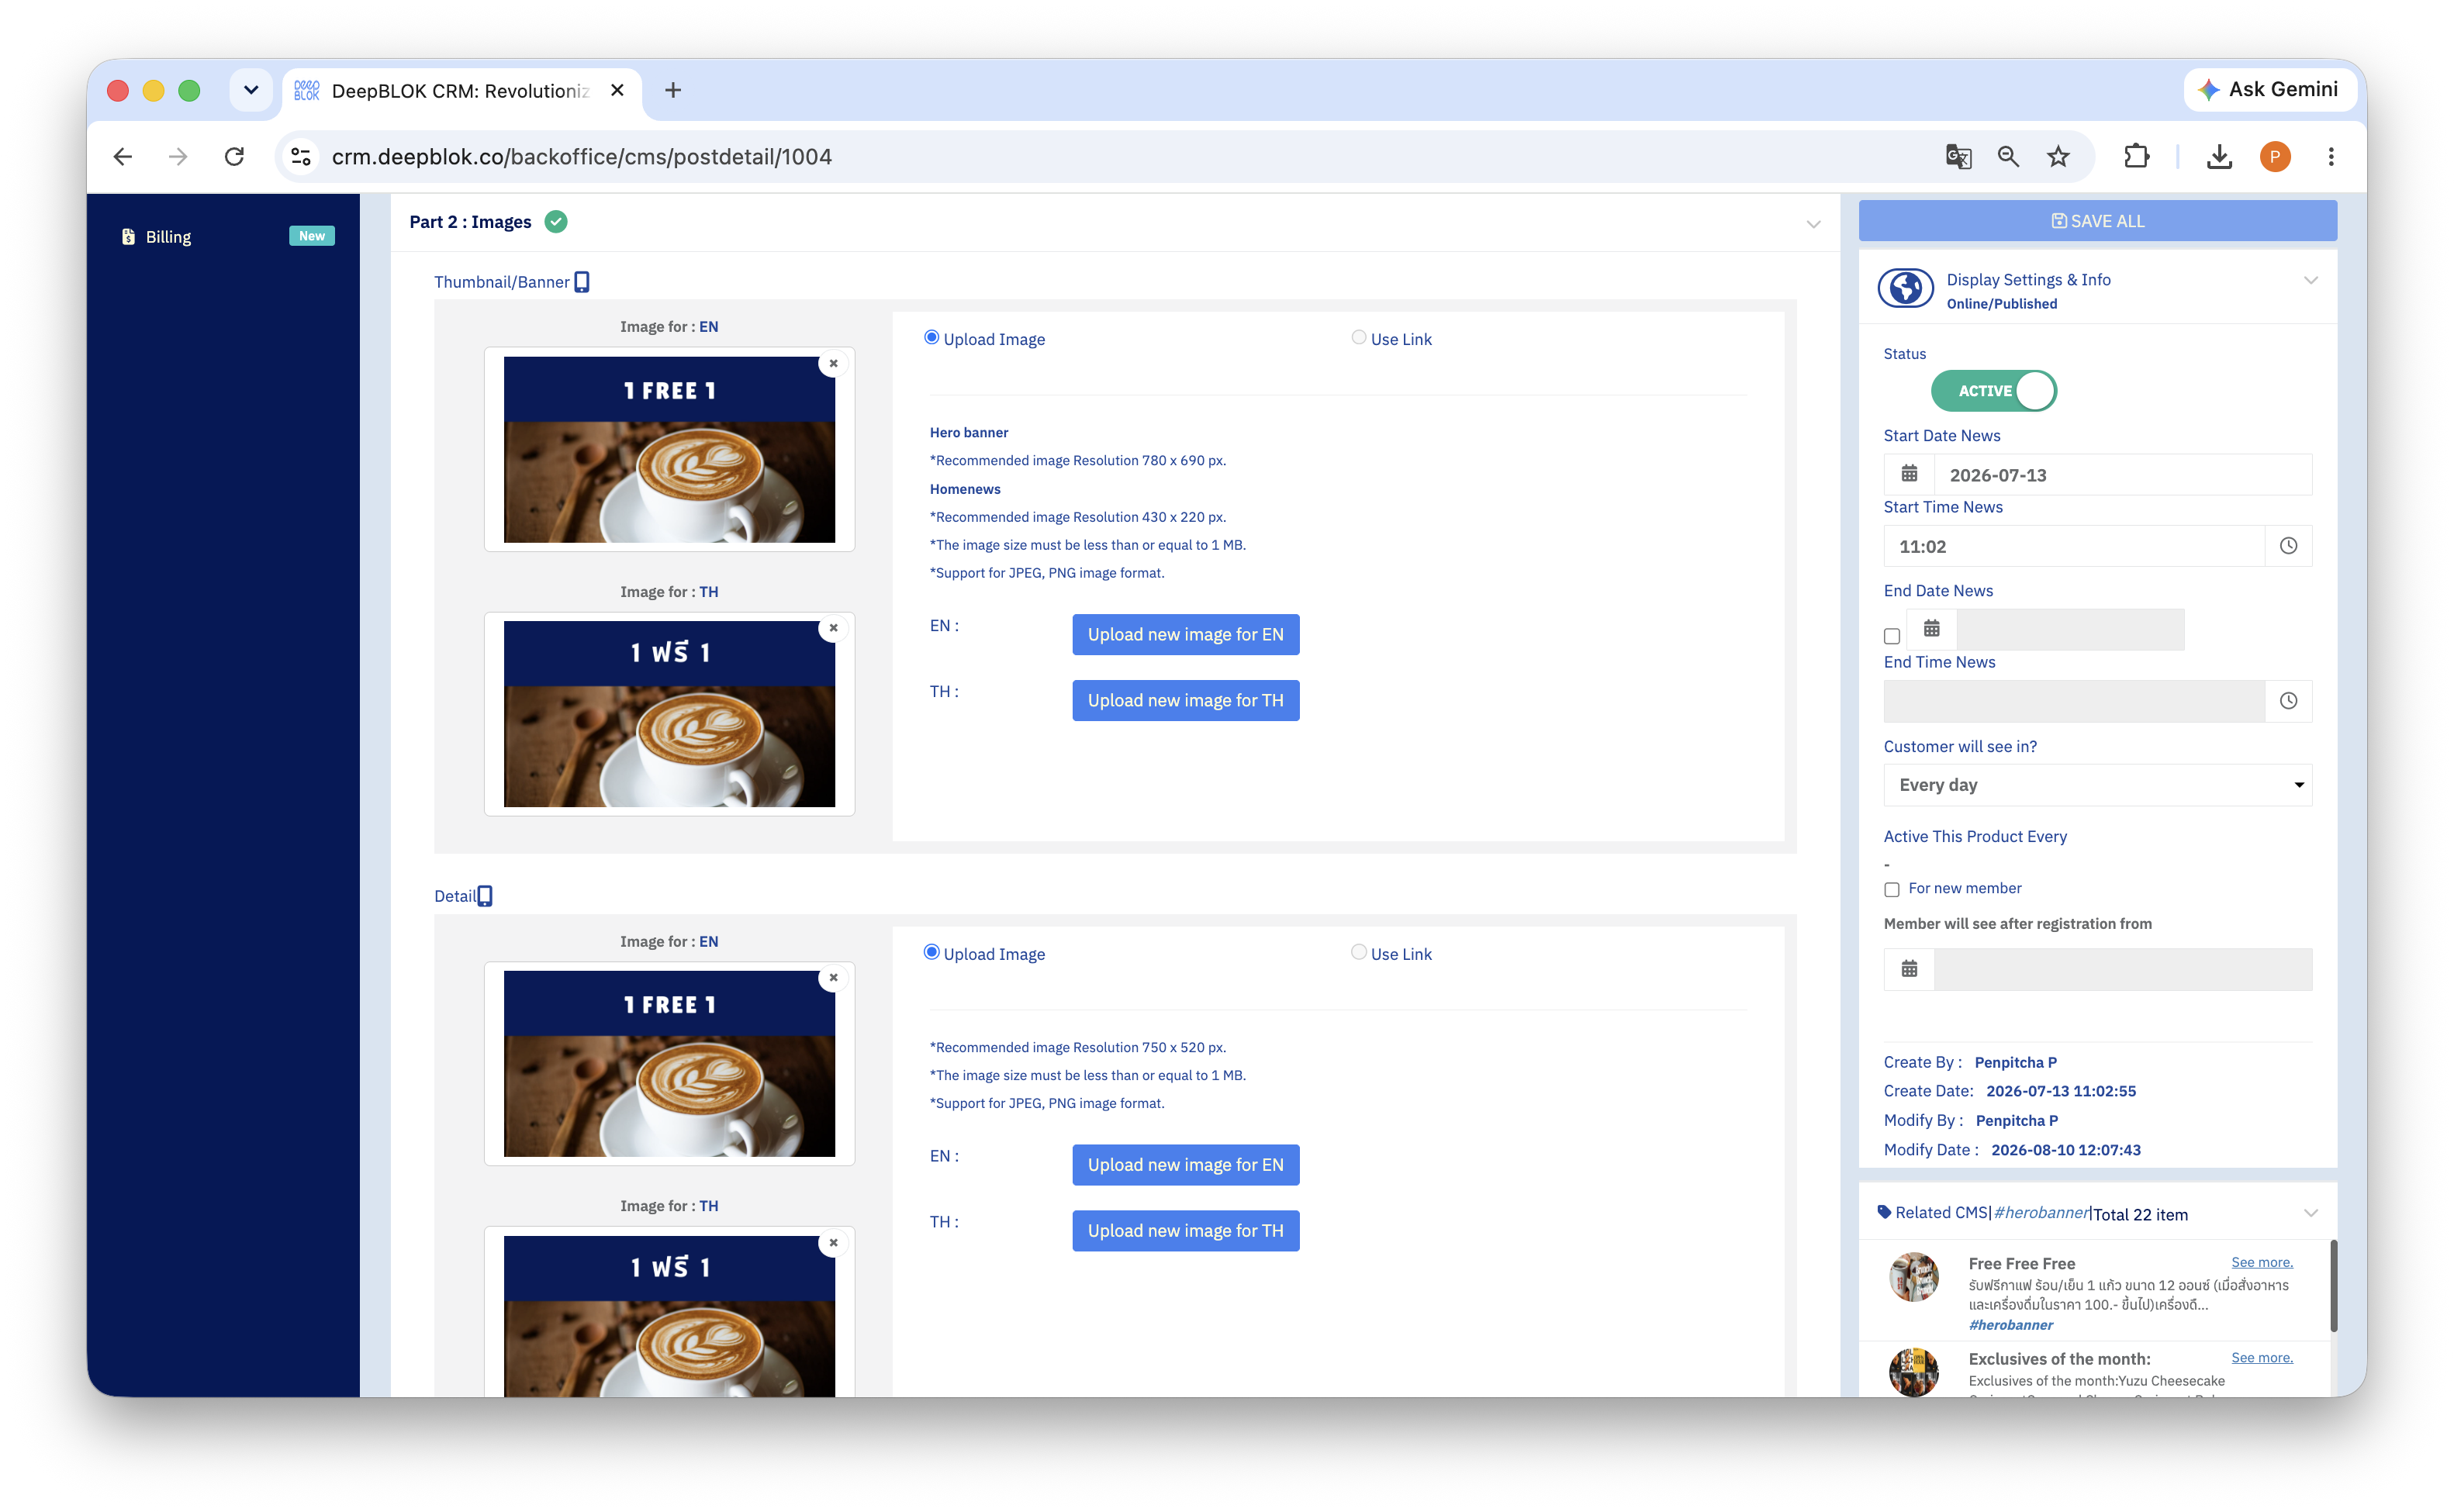
The Thumbnail/Banner group has 2 upload fields — Image for : EN and Image for : TH. To their right sit 2 radio options: Upload Image (upload a file from your computer, selected by default) and Use Link (point to an image hosted elsewhere). Choose Upload Image, then use the blue Upload new image for EN and Upload new image for TH buttons.
The size specs are printed below the options, and both Hero banner and Homenews are listed there together in the same field. Use the dimensions for whichever one you decided on in the previous section.
📌 A note on the 2 specs in one field: a single upload field shows 2 recommended sizes because that field feeds 2 display positions. The system is waiting for you to pick a tag in
Part 4, and the image then appears wherever that tag puts it. Use the dimensions that match the tag you're going to pick, not the first number you see.
To replace or remove an image already in place, click the × in the top-right corner of that image preview. The field returns to empty and you can upload a new file straight away.
4. Upload the detail image in both Thai and English
Scroll down to the Detail group, which has the same Image for : EN and Image for : TH fields. Both use 750 × 520 px.
This is the image customers see when they tap into the news detail page. It sits at the top, above the title and body. If your promotion has terms or details worth reading, this image is a better place for that information than the banner.
Once all 4 fields are filled, click the SAVE button in the bottom-right corner of the Part 2 panel itself.