

A news item only reaches customers once it clears 2 gates: the date range, set in the Display Settings & Info rail on the right, and the position, set in the News Tags field inside Part 4 : Display Info. The 2 live in different places on the same page. It takes about 5 minutes, and both can be changed later without rebuilding the item.
⚡ Quick Path:
News & Activity→Editon that row →Part 4 : Display Infofill inNews Tags→SAVE→ in the right-hand rail setStatustoACTIVEand aStart Date News→ tickEnd Date Newsif there is one →SAVE ALL
Requirements before you start
- An item that already exists — this article configures one you've built. If you haven't, start with the article on creating news and promotions and come back.
- Your promotion's start and end dates to hand — it goes faster, because the 2 fields sit on separate lines and the end date has to be switched on before you can type in it.
- An agreement on where this item belongs — the full-width banner at the top, or a news card below it. The position is what decides the image size you need.
⚠️ Watch out: position and image size are tied together. The
Thumbnail/Bannerfield prints 2 recommended sizes — 780 × 690 px for the top banner and 430 × 220 px for the news card. Moving an item to a different position without rebuilding the artwork leaves the image stretched or cropped.
Set the schedule and the position in 4 steps
1. Open the item you want to configure
In the left sidebar, click News & Activity. On Content List, find the item's row and press the blue Edit.
Each row already reports its current state. The line under the title reads Status: followed by Active in green or Inactive in red, then from the start datetime to the end datetime, and finishes with News Tags : and the positions that item holds. That one line tells you which items are live and where they're showing.
2. Choose the position in Part 4's News Tags field
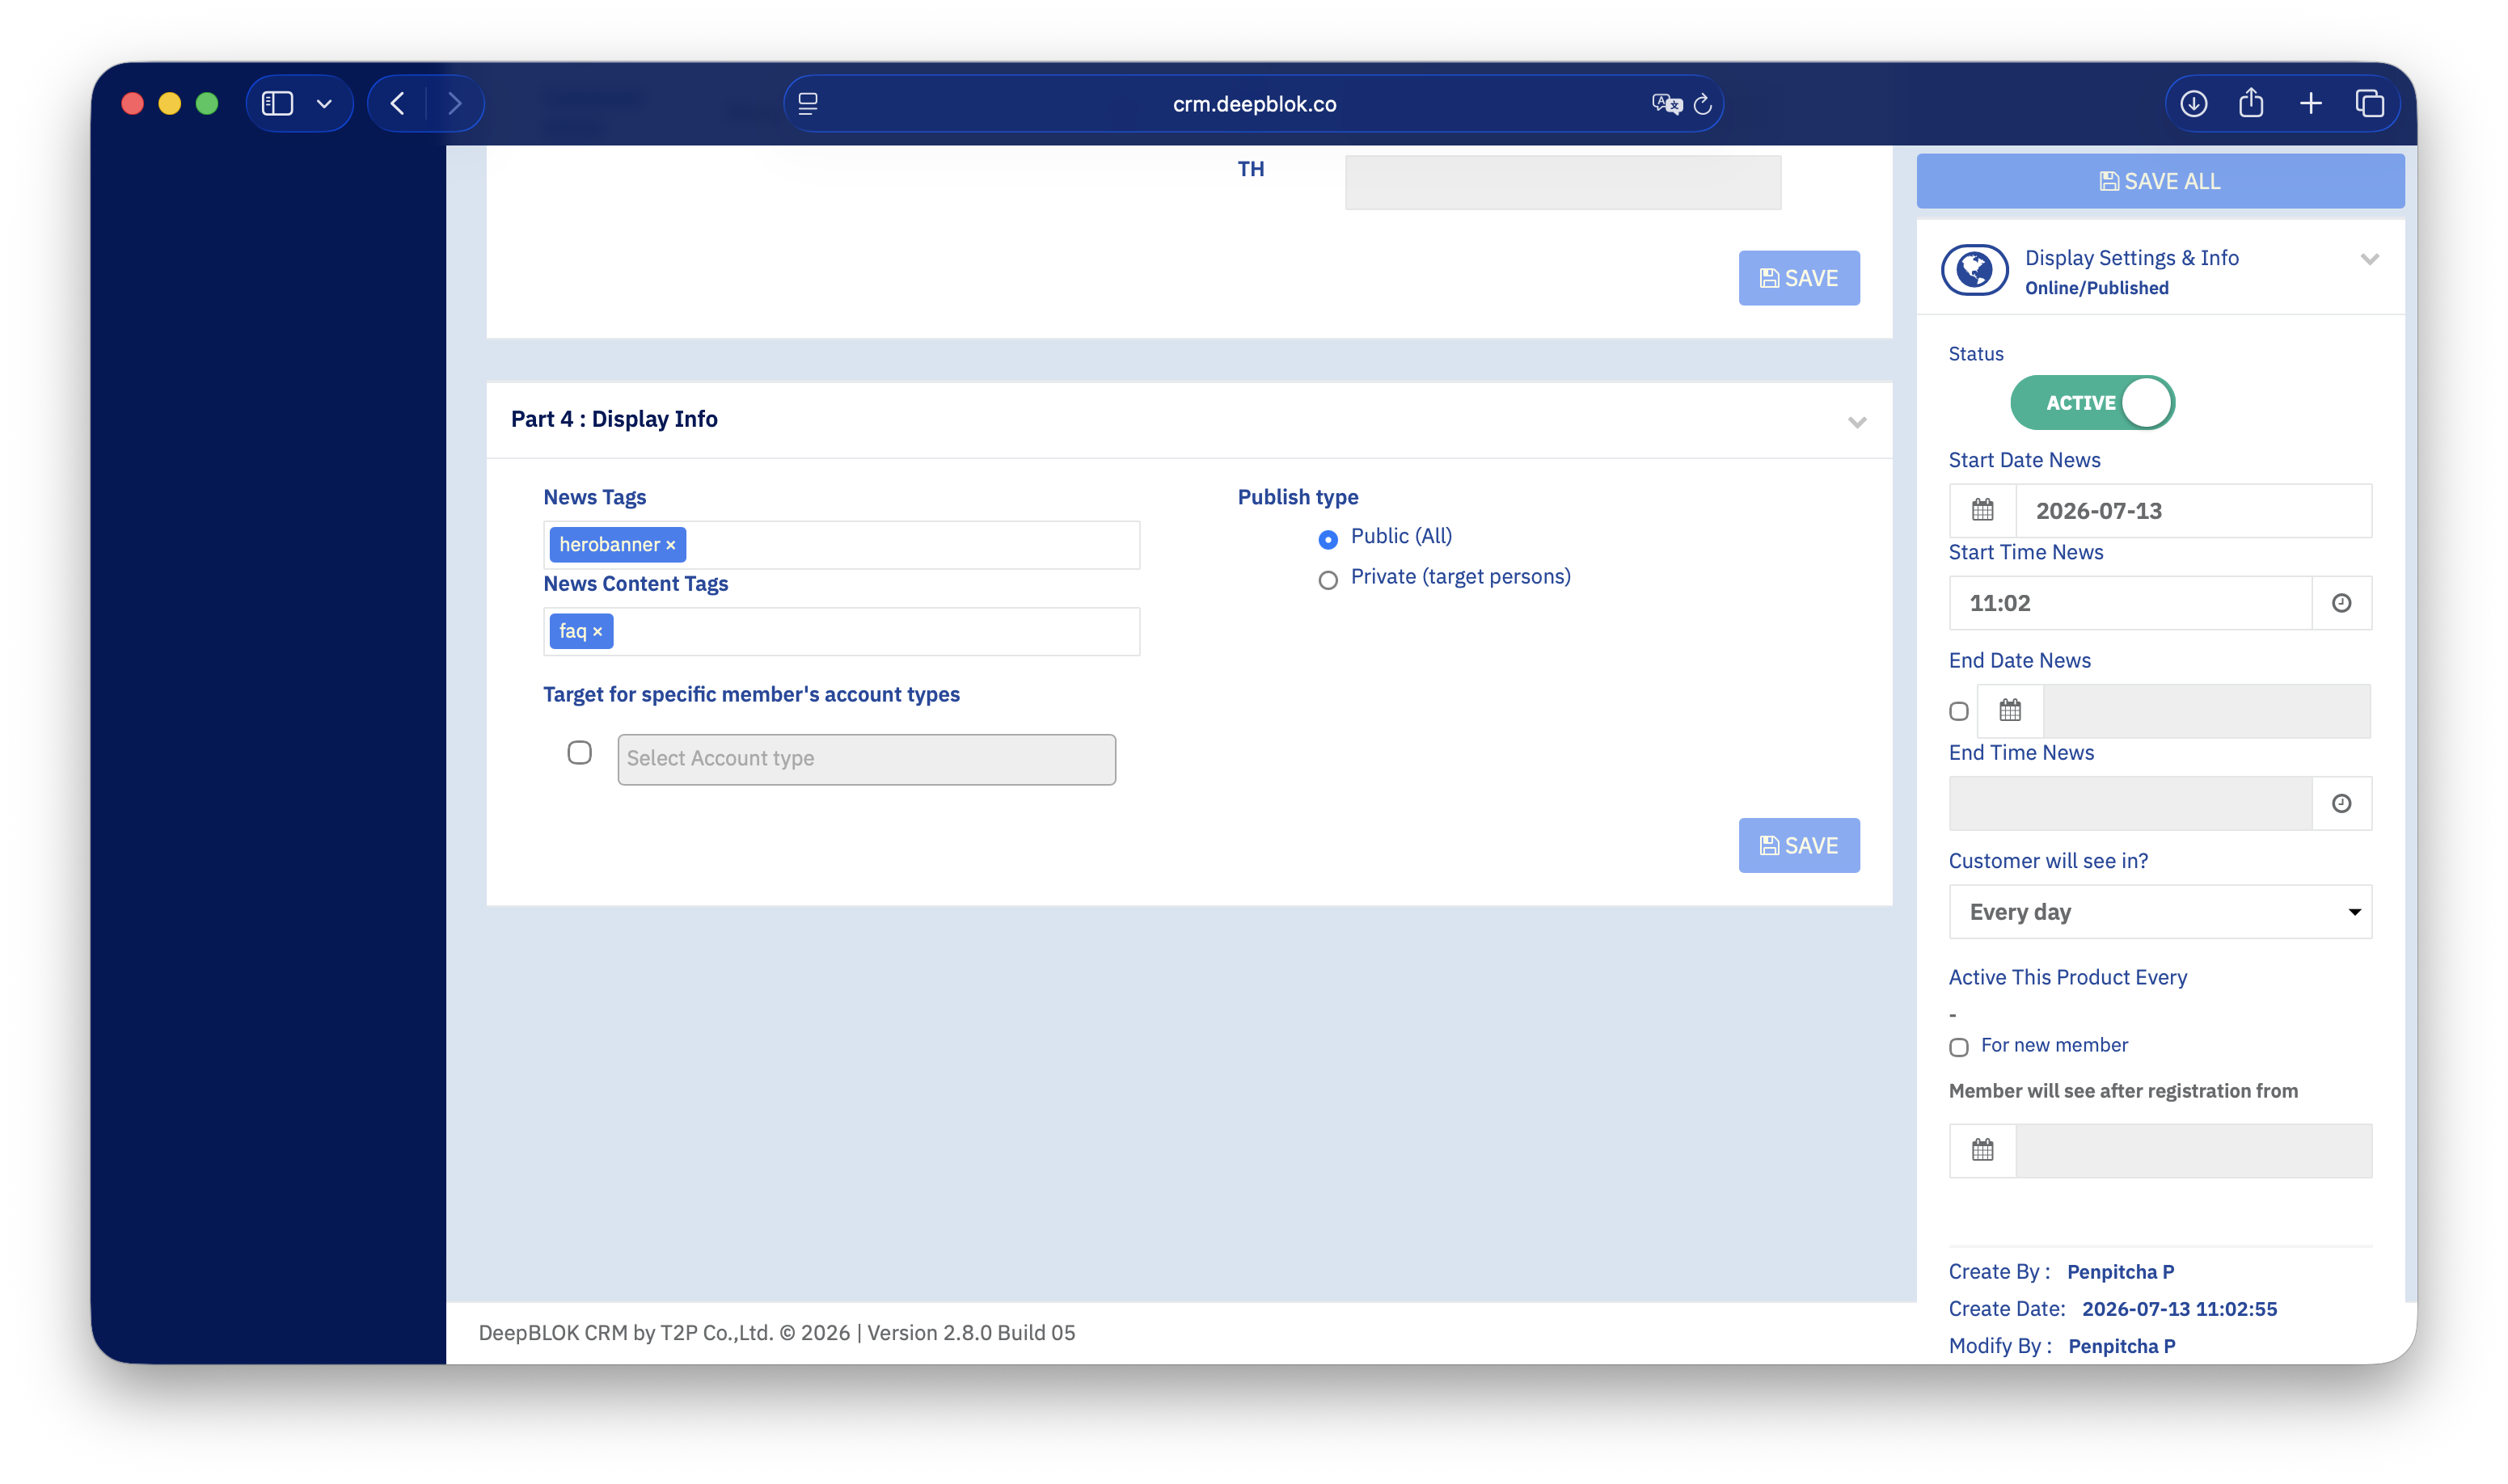
Scroll to Part 4 : Display Info. Its first field is News Tags, a multi-value tag input — each tag you add appears as a small chip with an × to remove it.
4 values appear on the live system, all in lower case.
1. herobanner The full-width banner at the top of the member screen — the first thing a customer sees. Reserve it for the headline promotion of the period.
2. homenews A news card on the home screen, below the banner. Good for secondary items you want visible without competing with the main promotion.
3. onboarding The set of items shown to new members. Used alongside the For new member checkbox in the right-hand rail.
4. faq A content grouping for frequently asked questions, rather than a promotional position.
One item can carry several tags at once — a live item was seen holding all four. Before you do that, though, check the artwork: there's only one cover file, and the 2 positions use different proportions.
Press the panel's SAVE at bottom-right when the tags are in.
3. Set the status and dates in the right-hand rail
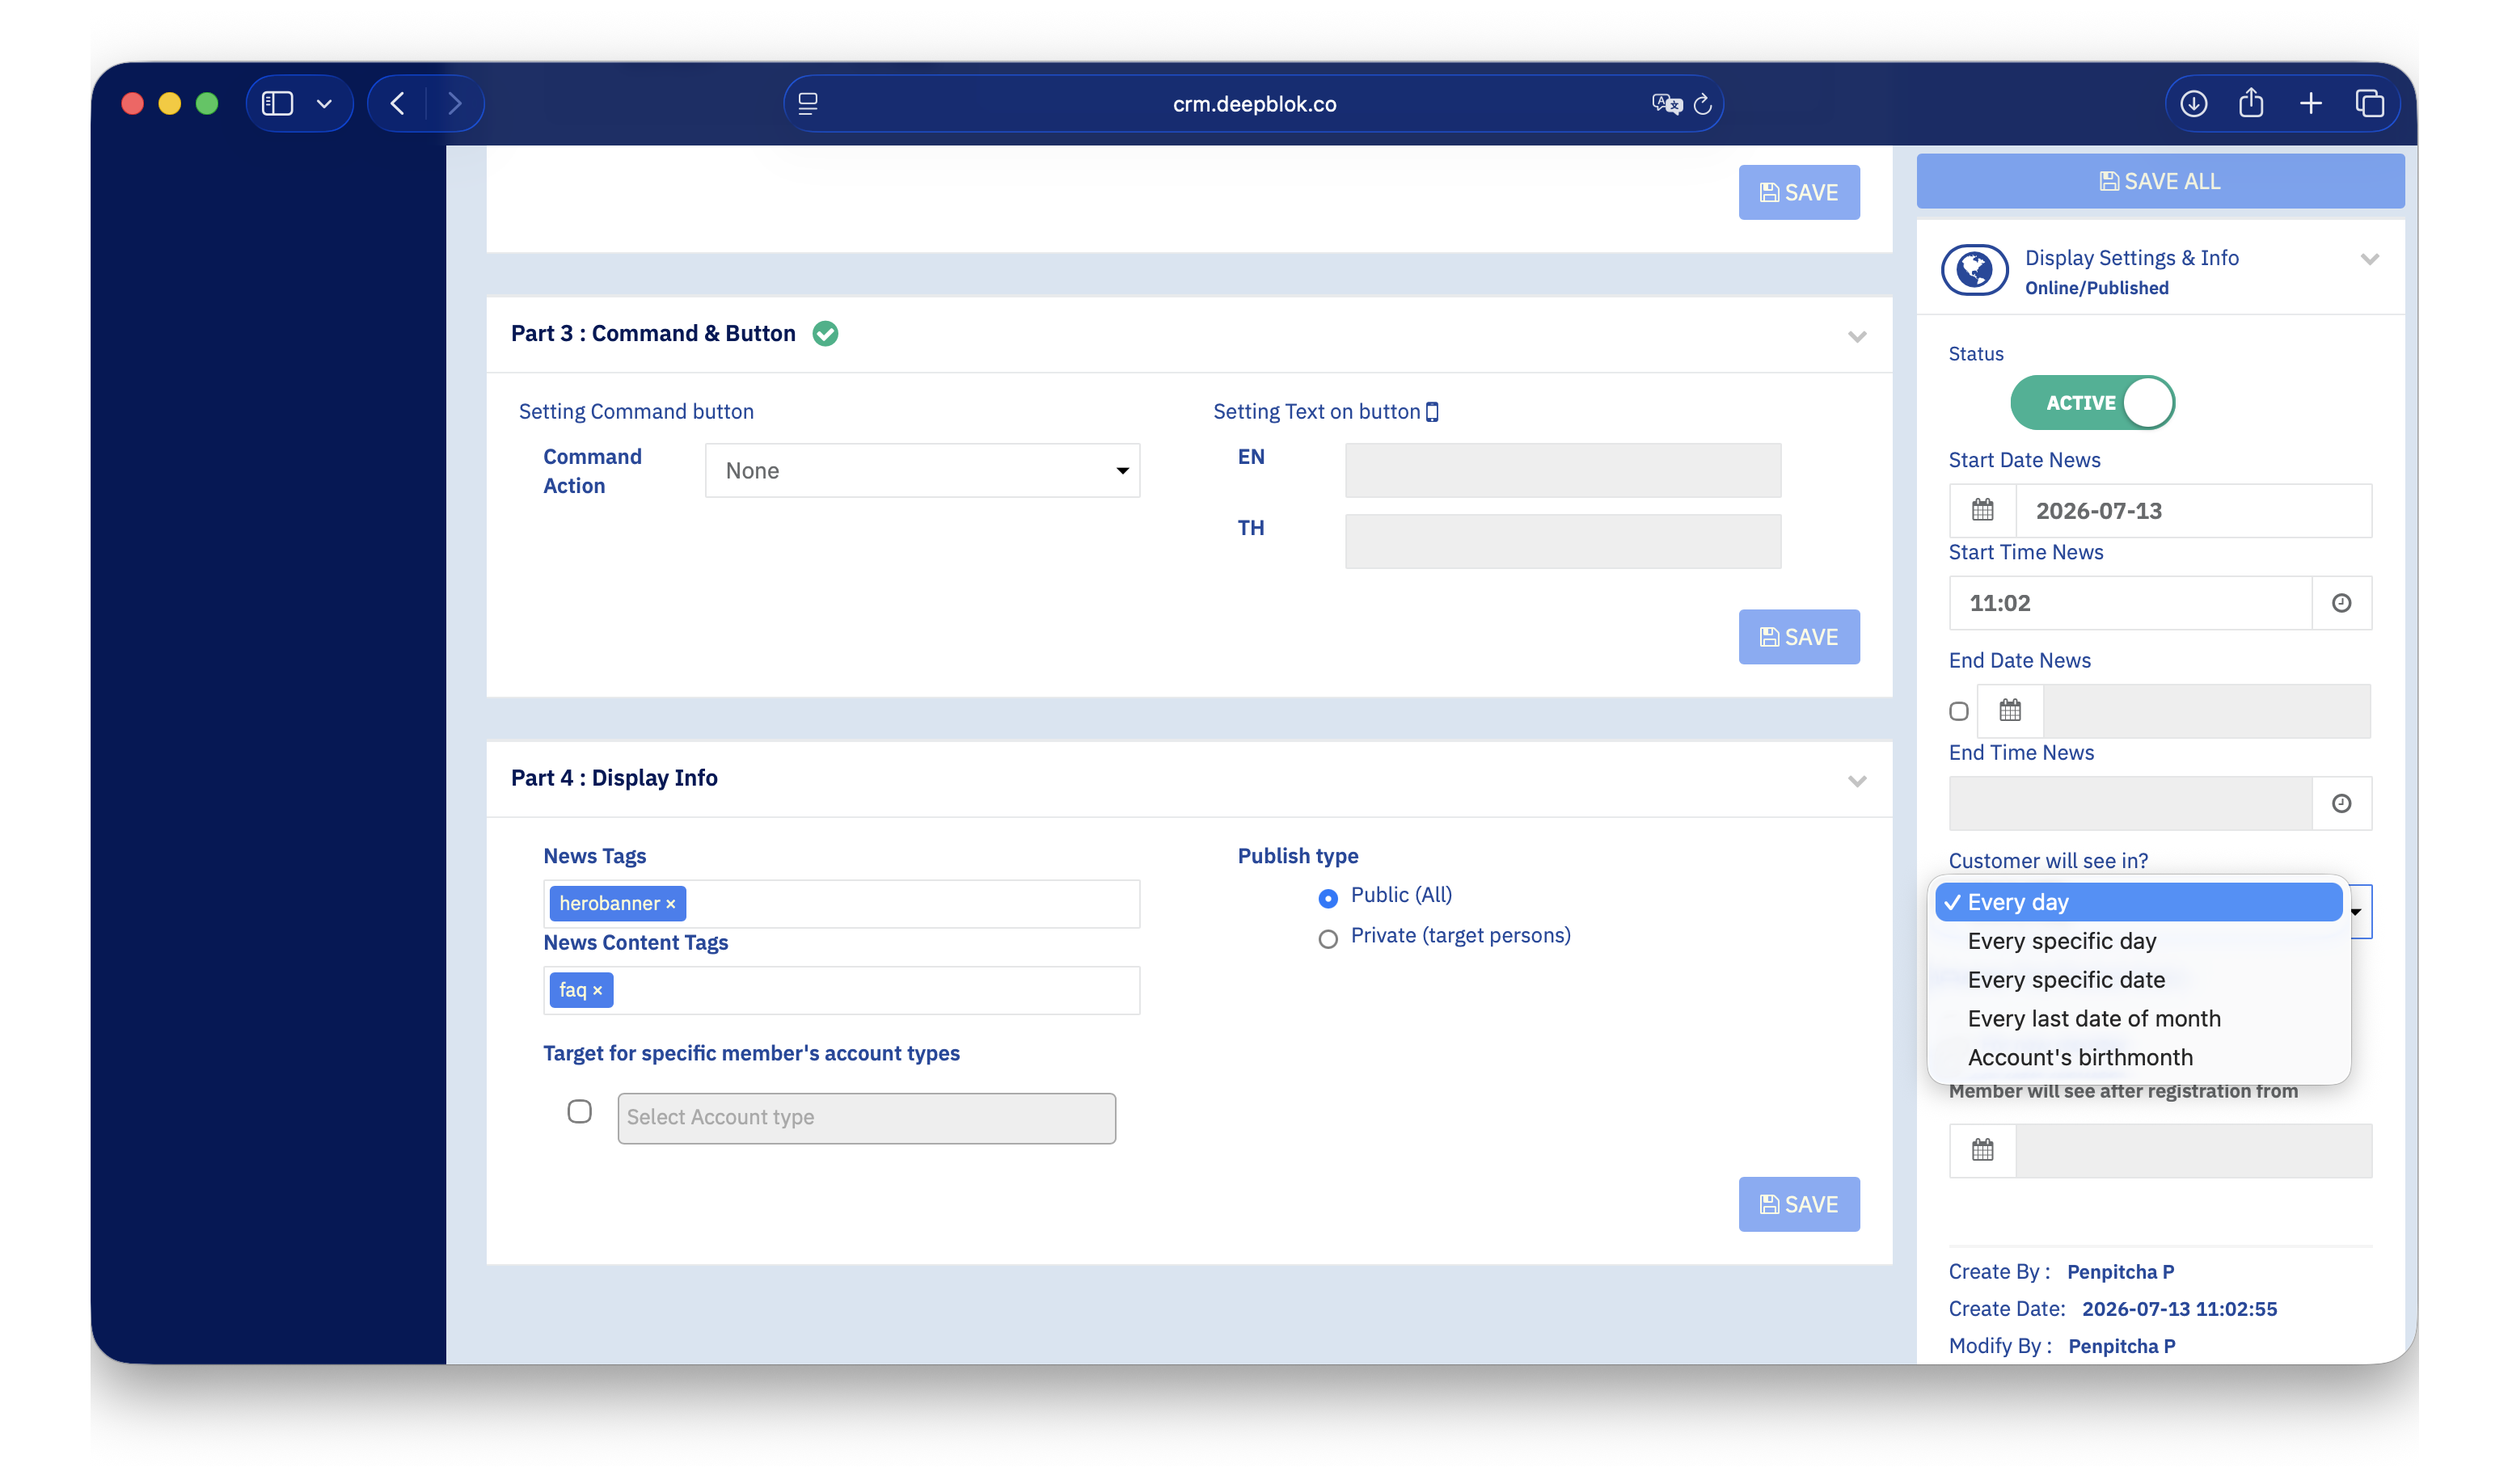
The rail is headed Display Settings & Info with Online/Published beneath it. Top to bottom, these are the controls.
Underneath sit the create and last-modified details, which help when several people work on the same items.
📌 Good to know: leaving the
End Date Newscheckbox unticked means the item has no end and runs indefinitely. In theContent Listtable those items show an end of9999-12-31 23:59:59— that's the system's placeholder, not corrupted data.
4. Press SAVE ALL
When everything is set, press the full-width blue SAVE ALL at the top of the right-hand rail.
✅ Confirm it worked: back on
Content List, read the line under that item's title.Status:should beActivein green, thefrom ... to ...range should match what you set, andNews Tags :should list the tags you just added. Then open your brand's LINE on a phone and check the item really is in the position you intended.