

When you already have a specific list — people who joined an in-store activity, customers your team wants to compensate, names collected at an event — the most direct route is to name them individually on the Upload Target tab of the campaign editor rather than picking a group. There are 2 ways to do it: type up to 1,000 account numbers, or upload a CSV holding up to 99,999. Around 20 minutes.
⚡ Quick Path:
Targeted Campaign→+ Create Campaign→Send Coupon / Reward→ name it, choose a reward →Save→Upload Targettab → type account numbers separated by commas, or pressdownloadfor the template and upload it back →Save→ read the green bar for how many verified →Publish
Requirements before you start
- Access to Targeted Campaign — if it isn't in your left sidebar, ask an Admin on your team to grant it first.
- Each customer's member account number — the system matches on the account number, a long numeric string; the examples in the product are 16 digits.
- The reward and the coupon expiry — set in the campaign's first section, exactly as in the article on sending coupons to a customer segment.
- A spreadsheet application — if you take the CSV route.
⚠️ Watch out: this field takes the member account number — not a phone number, not a name, not an email. Paste phone numbers in and nothing resolves to a real member, so the campaign reaches nobody. Check the length of the numbers before you paste, every time.
Send coupons from a list in 4 steps
1. Create the campaign and choose the reward
Identical to the article on sending coupons to a customer segment: click Targeted Campaign, press + Create Campaign, click the Send Coupon / Reward tile and press OK.
In the first section of Create Campaign, set the Targeted Campaign Name, choose a reward with Add Reward, and set the Reward Expire date. Press Save and the rest of the page unlocks.
2. Open the Upload Target tab
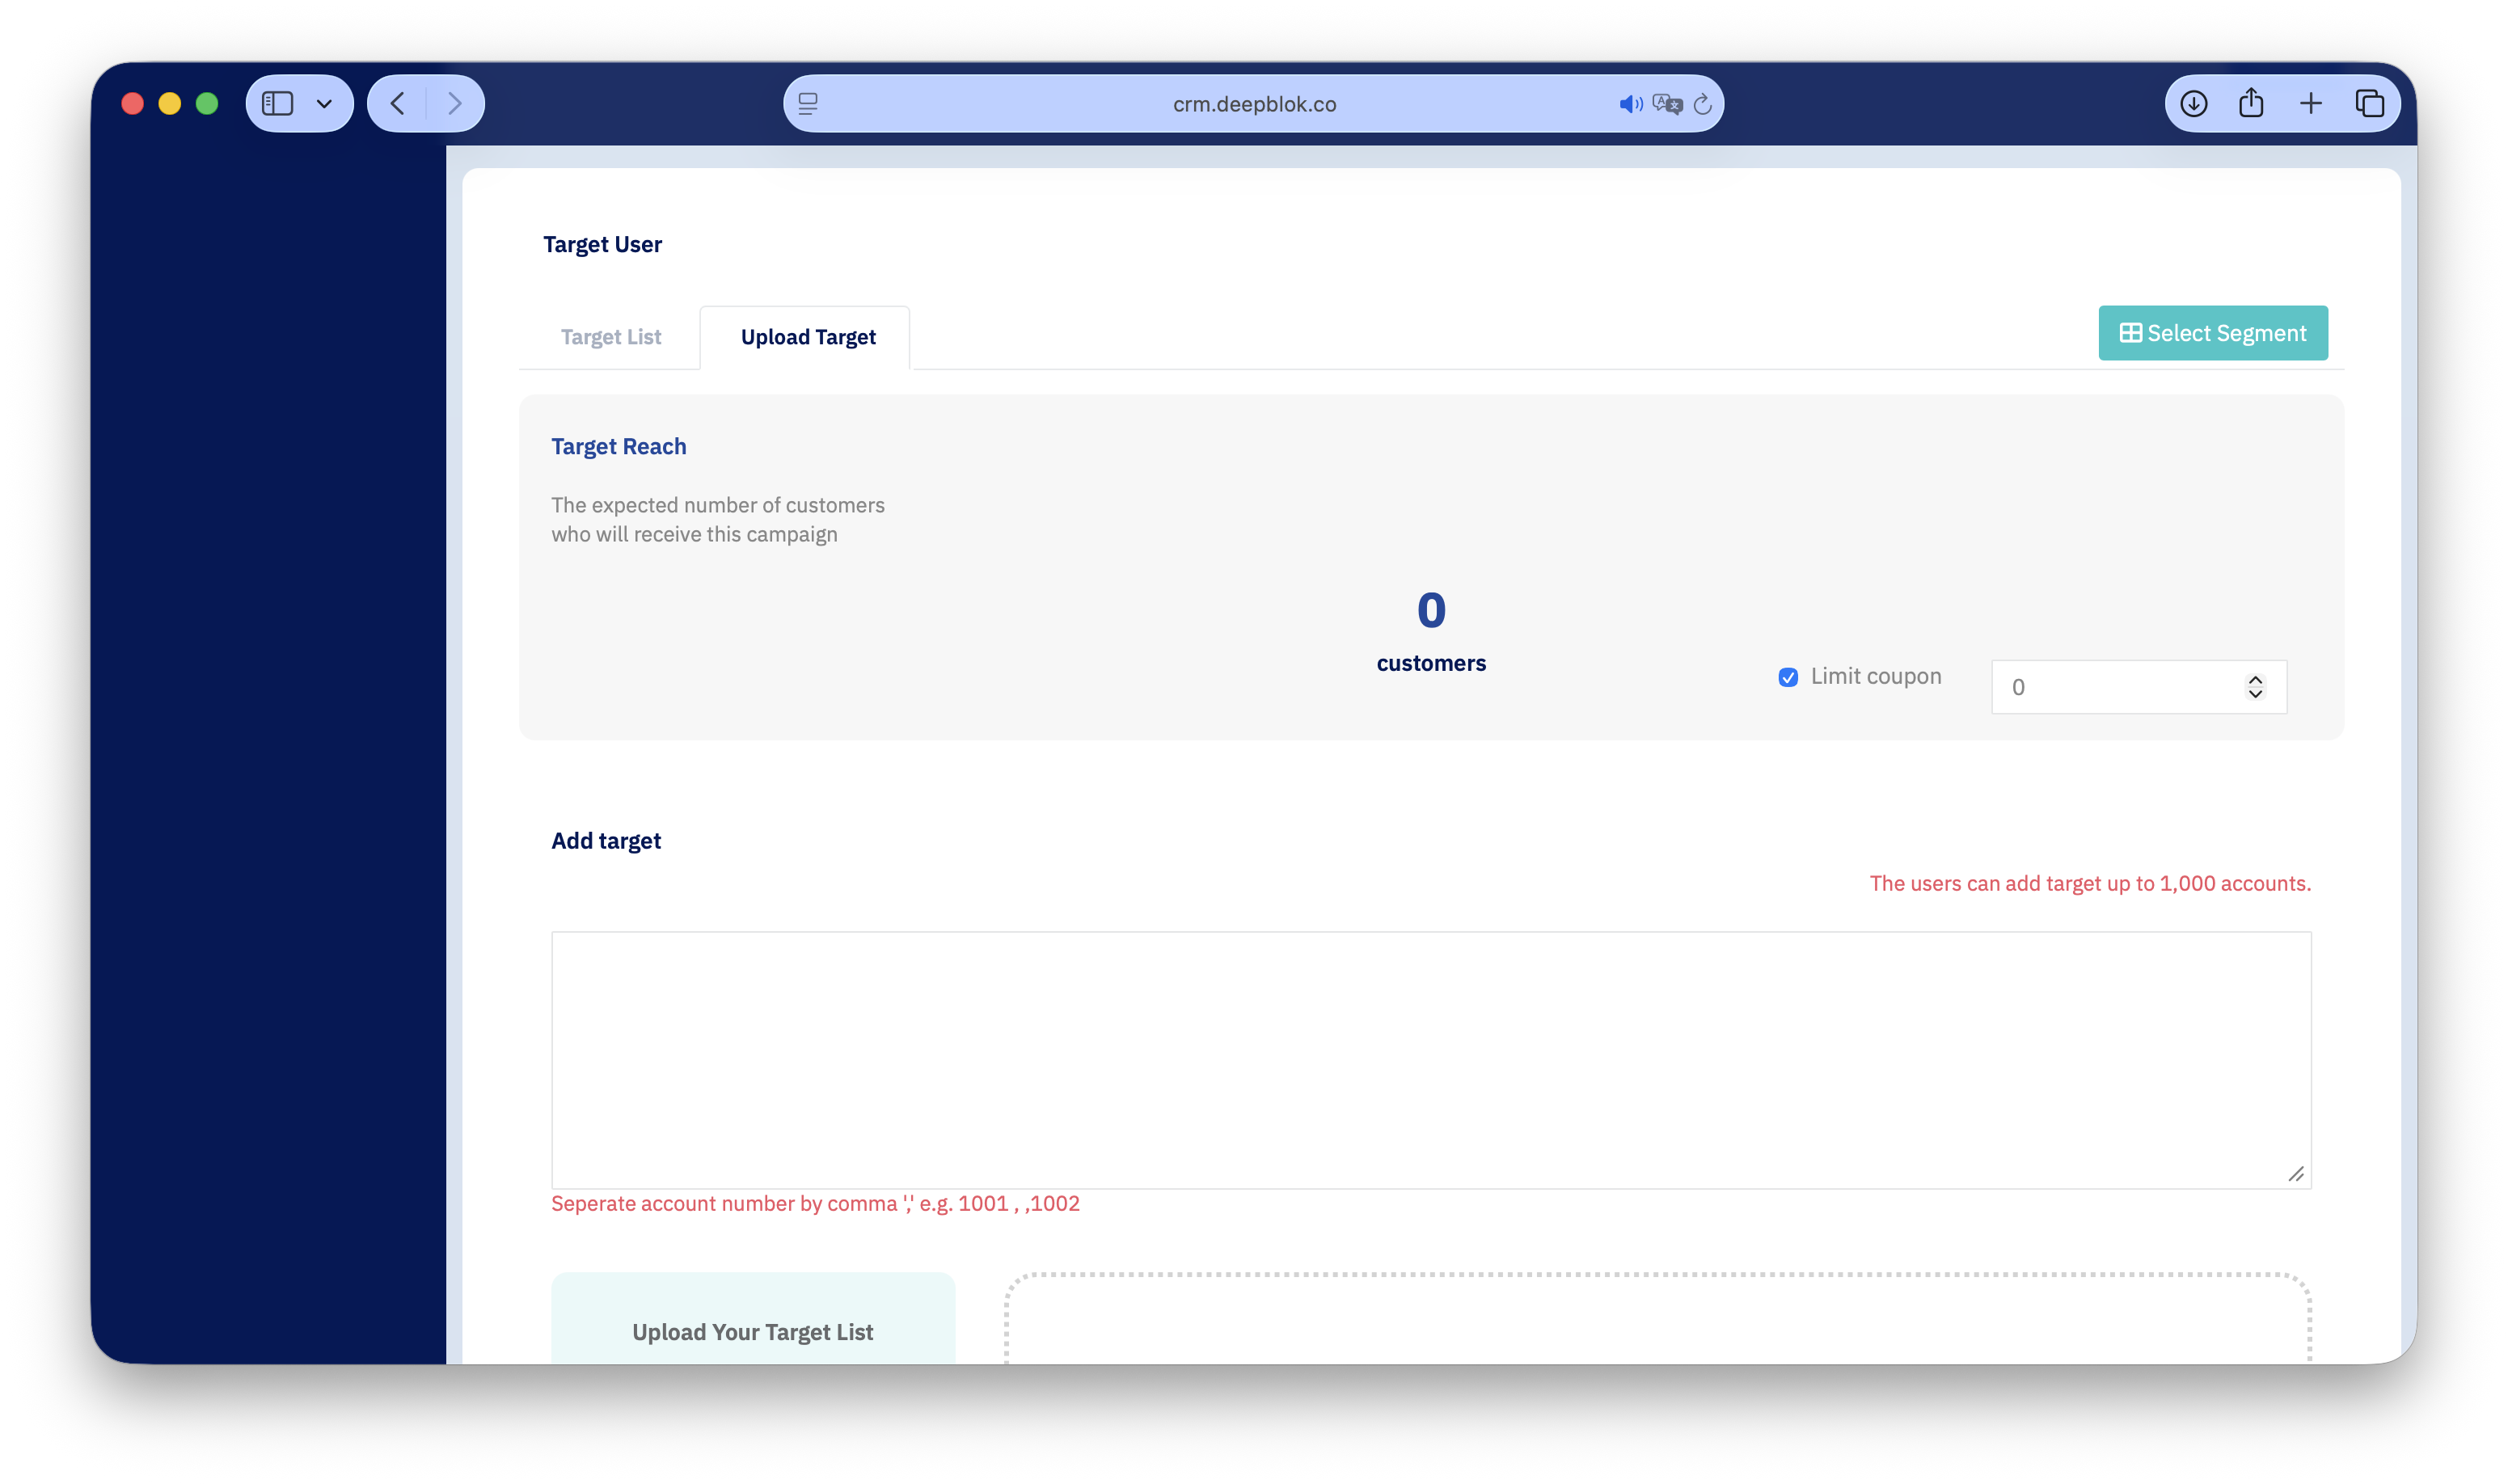
In the Target User section you'll see 2 tabs. Click the second one, Upload Target.
At the top of it sits the Target Reach box with the expected recipient count — still 0 — and a Limit coupon checkbox for capping how many coupons go out.
Below that is the Add target heading, where the list goes.
3. Choose how to enter the list, then press Save
2 routes. Pick the one that fits how many names you have.
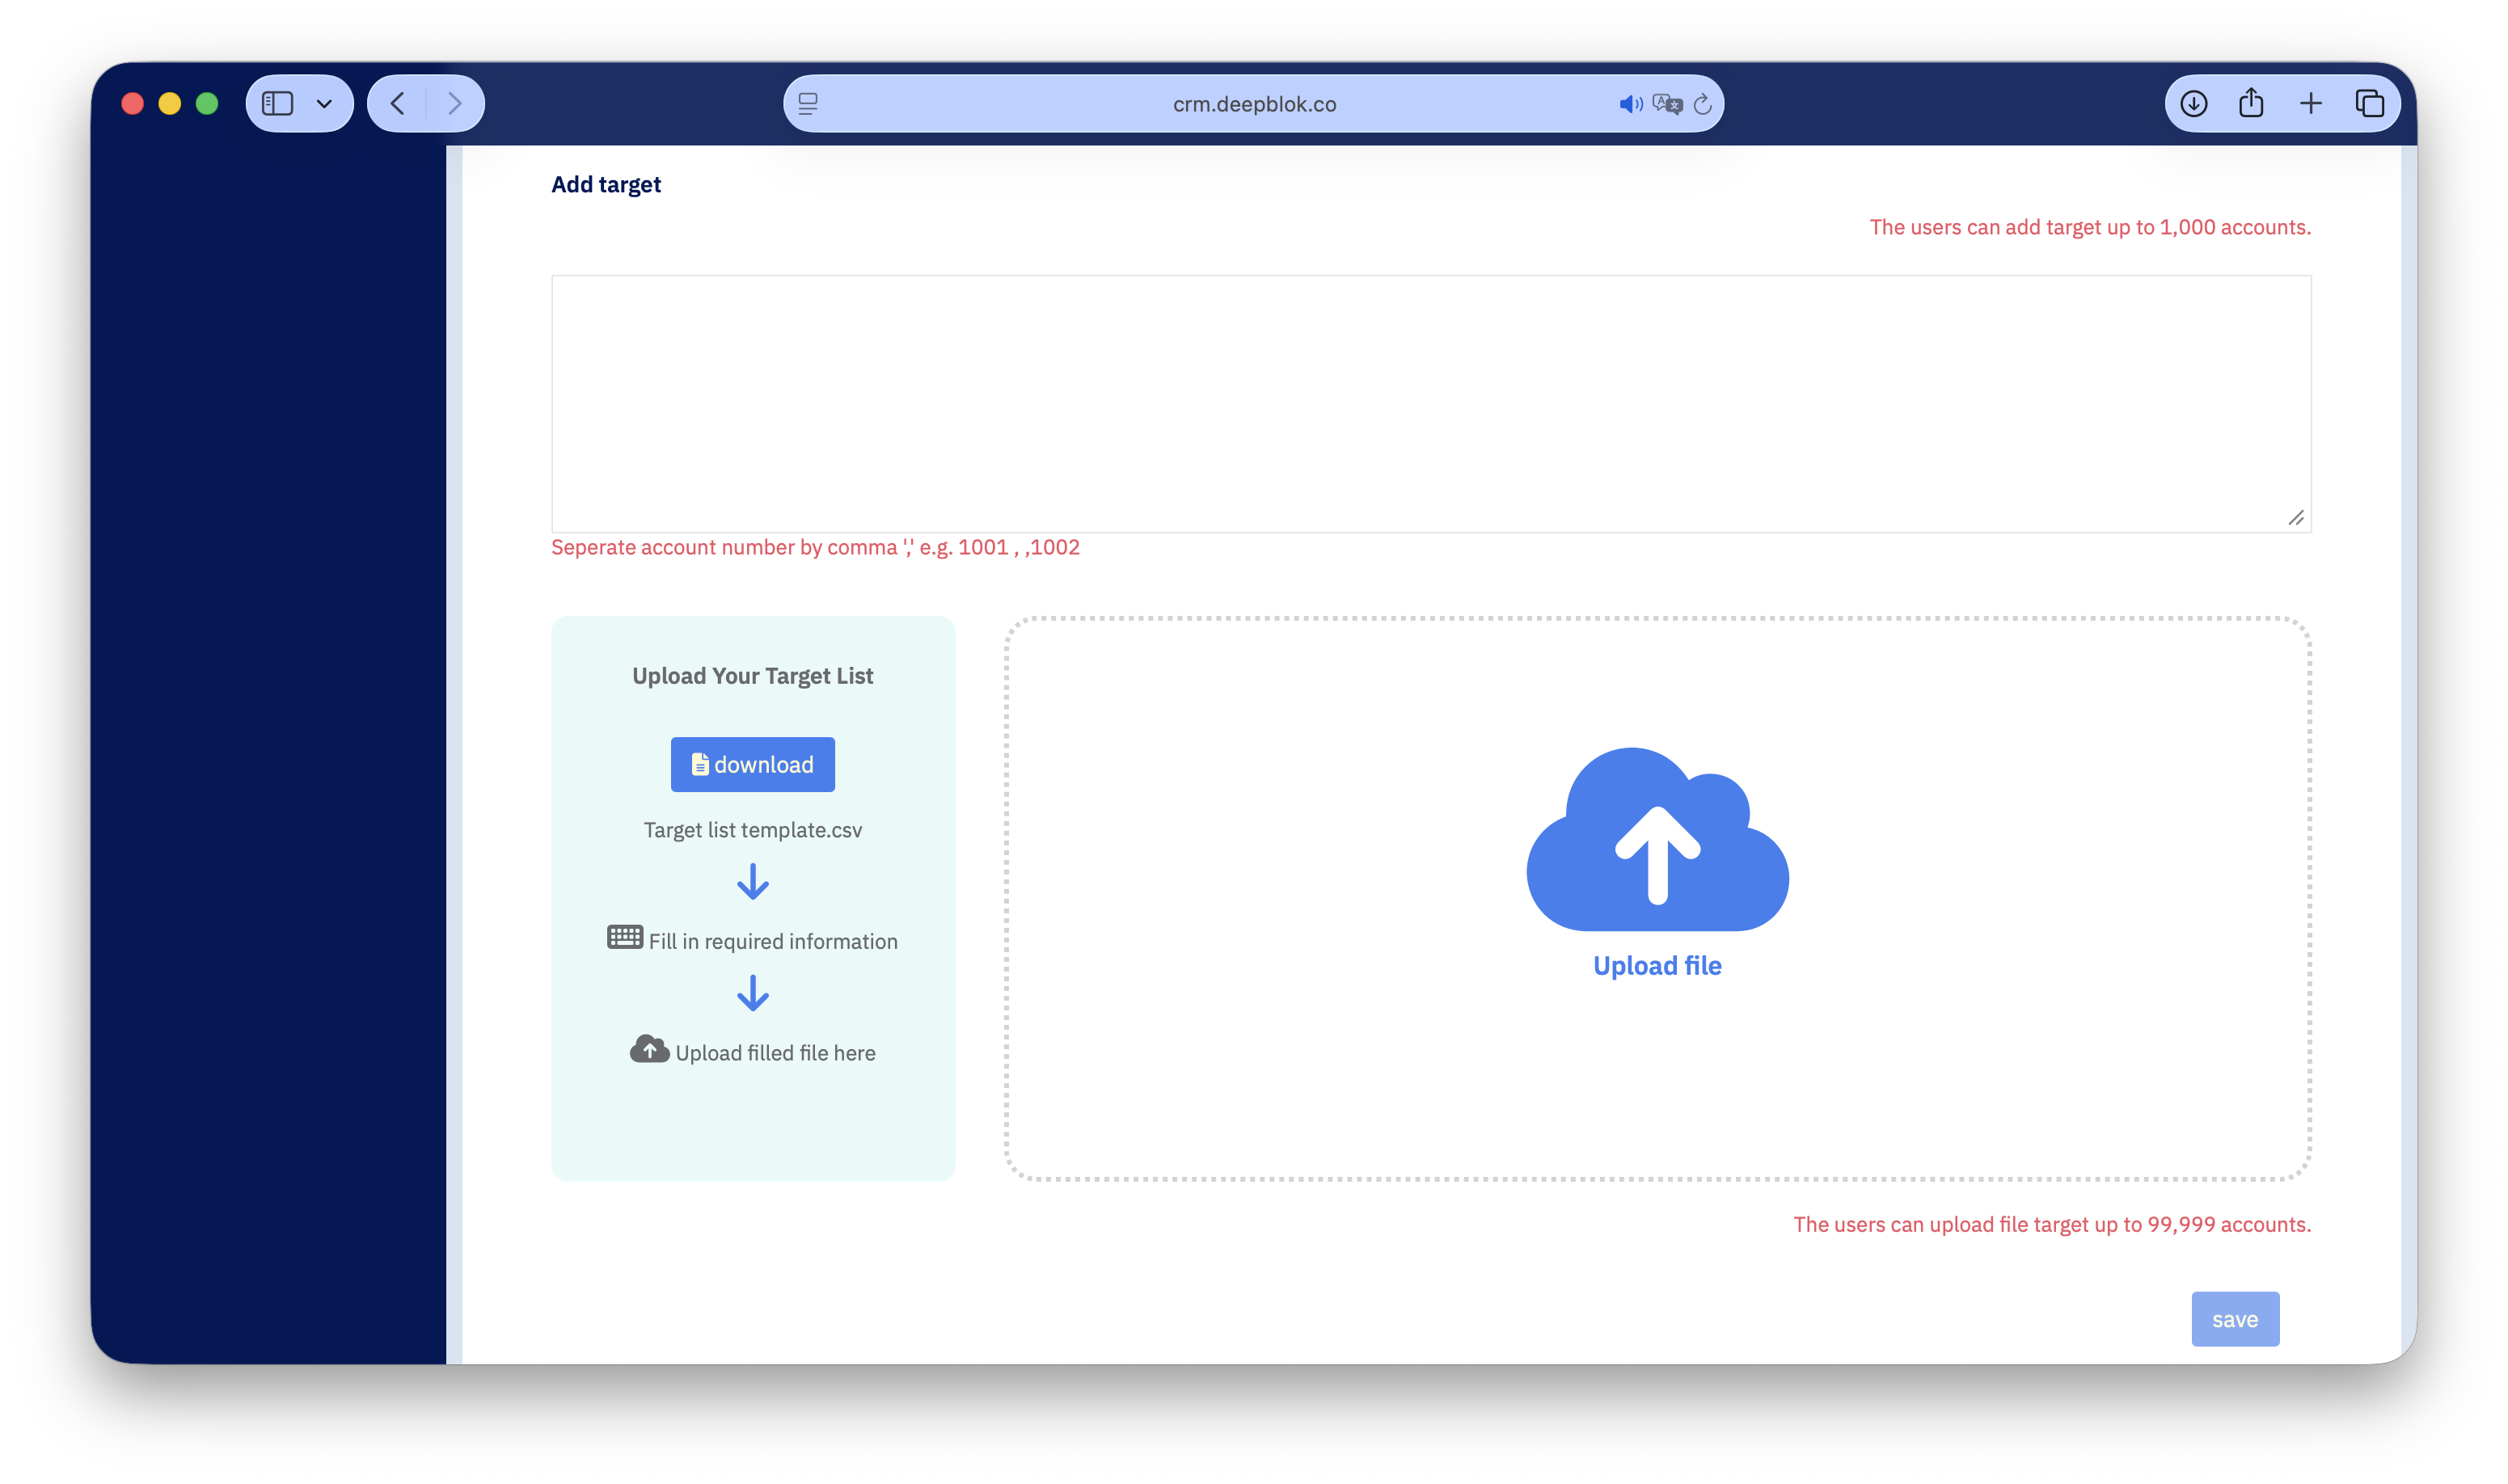
1. Type the account numbers straight in Paste the member account numbers into the text area under Add target, separating each one with a comma. The note above the field states a ceiling of 1,000 accounts. Best for lists in the tens or low hundreds.
2. Upload a CSV file Underneath the text area sits a card headed Upload Your Target List laying out 3 steps: press the blue download button to get Target list template.csv, fill the file in, then upload it back into the dashed Upload file area on the right. This route takes up to 99,999 accounts.
Once the list is in, press Save at the bottom right of the section.
📌 Good to know: always start from the downloaded template rather than building a CSV from scratch. The template already carries the column headings the system expects, and a hand-built file usually fails on a heading rather than on the data.
4. Check how many verified, then send
After Save, a full-width green bar appears under the text area reading N Customer Verified, where N is how many of your account numbers resolved to real members.
Compare that figure with how many names you entered, every time. Put in 120 accounts and see 118, and 2 didn't match — go back and check the source list before sending, because a sent campaign can't be edited.
To cap the coupons, scroll back up, tick Limit coupon and enter a number — 300 names on the list but only 100 coupons to give out, for instance.
Then decide whether to switch on Send notification for a LINE message too, and press Publish on the bar at the foot of the page.
✅ Confirm it worked: back on
Targeted Campaign List, the campaign should readPublished, and theReachedcolumn should match the figure from the green bar. Then open the coupon page in the member system from the phone of one customer on the list — the coupon should be there with the right expiry.
Note on the 2 routes: the ceilings are very different
The 2 routes in step 3 don't just differ in convenience. Their ceilings are almost a hundred times apart.
Recommendation: past 2 or 3 dozen names, use a CSV even though you're nowhere near the 1,000 ceiling — the leftover file is the only thing that can later tell you who that round actually went to.
Common Problems
Frequently Asked Questions
Q: Where do I find a member's account number?
A: It's part of each member's record in the system. If your team has never pulled this list before, ask the DeepBLOK team who look after your brand how to export account numbers as a file — far quicker than copying them one at a time, and it removes the typos that leave the verification count short.
Q: Can I paste more than 1,000 accounts into the field?
A: No — the field states a 1,000-account ceiling. For anything larger, use the CSV route, which takes up to 99,999.
Q: Can I send to a single customer?
A: Yes. Put one account number in Add target and press Save; the green bar reads 1 Customer Verified. It works well for compensating a customer case by case — put a traceable reference in the campaign name so you can find it again later.
Q: Can I use Upload Target on a notification-only campaign?
A: Yes. The tab belongs to the Target User section, which is the same section on both coupon and notification campaigns. The article on sending a notification to a customer group covers filling in the notification half.