

Every report in the system is one you generate yourself from the Report Center page, and it arrives as a .csv file that opens straight into Excel or Google Sheets. Nobody has to send it to you, and there is no end-of-day cycle to wait for. This article covers choosing a report through to pressing download, plus the file lifetime worth knowing about first.
⚡ Quick Path:
Report→Report Center→ choose the report name → set the period →Generate Report→ wait forReady→Download
⚠️ Watch out: the table shows a different year depending on the language. In Thai mode the dates are Buddhist era — 2569-08-22 — and in English they are 2026-08-22, on the very same row. Check which language you are in before reading an expiry date.
Requirements before you start
- Access to the report you want — access is granted per person, per report, so the
Report Namefield lists only the reports your account has been granted. If the one you need is missing, ask an administrator on your team to grant it first. - Knowing which period you need — most reports ask for a date range or a month, so settle that before you go in.
- Something that opens a
.csvfile — Excel or Google Sheets is enough.
Downloading a report in 4 steps
Step 1 Choose the report name
Click Report in the left menu bar. It expands into 3 items; click Report Center. The page opens in 2 sections: Search Report Criteria at the top, where you set the conditions, and Download History below, which holds the files already generated. The names around this page do not all agree: the breadcrumb above it reads Home › Download Center › Report Center, and in Thai mode the sidebar says ศูนย์รวมรายงาน while the page heading says ศูนย์รายงาน. All of them are this one page.
Click the REPORT NAME field. The list is arranged into categories such as Member Management and Check-in Activity. Category names are grey and cannot be selected — pick a report name underneath one. The category names stay in English even in Thai mode, while the report names under them are translated.
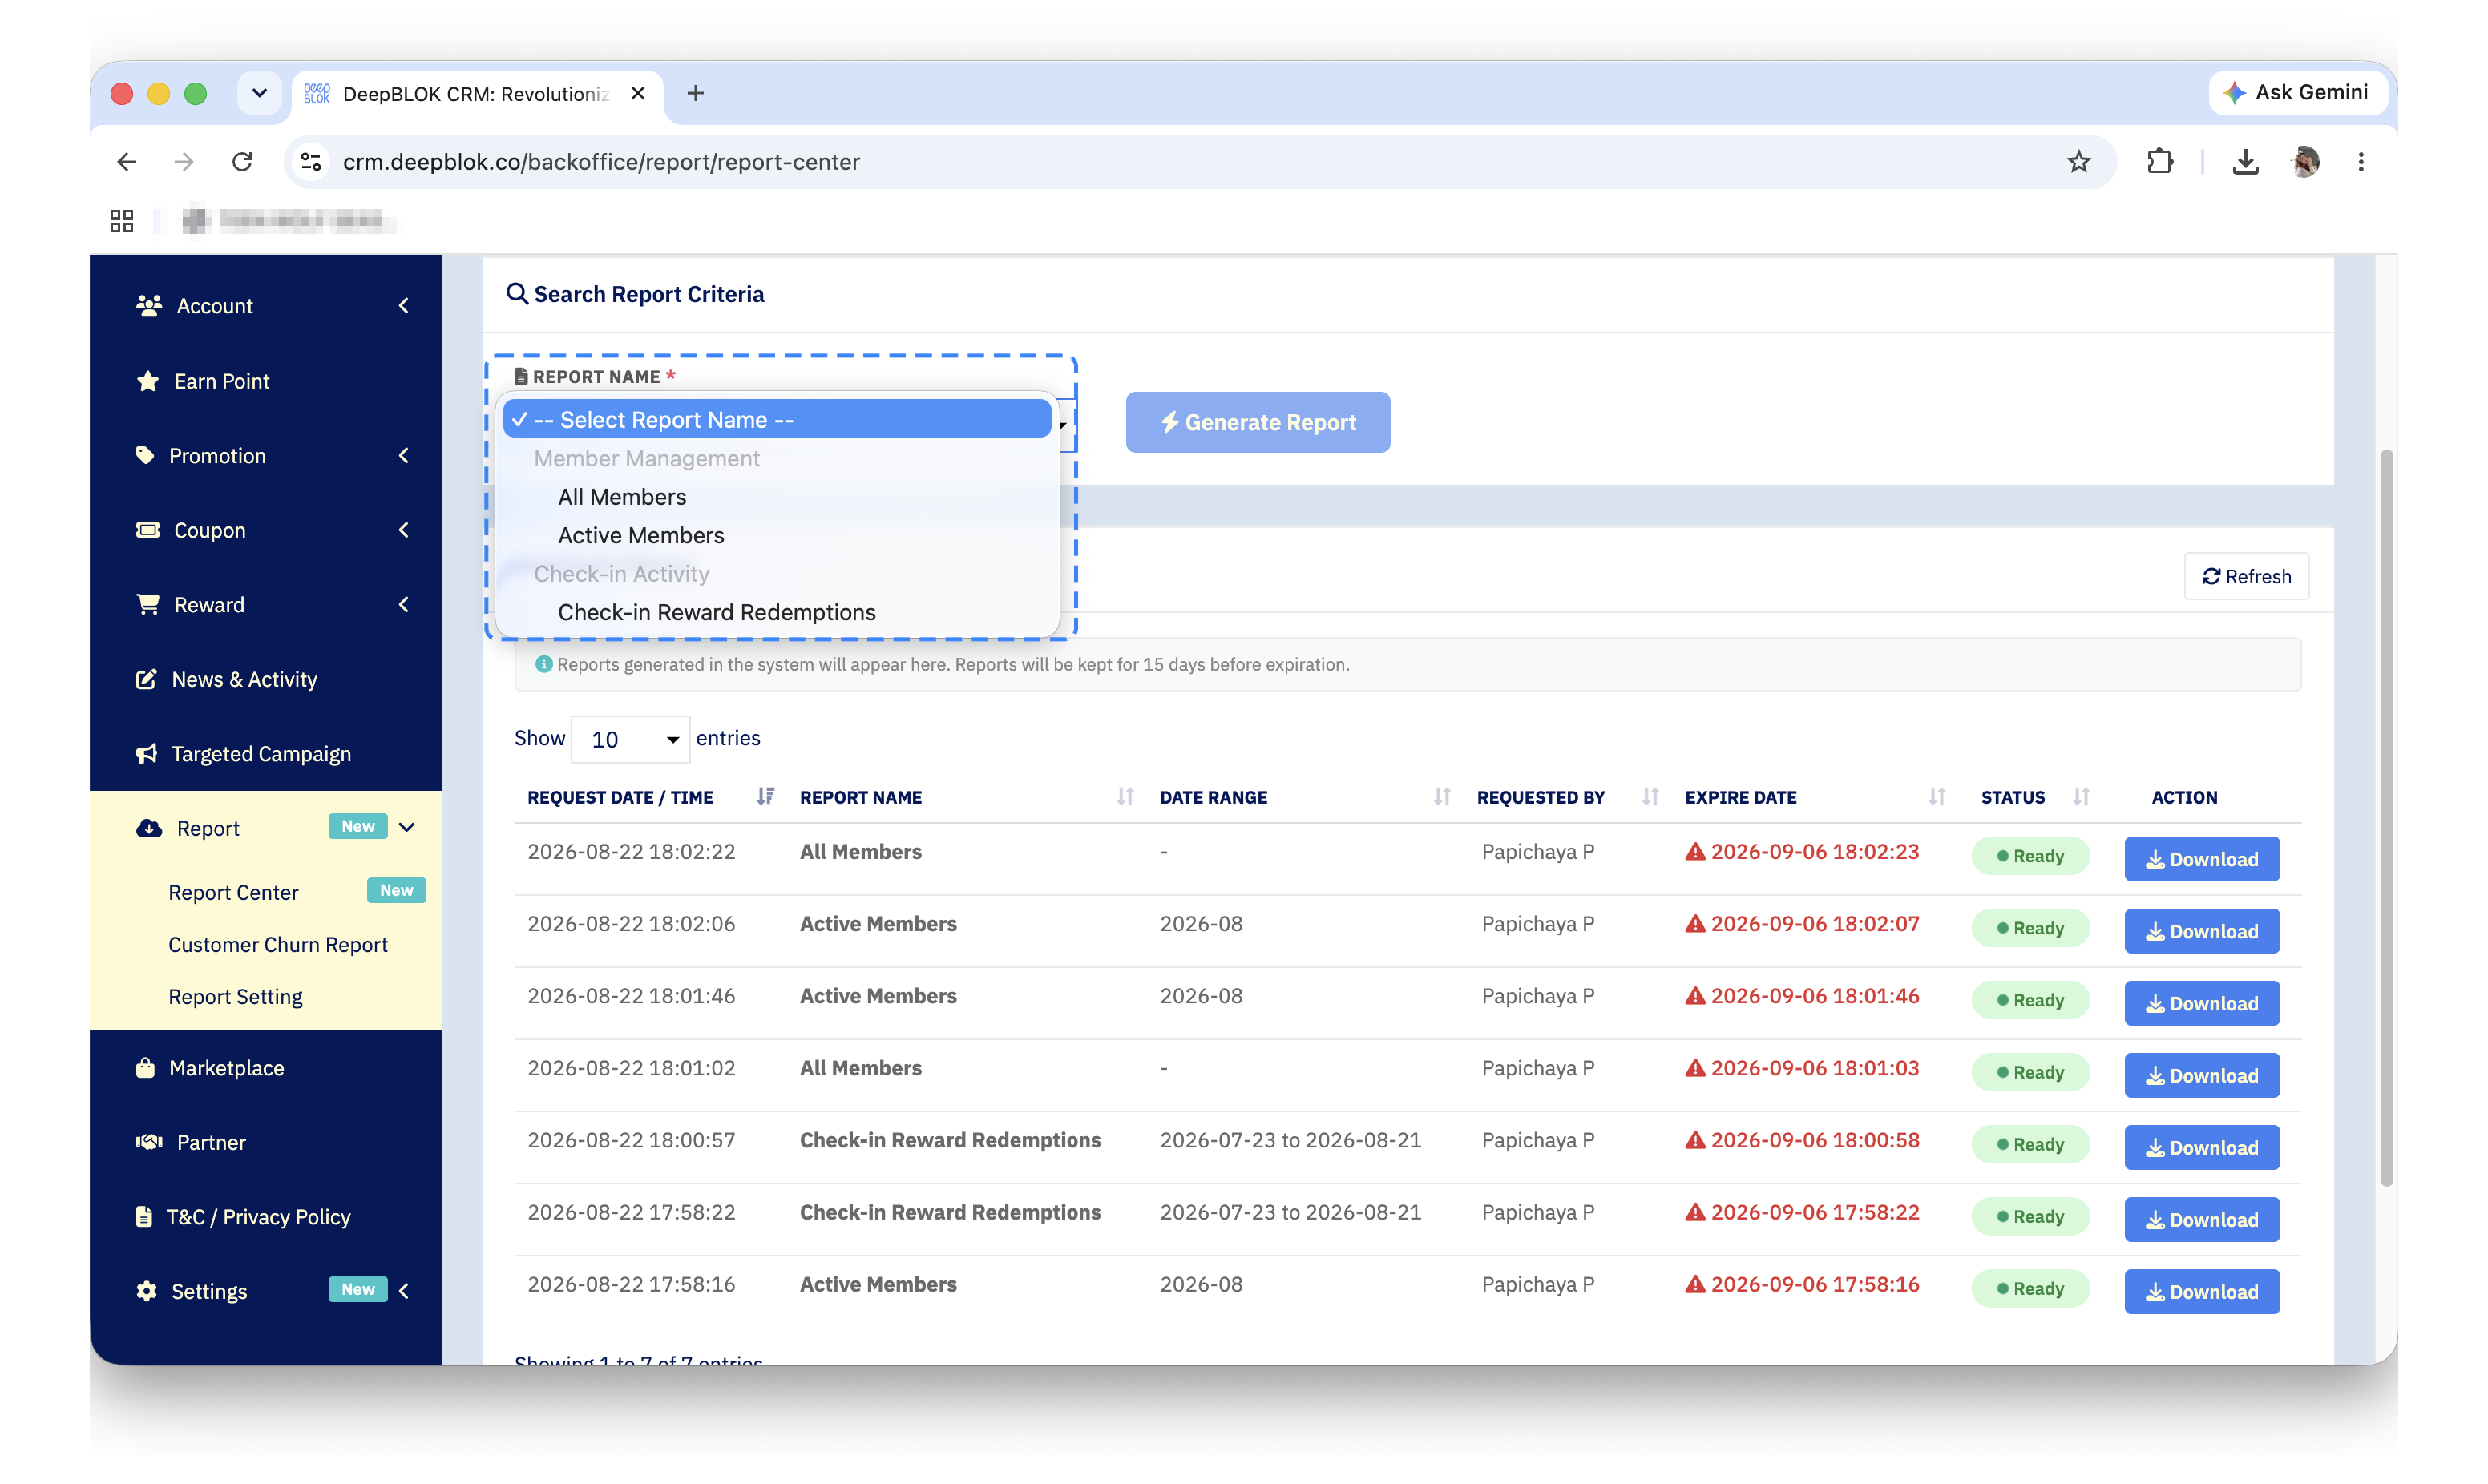
📌 Good to know about an empty list: if the field opens with nothing in it but the -- Select Report Name -- line, that means the signed-in account has not been granted any report yet — not that the system has none. Ask an administrator to grant access, then come back to this page.
Step 2 Set the period you need
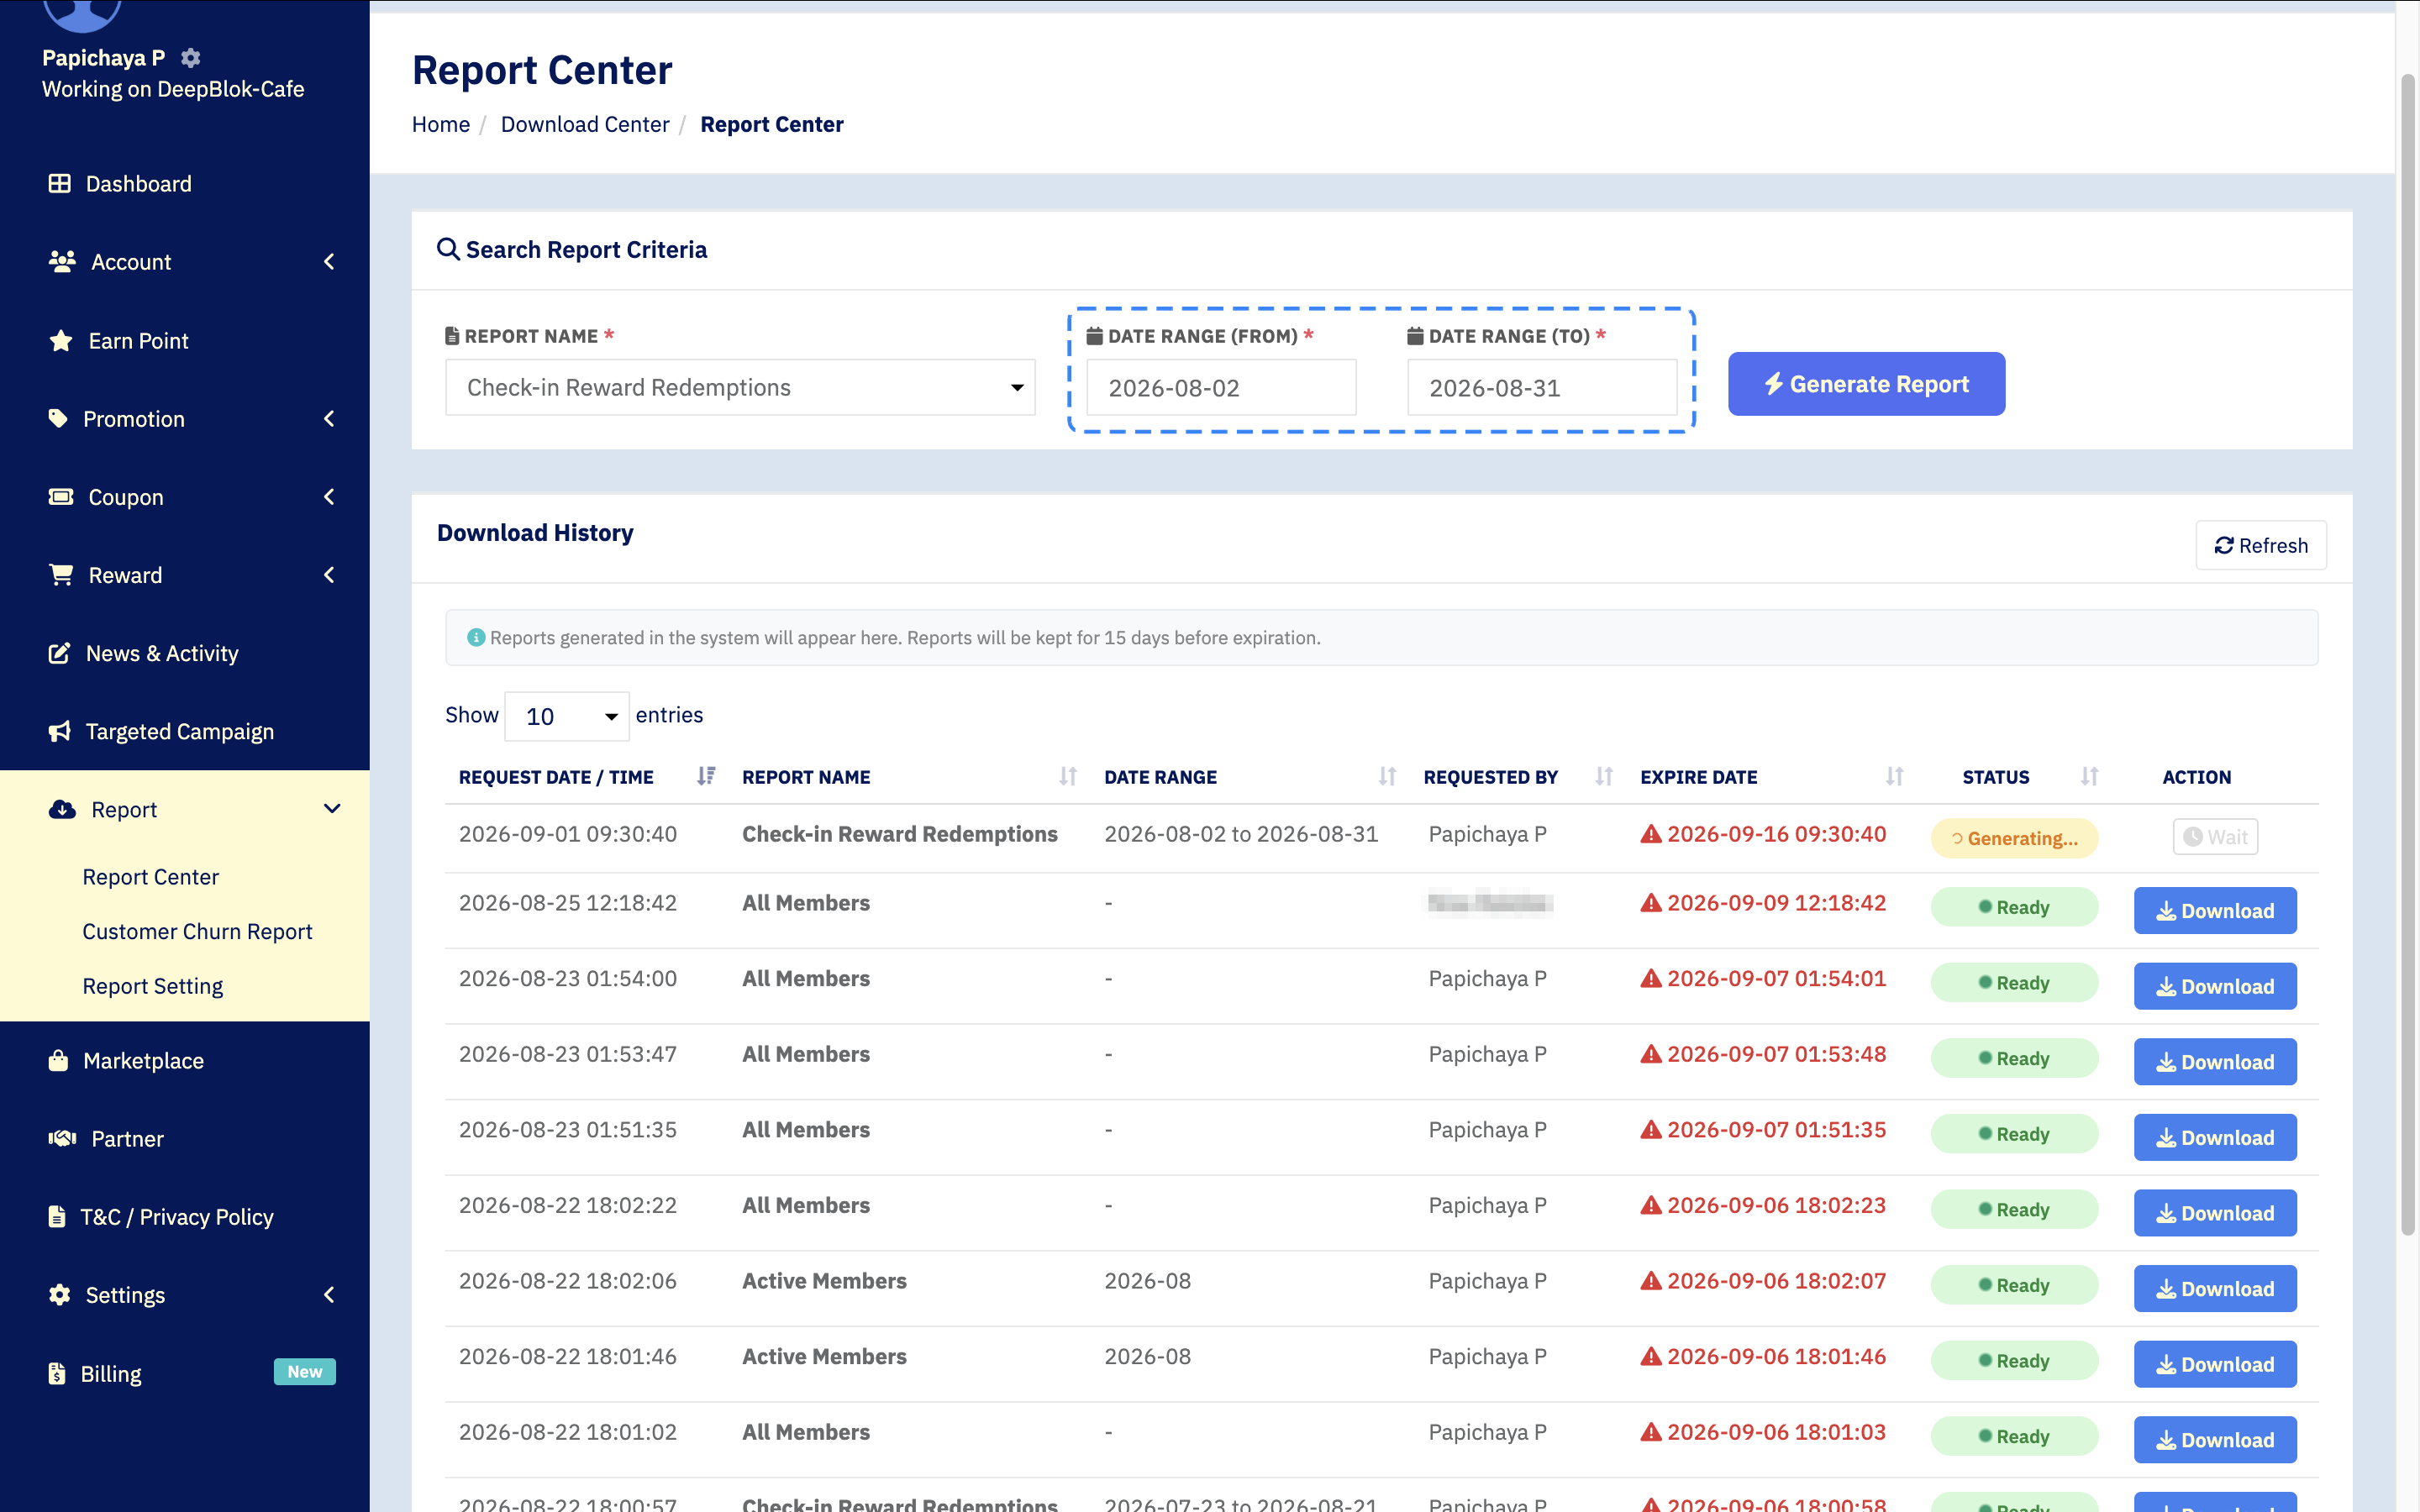
Once a report is chosen, the period fields appear to the right of the name field. Their shape changes according to the report — it is not the same field every time.
Fields marked with a red asterisk are the required ones. Generate Report stays pale until a report name has been chosen.
Step 3 Press Generate Report and wait for Ready
Press Generate Report and a new row appears at the top of the Download History table straight away. That table has 7 columns: REQUEST DATE / TIME when it was requested · REPORT NAME · DATE RANGE the period asked for · REQUESTED BY who asked · EXPIRE DATE when the file expires · STATUS · and ACTION, the button at the end of the row.
Status normally moves in 2 stages. At first it shows an amber Generating… badge and the button at the end of the row is a grey Wait that cannot be pressed. When the file is done the badge turns green and reads Ready, and the button becomes a blue Download.
Beyond those 2 there is also Failed, meaning the system could not build the file. That row carries no download button — generate it again.
If the badge has not changed after a moment, press Refresh at the top right of Download History.