

Reports carry sales figures by branch, member records and point movements, so not everyone on the team should see every one. Access is set at a fine grain — per person, per single report — and granting it takes under a minute.
⚡ Quick Path:
Report→Report Setting→ press the badge in that report'sUsers Accesscolumn → search for the name →+ Add User
Requirements before you start
- Access to the
Report Settingmenu — this is an administrator's menu. If you cannot see it, your account cannot configure access for others, so ask an administrator on your team to do it. - The name or admin code of the person you are granting access to — the search works on code and name, so have one of them ready.
- Knowing exactly which report — access attaches to one report at a time, not to the whole set at once.
Worth thinking about before granting access
These reports are the kind of data that should sit only with the people whose job needs it. The general rule is to grant only the reports someone actually works with, rather than opening the whole set because it is quicker.
The other half of that is remembering to take access away when someone changes team or leaves, because removal is something you have to come in and do. And if your team already has an approval step for granting access, complete it before you come here and press anything.
The Report Setting page and its columns
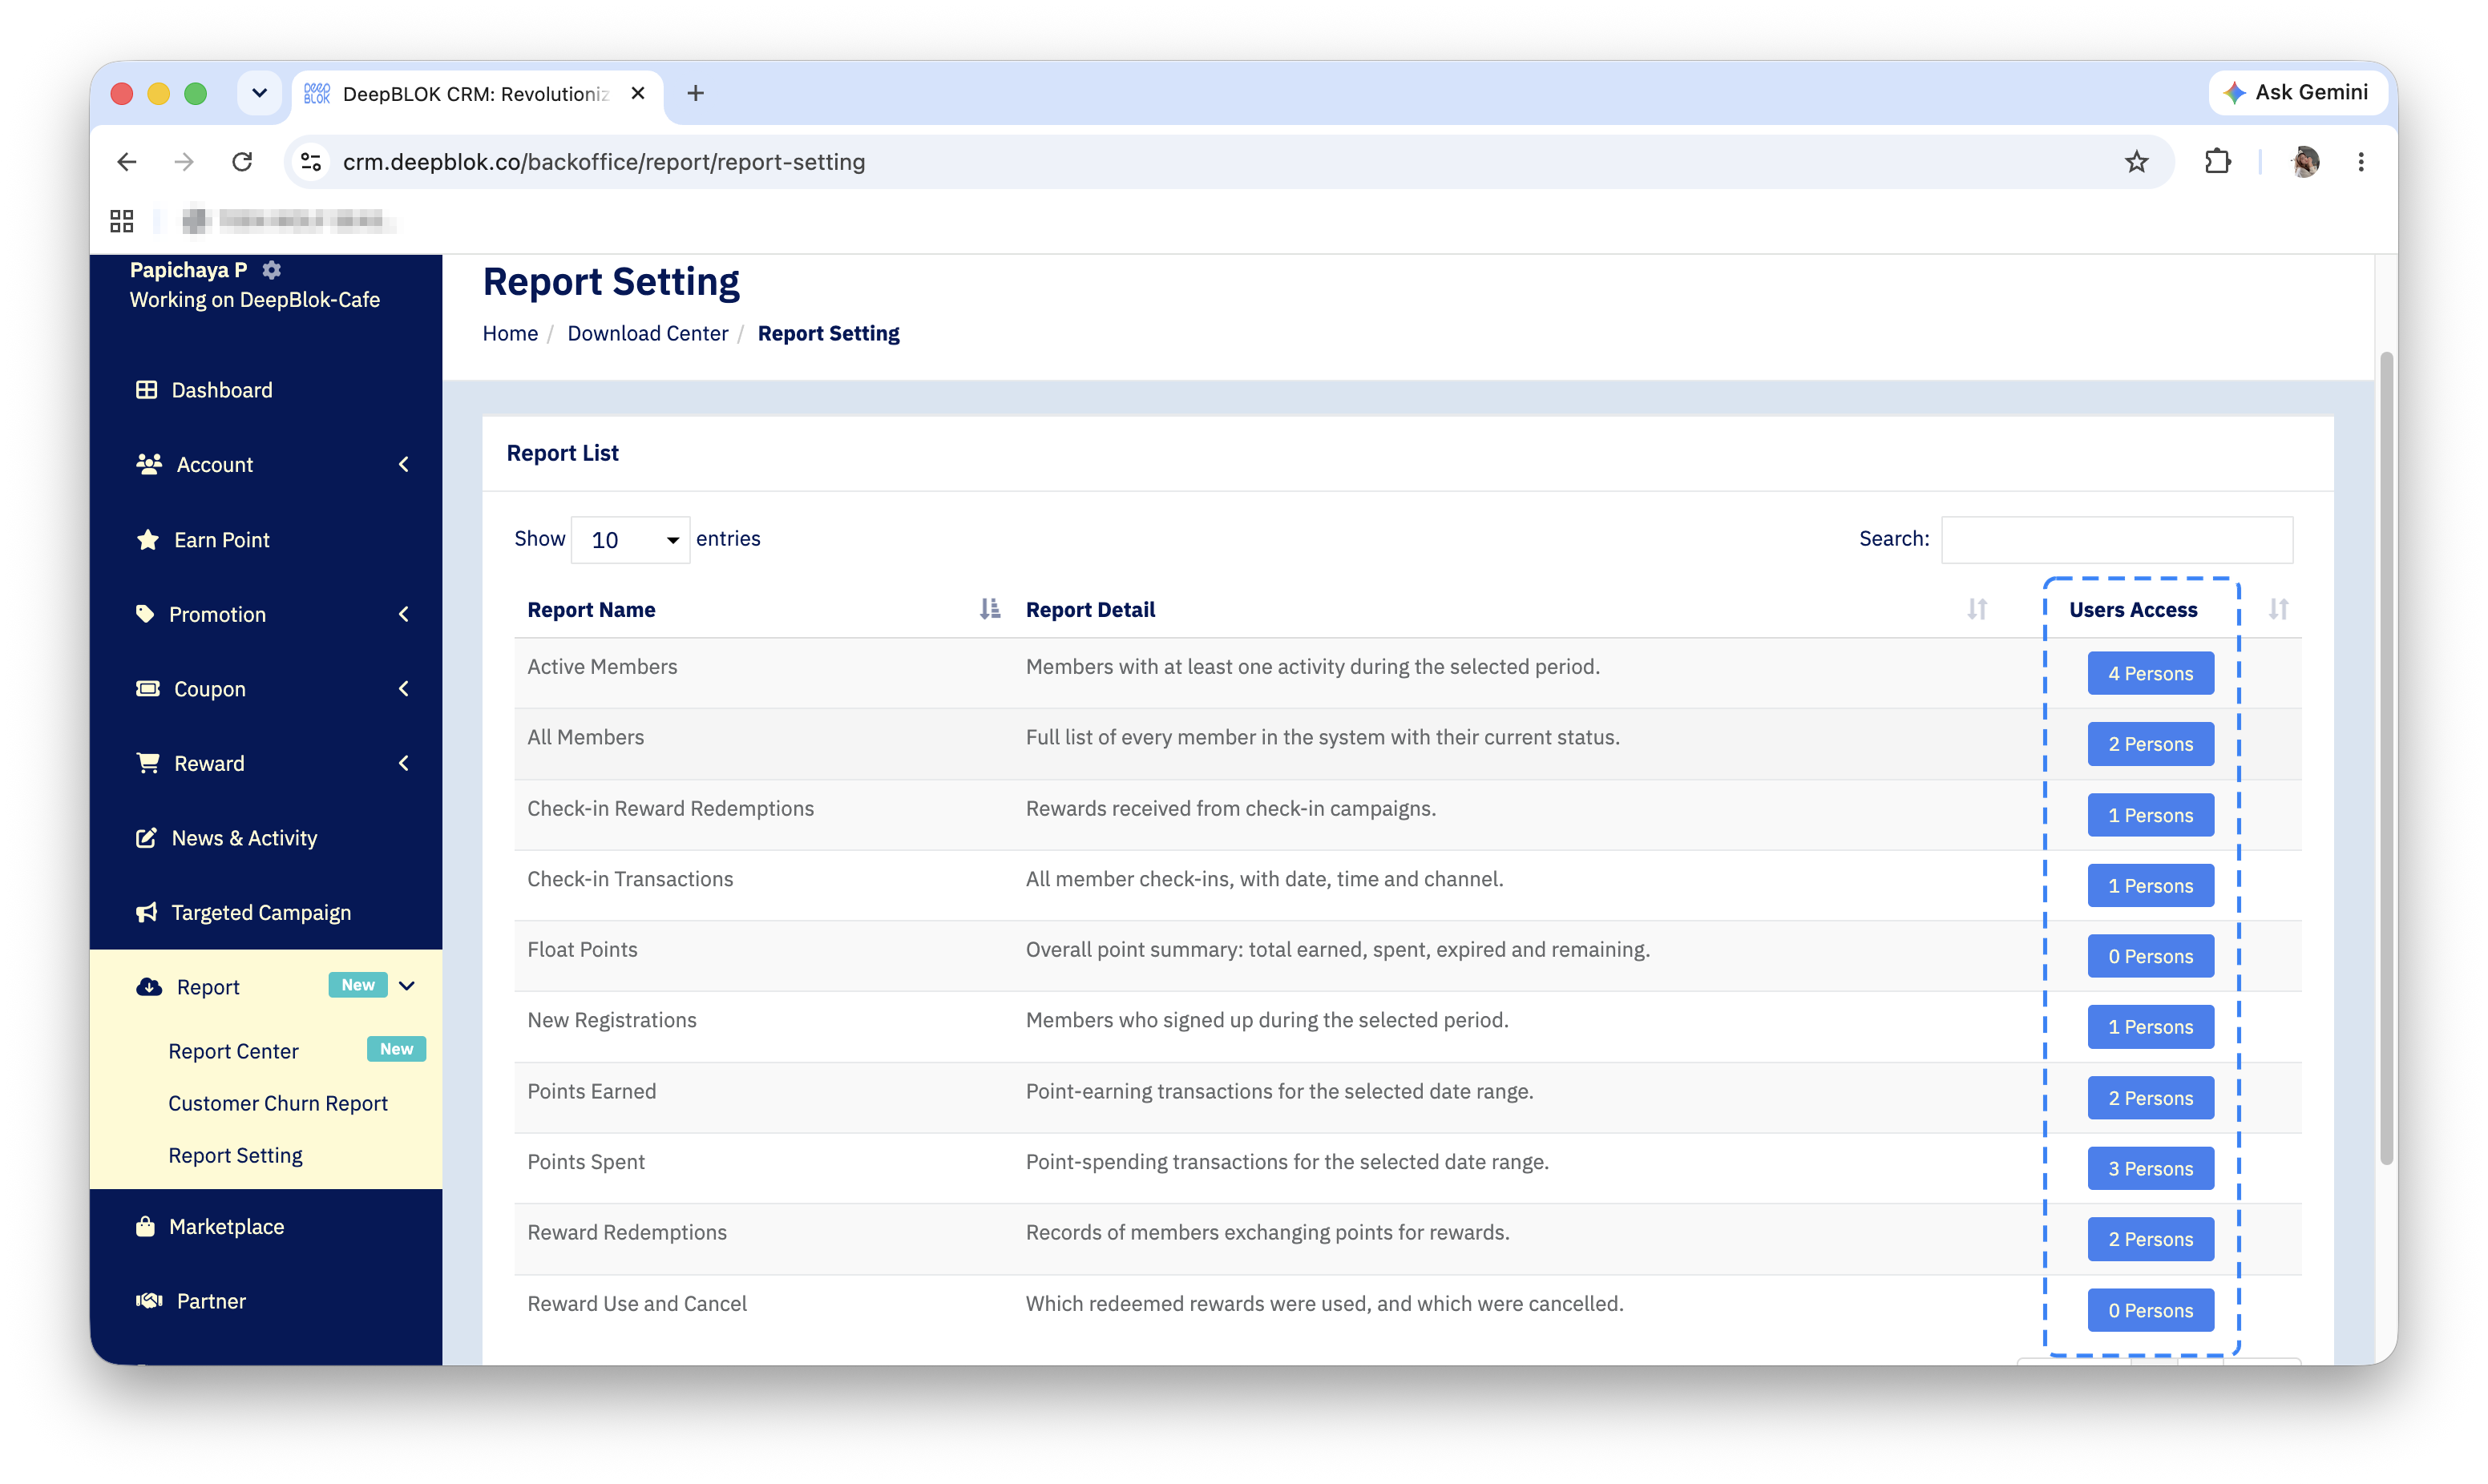
Click Report in the left menu bar and choose the Report Setting submenu. The page holds a Report List table listing all 15 reports that can be permissioned, across 2 pages, with a Search box above it and page numbers below.
That last badge does 2 jobs at once: it states the head count, and it is the button that takes you in to change it. Press it directly.
Granting access in 3 steps
Step 1: Press the badge in the Users Access column
Find the row for the report you want — the Search box above the table helps if there are many — and press the blue badge in its Users Access column. The Report Permission page opens.
⚠️ Note on pages that look identical: the Report Permission page looks the same for every report. The only thing that distinguishes them is the report name under the Report Name heading at the top. Read that name and confirm it matches the report you meant before you add or remove anybody.
Step 2: Search for the name, then press + Add User
The upper section is headed Search user and press enter to grant permission. Type the name or admin code into the box and press Enter to select. The chosen name becomes a chip inside the box, in the form admin code : name.
Then press the blue + Add User button to the right of the box. The button stays greyed out and unclickable until a name is sitting in the box as a chip, which makes it a useful check that the selection took.
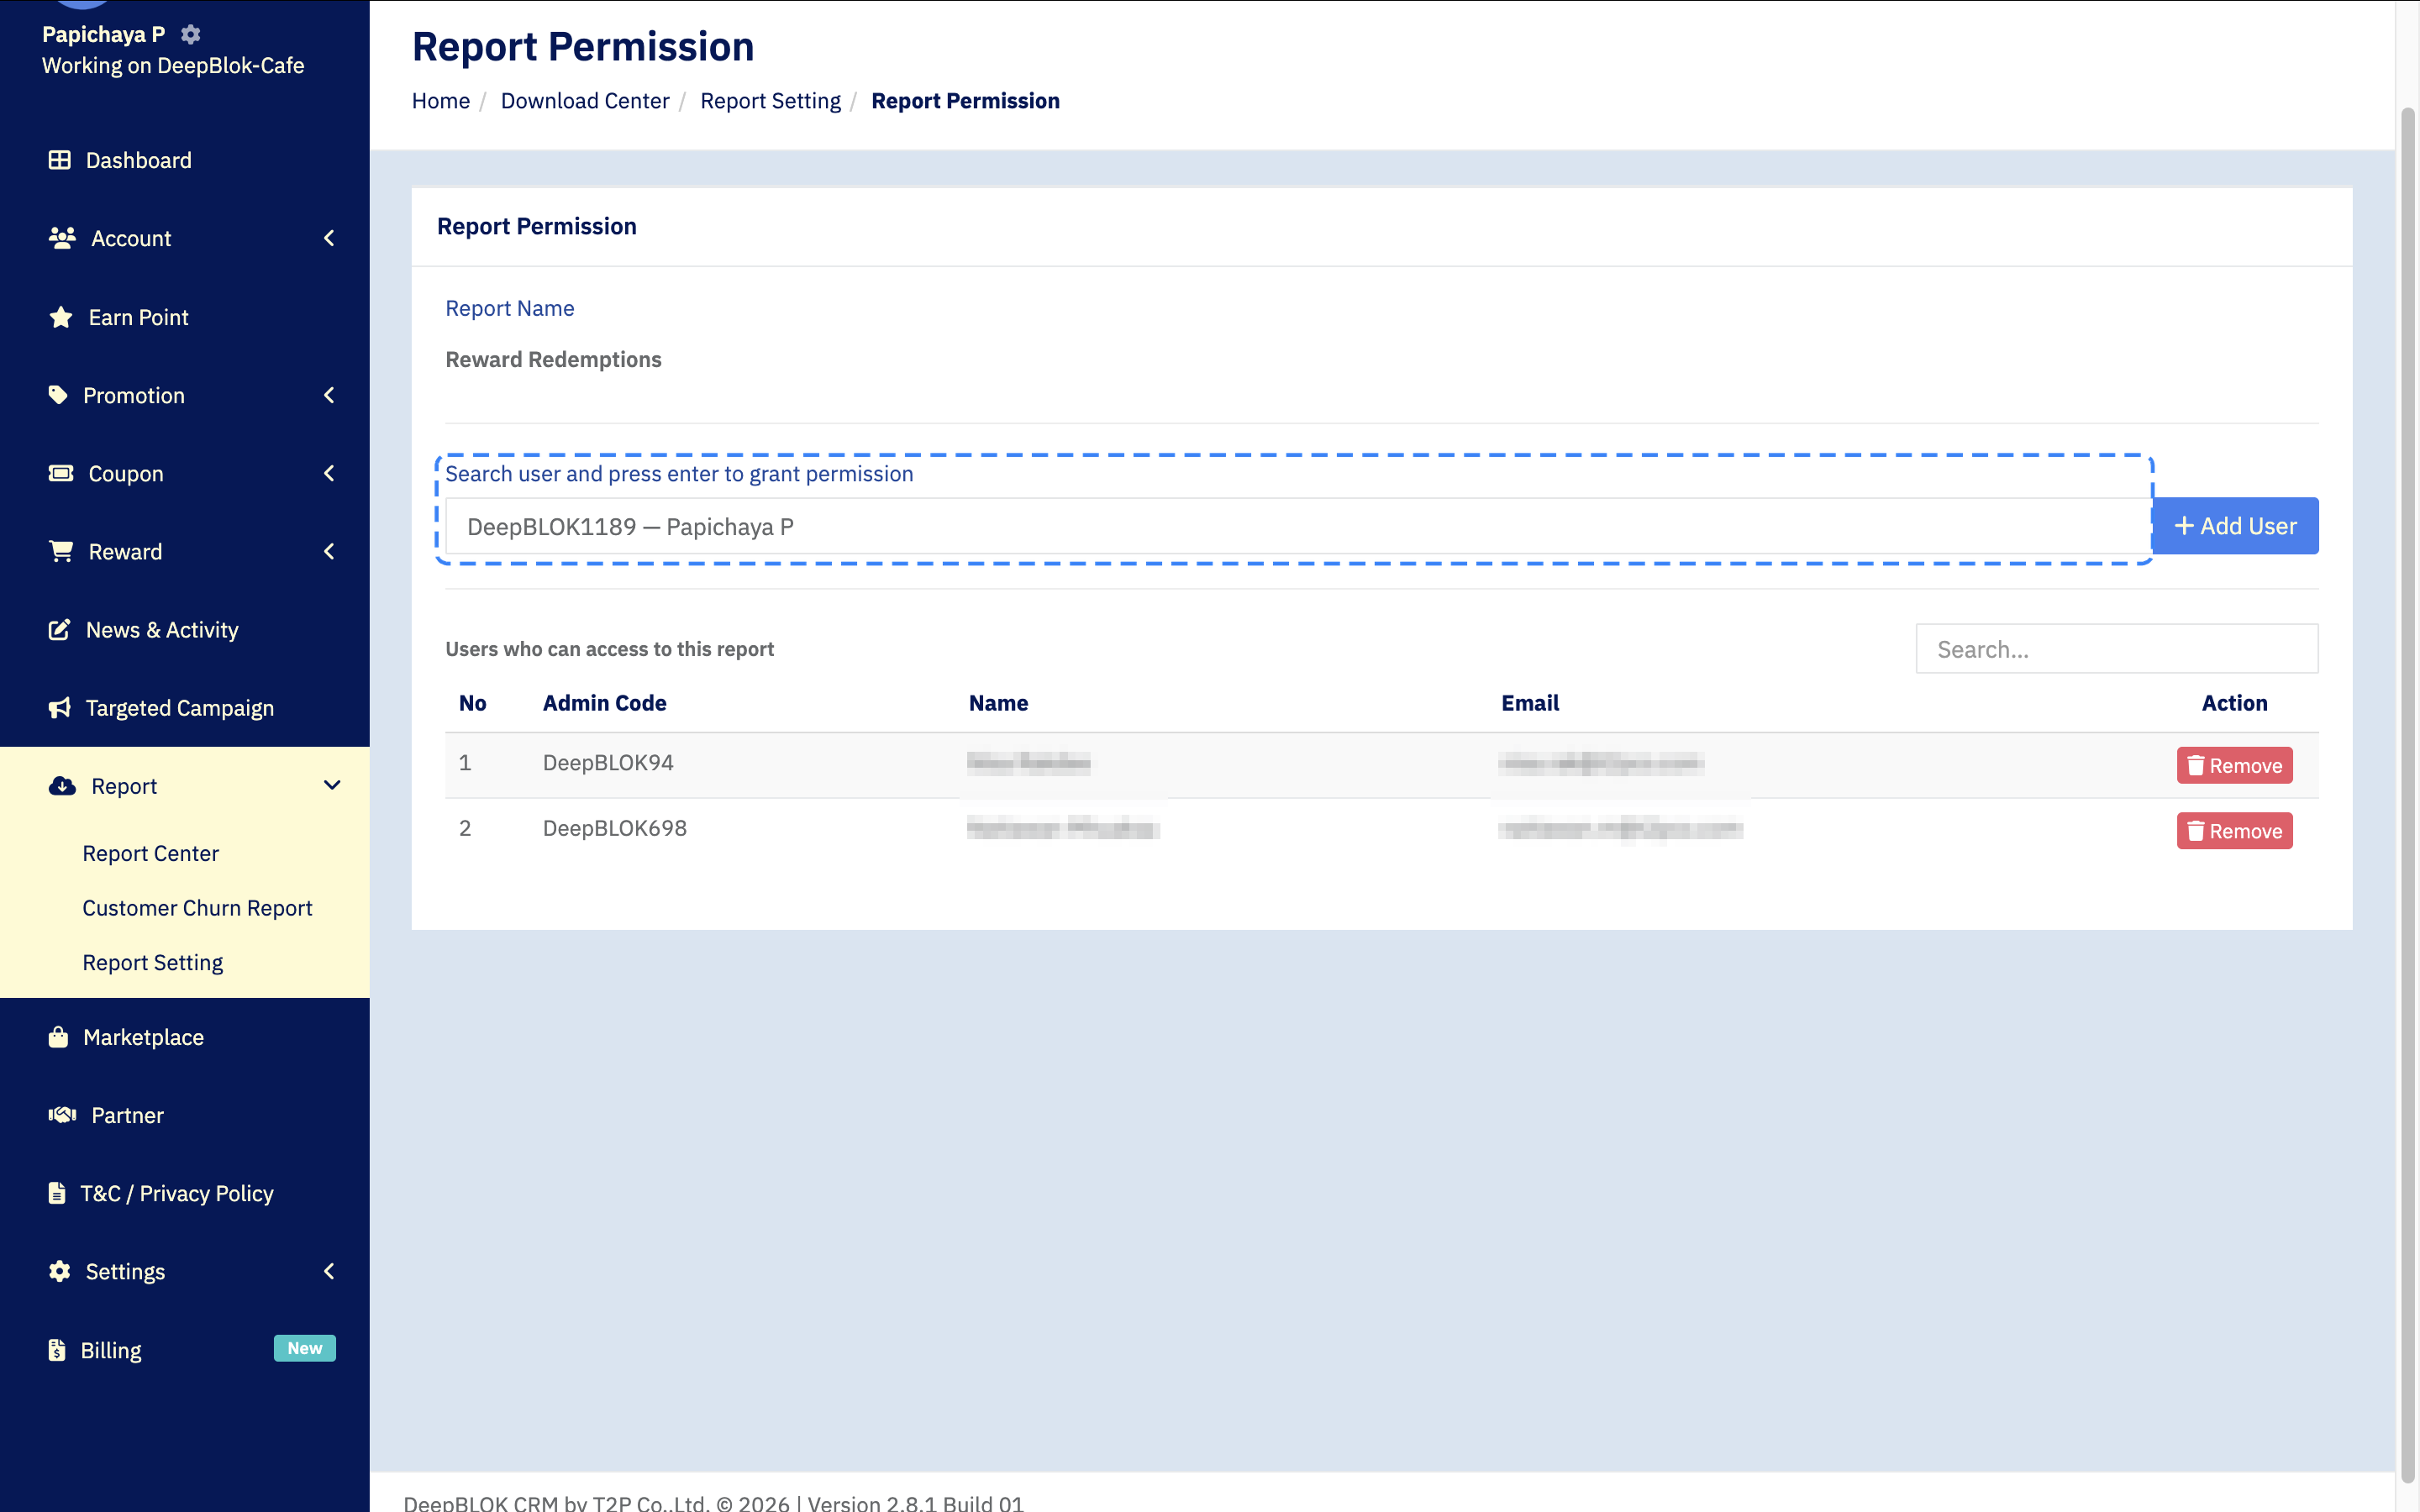
This is the step people miss most often. Selecting the name so it appears as a chip is not enough — you have to press + Add User as well. The chip in the box is a pending selection and has no effect until the button is pressed.
Step 3: Check the table below
Under the search box is a section titled Users who can access to this report, a table of the people who actually hold access. It has 5 columns: No, Admin Code, Name, Email, and Action, which holds the removal button.
✅ Confirm it worked: the name you just added should appear as a new row in the Users who can access to this report table, and back on the Report Setting page, the number in that report's Users Access badge should have gone up by one. If the number is unchanged, + Add User was never pressed.
Removing access from a report
Open that report's Report Permission page the same way as in Step 1, then find the person's row in the table below. The Action column at the end of the row holds a red button reading Remove, with a bin icon.
Before pressing it, check both the Admin Code and the Email on that row against the person you mean. Names can repeat; codes and email addresses do not. Pressing it brings up a confirmation dialog, so there is still a chance to cancel if you picked the wrong row.