

Before you invite a teammate, you pick one role for them — and that role decides which menus they see and which buttons they can press. The full permission table lives on the Role Management page under Settings. It is a read-only page, so you can open it any time and compare roles safely before you decide anything.
⚡ Quick Path:
Settings→Role Management→ read down the column of the role you're considering, module by module
Reading it once takes about 5 minutes, and after that you can pick the right role for a new hire yourself every time.
Requirements before you start
- An account that can open
Settings— in the permission table as configured,Adminis the role with the widest access. If you can't find theRole Managementsubmenu item, ask someone on your team with theAdminrole to open the page for you. - A clear picture of what the person will actually do — for example look up customer data to answer calls, build campaigns, or approve point adjustments. Starting from the job picks the role far faster than starting from the role name.
- You don't need their account to exist yet — read and choose the role first, then create the account per the article on creating an Admin account for a teammate, so there's nothing to correct afterwards.
The 5 roles in the system
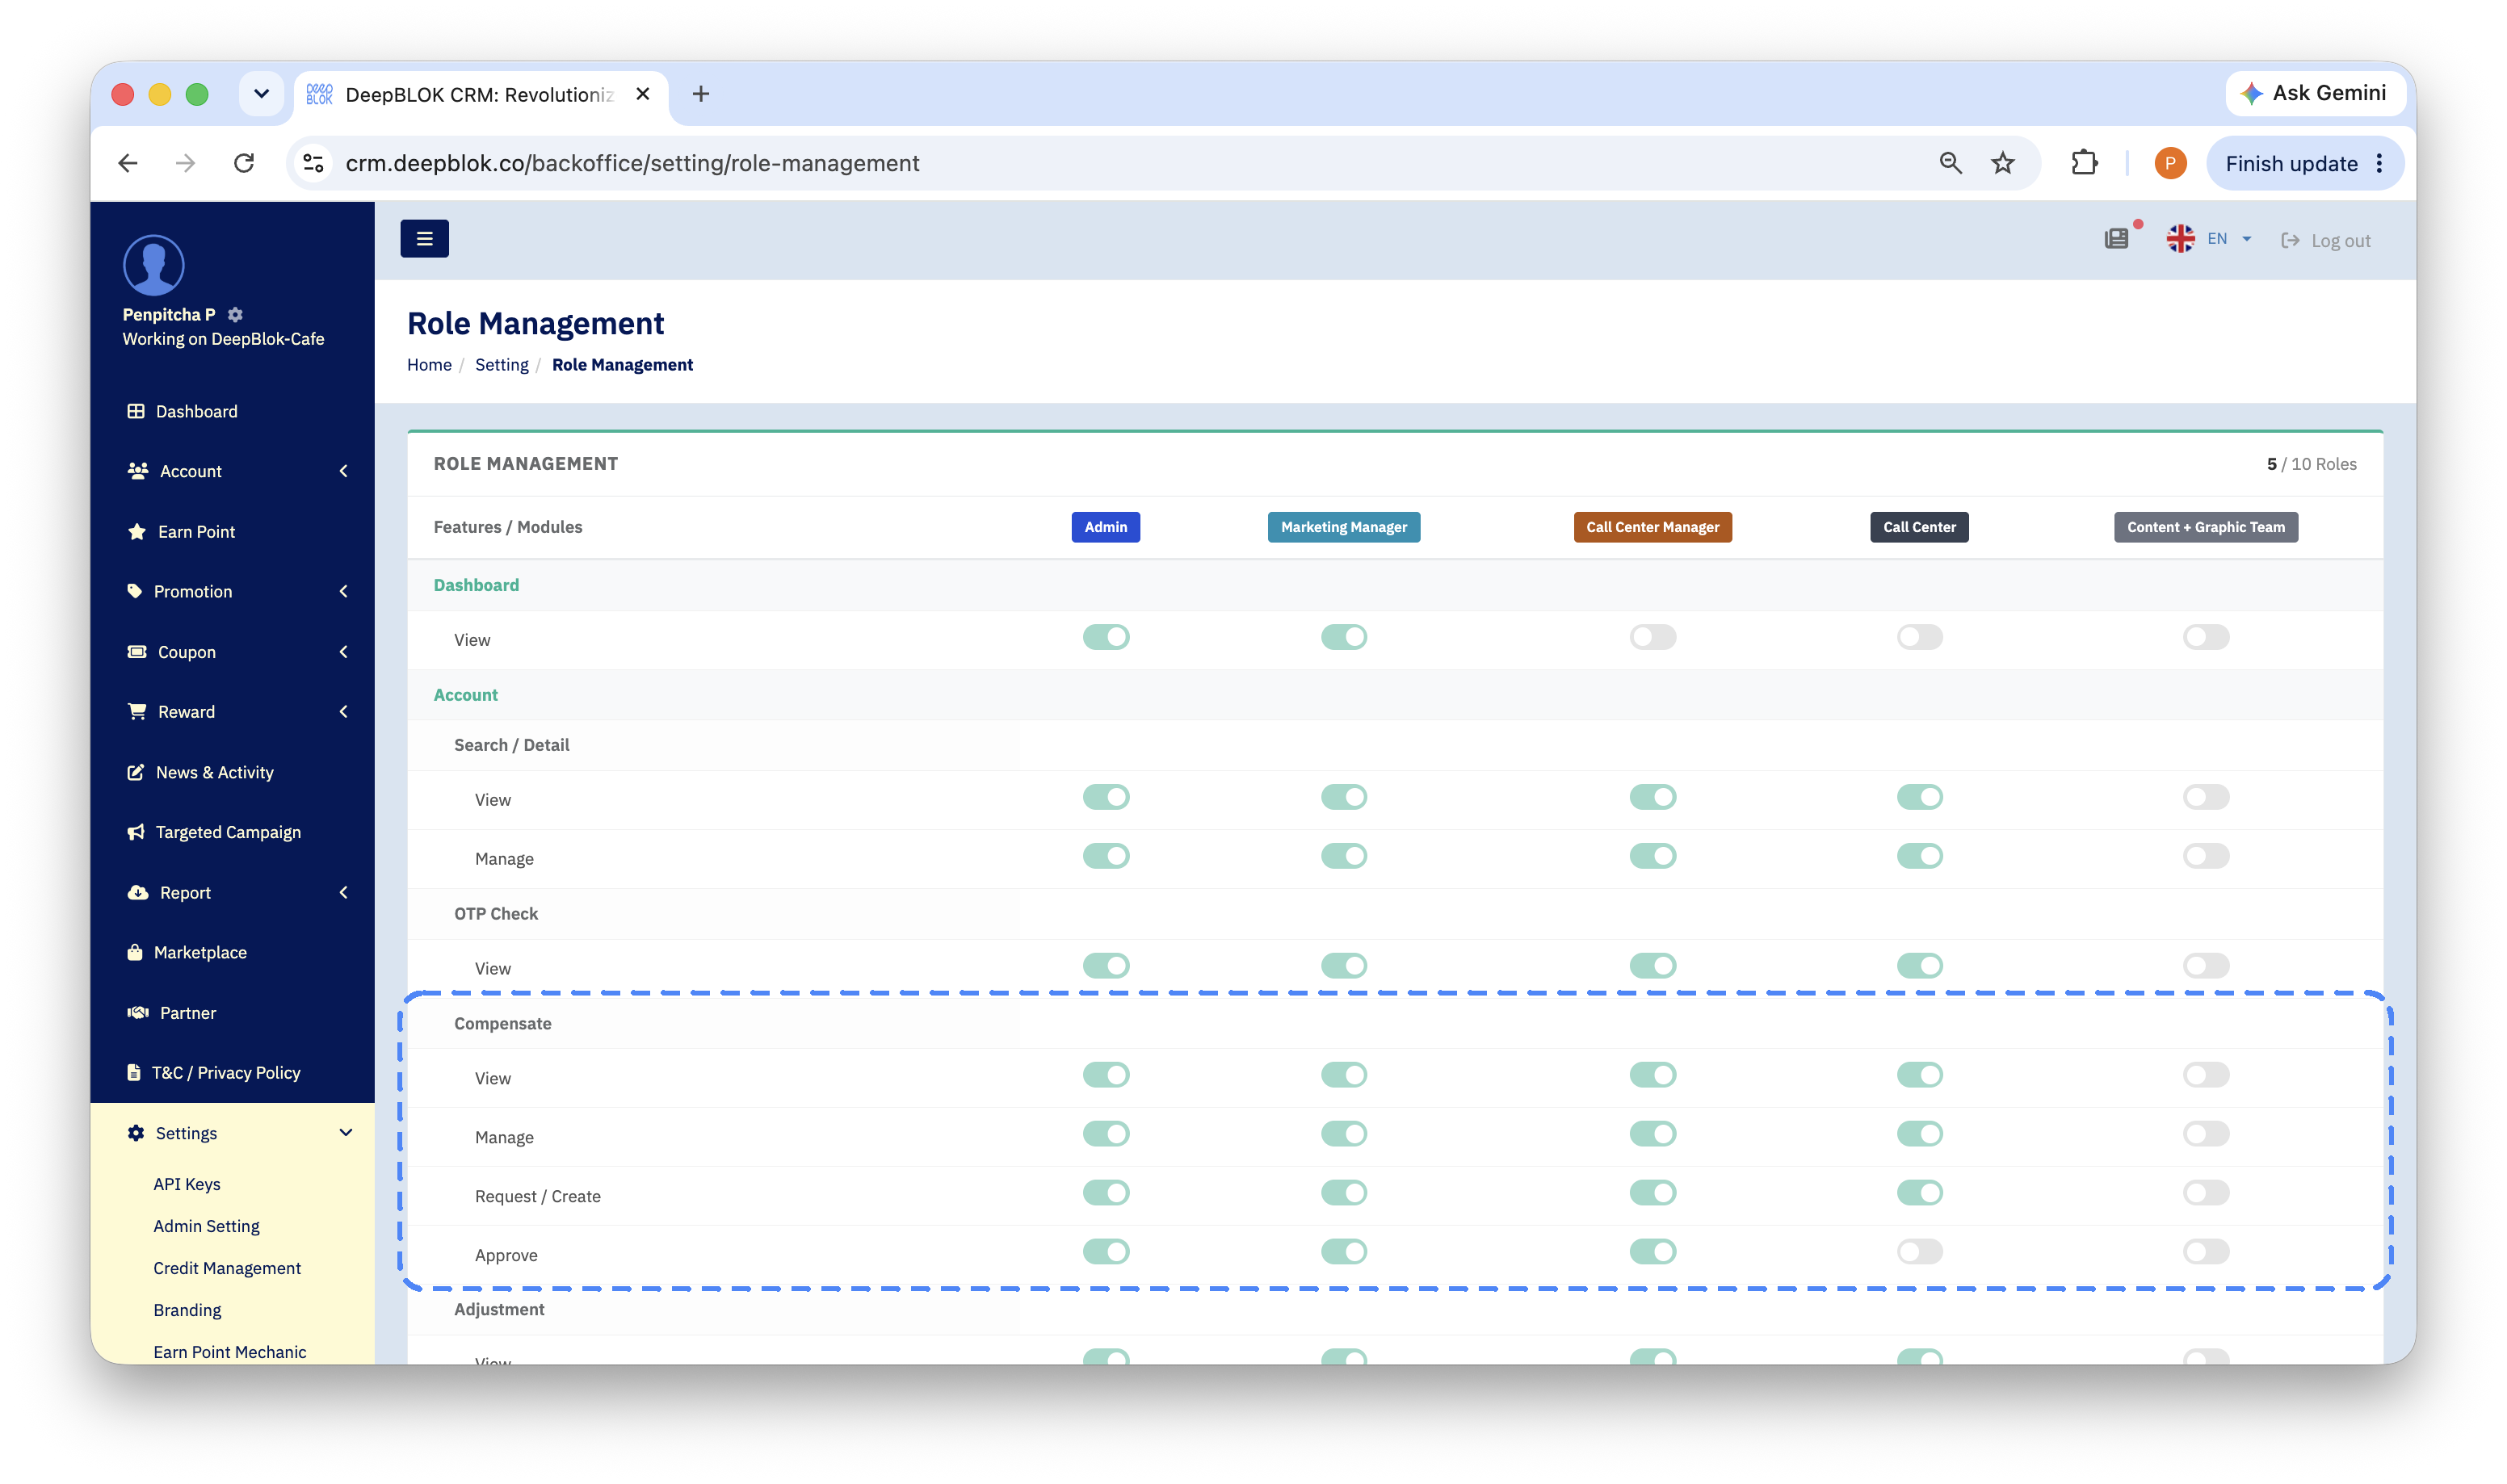
The system ships with 5 roles, shown as 5 columns in the permission table. Each has its own badge colour so you can tell them apart quickly elsewhere in the product, such as the Role column on the admin list page.
1. Admin (dark blue badge) The role with the widest access in the table — viewing, managing, raising records and approving them. It suits business owners, store managers, and anyone who has to look after the whole system, including creating and editing other admin accounts. Keep the number of these small and grant it only where it's genuinely needed.
2. Marketing Manager (light blue badge) In the Account module this role is granted everything Admin is — viewing, managing, raising records and approving them — including Segmentation, which is what builds customer groups. It suits the person running campaigns who needs customer data in full and needs to approve their own records.
3. Call Center Manager (orange badge) The role for a customer-care team lead. In the Account module it matches Marketing Manager almost line for line, approvals on compensation and adjustments included. The one difference is Segmentation, which is off — so it looks after individual customers in full, but doesn't do the grouping work.
4. Call Center (black badge) The role for staff answering calls or customer chats. View, Manage and Request / Create are on, so they can raise compensation and adjustment records — but Approve is off, and so is Segmentation. It's built so the front line can do the whole job with someone else signing it off.
5. Content + Graphic Team (grey badge) The role for the content and design team. Every line in the Account module is off, so it reaches no member data at all — which suits people working on content and artwork who never need to touch customer records. Before assigning it, scroll the other modules on the Role Management page to see what it does have.
📌 Good to know: the top right of the permission table shows a role count reading
5 / 10 Roles— the system supports up to 10 roles, and 5 are configured today. If your team needs a permission set that none of these 5 matches, talk to the DeepBLOK team that looks after your account.

Read the permission table in 3 layers
Read left to right: work out what the row is, then follow across to see whether the role you care about has it switched on.
- The module name — green text on a grey band, such as
DashboardandAccount. These are the top-level areas of the product. - The sub-feature name — indented one level, such as
Search / Detail,OTP Check,Compensate,Adjustment. These are pages or jobs inside that module. - The action name — indented deepest, such as
ViewandManage. This is what can actually be done, and it's the line that carries a toggle to read.
Each cell is read from the colour of the toggle: a green toggle pushed right means granted; a grey toggle sitting left means not granted.
The 4 actions in the table mean distinctly different things, and knowing them makes role choices much more precise.
📌 Good to know:
Request / CreateandApproveare deliberately separate, and you can see it working on theCall Centerrole — it can raise a compensation or adjustment but can't approve one, so anAdmin,Marketing ManagerorCall Center Managerhas to sign it off. The separation of who raises and who approves is built into the role itself.