

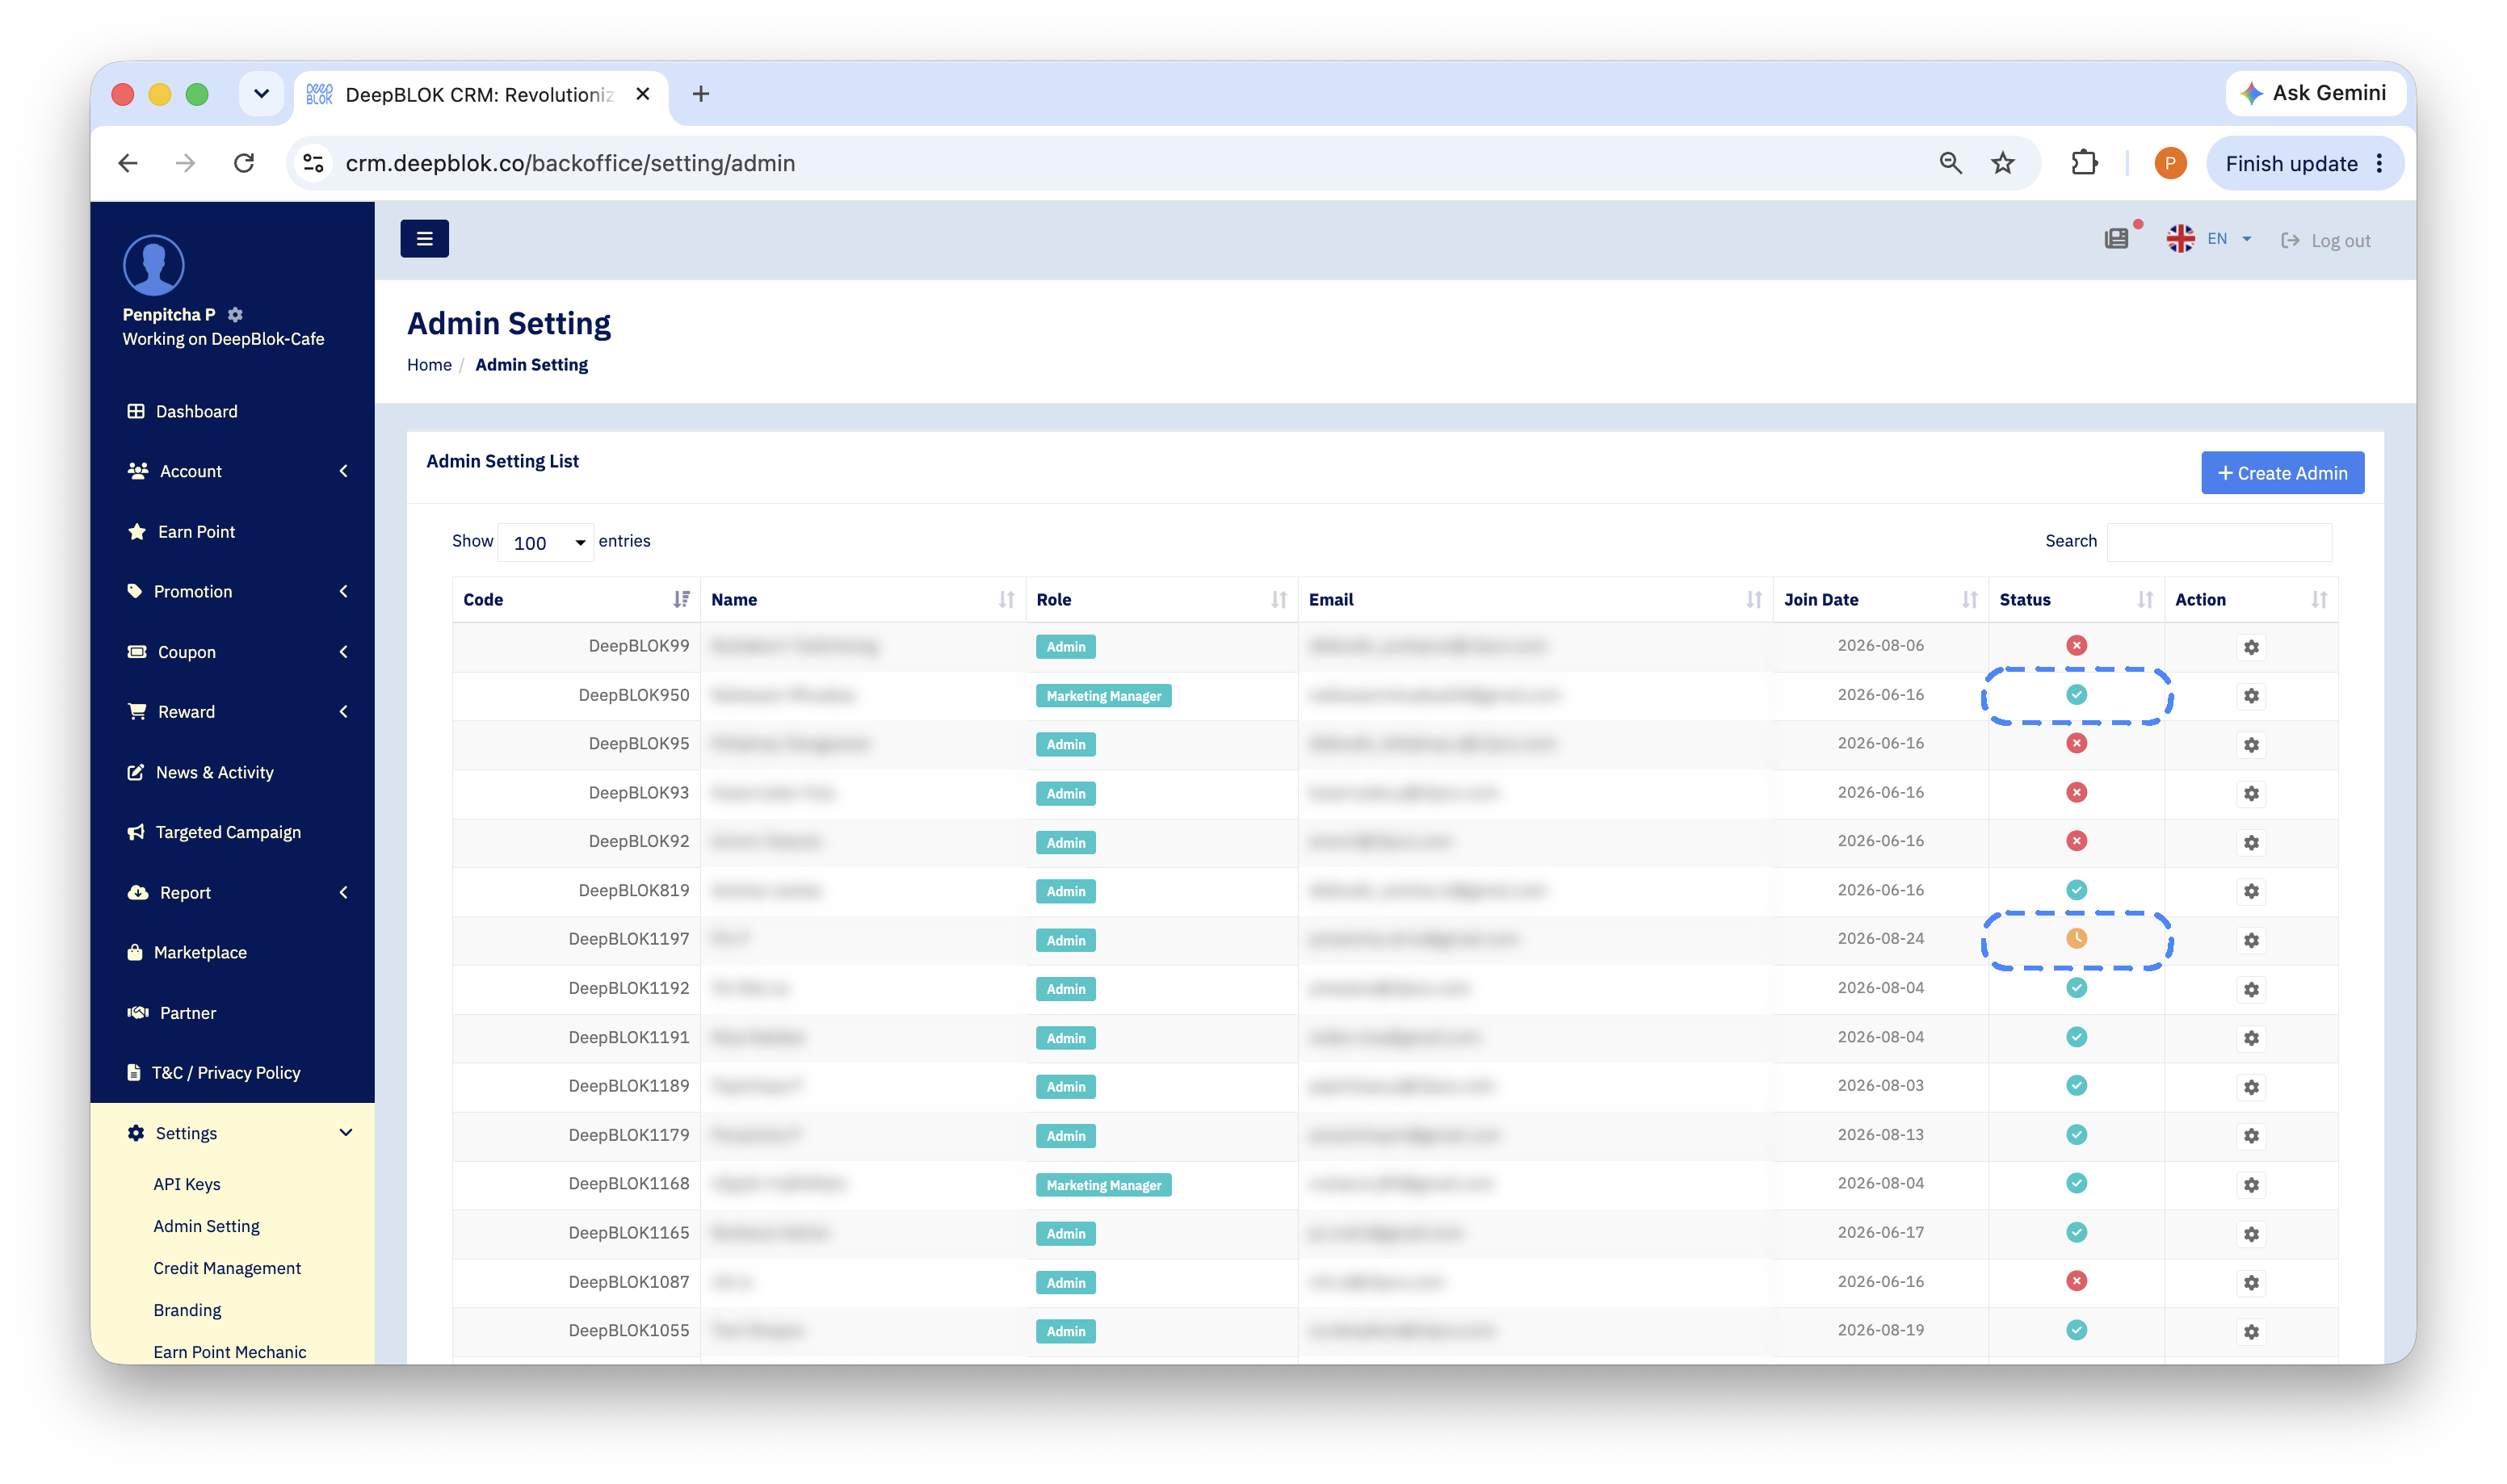
These 2 symptoms have different fixes, and the thing that tells you which one to use is the icon in the Status column of the admin list. An account that has never logged in successfully shows an orange clock; one that has been used shows a green check. Read the icon first and you won't lose time on a button that can't be clicked.
⚡ Quick Path:
Settings→Admin Setting→ read the icon in that row's Status column → ⚙️ → orange clock meansResend Email· green check meansEditthenReset Password
Requirements before you start
- Access to the Admin Setting menu — only the Admin role opens
Settingsand findsAdmin Settinginside it. If you can't see the menu, ask someone who can, and check what each role covers in the "What each role can do" article. - The email address the account was created with — to confirm it's spelled correctly and that it's a mailbox the person can actually open.
- A way to reach the person directly — the temporary password goes to their email, and you'll want them opening it right after you send.
⚠️ Watch out: don't let 2 people share one admin account as a temporary workaround. Every action is logged under the account holder's name, so sharing makes it impossible to tell afterwards who did what.
Read the status icon first, then choose the route
The Status column in the admin list isn't text — it's an icon, and that icon decides the route.
The fix in 4 steps
1. Open the admin list and find that person's row
In the left sidebar, open Settings at the bottom. It expands inline with a pale-yellow highlight. Then open Admin Setting.
The page is titled Admin Setting List and its columns are Code · Name · Role · Email · Join Date · Status · Action. Use the Search box at the top right of the table to find the name or email of the person who can't get in.
2. Read the icon in that row's Status column
Match it against the table above and note which one that row shows. This step is important, because the buttons available differ by status.
3. Fix it according to the status you saw
Do one of the following, matching the icon from step 2 — not both. An orange clock takes 3.1; a green check takes 3.2.
3.1 Orange clock — resend the invitation
Before sending, check the address in that row's Email column is spelled correctly, because a resend goes to the same address.
- Click the ⚙️ icon in that row's
Actioncolumn. A small menu opens. - Choose ✉️
Resend Email. The system sends the invitation to that admin's email address again. - Tell them to check their inbox — and their junk folder.
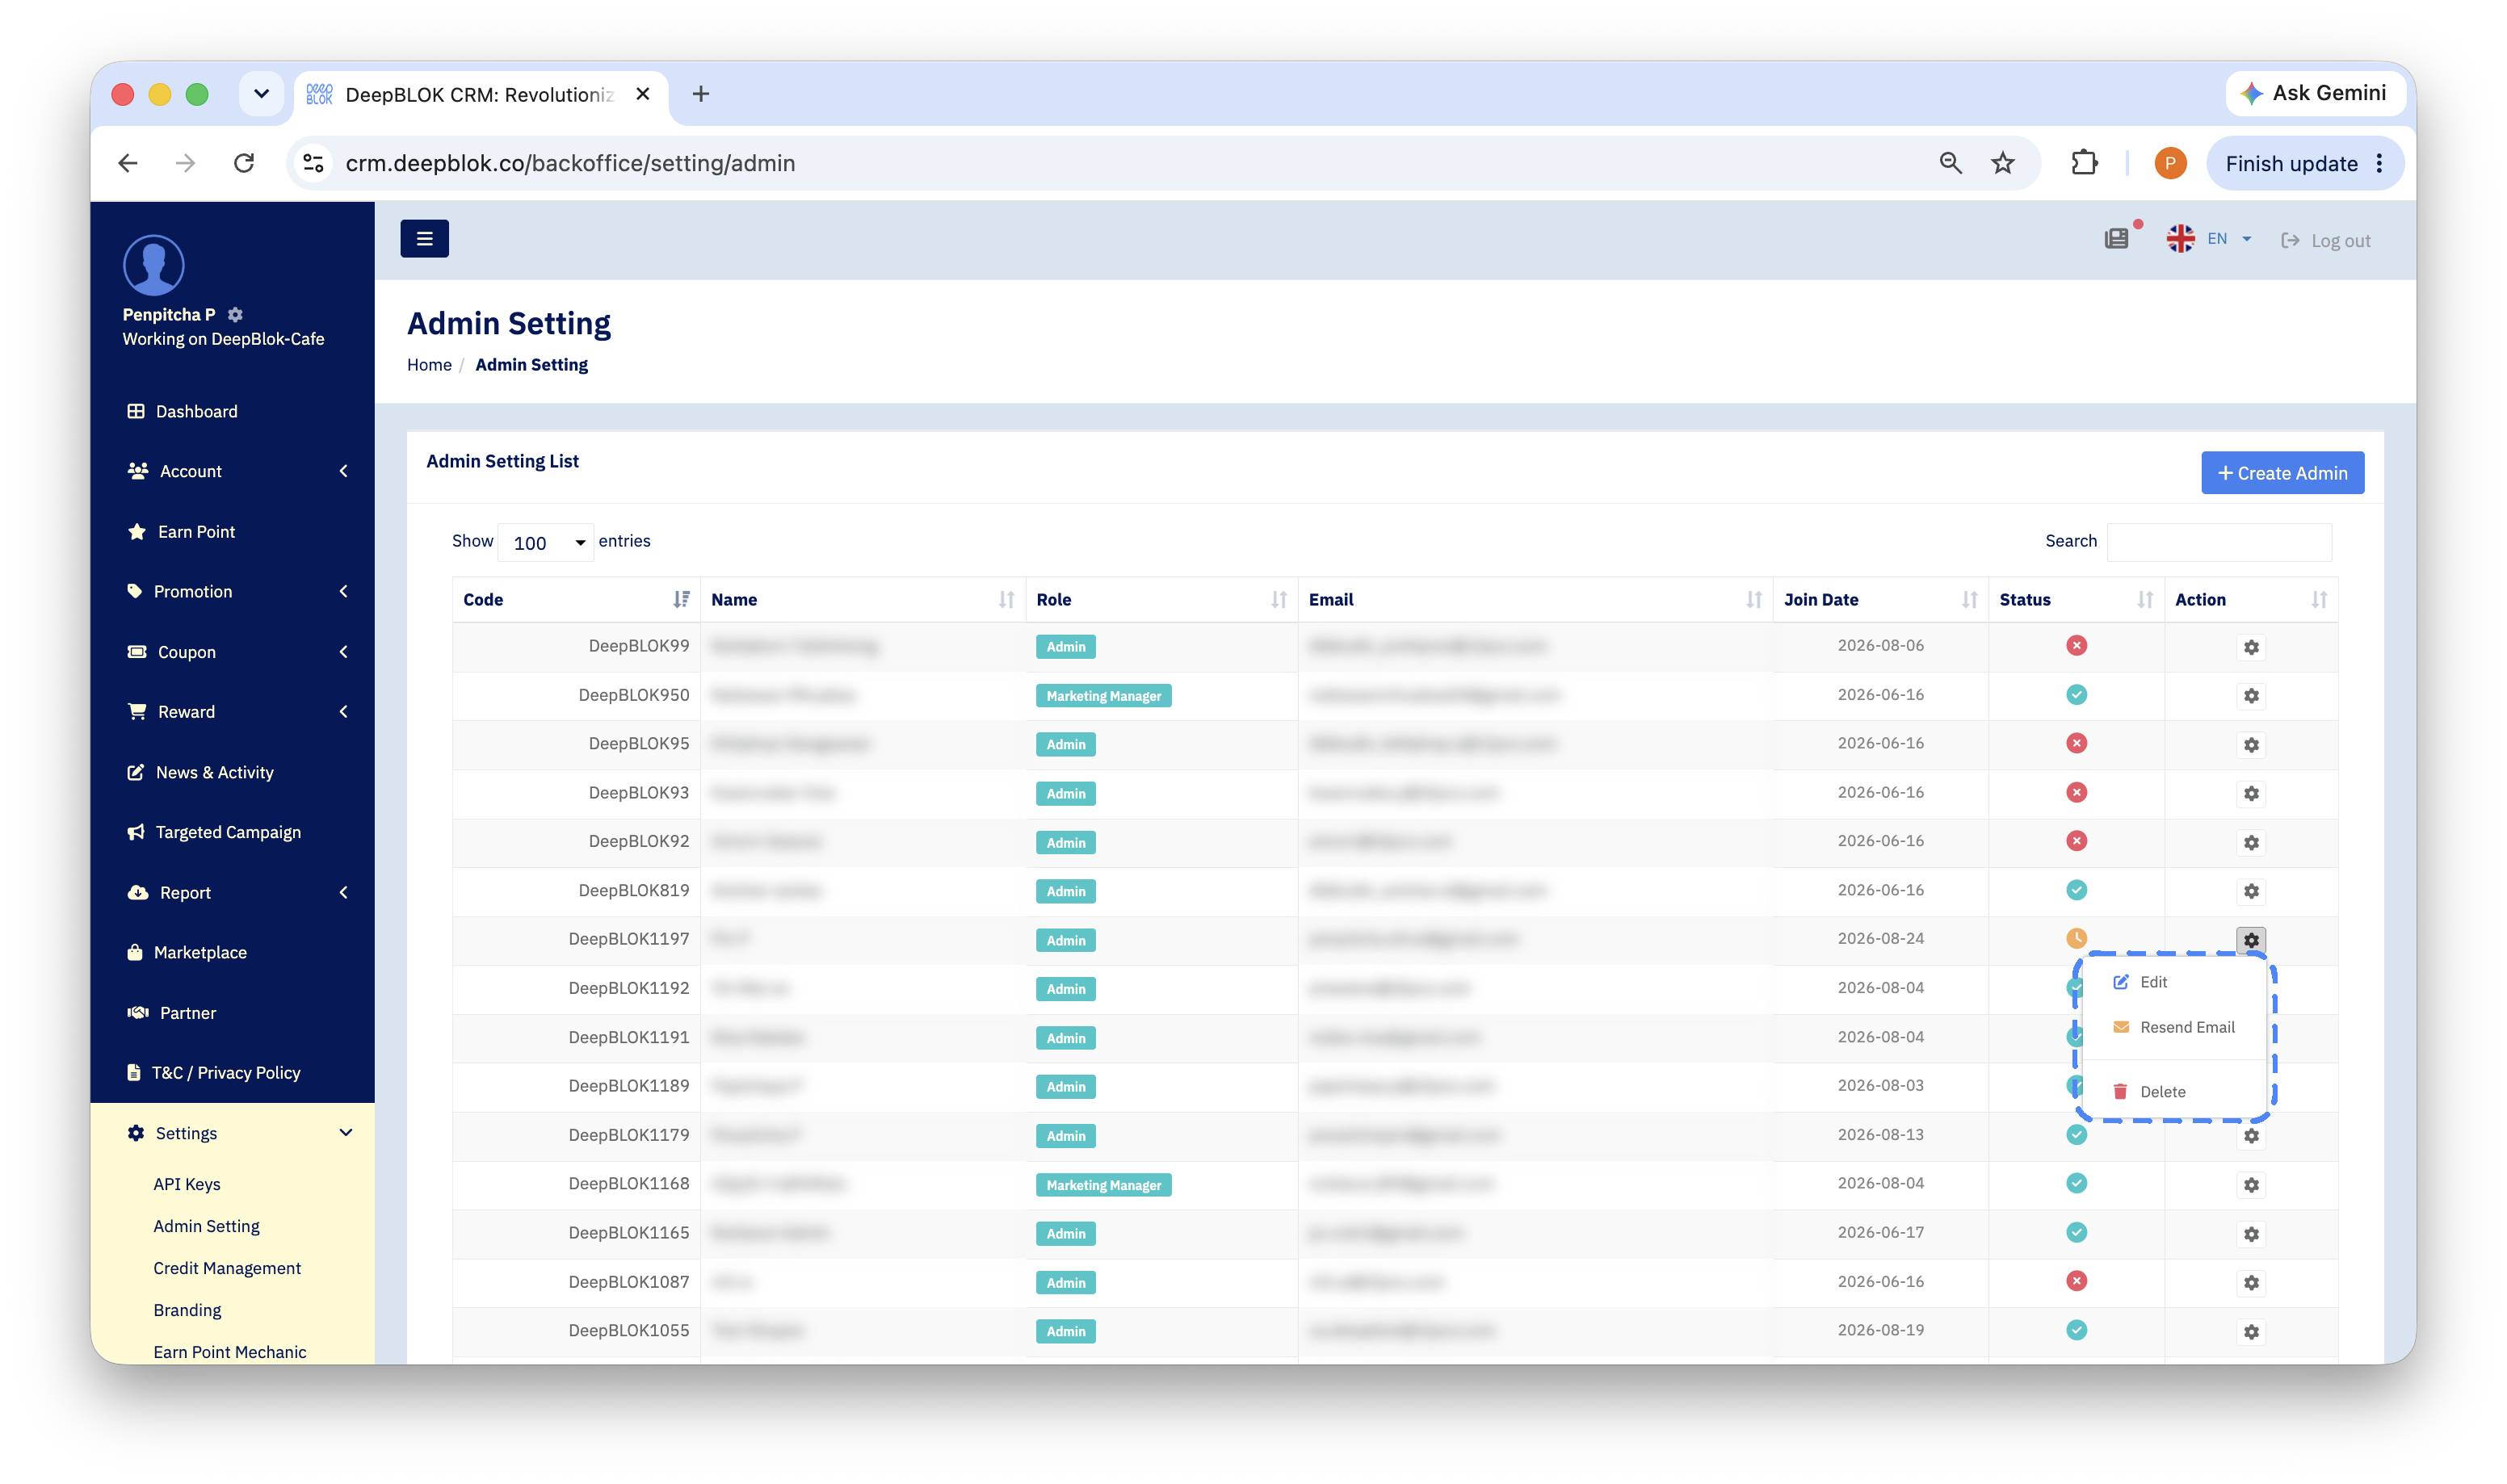
The full step-by-step, including what to check before sending, is the "How to resend an Admin invitation" article.
3.2 Green check — reset the password
An account already in use takes a different route.
- Click the ⚙️ icon in the
Actioncolumn and choose ✏️Edit. TheAdmin Editpage opens. - Look at the
Admin Settingpanel at the top of the page. Beside theEmail Addressfield there's a grey outline button, 🔑Reset Password. - Click it. A confirmation window titled
Confirm Password Resetopens — nothing is sent yet. - Read the destination email in the pale blue box inside that window. It states which address the temporary password will go to.
- Once you've confirmed the address is right, click the blue ✈
Send Emailbutton.