

"Sent" can mean several different things in the system. The campaign may still be a draft; it may be scheduled for a time that hasn't arrived; it may have gone out successfully to a target group smaller than anyone expected; or it may have delivered coupons into customers' accounts with no message going out at all. This article works through all four, starting with what the campaign list tells you straight away.
⚡ Quick Path:
Targeted Campaign→ read that campaign's status → read the Reached count → open the campaign and check the target group → check the switch in the Send notification section
Requirements before you start
- The campaign name or ID you're checking — to find it in the list. If you don't know it, use the
Create date & bycolumn to narrow down campaigns created around that time. - Access to the Targeted Campaign menu — if you can't find it, check what your role covers in the "What each role can do" article.
- At least one member account number from a customer who says they didn't receive it — this tells you whether that customer was in the target group at all, which is the fastest question to answer and rules out half the possible causes.
📌 Good to know: all 5 checks are read-only — none of them resends the campaign. Work through them before deciding to send again, because resending without knowing the cause usually produces the same result.
The 5 Checks
1. Open the campaign list and read that campaign's status
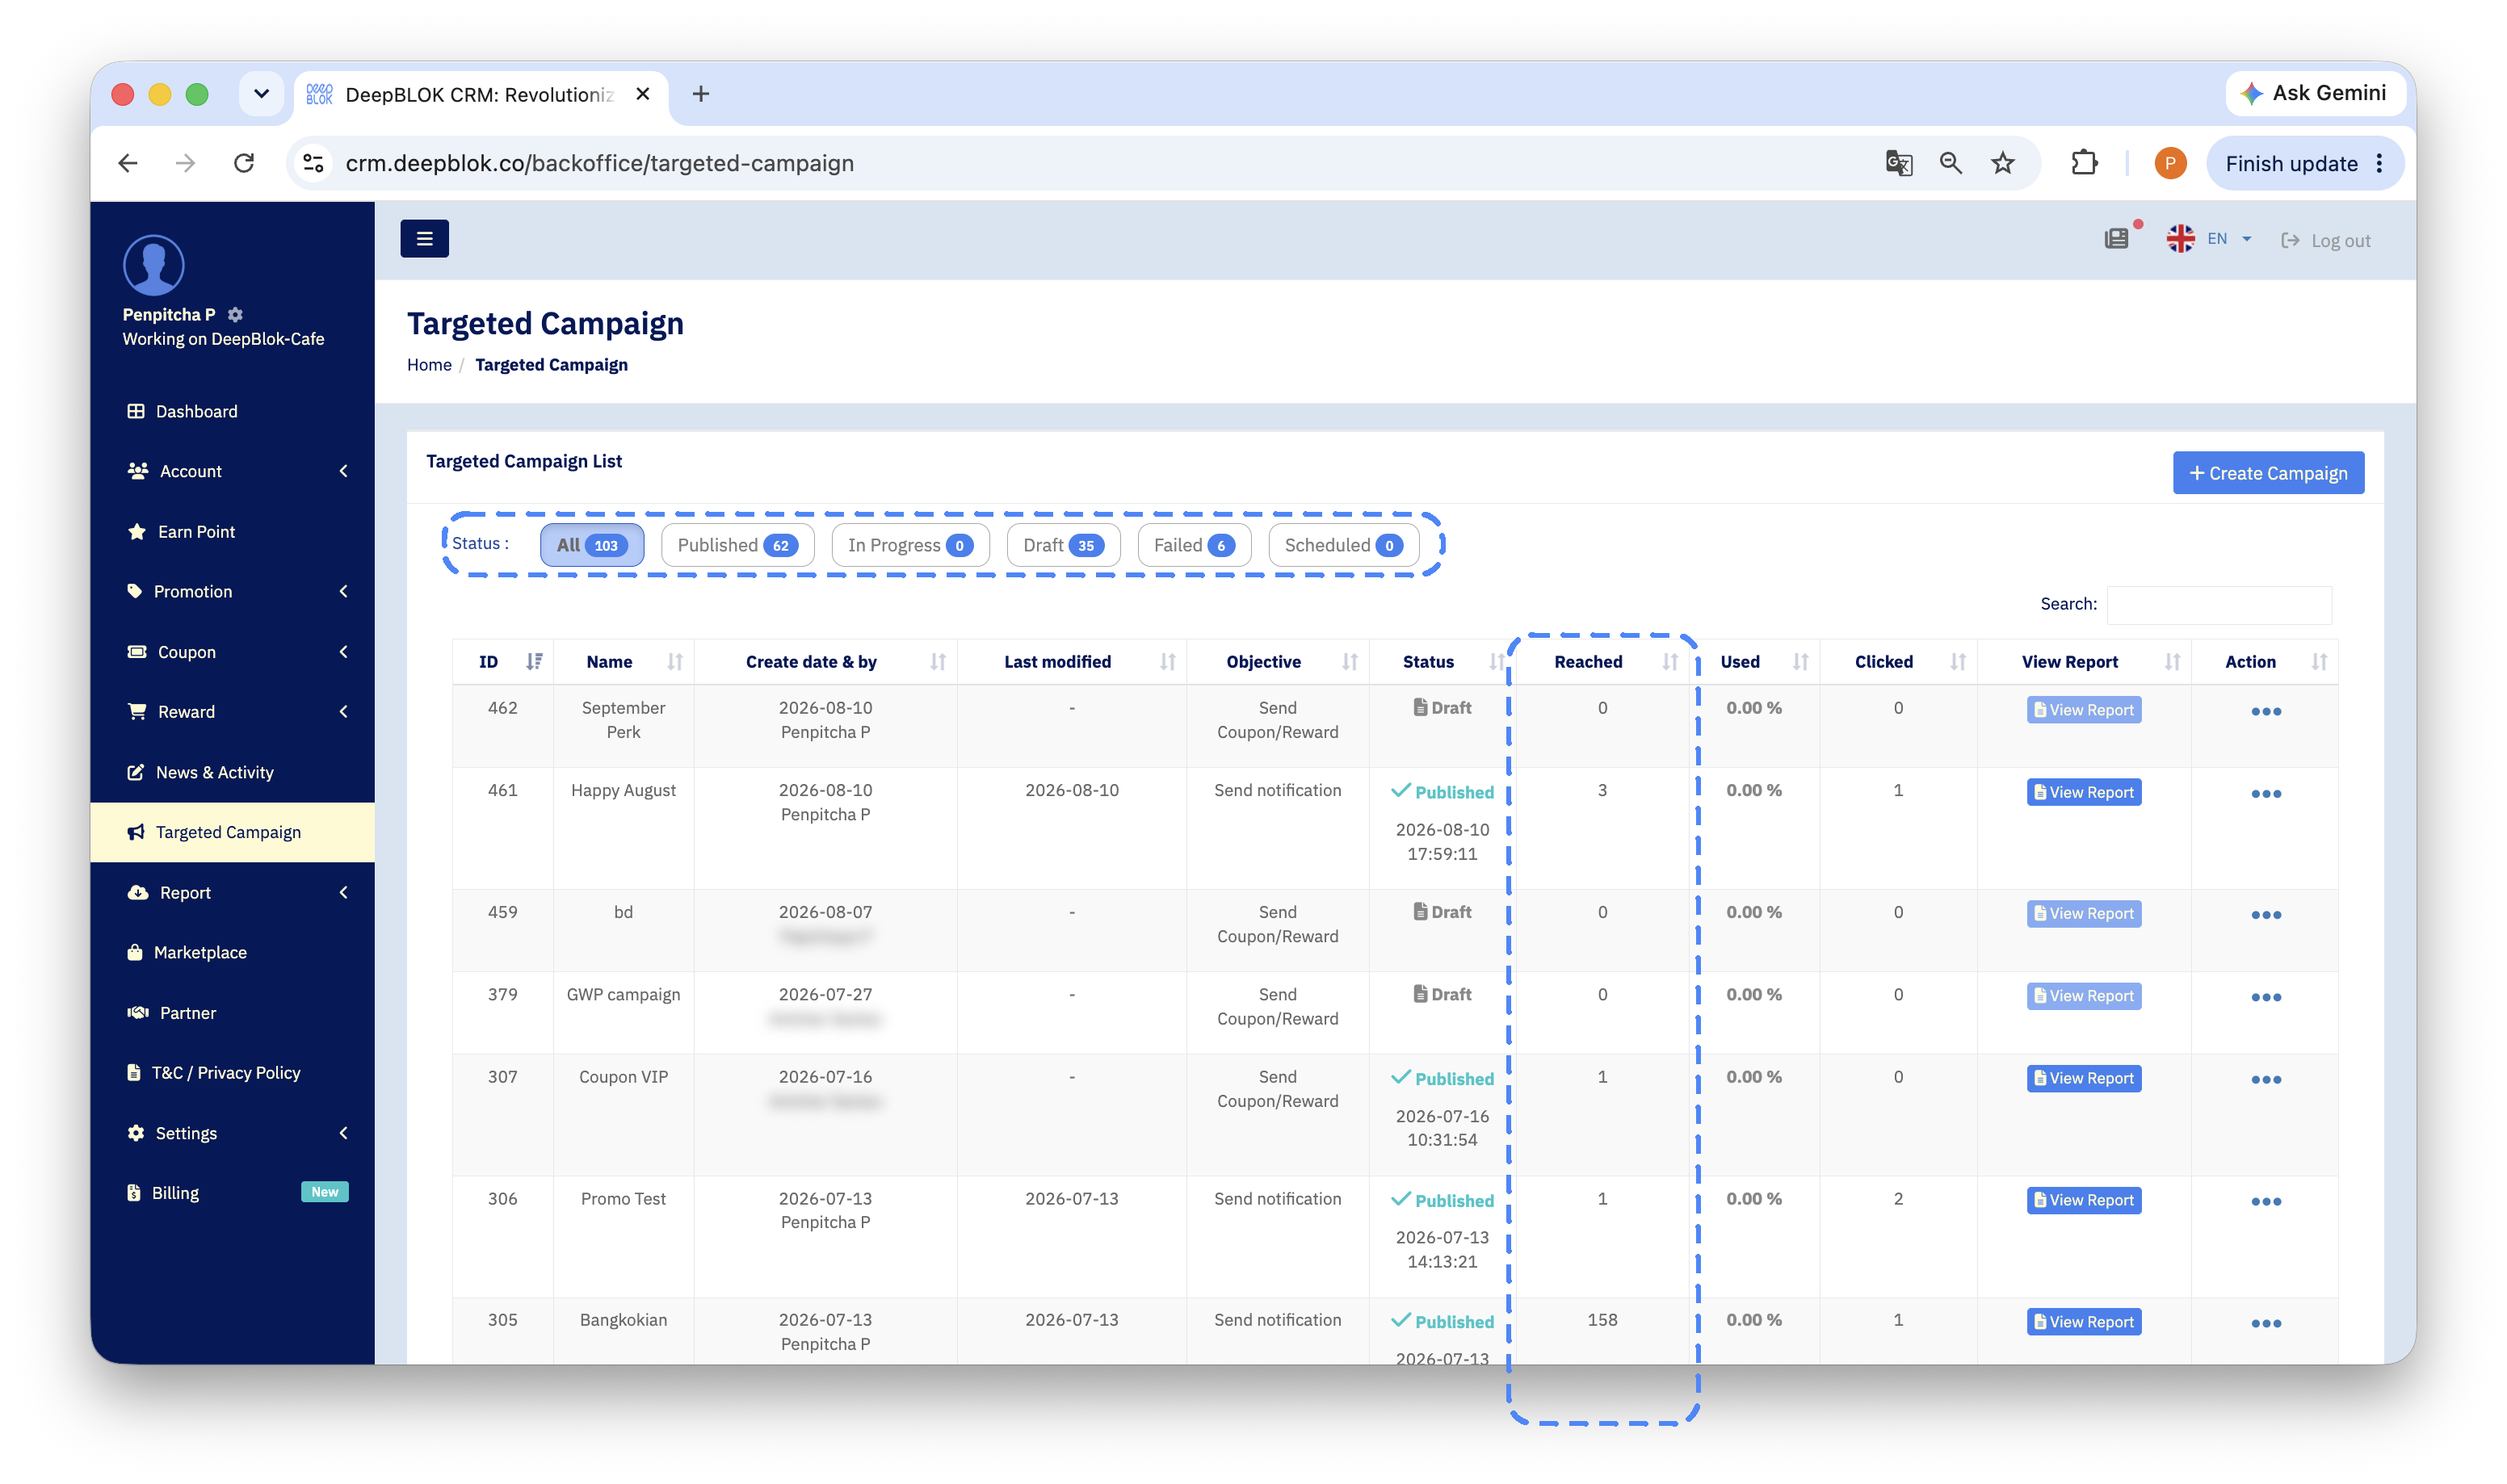
Go to Targeted Campaign in the left sidebar. The page is titled Targeted Campaign List, with status filter chips above the table, each carrying a live count. Use the Search box at the top right to find the campaign.
The status is the first answer, and often the only one you need.
2. Read the Reached, Used and Clicked numbers
The same row carries 3 numbers that tell you which side the problem is on.
1. Reached How many people the campaign got to. If it's 0, or far below what you expected, the problem is the target group — go to check 3.
2. Used Shown as a percentage — the share that has been used. If Reached has a number but Used is zero, it arrived and nobody has used it yet, which is a different problem from the one the customer reported.
3. Clicked How many times the message was clicked. If Reached has a number but Clicked is 0 on a campaign that has a button, go to check 4 to see whether a message went out at all.
📌 Good to know: when Reached has a number but the customer insists they saw nothing, suspect check 4 first. The coupon may already be in their account with nothing having told them so.
3. If Reached is lower than expected, open the campaign and check the target group
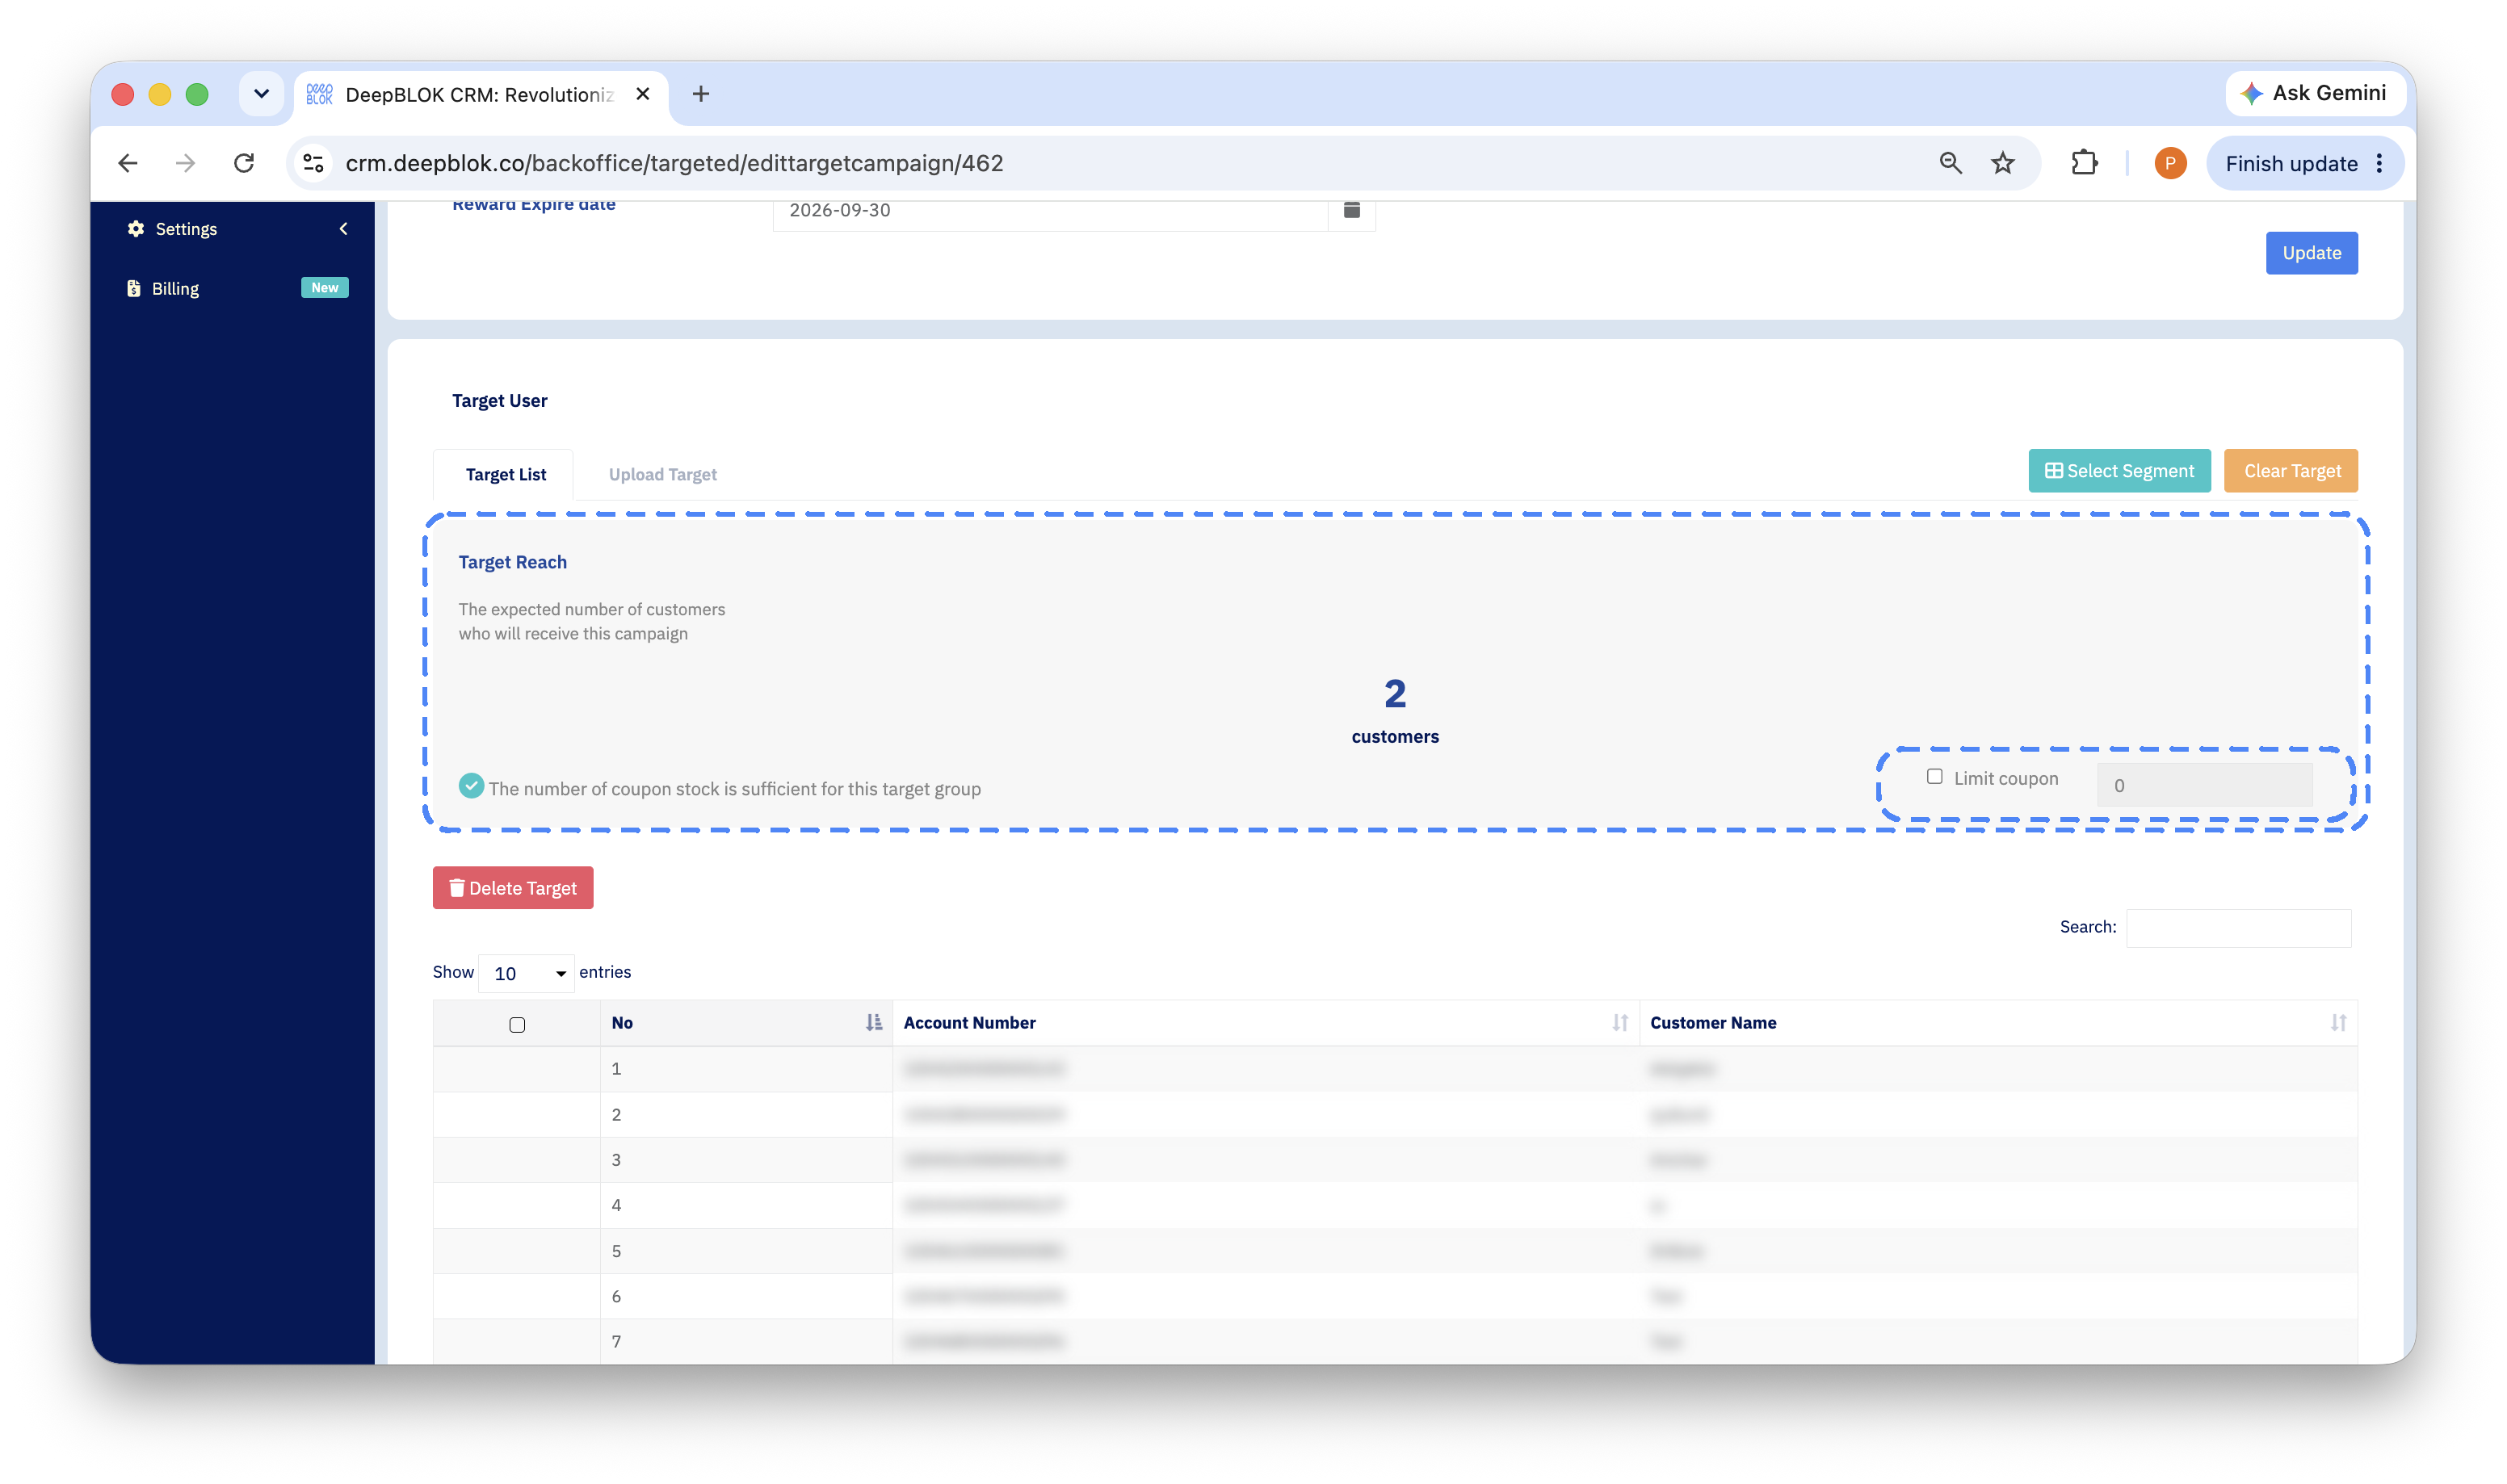
Open the campaign and scroll to the Target User section. How you check depends on how the target group was chosen.
If it was chosen by segmentation Look at the Target Reach Summary section, which has 3 columns.
SELECTED SEGMENTATION— the name of the segment chosen. Check it's the one you meant.EXPECTED REACH— the number of customers expected to receive it. An unusually low figure here means the segment was small to begin with.DELIVERY SETTINGS— aLimit couponcheckbox with a number field beside it. If that box is ticked, the system sends to only the number entered, not to the whole segment. This is the most common reason Reached comes in below the size of the segment.
If it was chosen by uploading a list After saving, a full-width green bar appears under the input, stating how many accounts were verified. Compare that number with how many rows you uploaded. If it's lower, some of those numbers didn't match a member account.
Check the customer who reported it directly Look for that customer's member account number in the target list table. If they aren't in it, the matter ends there — the customer wasn't in the group that was sent to, rather than the send having failed.
4. Check whether the switch in the Send notification section is on
Scroll to the campaign's Send notification section. It holds a single switch, and it is off by default. It turns green when on.
With the switch on, check these 3 things.