

The standard signup fields tell you who your customers are, but not what they like. If you want to know how they take their coffee, which province they live in, or what kind of promotion interests them, you can add up to 5 questions of your own in Settings > Register Form Management, in any of 5 answer formats.
⚡ Quick Path:
Settings→Register Form Management→ scroll toCustom Questions→+ Add Question→ type the question in both EN and TH → pick anAnswer Type→ setValidation Rules→Save
Requirements before you start
- An account with the Admin Role — you need access to
Settings > Register Form Management. - Your questions written in both Thai and English. The system requires both; you can't skip one, even if all your customers are Thai.
- Your answer options decided if you're using a multiple-choice format — again in both languages.
- Know how many questions you need — 5 is the hard maximum. Pick only the ones whose answers you'll actually act on.
💡 Ask as little as you can get away with. Every question is one more step between a customer and a completed signup. Start with one or 2 that clearly serve the business, and add more later if they earn their place.
When customers see the questionnaire
Once you add questions, the customer's signup form splits into 2 steps:
Worth knowing before you test — with no questions configured, the form stays a single page.
Build your questionnaire in 5 steps
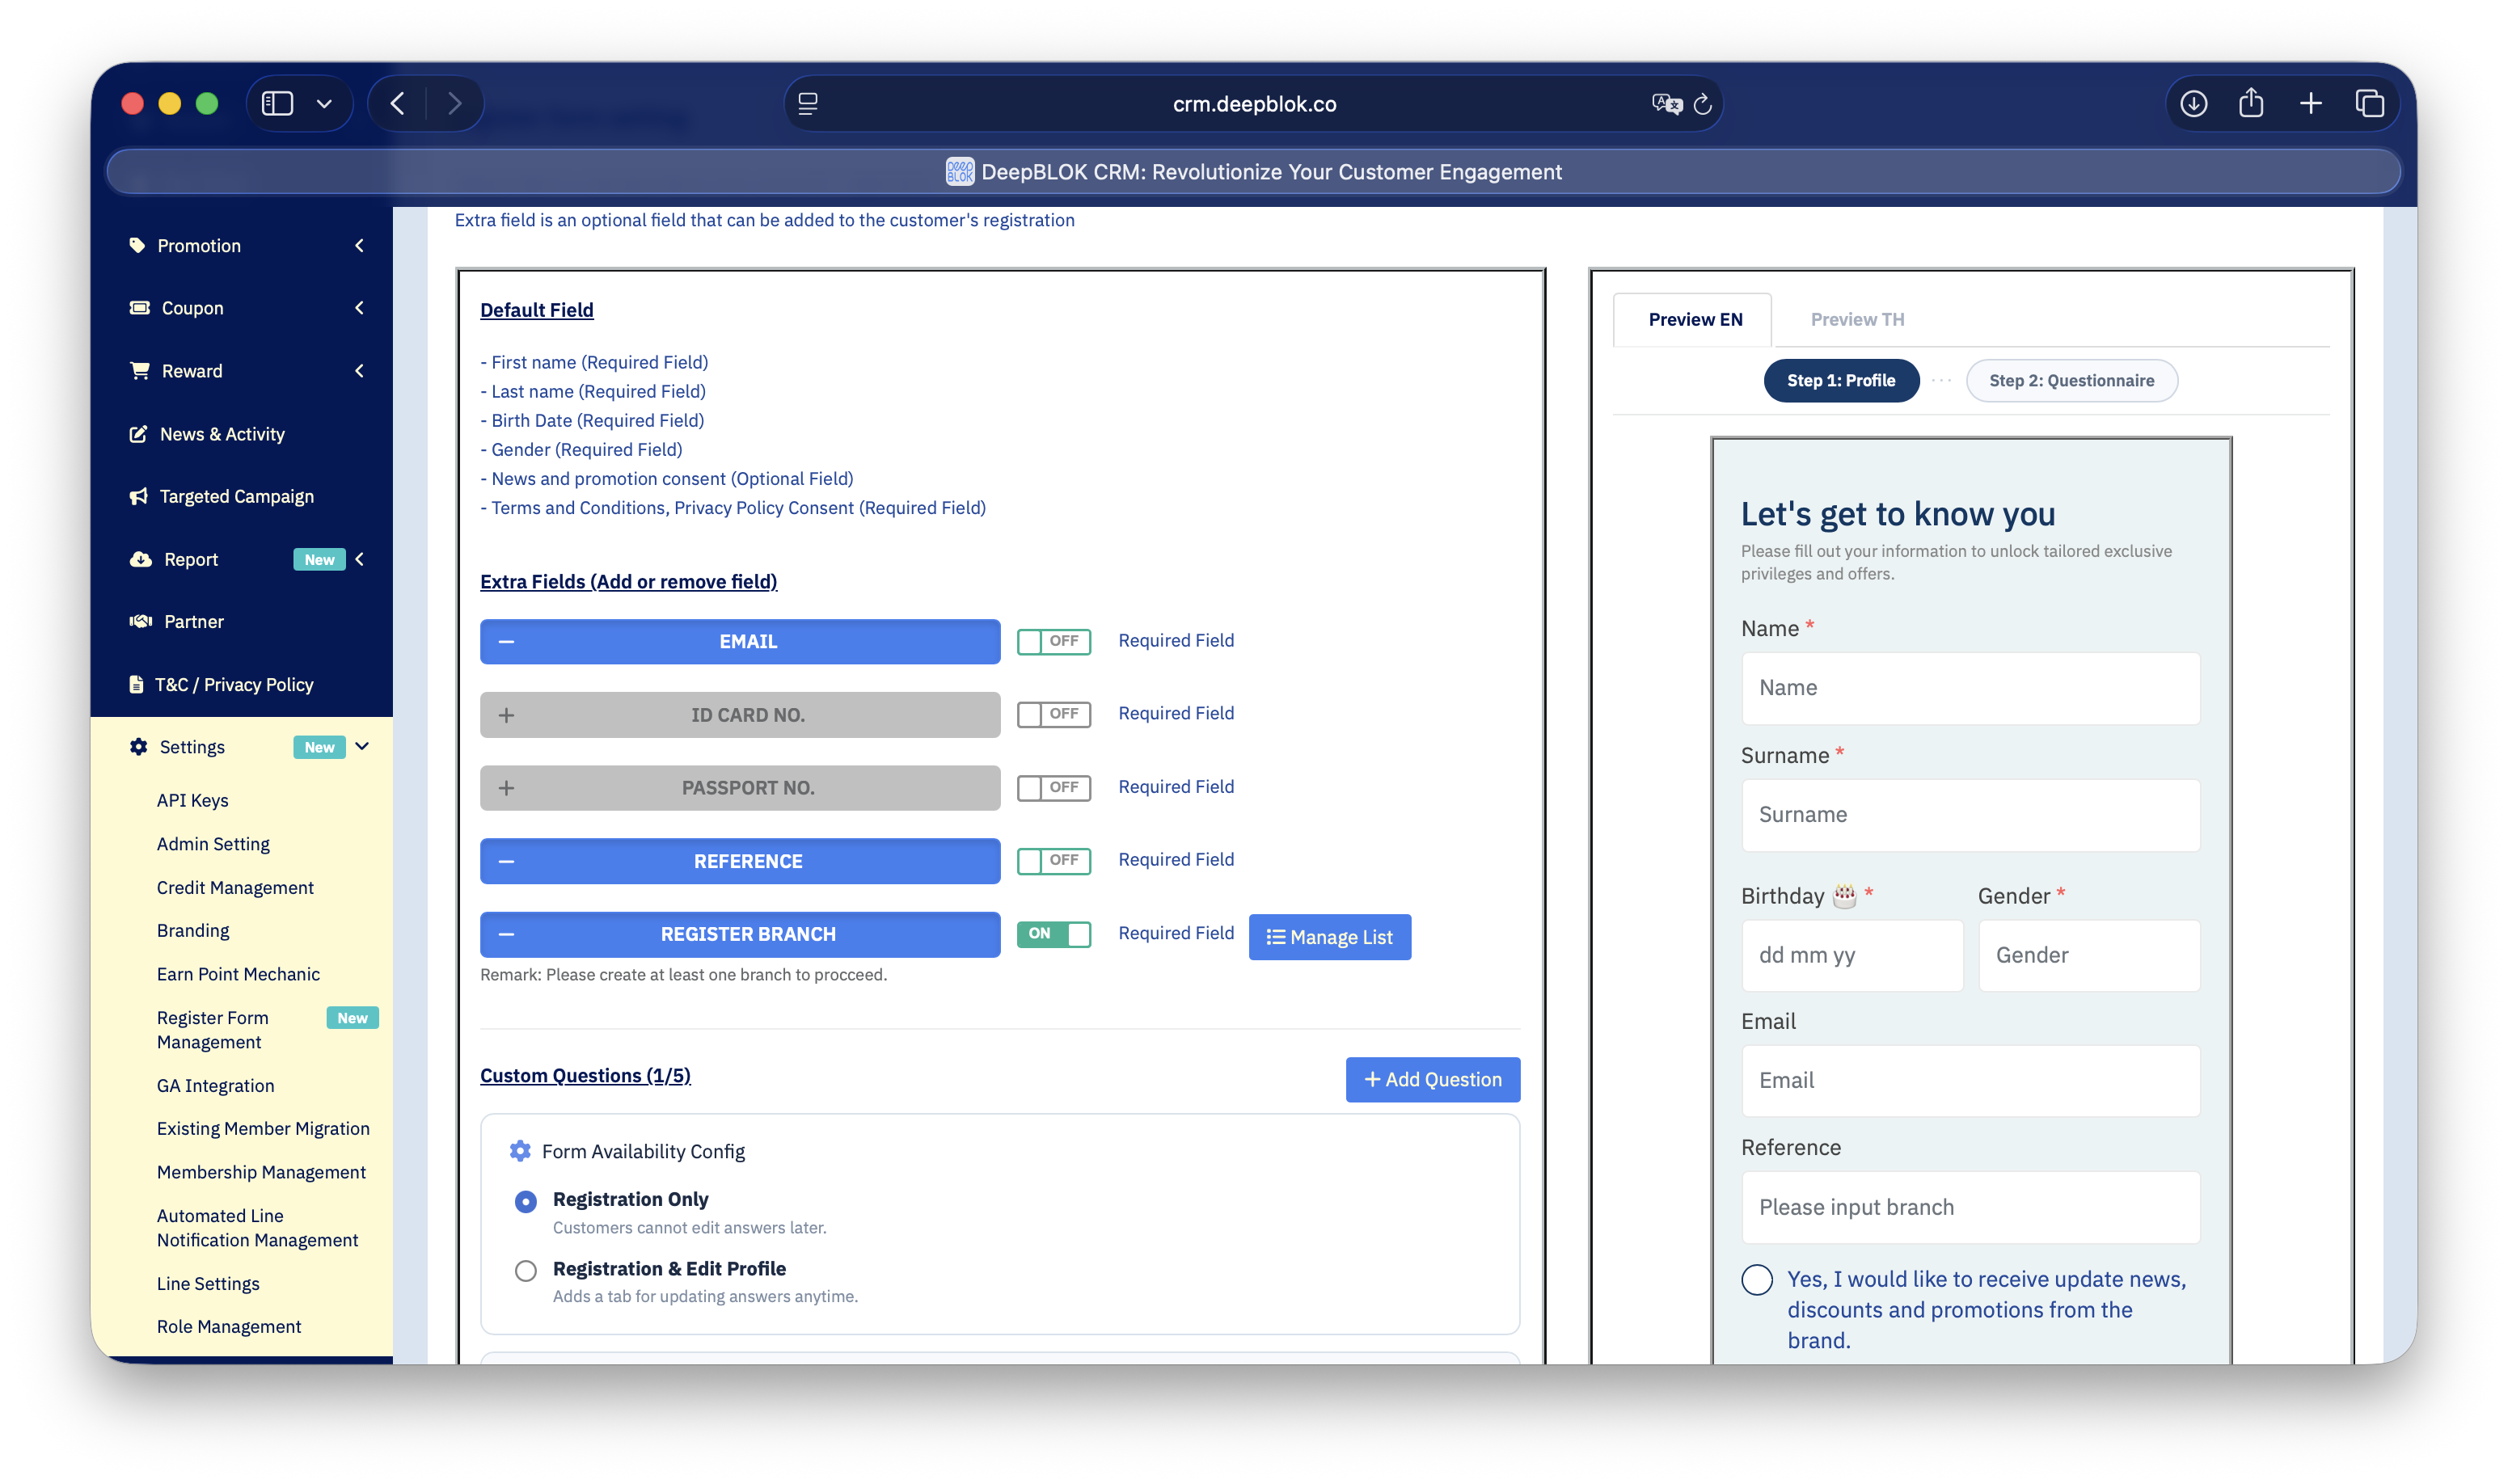
Step 1: Open Register Form Management and find Custom Questions
In the left sidebar, click Settings, then Register Form Management. Scroll below the Extra Fields section to the Custom Questions panel — its heading shows how many you've used, e.g. Custom Questions (0/5).
Click the blue + Add Question button at the top right of the panel. It greys out once you have five.
Step 2: Write the question in both languages
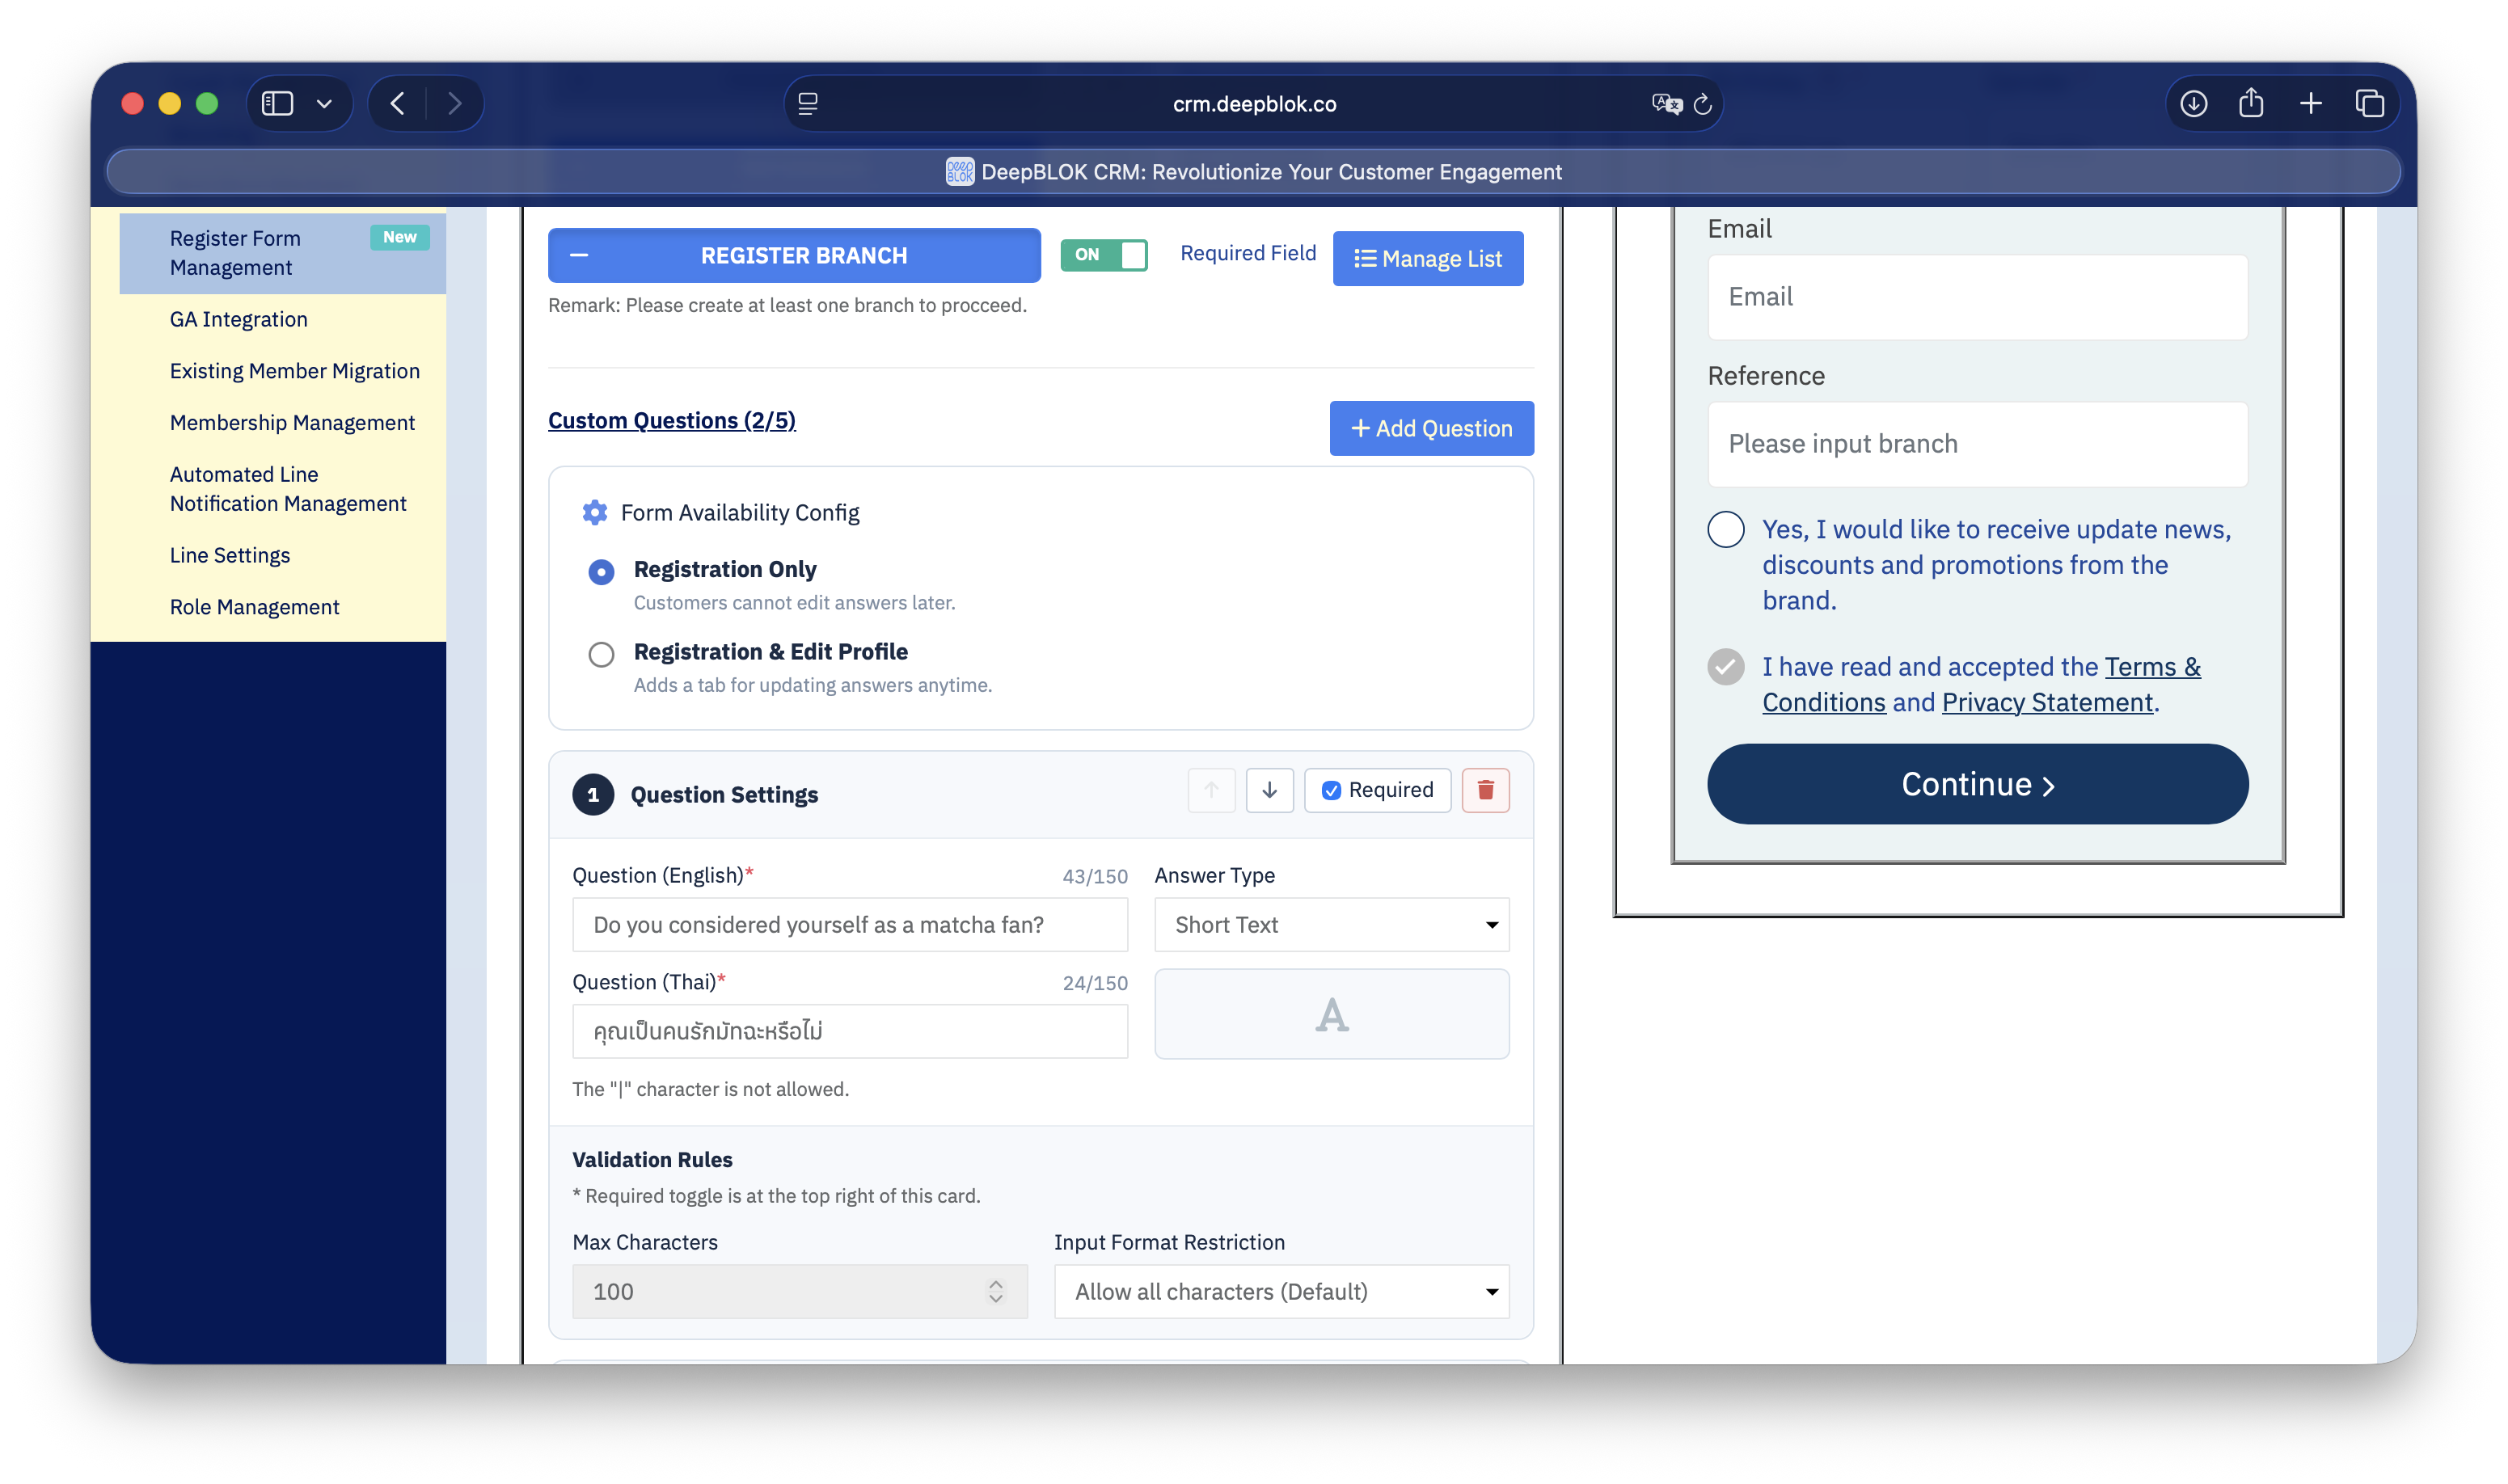
A new question card opens. Fill in both Question (English) and Question (Thai) — each carries a red *, so both are mandatory. Each takes up to 150 characters and shows a live counter as you type.
⚠️ The
|(pipe) character isn't allowed in questions. The system rejects it — there's a note under the field saying so.
Step 3: Choose the answer format
On the right of the card is an Answer Type dropdown with 5 options, each suited to a different kind of question:
💡 Prefer a multiple-choice format wherever you can. Free-text answers arrive spelled a dozen different ways and are painful to group. Multiple-choice answers can be counted and filtered immediately.
Step 4: Set the validation rules
Below the question fields sits a Validation Rules section whose contents change with the answer format you chose.
For Short Text and Paragraph
For Checkbox
Whether the question is mandatory is controlled by the Required checkbox at the top right of the card — not in Validation Rules (the section itself says as much).
Step 5: Add the answer options, then save
If you chose Dropdown, Radio, or Checkbox, an Options section appears:
- Click
+ Add Optionto add one at a time. - Each option needs 2 fields — English and Thai, same as the question itself.
- Options are capped at 80 characters each, and the
|character isn't allowed here either. - You can add up to 15 options; the add button greys out at the limit, and a counter beside it shows where you are.
- The red bin icon at the end of each row removes that option.
Click Save at the bottom right of the panel once every question is configured.
✅ Confirm it worked: open the real registration link in the LINE app and walk it end to end —
เริ่มใช้งาน(Get started) → phone number → OTP → fill in Step 1 and pressContinue. If Step 2 appears with all your questions and the right options, it's genuinely live.
📌 Note on the Preview tab: the
Preview EN/Preview THtab on the settings page is a rough layout aid and doesn't always match the real customer form. Trust the test in the LINE app.