

To send a coupon only to customers with a birthday this month, or only to those who have drifted away, the thing you need first is a customer group — built from the Segmentation menu. The group you build is what a campaign later sends to, which makes this the job that always comes before a campaign. Building one takes about 3 minutes, and it works for any login that can see Segmentation under the Account menu.
⚡ Quick Path:
Account→Segmentation→+ Add New Segmentation→ name it →Save & Next→+ Add new condition→Finish
📌 Read this before you start — this page creates real data. This menu creates, edits and deletes customer groups for real, and the groups you build get used by campaigns afterwards. Agree with your team first how groups should be named, and who looks after the ones already created.
Requirements before you start
- Permission for the Segmentation menu — look under
Accountin the left sidebar. IfSegmentationis not there, your login has not been given this permission, and we recommend asking an administrator on your team to grant it first. - The conditions you intend to use — age, birth month or membership tier, for instance. Decide which customers you want before you start, because every condition you add narrows the group.
- A group name your team will understand — the name appears in the group picker when a campaign is built, so a name that does not say who is in the group makes it easy to pick the wrong one.
The Segmentation List page and the columns worth reading
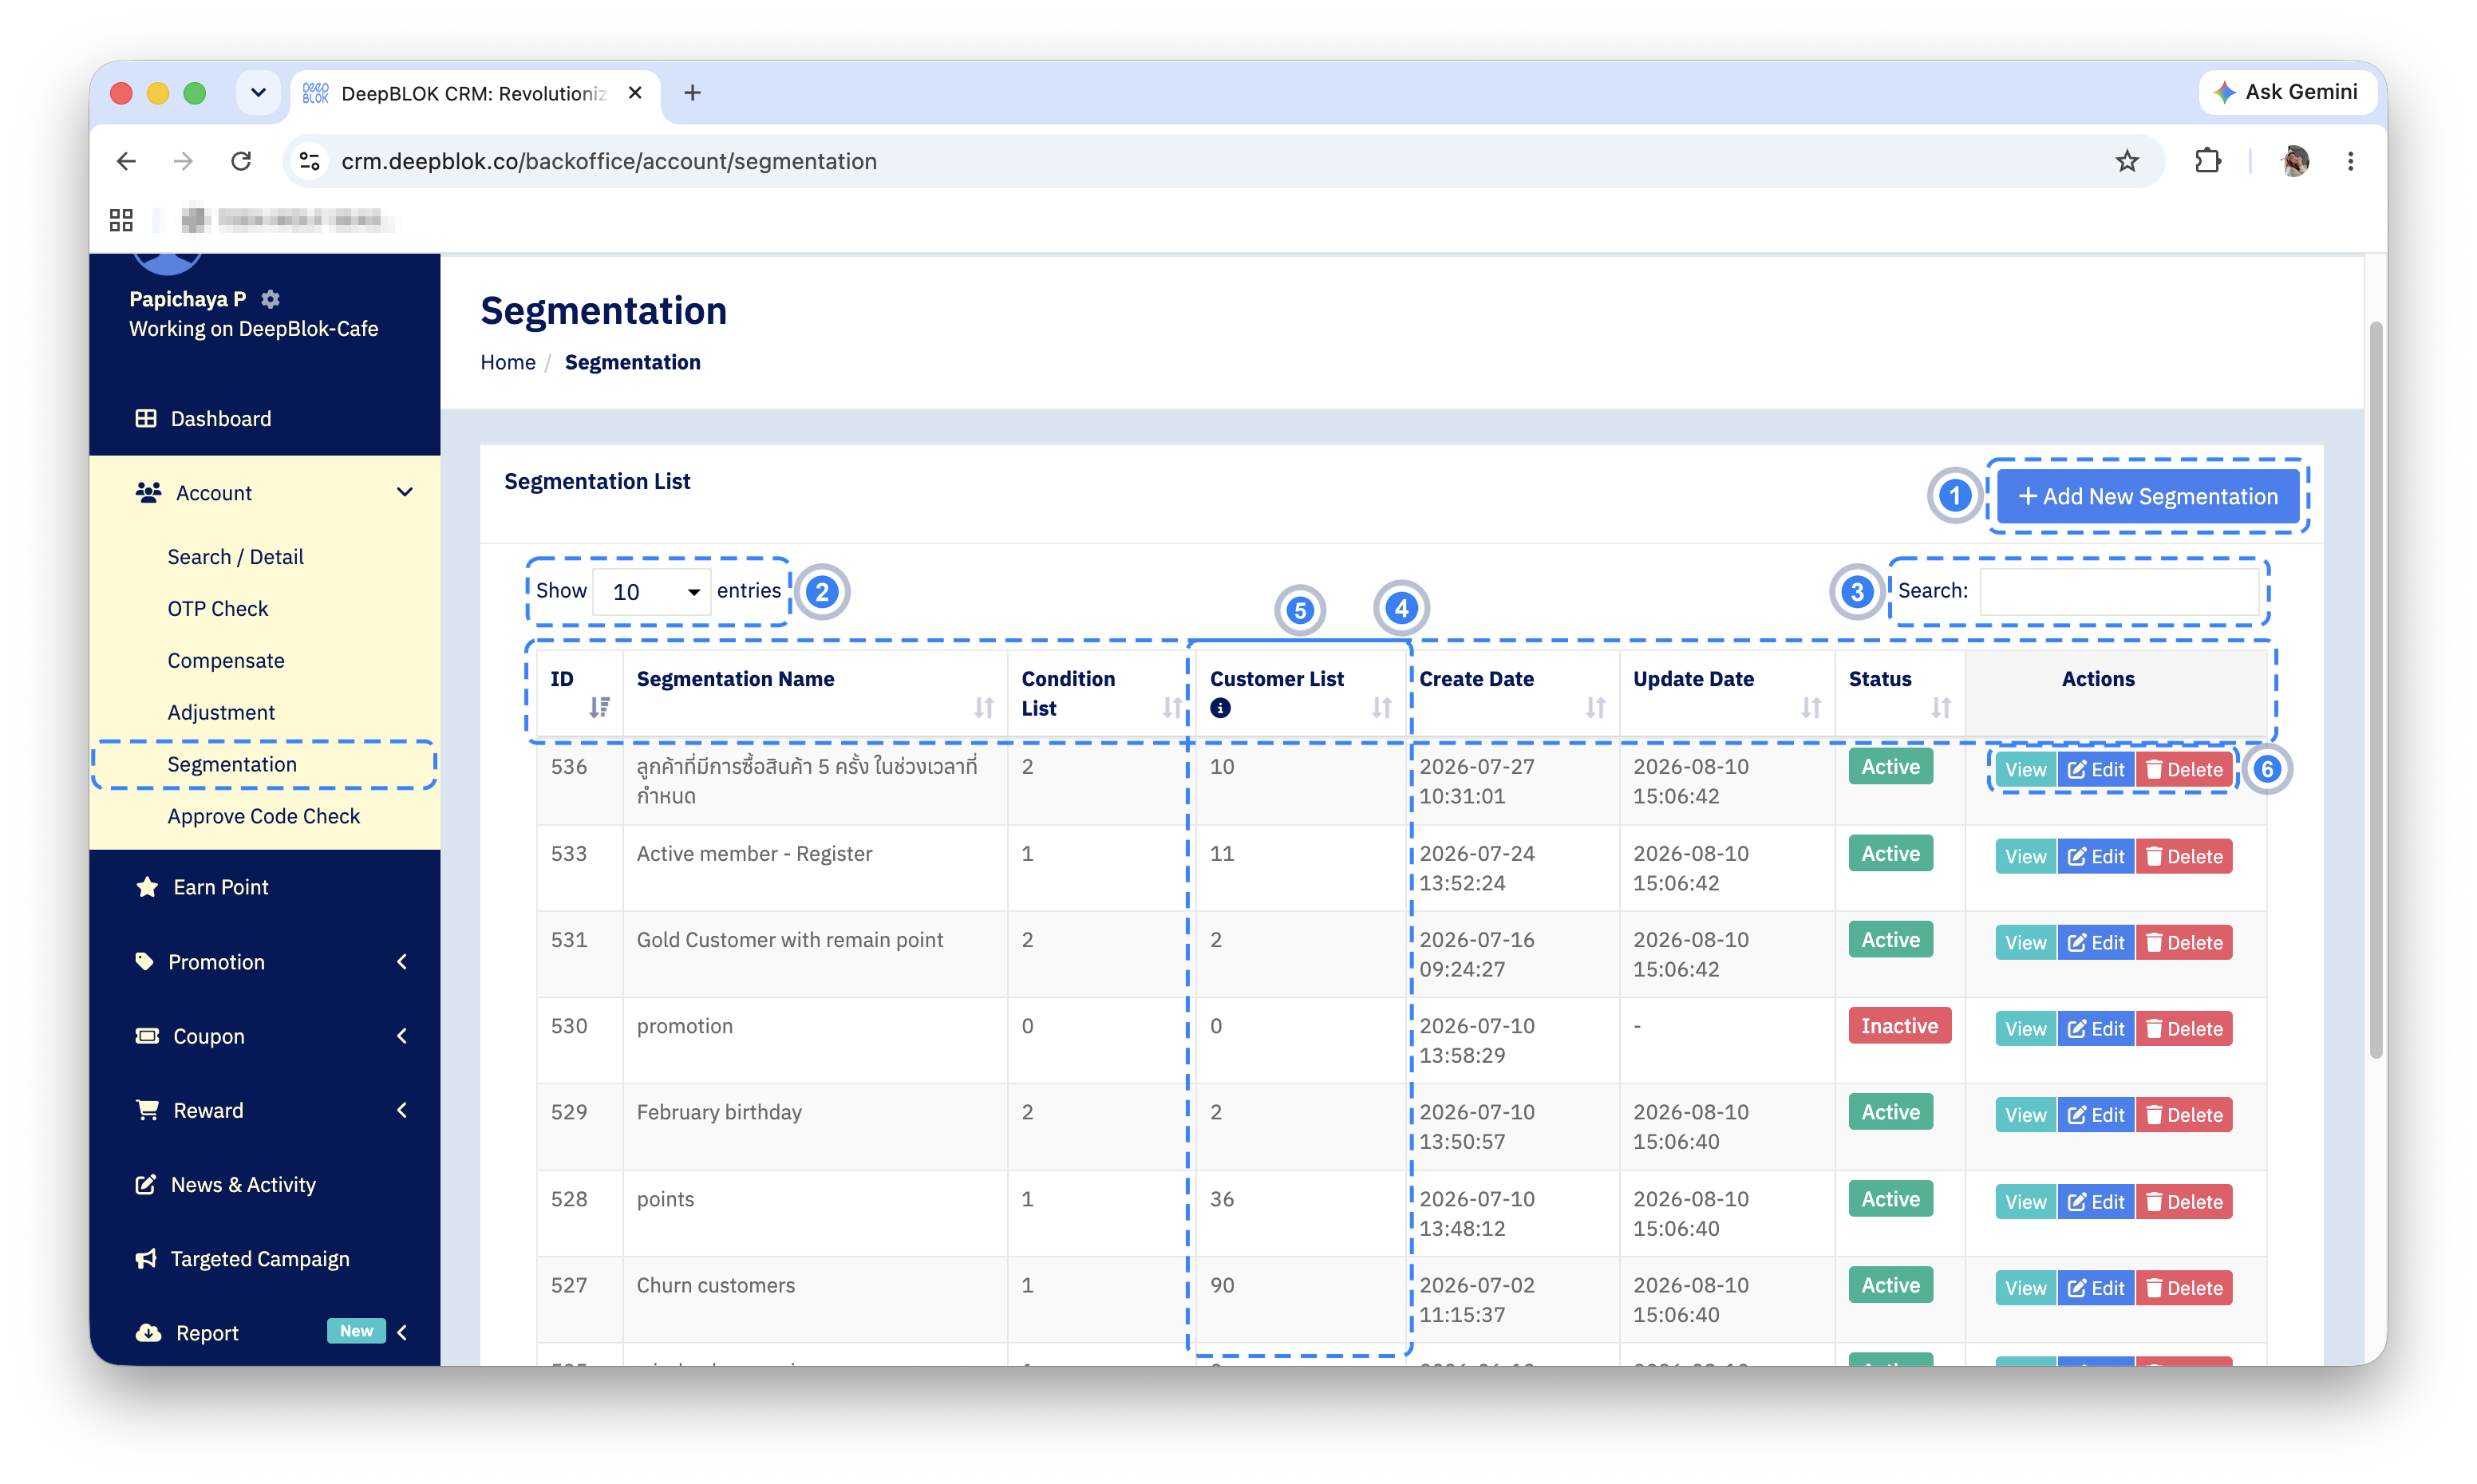
Clicking Segmentation under the Account menu opens a page headed Segmentation, with a card titled Segmentation List in the middle. At the top right of that card is the blue + Add New Segmentation button.
The table inside holds the groups your team has already built, in these columns:
1. ID The group's number, useful as a reference when talking to your team.
2. Segmentation Name The name given to the group — the same name you will see when picking a group for a campaign.
3. Condition List How many conditions that group holds. A 0 means the group has no conditions yet.
4. Customer List How many customers match that group's conditions. This is the figure to check before using a group.
5. Create Date and Update Date When the group was created and last edited. A group never edited shows a dash in the second column.
6. Status A badge reading either Active in green or Inactive in red.
7. Actions 3 buttons: View to look at the detail, Edit to change it, and Delete to remove it.
Above the table are a Search: field on the right and a Show 10 entries dropdown on the left for how many rows to show per page. We recommend searching for the group you are about to create first, every time — teams often build the same group twice without realising, and then pick the wrong one when a campaign goes out.
Building a segment in 3 steps
Step 1 Name the group and describe it
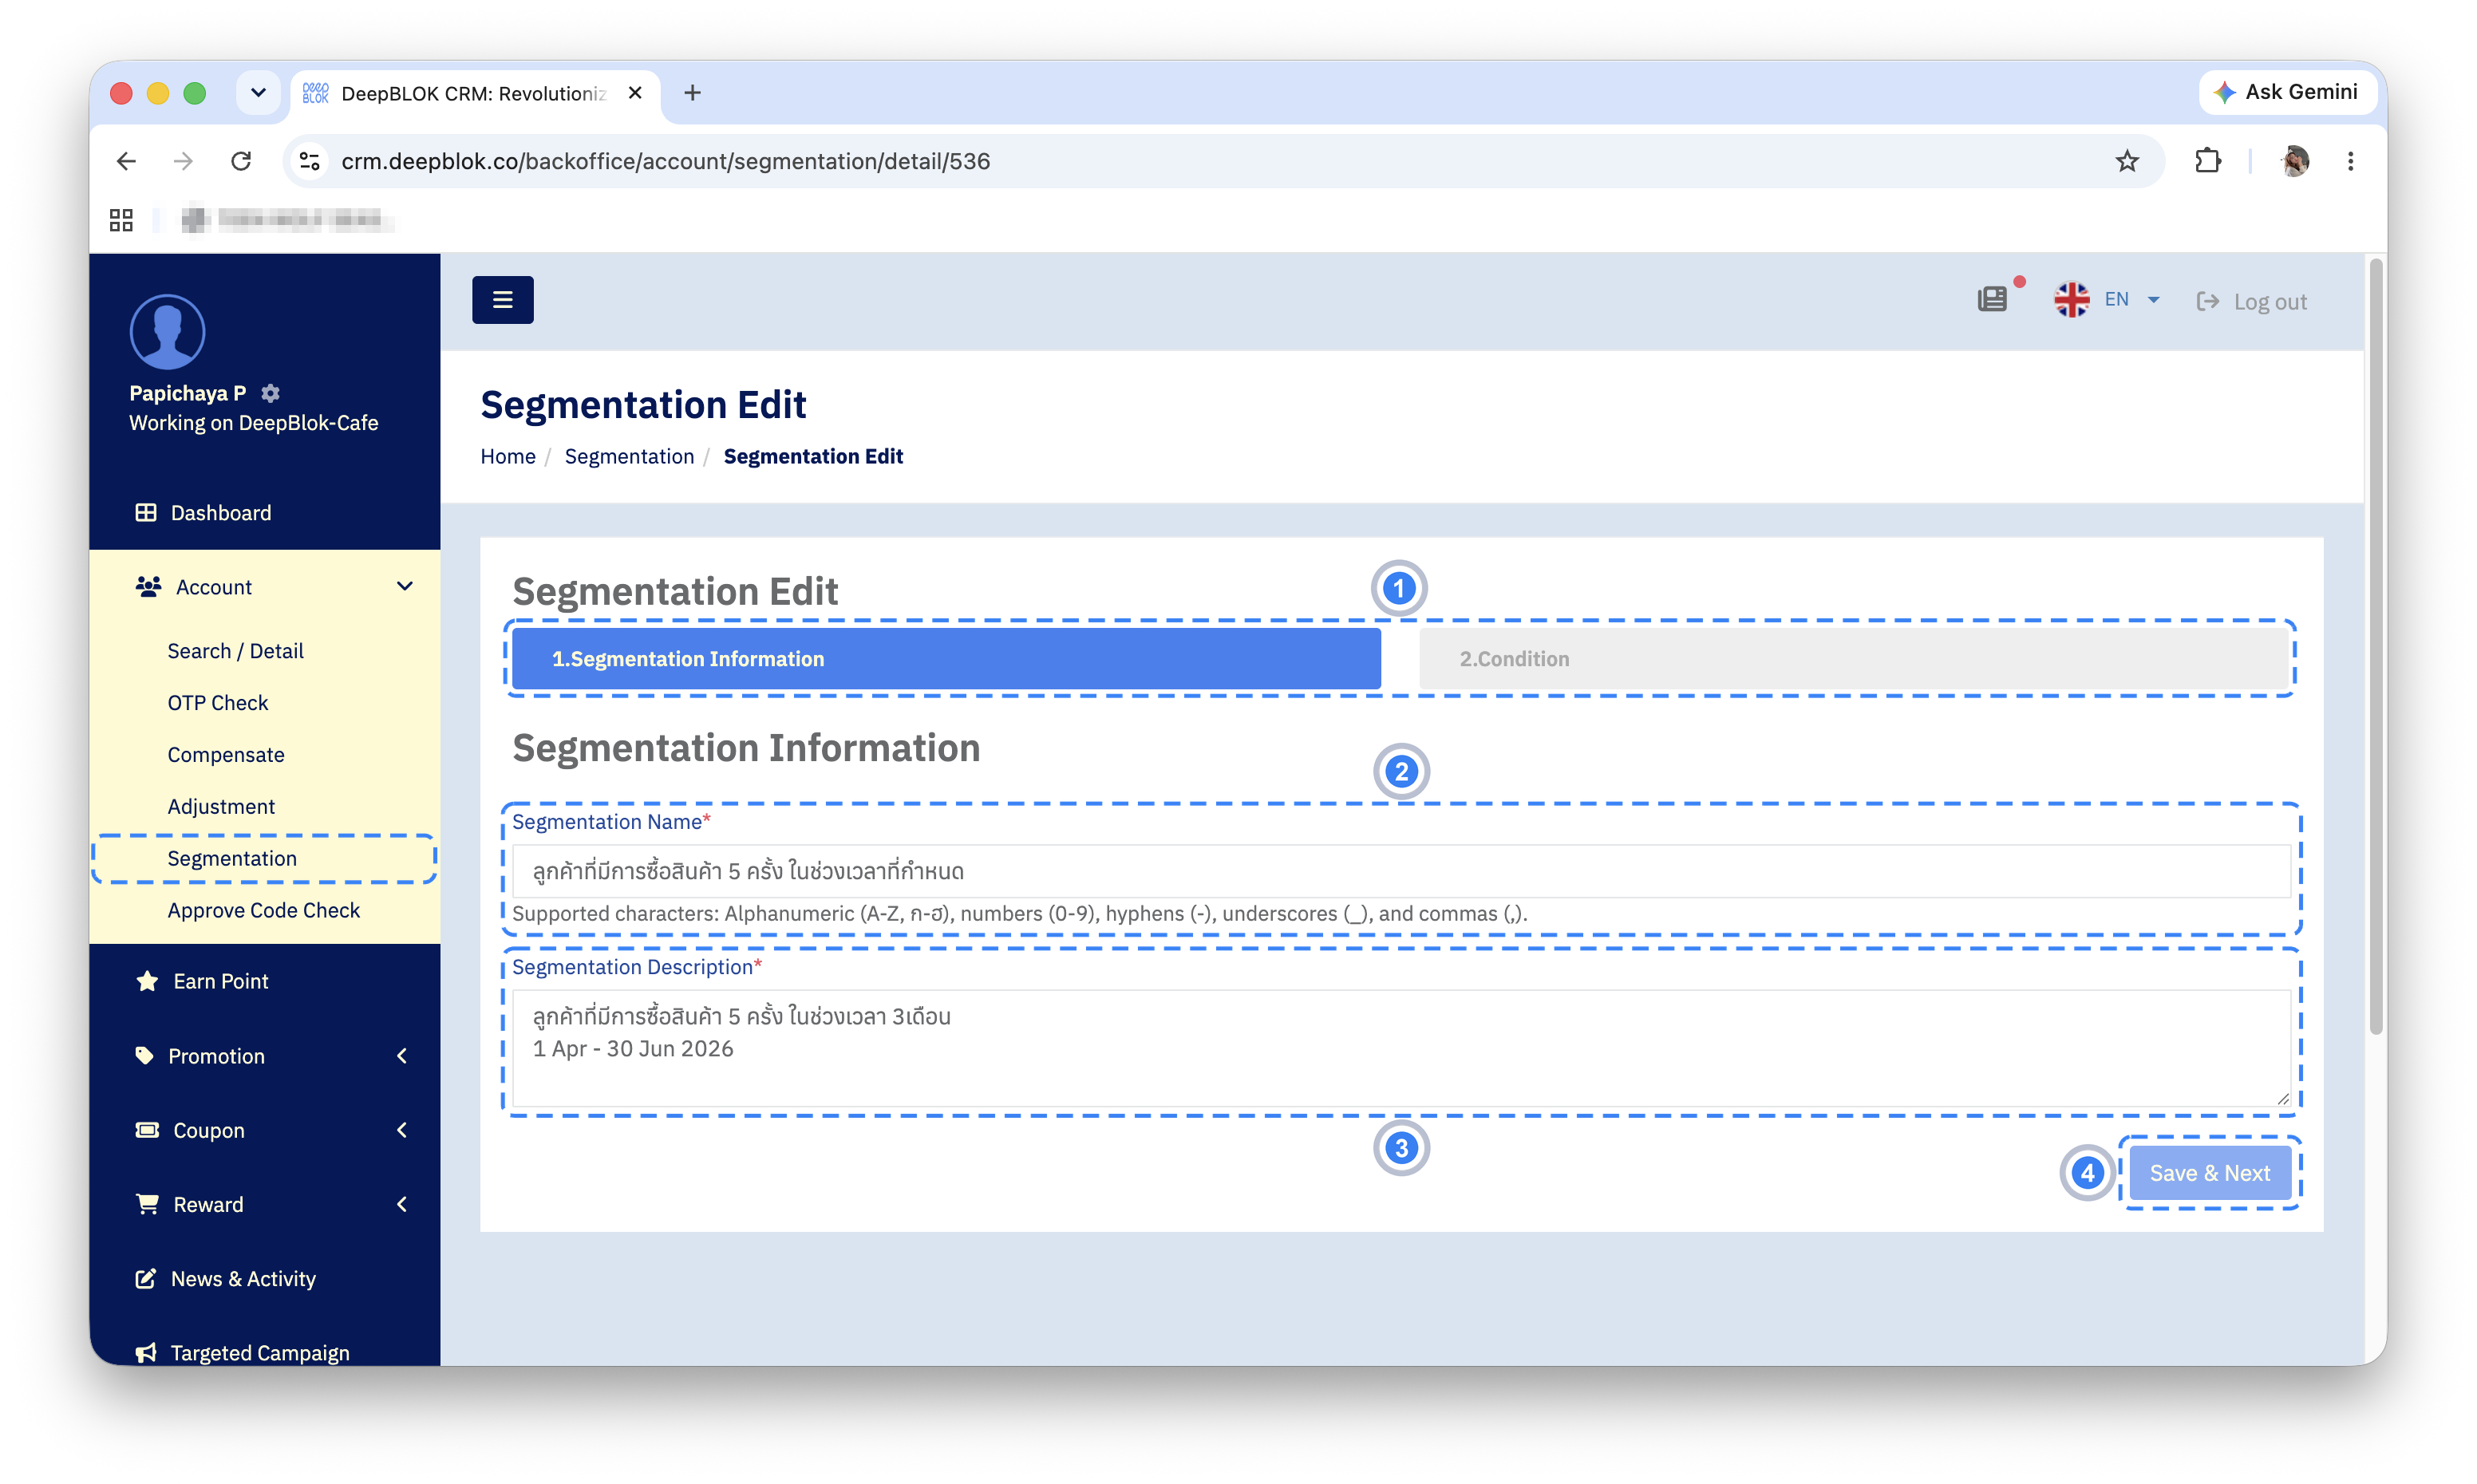
From the Segmentation List page, click the blue + Add New Segmentation button at the top right of the card. The system opens the Segmentation Create page, which runs in 2 steps — 1.Segmentation Information and 2.Condition.
📌 Worth knowing: the system allows a maximum of 20 segments per brand. Once 20 exist you cannot create another until an old one is deleted, so give each group a name that says what it is and keep only the groups still in use.
This step holds 2 fields, both marked with a red asterisk, meaning both are required.
Segmentation Name is the group's name. Beneath the field, a line spells out which characters are allowed: Supported characters: Alphanumeric (A-Z, ก-ฮ), numbers (0-9), hyphens (-), underscores (_), and commas (,).
Segmentation Description is the group's description, in a multi-line field. Use it to say what the group is for.
With both filled in, press Save & Next at the bottom right.
**The line under the name field is precise about what is allowed — letters, numbers, hyphens, underscores and commas. If a name is rejected, look for another character in it, such as a bracket or a slash. The description is worth writing properly for colleagues, because it is the only place recording what the group was meant for.
Step 2 Choose the conditions you want to use
On step 2.Condition you will see the Condition heading and a blue + Add new condition button.
Press it and the system opens a box titled Condition management, holding a condition picker that reads Select a condition, with a search field. The options are grouped: the Demographic group holds Age, Birth Month, Gender and Nationality, and the Loyalty group begins with Member Tier, with more below as the list scrolls.
Pick the condition you want, set its value, and save. Each condition you add appears under Segmentation Condition List as a card carrying a number in a circle, the group the condition came from, and a plain-language summary — Birth Month Include value "JANUARY", or Age Greater than or equal to value 25. A three-dot button sits on the right of each card; it opens 2 commands, Edit and Delete, the second in red.
Press + Add new condition again for as many conditions as you need.
⚠️ One thing to watch: conditions from the second onwards carry an AND tag, which means a customer must satisfy every condition at once. Each condition you add makes the group narrower, not wider. Set Birth Month to January and then add Age Between 30 To 50, and the group becomes people born in January and aged 30 to 50 — no one else. If the matching count is lower than you expected, we recommend checking whether the conditions contradict each other.