

A customer group is not fixed once built: its conditions can change, its name can change, and it can be deleted. All 3 happen from the buttons in the Actions column of the Segmentation List page. What makes this different from building a new group is that an existing group may already be in use by a campaign, so touching it affects someone else's work too. This article covers both jobs step by step, with the checkpoints worth taking before you confirm. Editing or deleting one group takes under two minutes.
⚡ Quick Path:
Account→Segmentation→ find the group's row →Editto change it, orDeleteto remove it
📌 Read this before you start — the work in this article changes real data and may affect a campaign already using the group. Editing conditions changes who is in the group, and deleting a group removes something a campaign refers to. Find out where that group is used before you begin.
Requirements before you start
- Permission for the Segmentation menu — if
Segmentationis not under theAccountmenu, we recommend asking an administrator on your team to grant it first. - Certainty about which group you are changing — note the group's name or its
ID, because the rows sit close together and the wrong one is easy to hit. - An answer to where that group is used — check first whether a campaign is currently sending to this group. This matters more than the other two, because it is the only thing that tells you who your change affects.
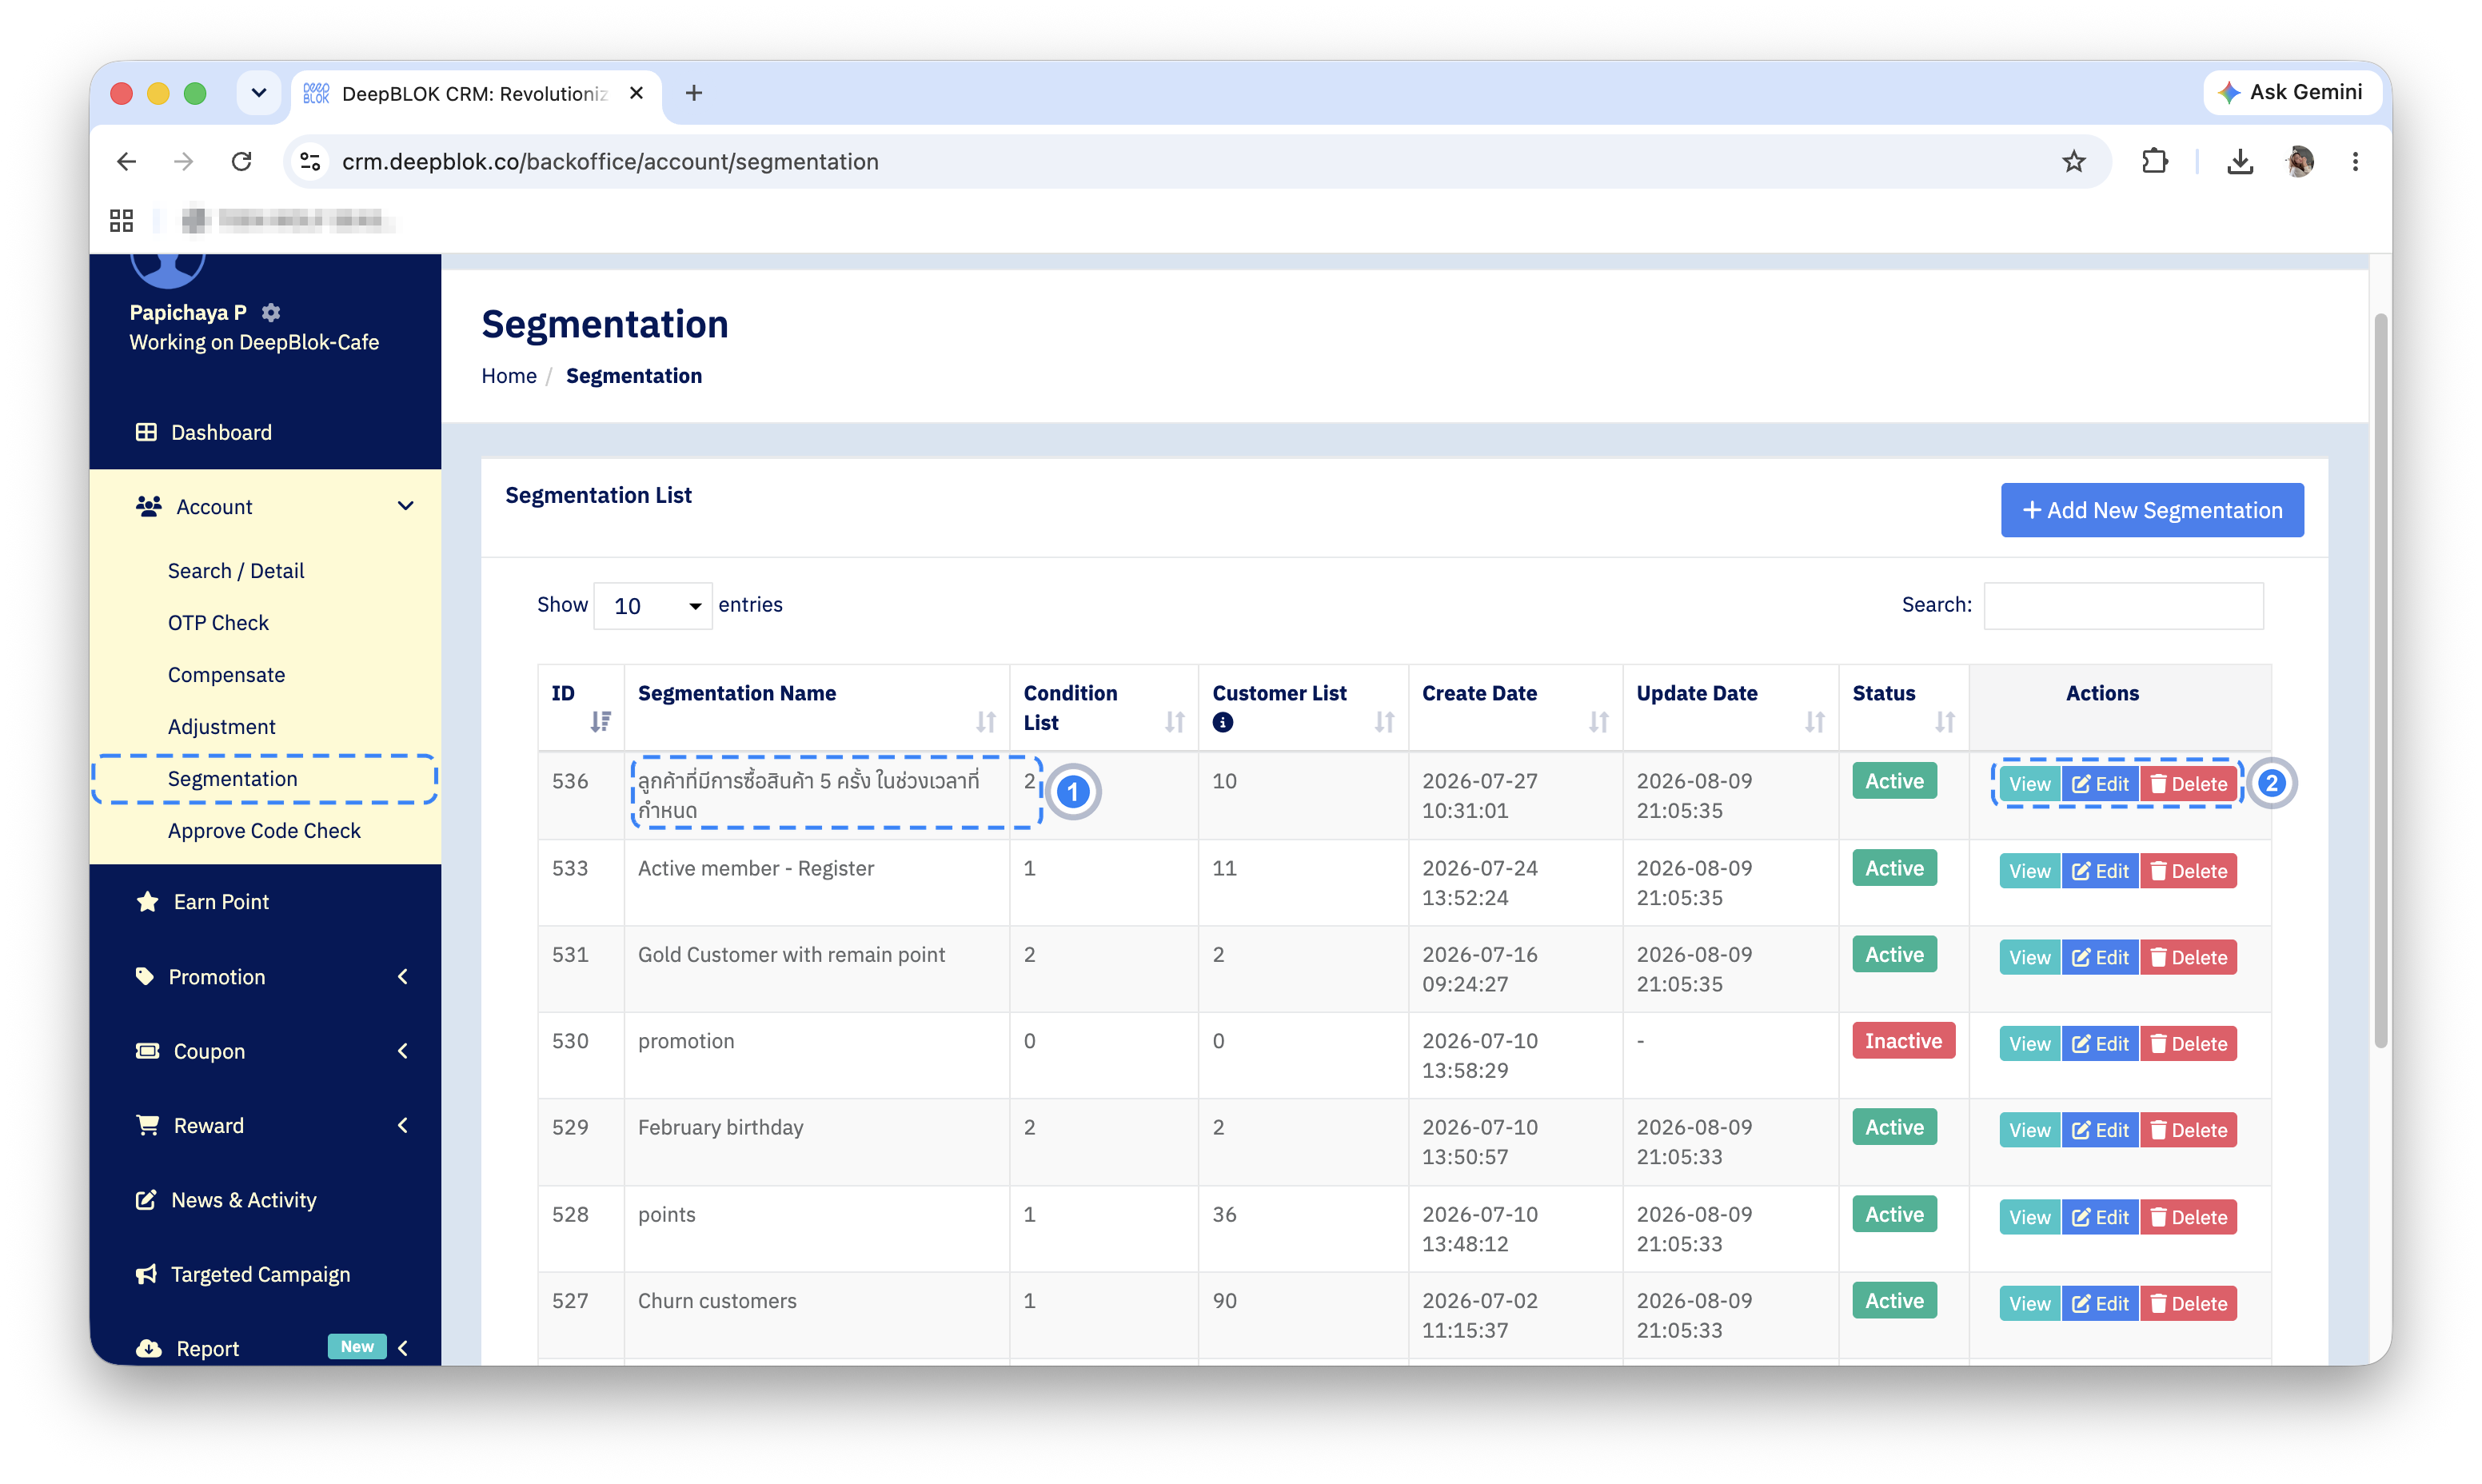
The 3 buttons in the Actions column and what each does
Every group's row ends with 3 buttons side by side.
1. View Opens that group's detail. It reads data and changes nothing. Use it when you want to see what conditions a group holds without intending to change them.
2. Edit Opens the Segmentation Edit page, where the name, description and conditions can be changed.
3. Delete Removes that group. A confirmation box always appears first.
⚠️ One thing to watch: the 3 buttons sit side by side, and Delete is on the far right. With a scrolled table or a glance at the wrong row, the wrong button is easy to press. We recommend reading the group name in the row before pressing anything — and if you only want to see the conditions, use View rather than Edit, since stepping through the edit form can save over the existing values without meaning to.
Editing a group in 3 steps
Step 1 Press Edit on that group's row
On the Segmentation List page, find the row of the group you want to change and press Edit. The system opens the Segmentation Edit page.
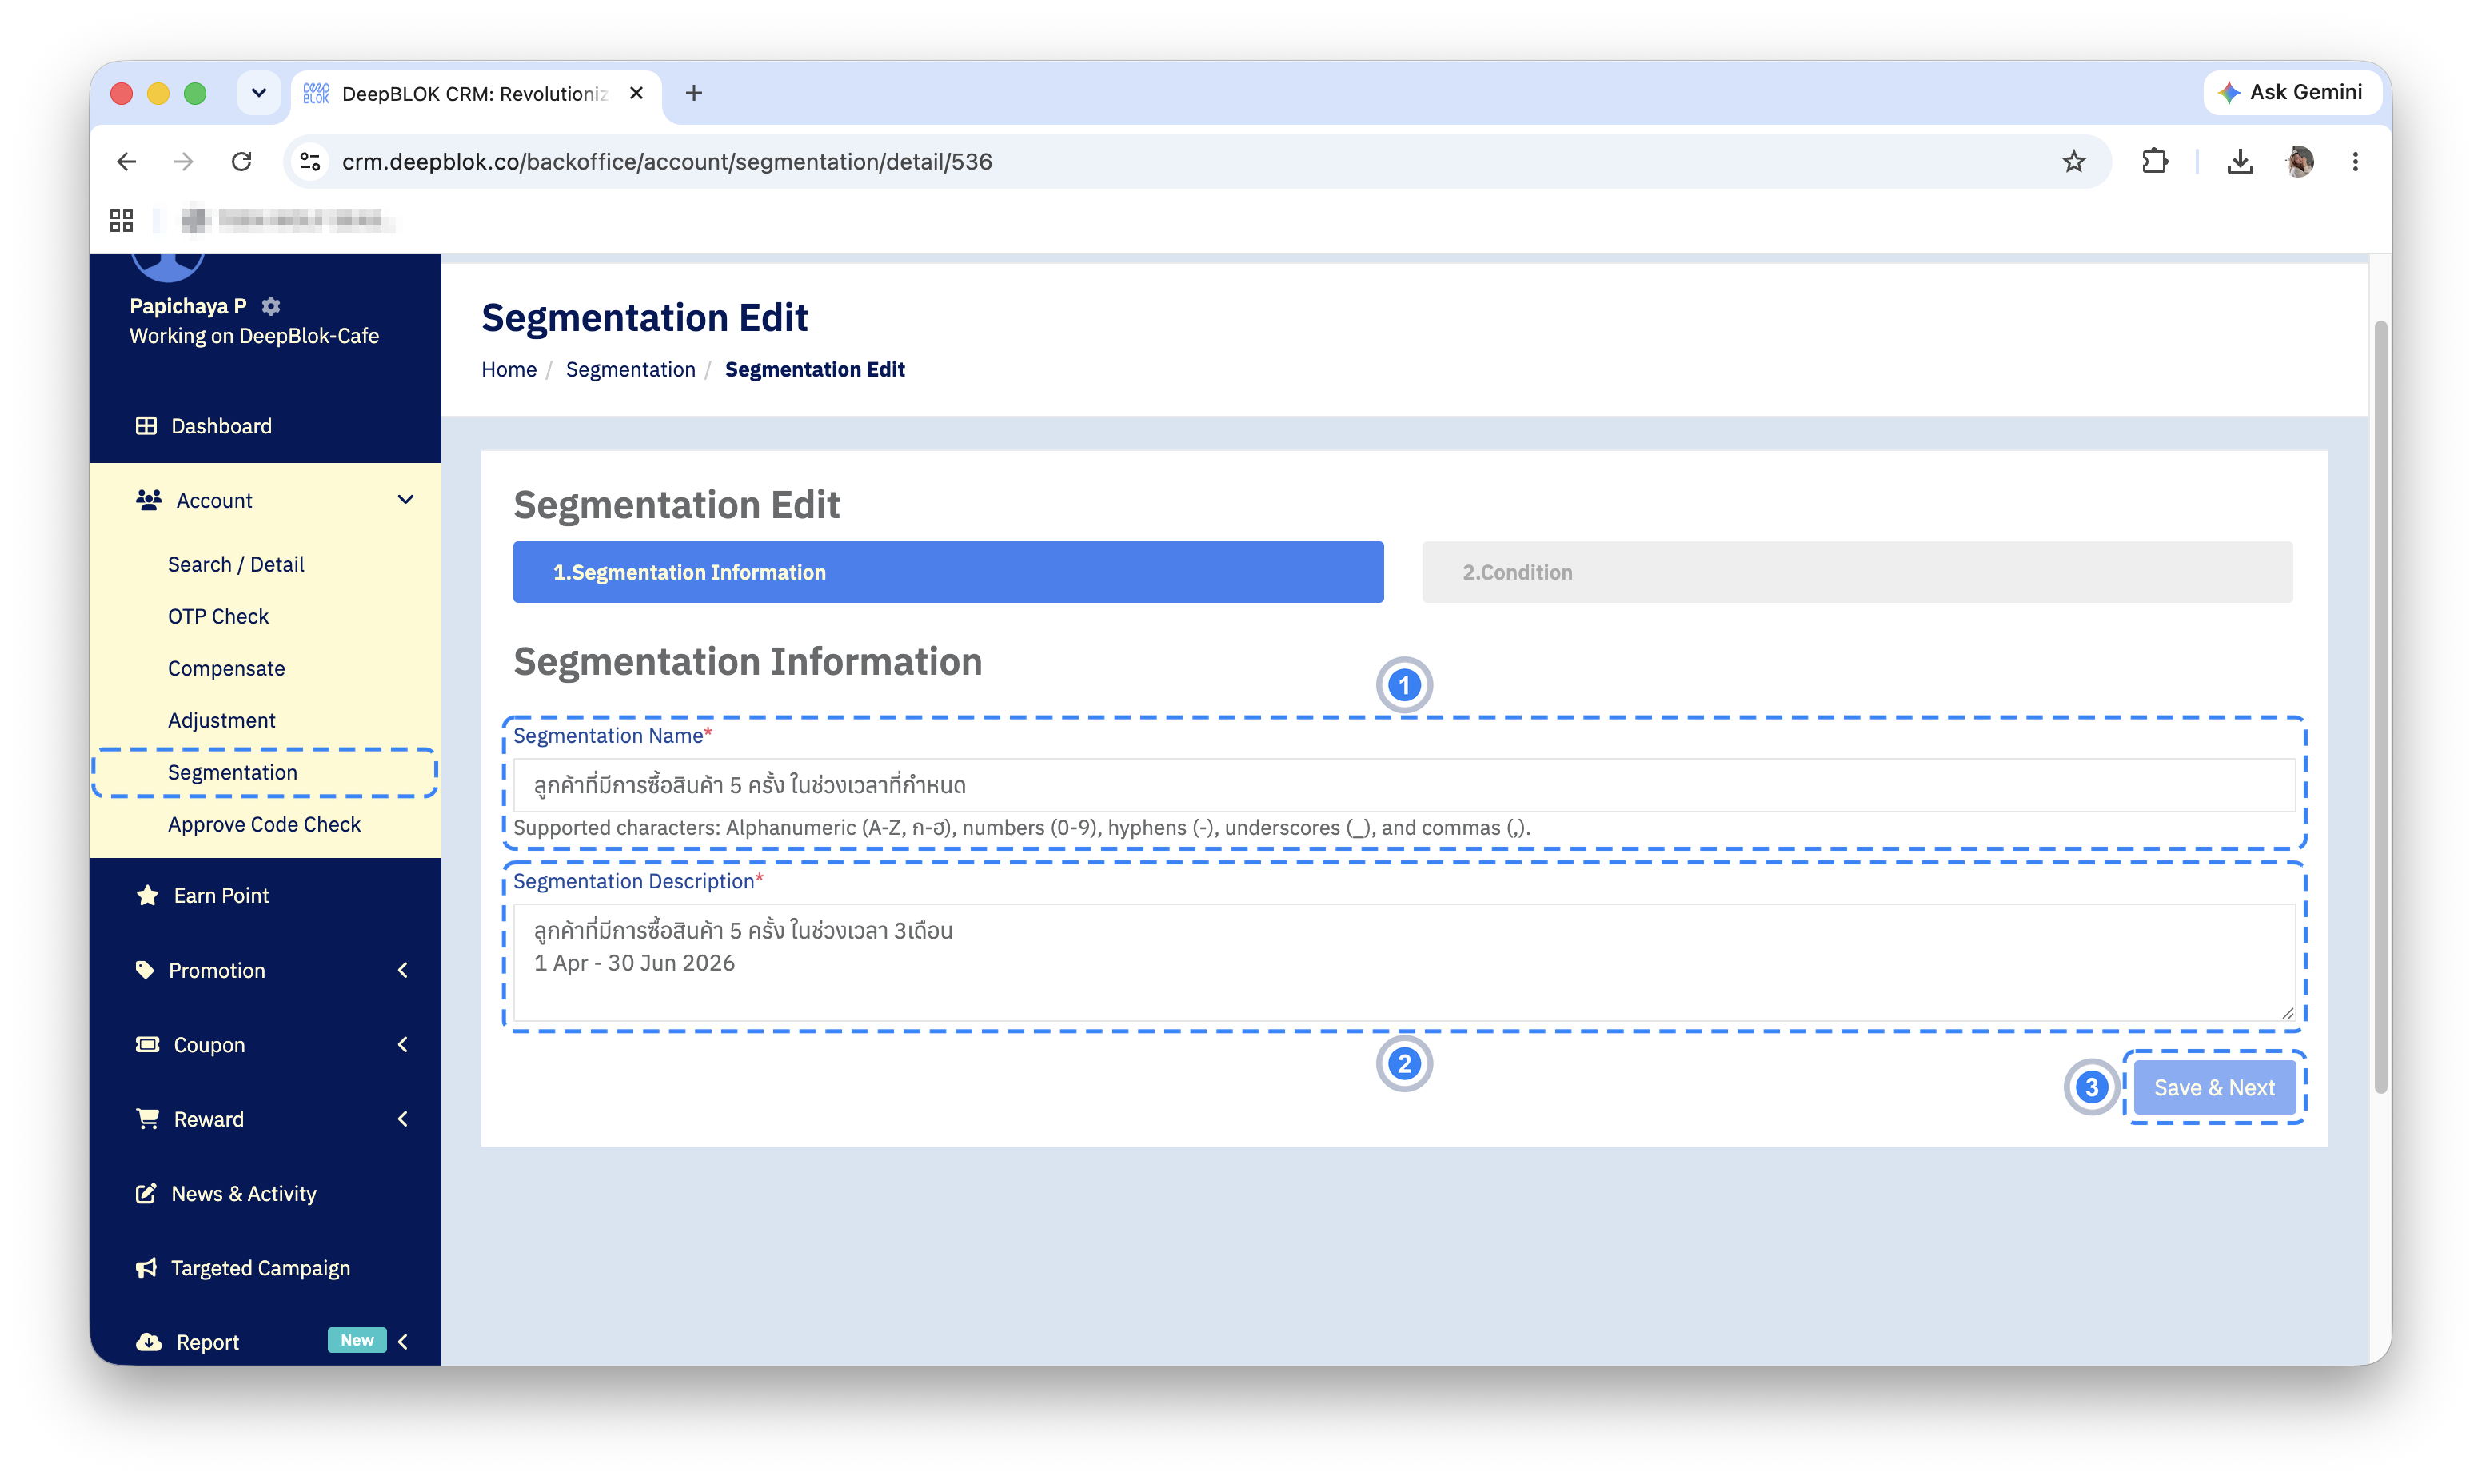
📌 Good to know: the edit page uses the same layout as the create page — the same 2 step tabs, 1.Segmentation Information and 2.Condition. What differs is the page title and that the group's existing values are already filled in. If you have built a group before, this page will be familiar immediately.
Step 2 Change the name and description, then move on
The 1.Segmentation Information tab shows the group's current name and description in the fields. Both can be changed, and both must still hold a value, since both carry a red asterisk.
The name still follows the same character rules — letters, numbers, hyphens, underscores and commas — as the line beneath the field says.
With your changes made, press Save & Next at the bottom right to save and move to the condition tab.
If you only need to change the name or description and do not want to touch the conditions, pass through the second tab without changing anything and press Finish.
Step 3 Change the conditions, then press Finish
The 2.Condition tab shows the group's existing conditions under Segmentation Condition List, as cards in order. Each card carries its number in a circle, the group the condition came from, the plain-language summary, and a three-dot button on the right for managing that condition.
New conditions are added with + Add new condition, exactly as when building a group. Once the conditions are as you want them, press Finish at the bottom right and the system returns to the Segmentation List page.
⚠️ One thing to watch: changing the conditions changes the figure in the Customer List column, because that figure is how many customers match the group's conditions as they stand. Adding a condition narrows the group, since every condition is joined by the AND tag. We recommend noting the old figure before you edit and comparing it with the new one after Finish — a figure that drops far more than expected usually means the condition you added contradicts one already there.