Awarding points is the task your counter staff will run most often. There are 2 ways in — scan the customer's QR code, or type their phone number if they can't get the code up in time. Both routes meet at the same screen, where you enter the bill amount. The whole thing takes under 30 seconds, and the transaction is recorded the moment you confirm. This route is designed for when the web or your POS is unavailable — for everyday use, DeepBLOK still recommends awarding points through DeepBLOK Backoffice.
⚡ Quick Path: Home →
Earn Point→ scan the customer's QR code (or tapEnter Mobile no.and enter their phone number) → enter the bill amount →Confirm(Confirm) → check thePlease Confirmsummary →Confirm→Confirmin the popup
📌 Good to know: the app runs in English or Thai — switch under
Setting→Change language. Every label below is the app's own English string, except the customer-facing LINE screens (สะสมคะแนน), which have only been captured in Thai so far and appear in Thai. InEnglishthe date picker also switches to Gregorian years.
Requirements before you start
- The Merchant App signed in on the shop phone — if you don't have an account yet, start with the article on opening a Merchant App account for your shop.
- The customer's bill amount — the only mandatory field, and what the points are calculated from, so close the sale before you award anything.
- The customer's QR code, or the phone number they signed up with — the number has to already exist in the membership system; someone who hasn't joined yet can't be awarded points.
- A working data connection — transactions are recorded immediately and there is no offline mode.
📌 Good to know: The rate that turns a bill amount into points is configured in Backoffice, not in the app. Counter staff can't set a point value directly — you enter the bill amount and the system does the rest.
Award points in 5 steps
Step 1: Open the Earn Points menu
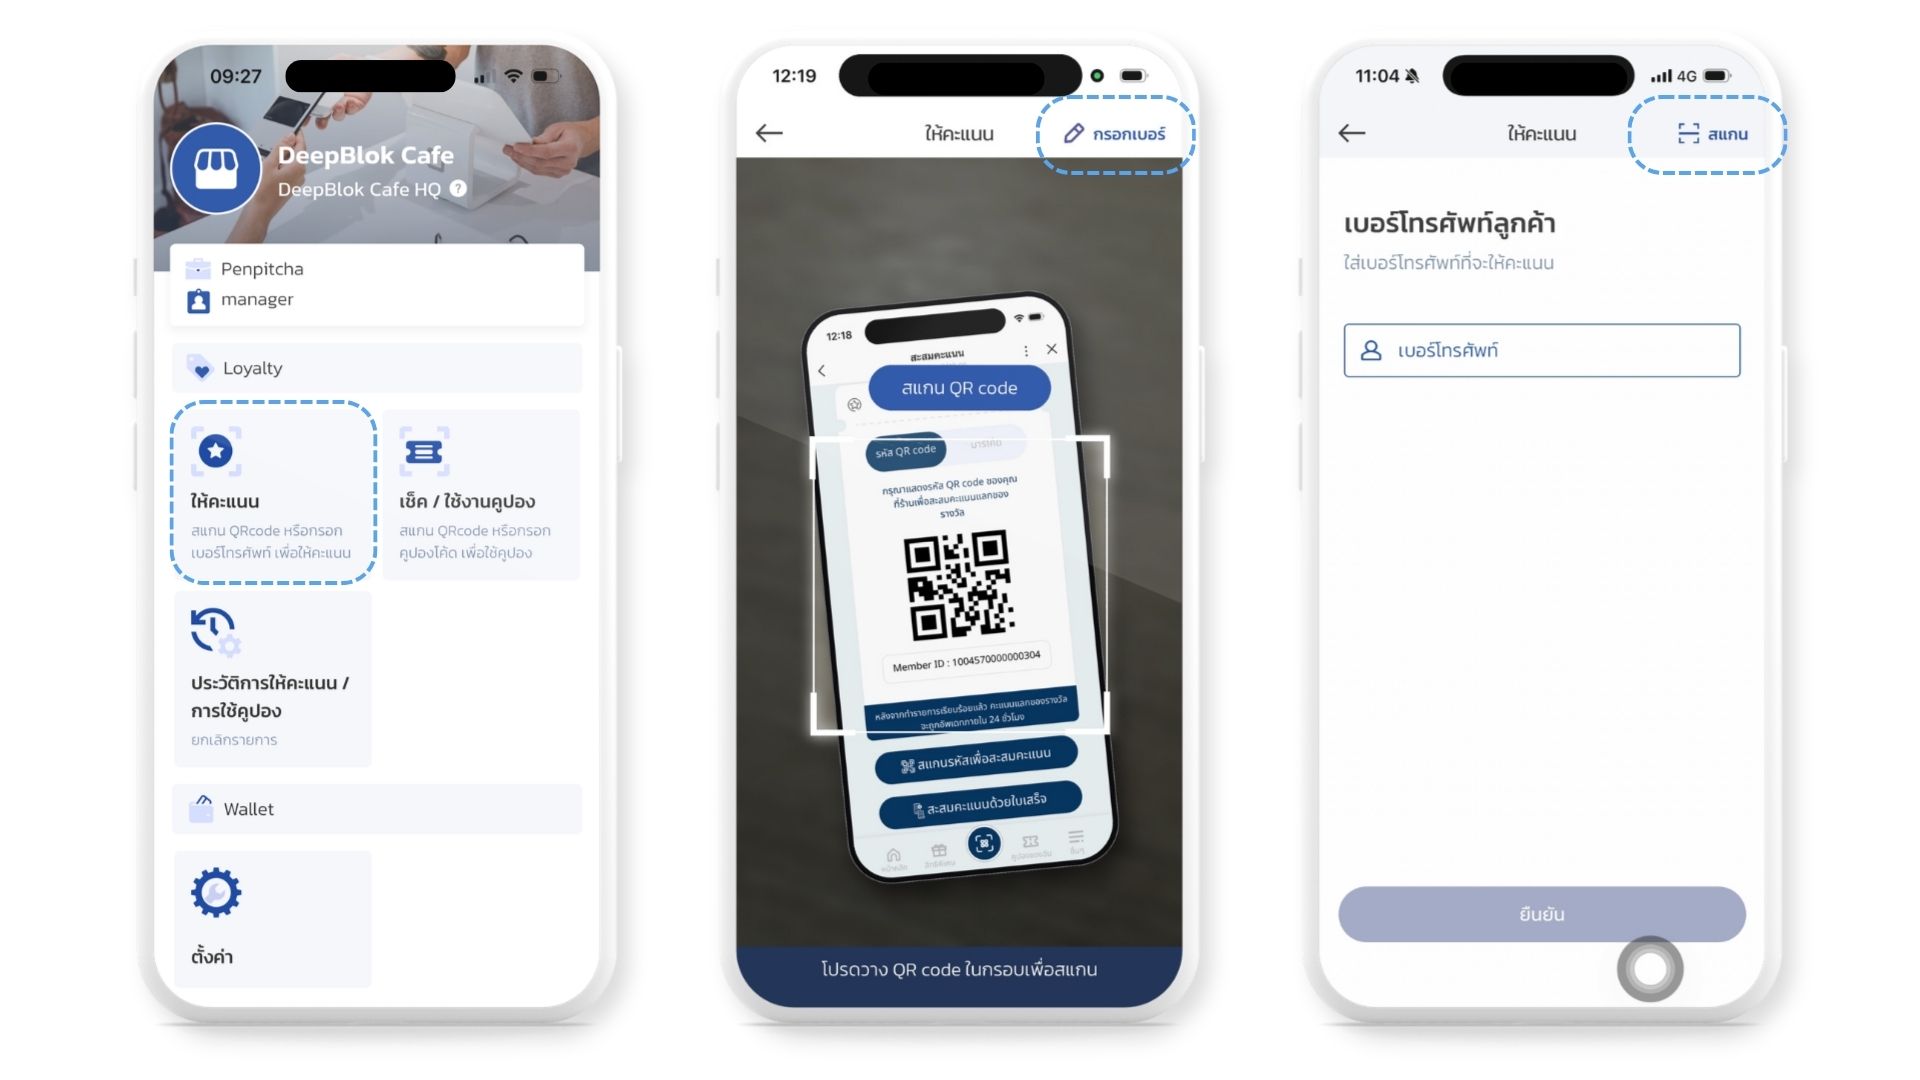
On the home screen, under Loyalty, tap the Earn Point (Earn Points) tile — the top-left card, with a star-in-a-frame icon and the sub-line Scan the QR code or enter phone number to.
The camera opens straight away, with a dark navy bar along the bottom reading Please place the QR Code in the frame to scan. (place the QR code inside the frame to scan).
Step 2: Identify the customer — pick one route
Route 1 — scan the QR code (fastest)
Ask the customer to open the สะสมคะแนน (Collect points) page in their membership account and hold the QR code inside the square frame. The app reads it and moves on by itself — there's no button to press.
Their screen has รหัส QR code and บาร์โค้ด tabs — use whichever your reader handles better. Below the code sits a Member ID box and a blue banner saying reward points update within 24 hours.
📌 Good to know: the
สะสมคะแนนscreen has no countdown. The member's code is tied to theirMember ID, so it doesn't expire — unlike theใช้คูปองscreen, whose code lasts about 15 minutes. If a scan fails here, go straight to route 2 and type the phone number rather than having the customer refresh anything.
Route 2 — type the phone number
At the top right of the scanning screen, tap Enter Mobile no. (enter number). The screen changes to Customer phone number (customer phone number). Enter the number they signed up with and tap the navy Confirm button. To go back to scanning, tap Scan at the top right of that screen.
Step 3: Enter the bill amount
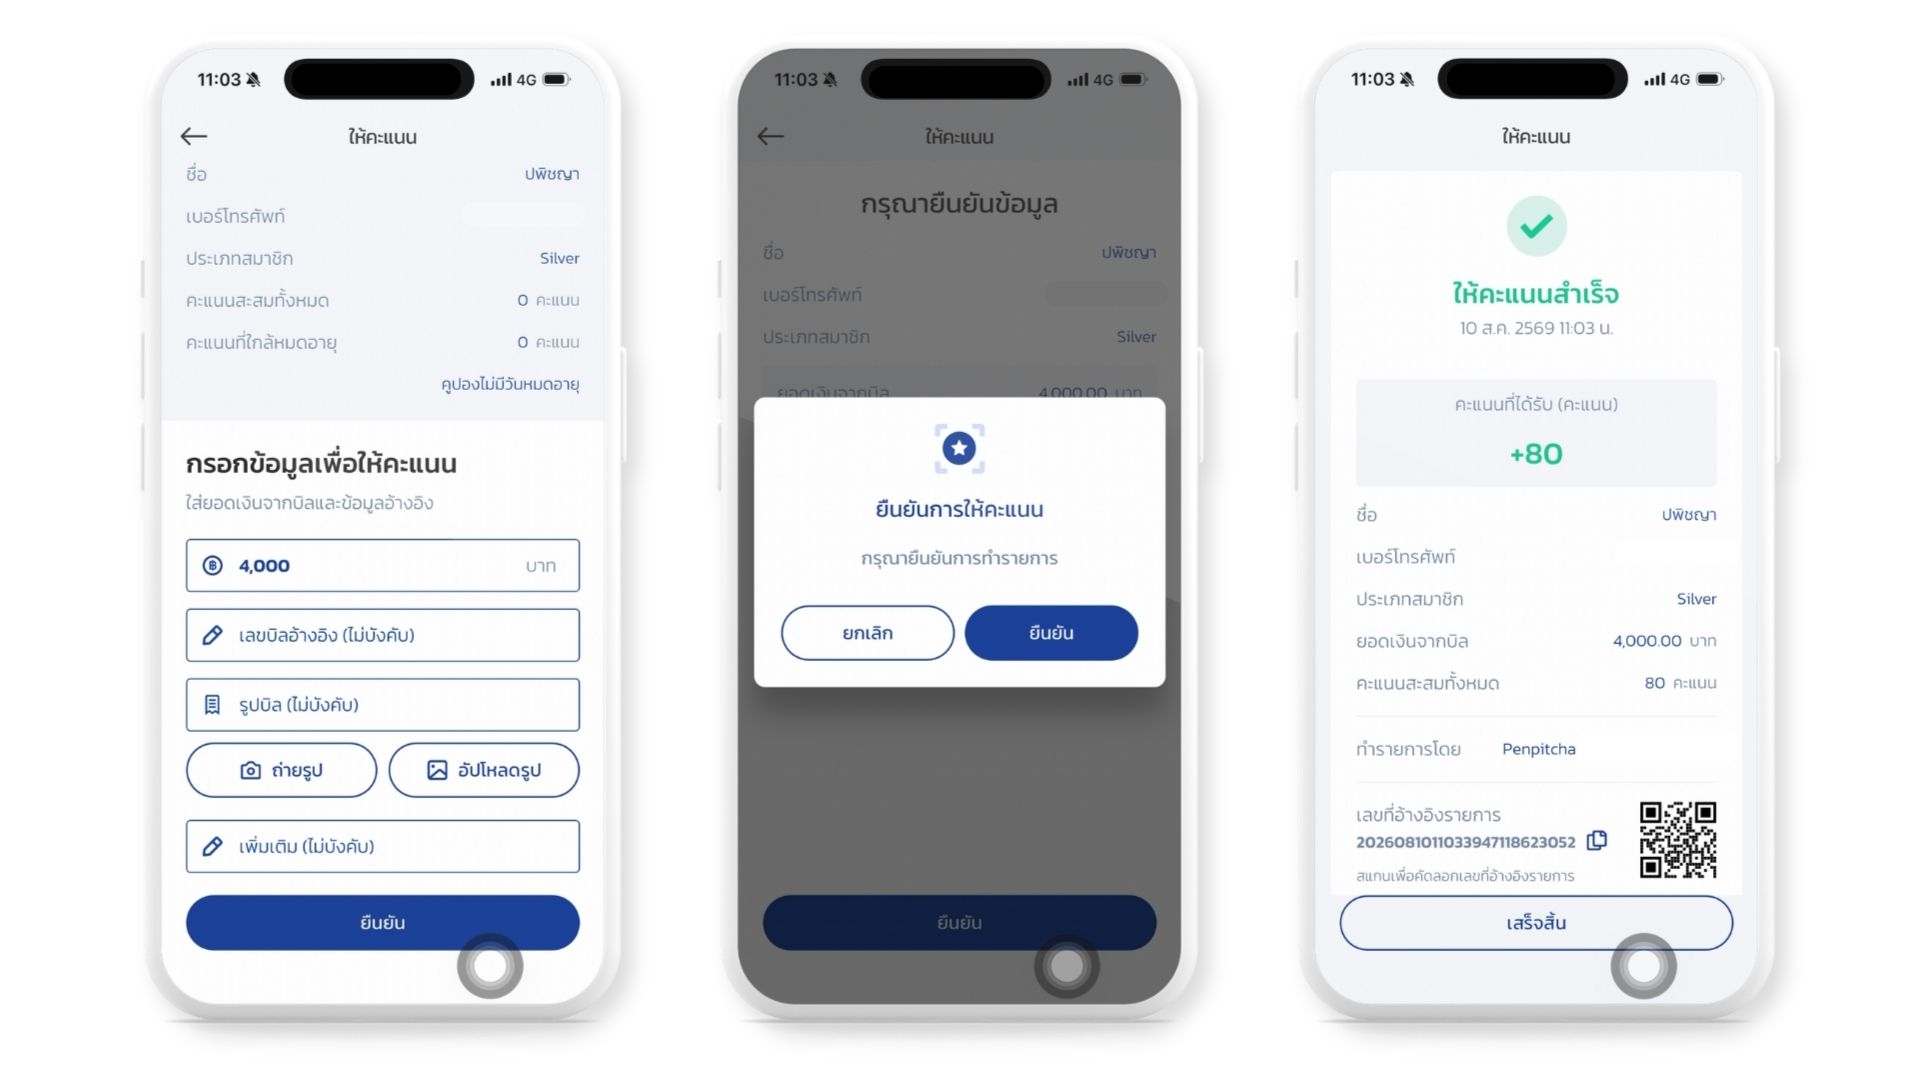
Once the customer is identified, their membership details appear at the top of the screen for you to check: Name (name), Phone number (phone), Account type (tier), Total point (total points) and Nearly expired point (points expiring soon) with the expiry date. Match the name and phone number against the customer in front of you before you enter anything.
Below that is Please enter billing information for granting points. (enter the details) — 4 fields, only one of them mandatory.
📌 Good to know about the receipt photo: The system stores it as an image only — there is no automatic reader for it, so no line items are extracted. 2 consequences: this transaction will not tell the shop what the customer bought, and checking that the receipt matches the amount entered is still a job for a person. Read the receipt before you type the amount.
When the fields are set, tap the navy Confirm button at the bottom.