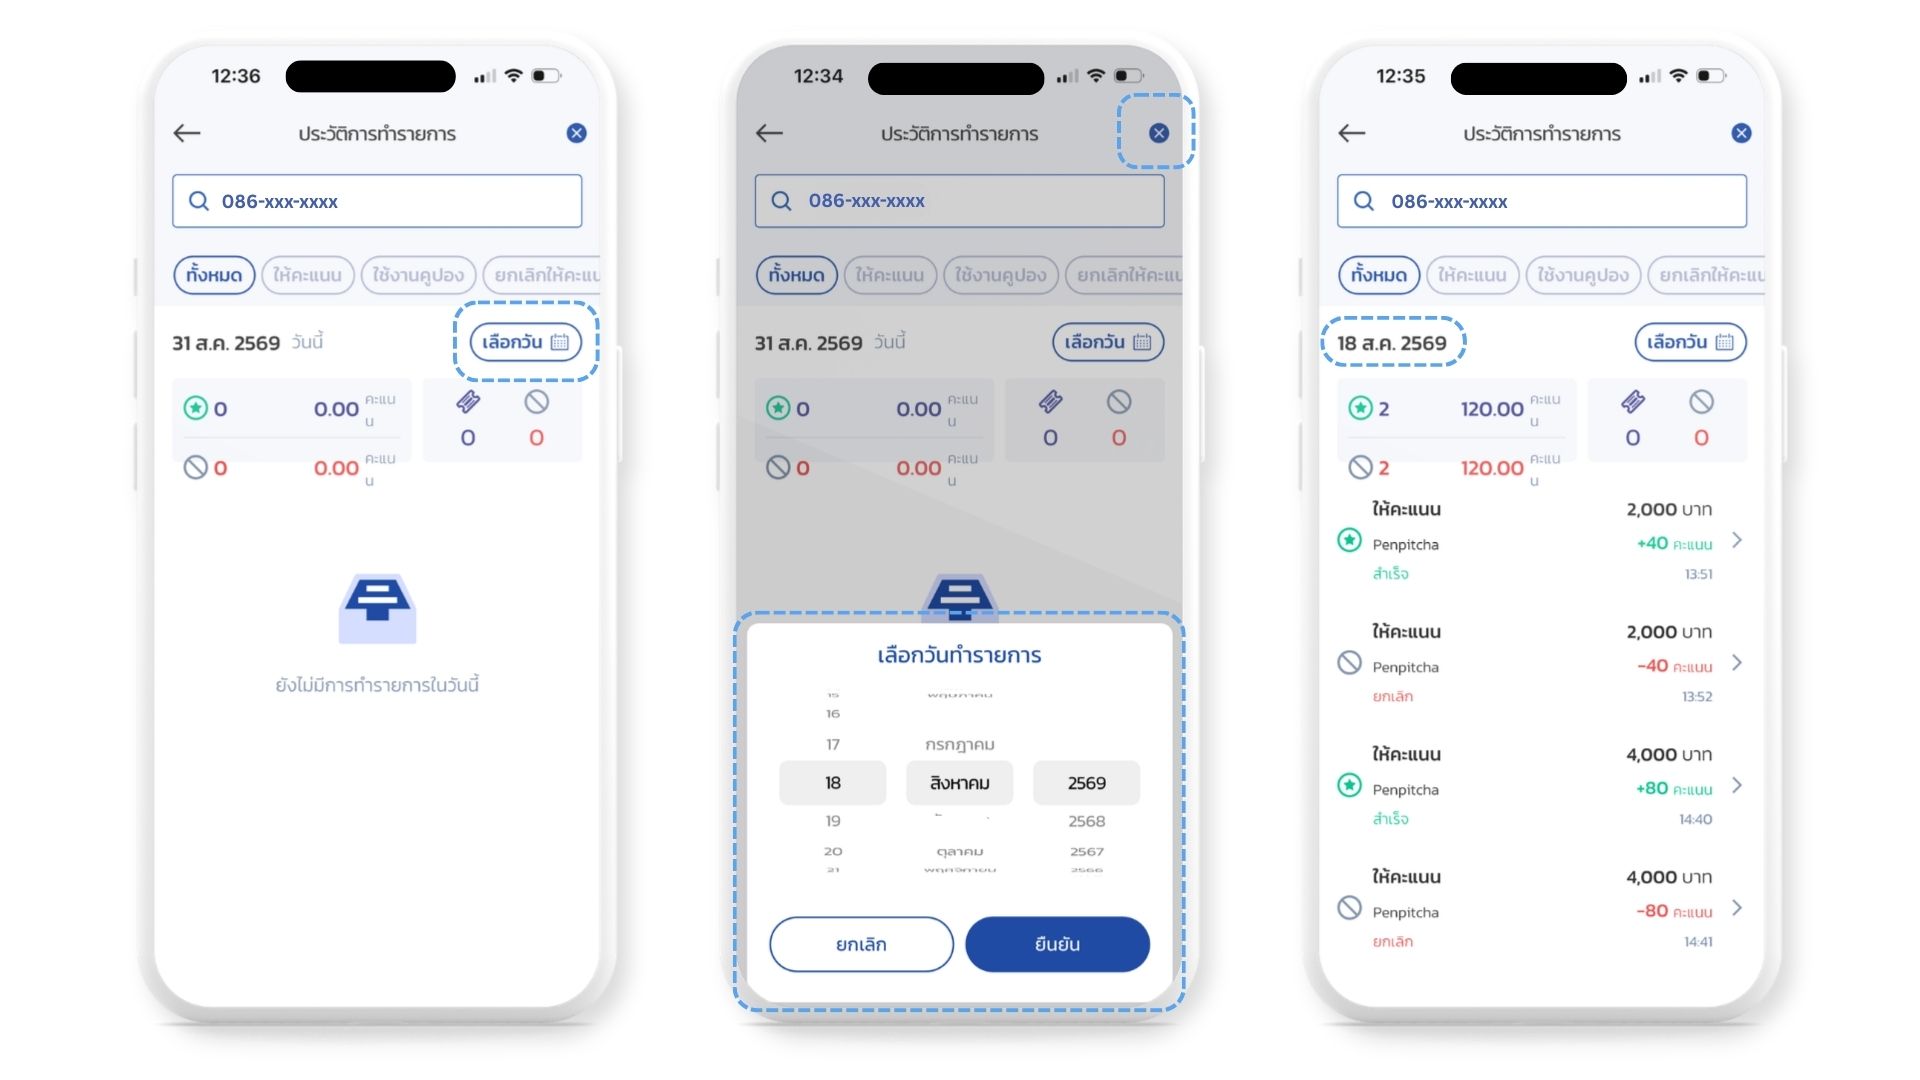
The history screen is where counter staff answer "have my points gone in yet?" and where you close the day — how many transactions were run, how many coupons were taken. It shows one day at a time, starting with today, and it's the only way into voiding a transaction that was run in error. What it lists is what was run through the Merchant App — mostly the stretches when the web or POS was unavailable. For the brand-wide picture you still go to the DeepBLOK Backoffice reports.
⚡ Quick Path: Home →
Transaction History (Point/Redeem→ the magnifier icon, top right → enter the customer's phone number → tap the row to open its detail Not looking for one customer? Skip the search: narrow with the filter chips (All·Earn point·Use coupon·Void earn point·Void use coupon), or tapChoose datefor a day other than today.
📌 Good to know: the app runs in English or Thai — switch under
Setting→Change language. Every label below is the app's own English string, except the open search box and the empty-day state, which have only been captured in Thai so far and appear in Thai. InEnglishthe date picker also switches to Gregorian years.
Requirements before you start
- The Merchant App signed in on the shop phone — if you don't have an account yet, start with the article on opening a Merchant App account for your shop.
- Knowing which branch you're looking at — history shows the branch you're signed in as, so check the branch name in the home screen's top bar first.
- The date of the transaction — anything from yesterday or earlier has to be selected by date; this screen isn't a continuous feed.
- The transaction reference, if you're chasing something for a customer — customers often screenshot the success screen, which carries it.
📌 Good to know: This is branch data, not personal data. Everything every staff member at the branch has run appears here; who ran each one is shown on that transaction's detail screen.
Check transaction history in 5 steps
Step 1: Open the history
On the home screen, under Loyalty, tap the Transaction History (Point/Redeem tile — the one with Cancel earn point or redeem coupon as its sub-line. The screen that opens is titled Transaction history (Transaction history).
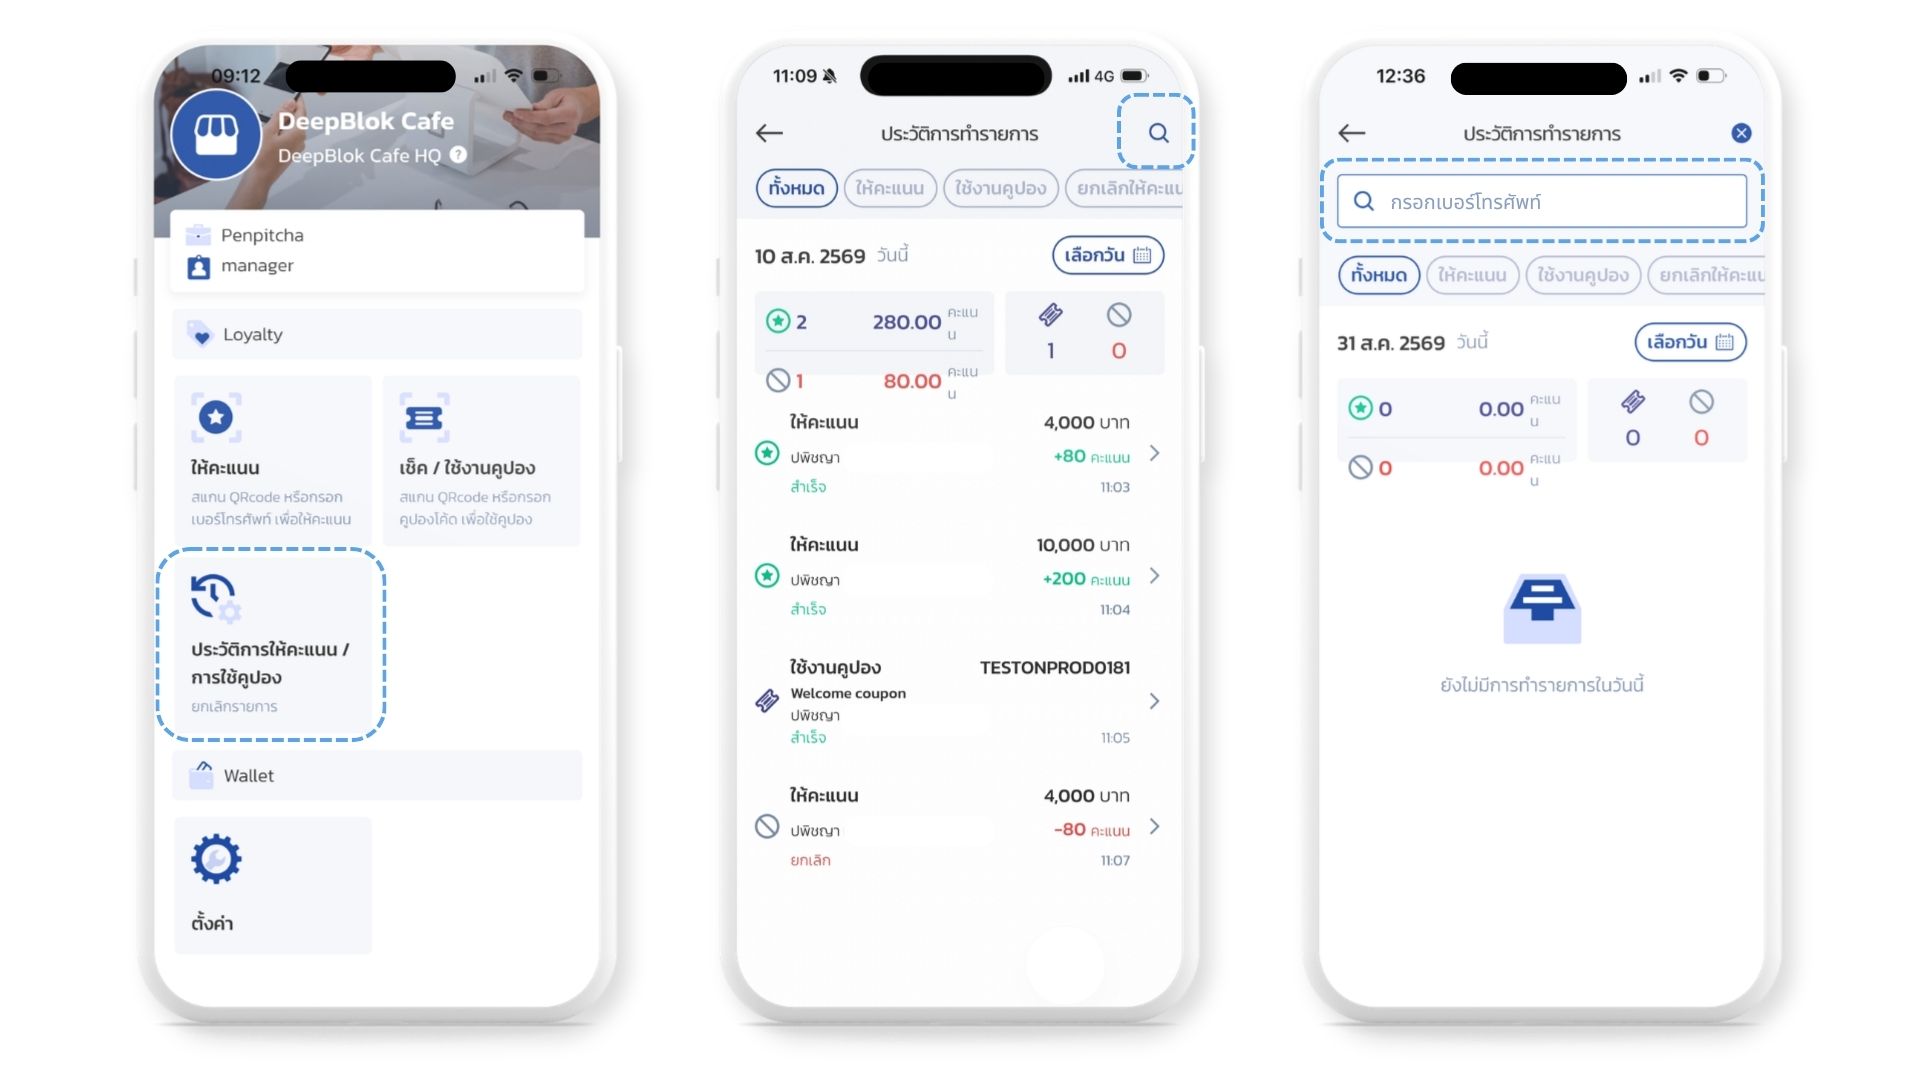
Step 2: Search by phone number when you know the customer
At the top right sits a magnifier icon. Tap it and a search box opens above the filter chips.
It searches by phone number only — the field's own placeholder says so, so you can't look a transaction up by customer name, bill number or transaction reference. When a customer calls about their points, asking for their phone number and searching straight for it is far faster than scanning the rows.
Tap the ✕ at the top right to close the search and go back to the full day.
Step 3: Filter with the chips at the top
Under the screen title are 5 filter chips, one selected at a time. The active one carries a navy outline. The strip scrolls sideways, so the 5th sits off-screen until you swipe.
1. All The default. Every transaction type mixed together in time order — useful for walking through what happened during a particular stretch of the day.
2. Earn point Points transactions only. This is what you use when reconciling against receipts, or when hunting for a transaction to void.
3. Use coupon Coupon redemptions only — for counting how many coupons a campaign has taken.
4. Void earn point Voided points transactions only. Worth opening at the end of every day to confirm there are no voids you didn't know about.
5. Void use coupon Swipe the chip strip left to reach it. Filters to coupon redemptions that were voided.
📌 Good to know: this chip existing confirms that voiding a coupon is supported. What it doesn't give you is a way to do it — no capture of a coupon-void flow exists anywhere in the app. If you need to reverse a coupon that was redeemed by mistake, tell whoever runs your Backoffice for now.
Step 4: Pick a date and read the summary cards
Below the chips is the date row, showing the date you're viewing with a Today badge when it's the current day. Tap Choose date on the right to go back to another date.
That button opens a Choose transaction date dialog — 3 scroll wheels for day, month and year. It takes one day at a time, not a range. Confirm with Confirm, or Cancel to close without changing the date.
Under that sit 2 summary cards, and their figures cover only the date you're viewing.