If the bill amount was wrong or the points went to the wrong customer, the original transaction can't be edited — but it can be voided and re-run. Counter staff can do this themselves without waiting on the back-office team — this is how you correct a transaction run on the phone while the web or POS was unavailable. The way in is the transaction history menu, not the points menu, and once it's done the points come straight back off the customer's account.
⚡ Quick Path: Home →
Transaction History (Point/Redeem→ tap the transaction →Cancel transaction(Void this transaction) → choosePlease select reason(reason) →Confirm→Confirmin the popup
📌 Good to know: the app runs in English or Thai — switch under
Setting→Change language. Every label below is the app's own English string. InEnglishthe date picker also switches to Gregorian years.
Requirements before you start
- The transaction has to be in the history of the branch you're signed in as — the history screen shows that branch's transactions, so a mistake made at another branch has to be voided by that branch.
- The time or the amount of the transaction — you'll need it to find the row, because history is shown one day at a time.
- A reason for voiding — the system requires you to pick one from a fixed list; you can't type your own.
- A word with the customer if they're still at the counter — their points balance drops as soon as you confirm.
⚠️ Watch out: A void is a new transaction that takes the points back, not a deletion. Both the original and the void stay in the history. Make sure you've selected the right row before confirming.
Void a points transaction in 4 steps
Step 1: Open the history and find the transaction
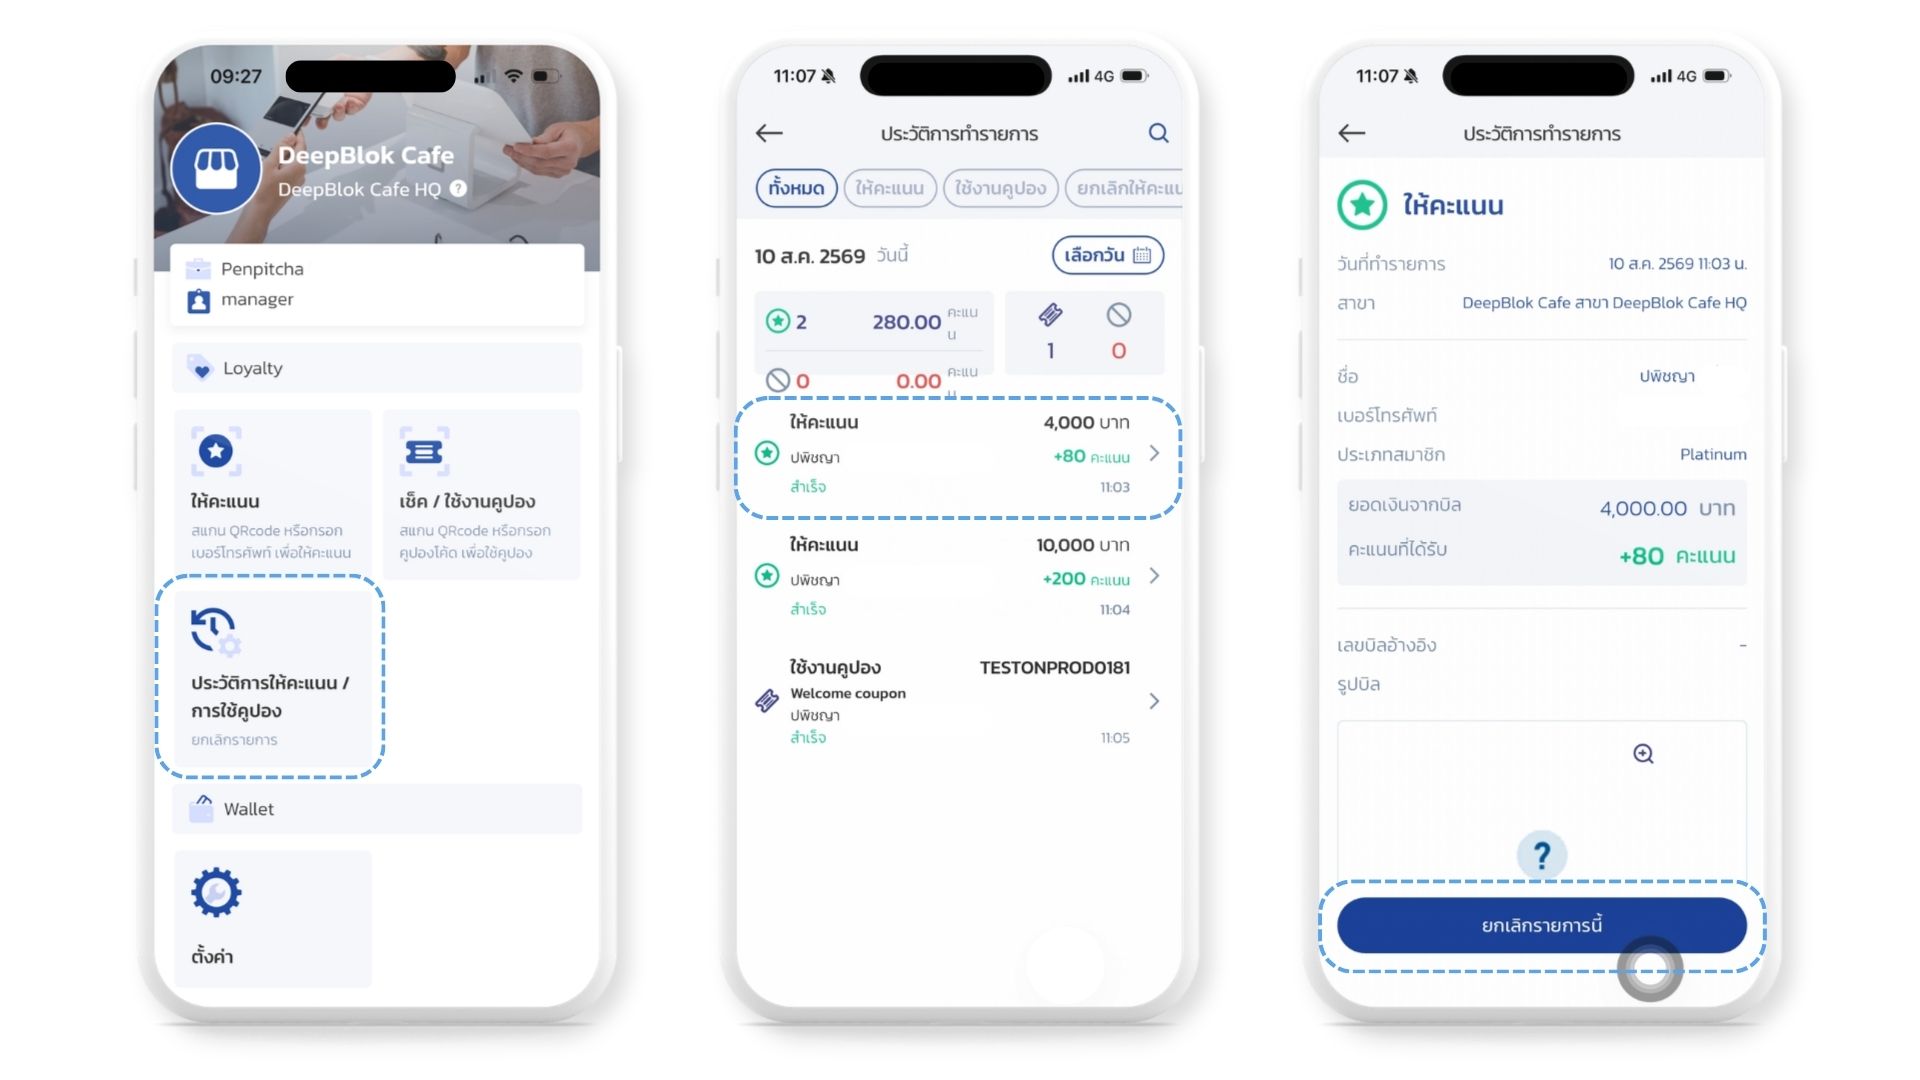
On the home screen, under Loyalty, tap the Transaction History (Point/Redeem tile — the one with Cancel earn point or redeem coupon (void a transaction) as its sub-line. The app opens Transaction history (Transaction history).
This screen shows one day at a time, starting with today. If the transaction you want is on another date, tap Choose date (choose a date) on the right of the date row. The filter chips along the top narrow things down — tap Earn Point to hide coupon transactions.
Step 2: Open the row and tap Void
Tap the row you want to void. The detail screen shows Transaction Date (transaction date), Branch (branch), the customer's details, Bill amount (bill amount), Point Amount (points awarded), Bill Reference (bill reference) and Bill picture (bill photo) if one was attached.
Check 3 things before going further — the time of the transaction, the bill amount, and the customer's name. Then tap the navy Cancel transaction button at the very bottom of the screen.
Step 3: Choose a reason
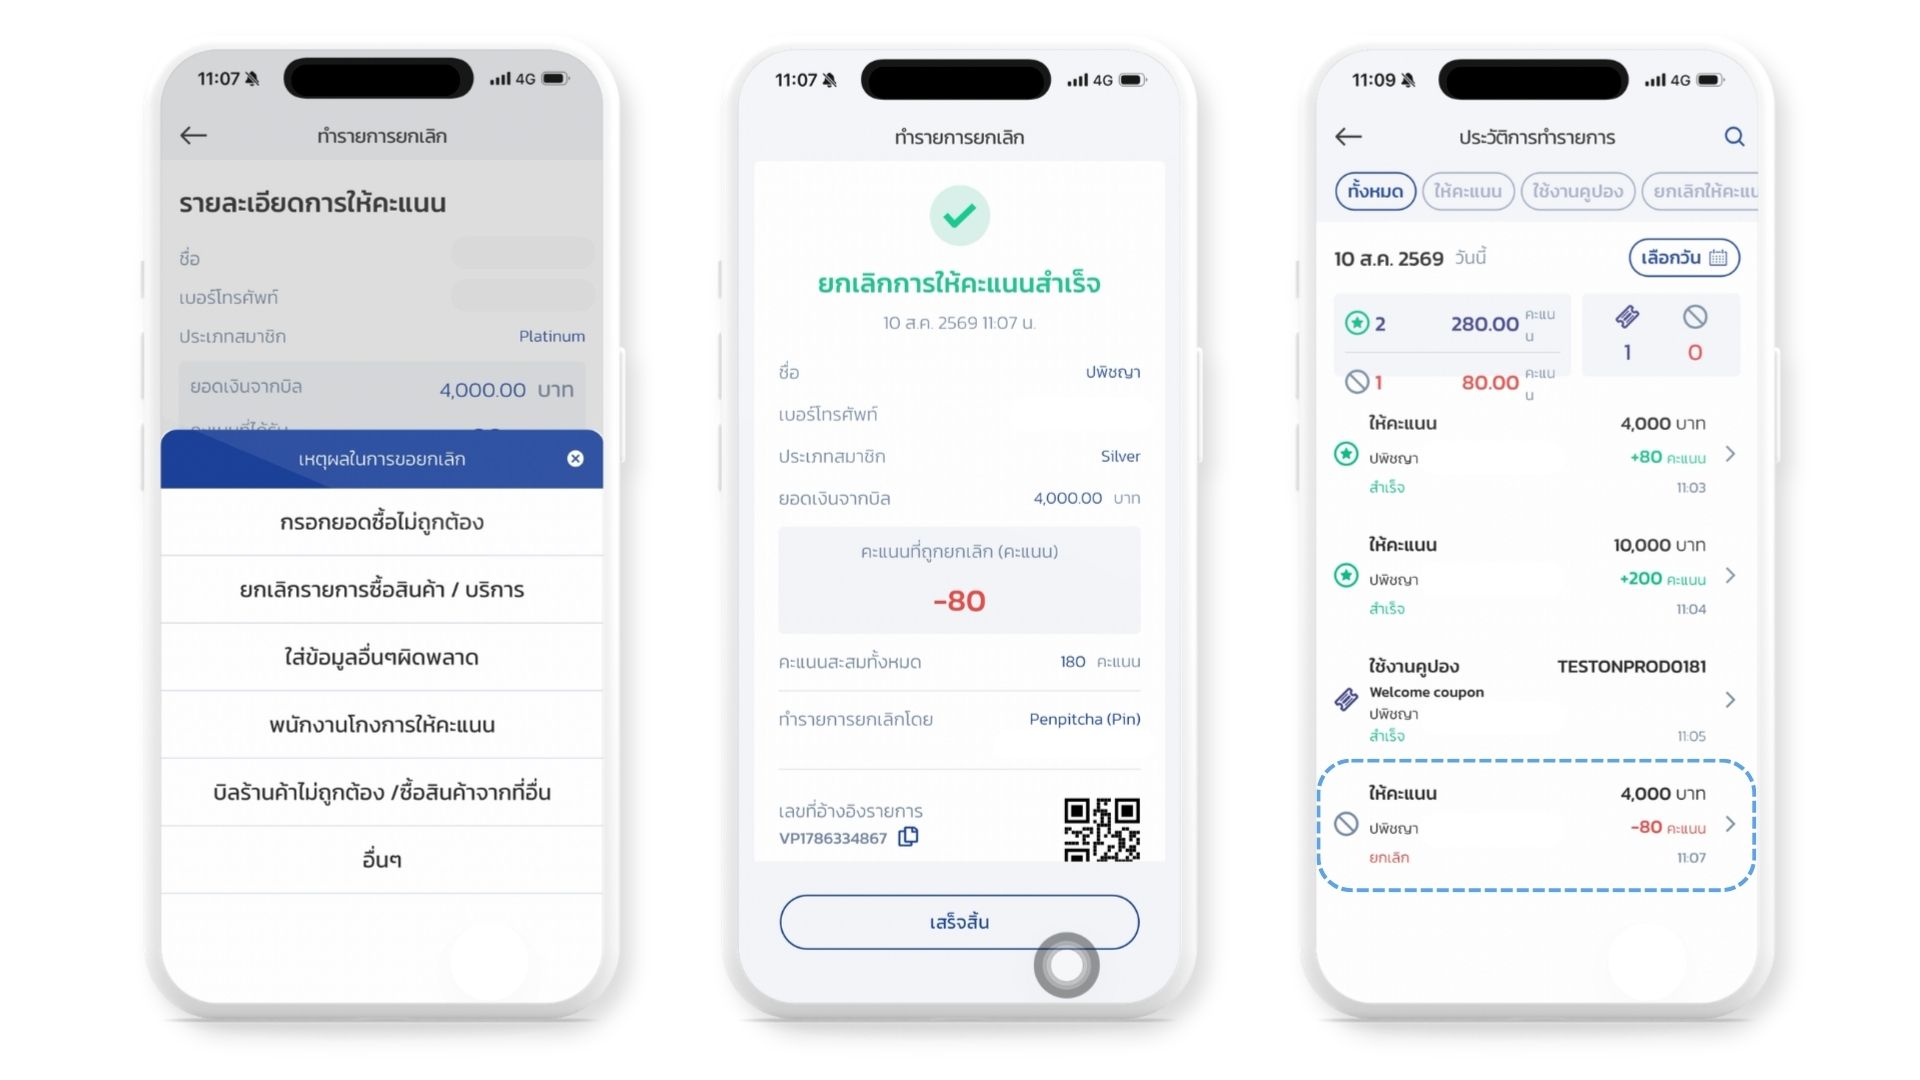
Voided Grant Points (Void transaction) recaps the original under Grant Points Detail, including the original Bill Reference (the transaction number) (transaction reference) — note that down if you may need to raise it with the back-office team later.
Scroll to the Voided Grant Points heading and tap the Please select reason field. A picker slides up from the bottom with 6 fixed reasons — you can't type your own:
Pick the one that actually matches what happened — the back-office team uses these to see which problems the counter hits most often. If you pick Others, follow up with the details separately.
The Confirm button stays grey until a reason is selected, then turns navy.