

When you want customers to earn points the moment they sign up, before they've bought anything, what you need to build is an Activity Promotion — under the Promotion menu, then the Activity Promotion submenu. It's a single-page form: no tabs, no conditions to configure. Allow about 5 minutes. Once you save it with the status switched on, the system awards points automatically to everyone who registers during the period you set.
⚡ Quick Path:
Promotion→Activity Promotion→+ New Promotion→ fill inPromotion Name,Credit Amount,Credit Type,End Date→ switchStatuson →Save
Welcome points are one of the best-value tools available for getting a customer back a second time, because the customer sees a real balance in their account from the first minute rather than a zero.
Requirements before you start
- Access to the
Promotionmenu — if it isn't in your left sidebar, ask an Admin on your team to grant it. - Check the brand name in the top-left corner — the
Working on …line has to be the brand you mean to build this for, because the promotion belongs to that brand. - Decide the points figure in advance — the system takes a single number. There's no calculation by amount spent, because signing up has no amount to calculate from.
- Know when your campaign ends — this form requires an end date, unlike a spend-based promotion which can run indefinitely. If you want welcome points to run forever, set a distant end date and put a renewal reminder in your team calendar.
- Set your branches up first if you'll limit this to certain ones — the
Registered Branch (Optional)field only lets you pick from branches that already exist (the "How to set up branches for the member registration form" article). - Check your system-wide point expiry if you'll use it — the first expiry option refers to whatever is set under
Settings→Credit Management.
How an Activity Promotion differs from a spend-based one
If you've just come from the "How to Create Advanced Rule-Based Promotions" article, the expectation to reset is that this form is far shorter — and short for good reasons.
Put as briefly as possible: an Activity Promotion only answers "who signed up, how many points, during which period, at which branches" — so there's nothing left to set a condition on.
Create the Activity Promotion in 6 steps
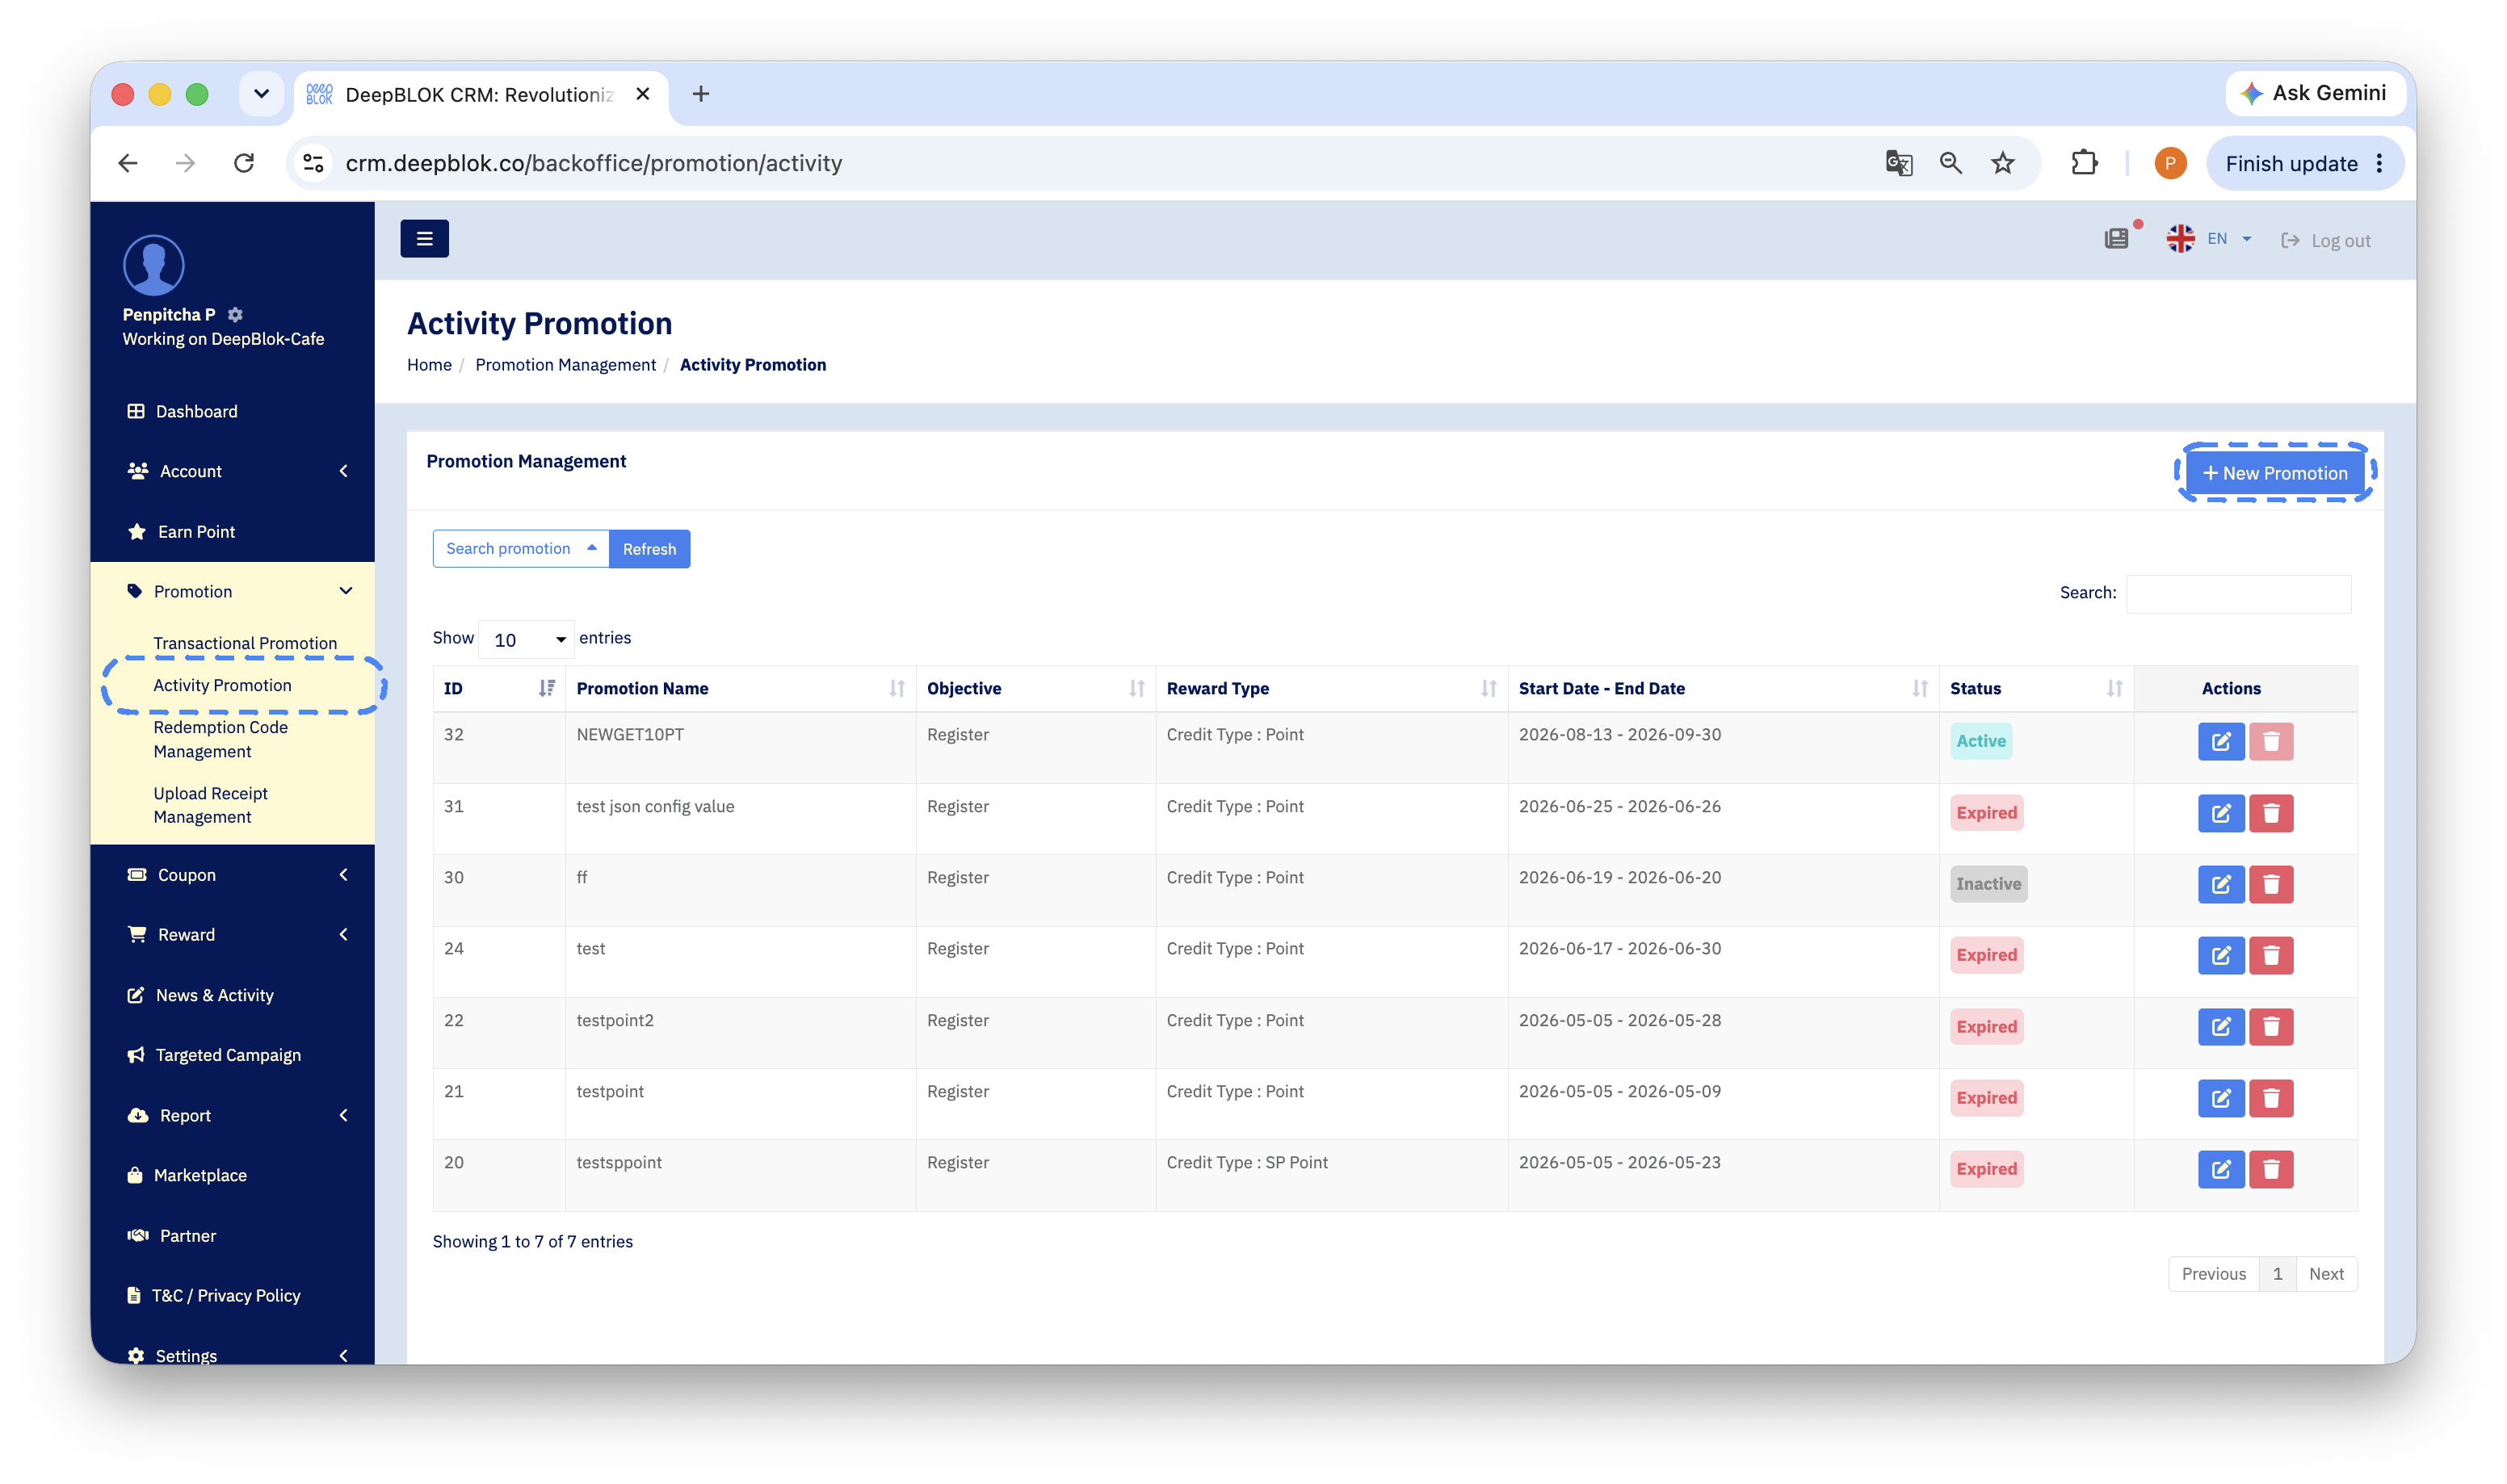
Step 1: Open the Activity Promotion page and start a new one
Click Promotion in the left sidebar, then the Activity Promotion submenu item. The system opens a page headed Activity Promotion, with a table already listing every activity promotion your brand has.
Click the blue + New Promotion button in the top-right corner of the table.
Step 2: Fill in the Promotion Detail section
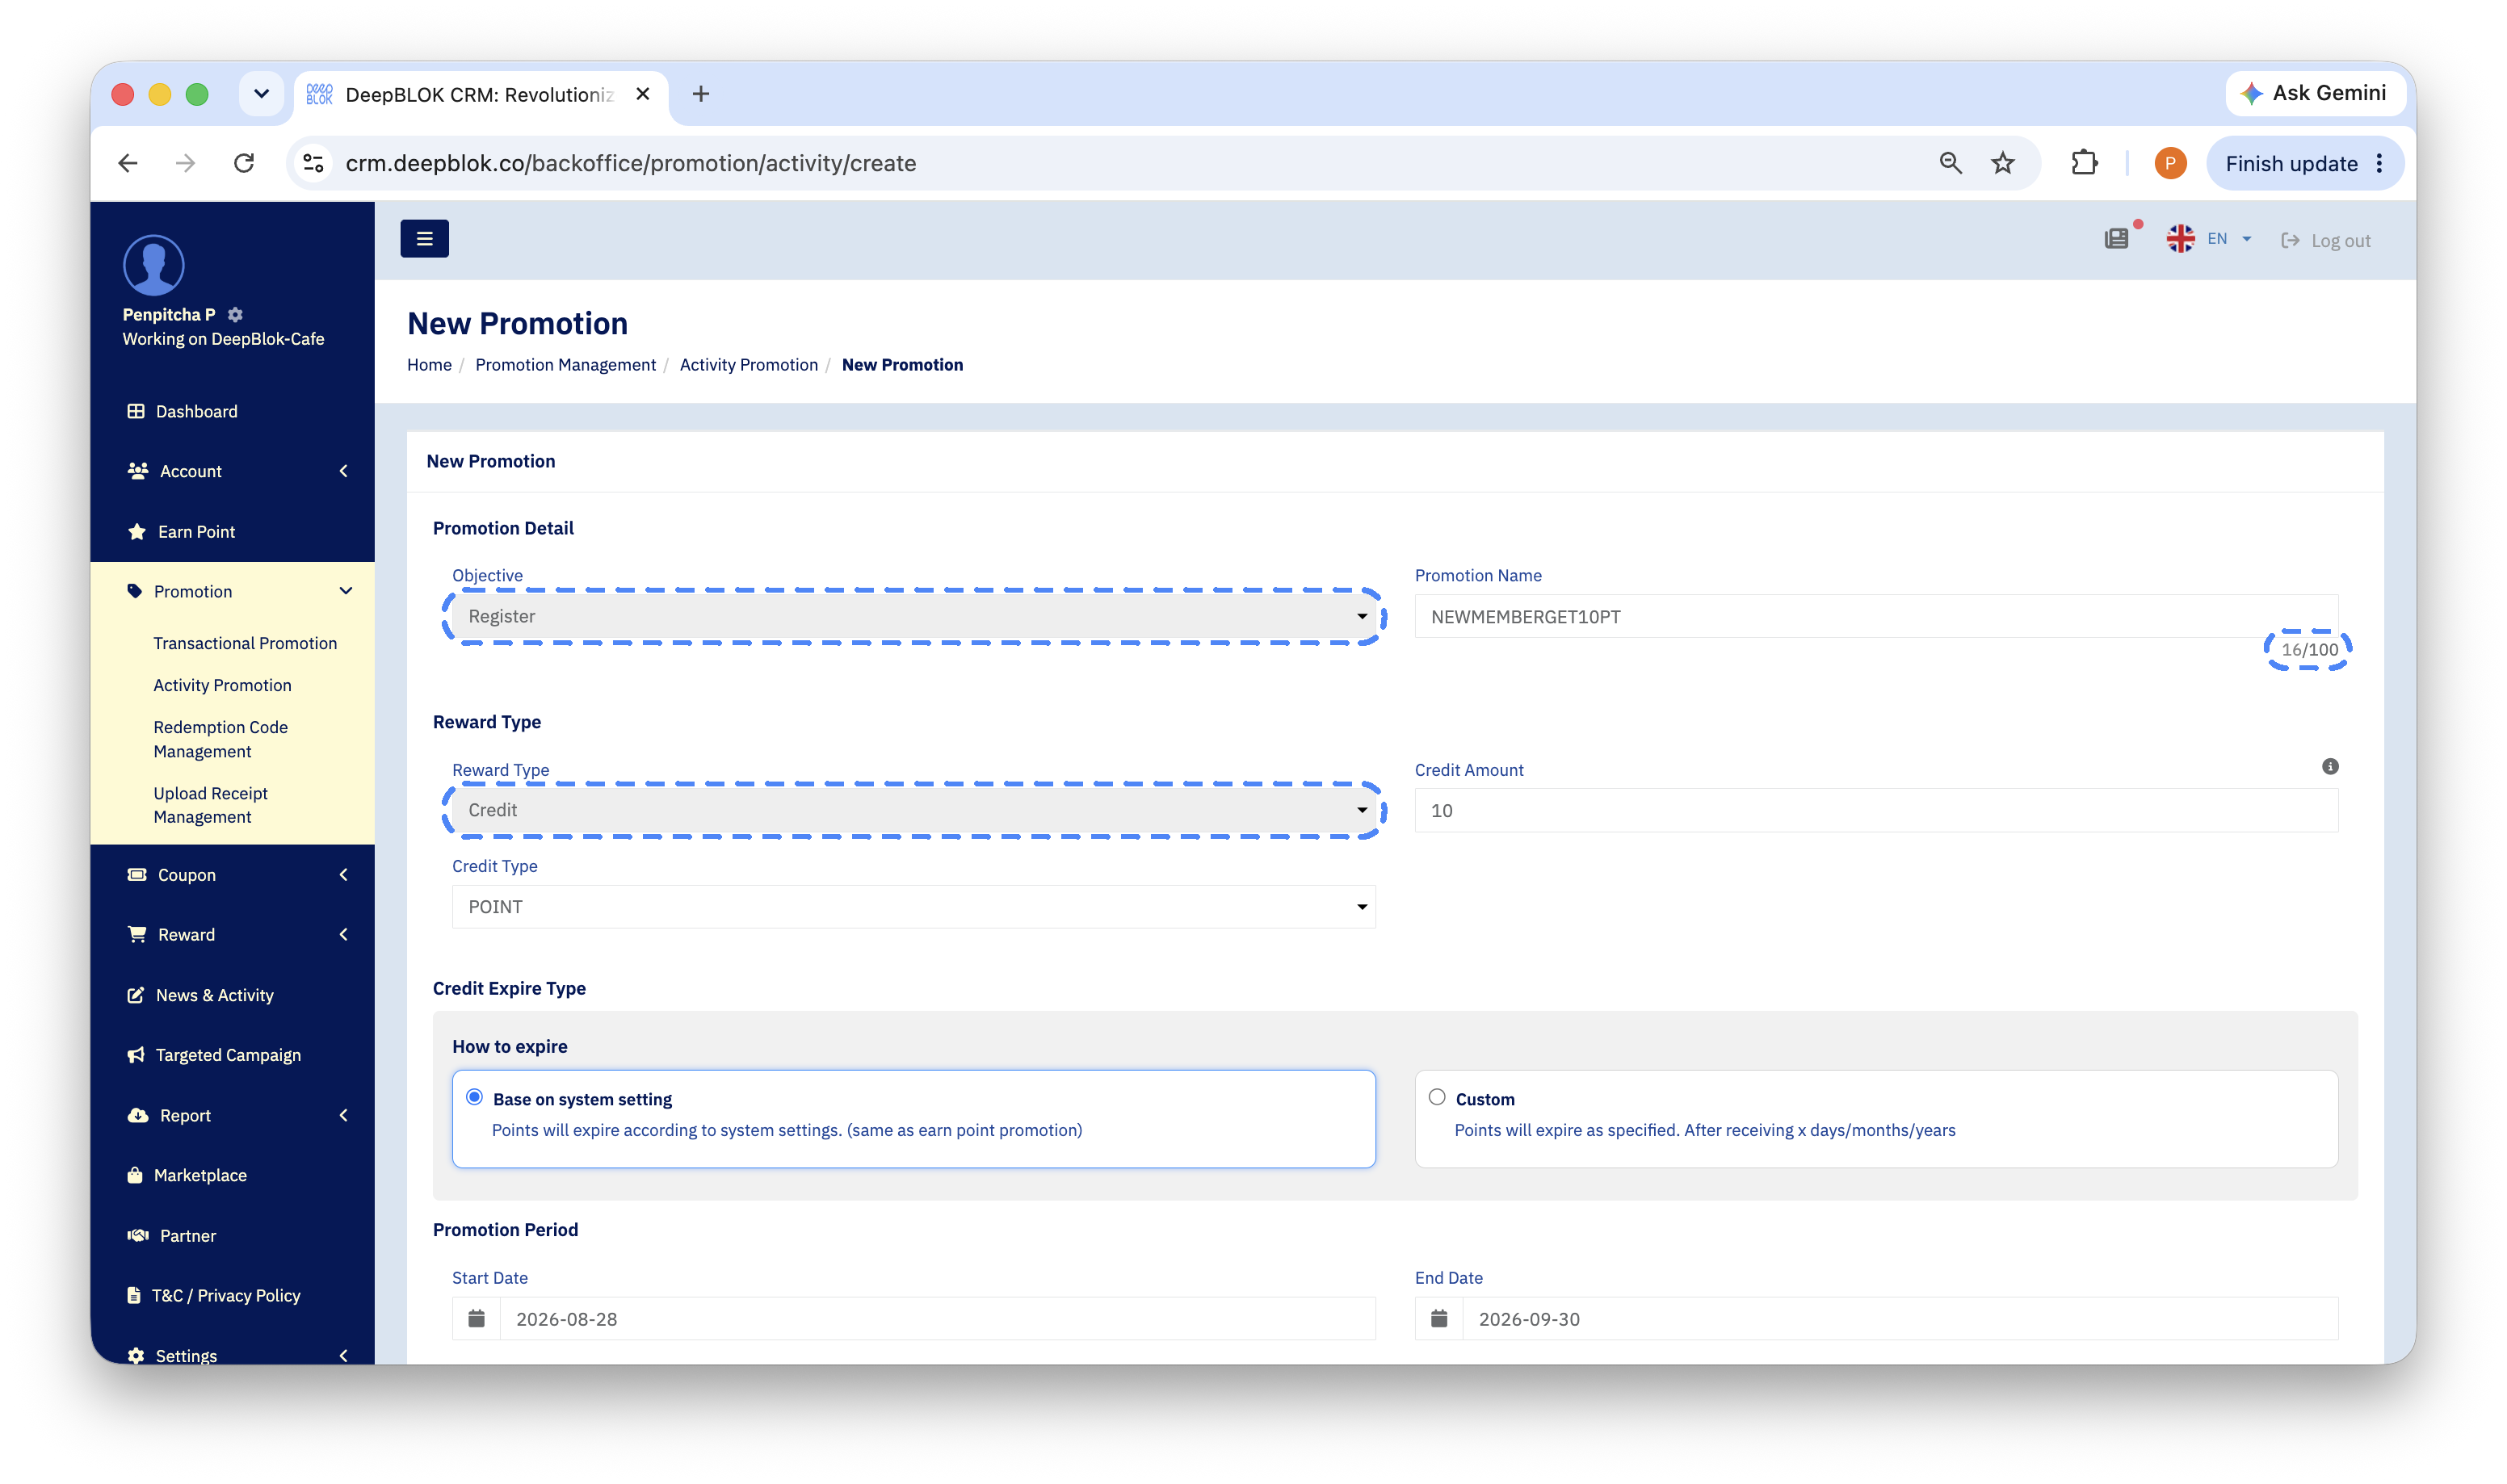
The system opens the New Promotion page. The top section is Promotion Detail, which has 2 fields.
The Promotion Name field has a character counter in its bottom-right corner, reading 0/100 while it's empty, so you can see whether the name is running long.
📌 Good to know: put the points figure in the name, e.g.
Welcome Point 50, because the list table has no column for the points amount — only the credit type. The name is the one place your team can read the figure straight from the list.
Step 3: Set the reward in the Reward Type section
The next section is Reward Type, and it's the heart of this promotion.
The Credit Amount field has a small ⓘ information icon in its top-right corner — hover it to read the system's own note.
Step 4: Choose how the points expire in Credit Expire Type
The Credit Expire Type section is a grey box with the inner heading How to expire and 2 selectable cards. Click a card to choose it; the selected one gets a blue border.
📌 Good to know: the system-wide value that
Base on system settingrefers to lives underSettings→Credit Management. If it's never been set, look at it before you decide — that's how you'll know how long your welcome points actually last.
Step 5: Set the period, the status and the participating branches
The 3 sections at the bottom of the form decide when and where this promotion runs.
The Promotion Period section — both fields are required.
Both are date fields only — there's no separate time input.
The Status section — a switch. When it's on it turns green and reads Active. Leave it on when you want the promotion to start on the date you set, and off when you'd rather prepare everything now and switch it on launch day.
The Advanced Settings section
⚠️ Watch out: every branch you pick here narrows the campaign rather than extending it. So for a nationwide launch, leave the field empty — that means every branch, and it's the safest choice. If you genuinely need to limit it to certain branches, register one test member through a branch you selected and another through one you didn't, then compare the
Points Historytab on both. Those 2 tests confirm the field's real scope more reliably than anything else.