

The rule that decides how much a customer has to spend to earn a point lives under the Promotion menu — not in the system settings screen, which is where most people look first. You set it through a 3-step create page: fill in the promotion details, define the condition, then define the reward. The whole thing takes about 10 minutes, and once you save it the system starts awarding points automatically on every transaction from your chosen start time onward.
⚡ Quick Path:
Promotion→Promotion Create→1. Promotion Information→2. Condition→3. Reward→+ Save reward
Requirements before you start
- A Backoffice account you can already log in to, with a Role that has access to the Promotion menu. If you don't see it in the left sidebar, ask a teammate with the Admin Role to adjust your permissions.
- Check the brand name in the top-left corner (
Working on …) matches the brand you're setting the rule for — the promotion you create applies to that brand. - Write your rule out as a single sentence first, for example "spend ฿100, earn 1 point".
- Decide up front when the rule starts, and whether it has an end date at all.
- If you plan to limit the rule to certain branches or member tiers, set your branches (the article on setting up branches for the member registration form) and member tiers (the article on setting up member tiers and their benefits) up first — step 2 offers you a list of what already exists.
📌 Good to know: a new rule applies only to transactions that happen after its start time. It does not go back and recalculate older receipts. To award points retroactively to customers who already bought something, use the method in the article on giving points to a customer manually or the How to award points to many customers at once with a CSV file article instead.
Understand the 3-step shape first
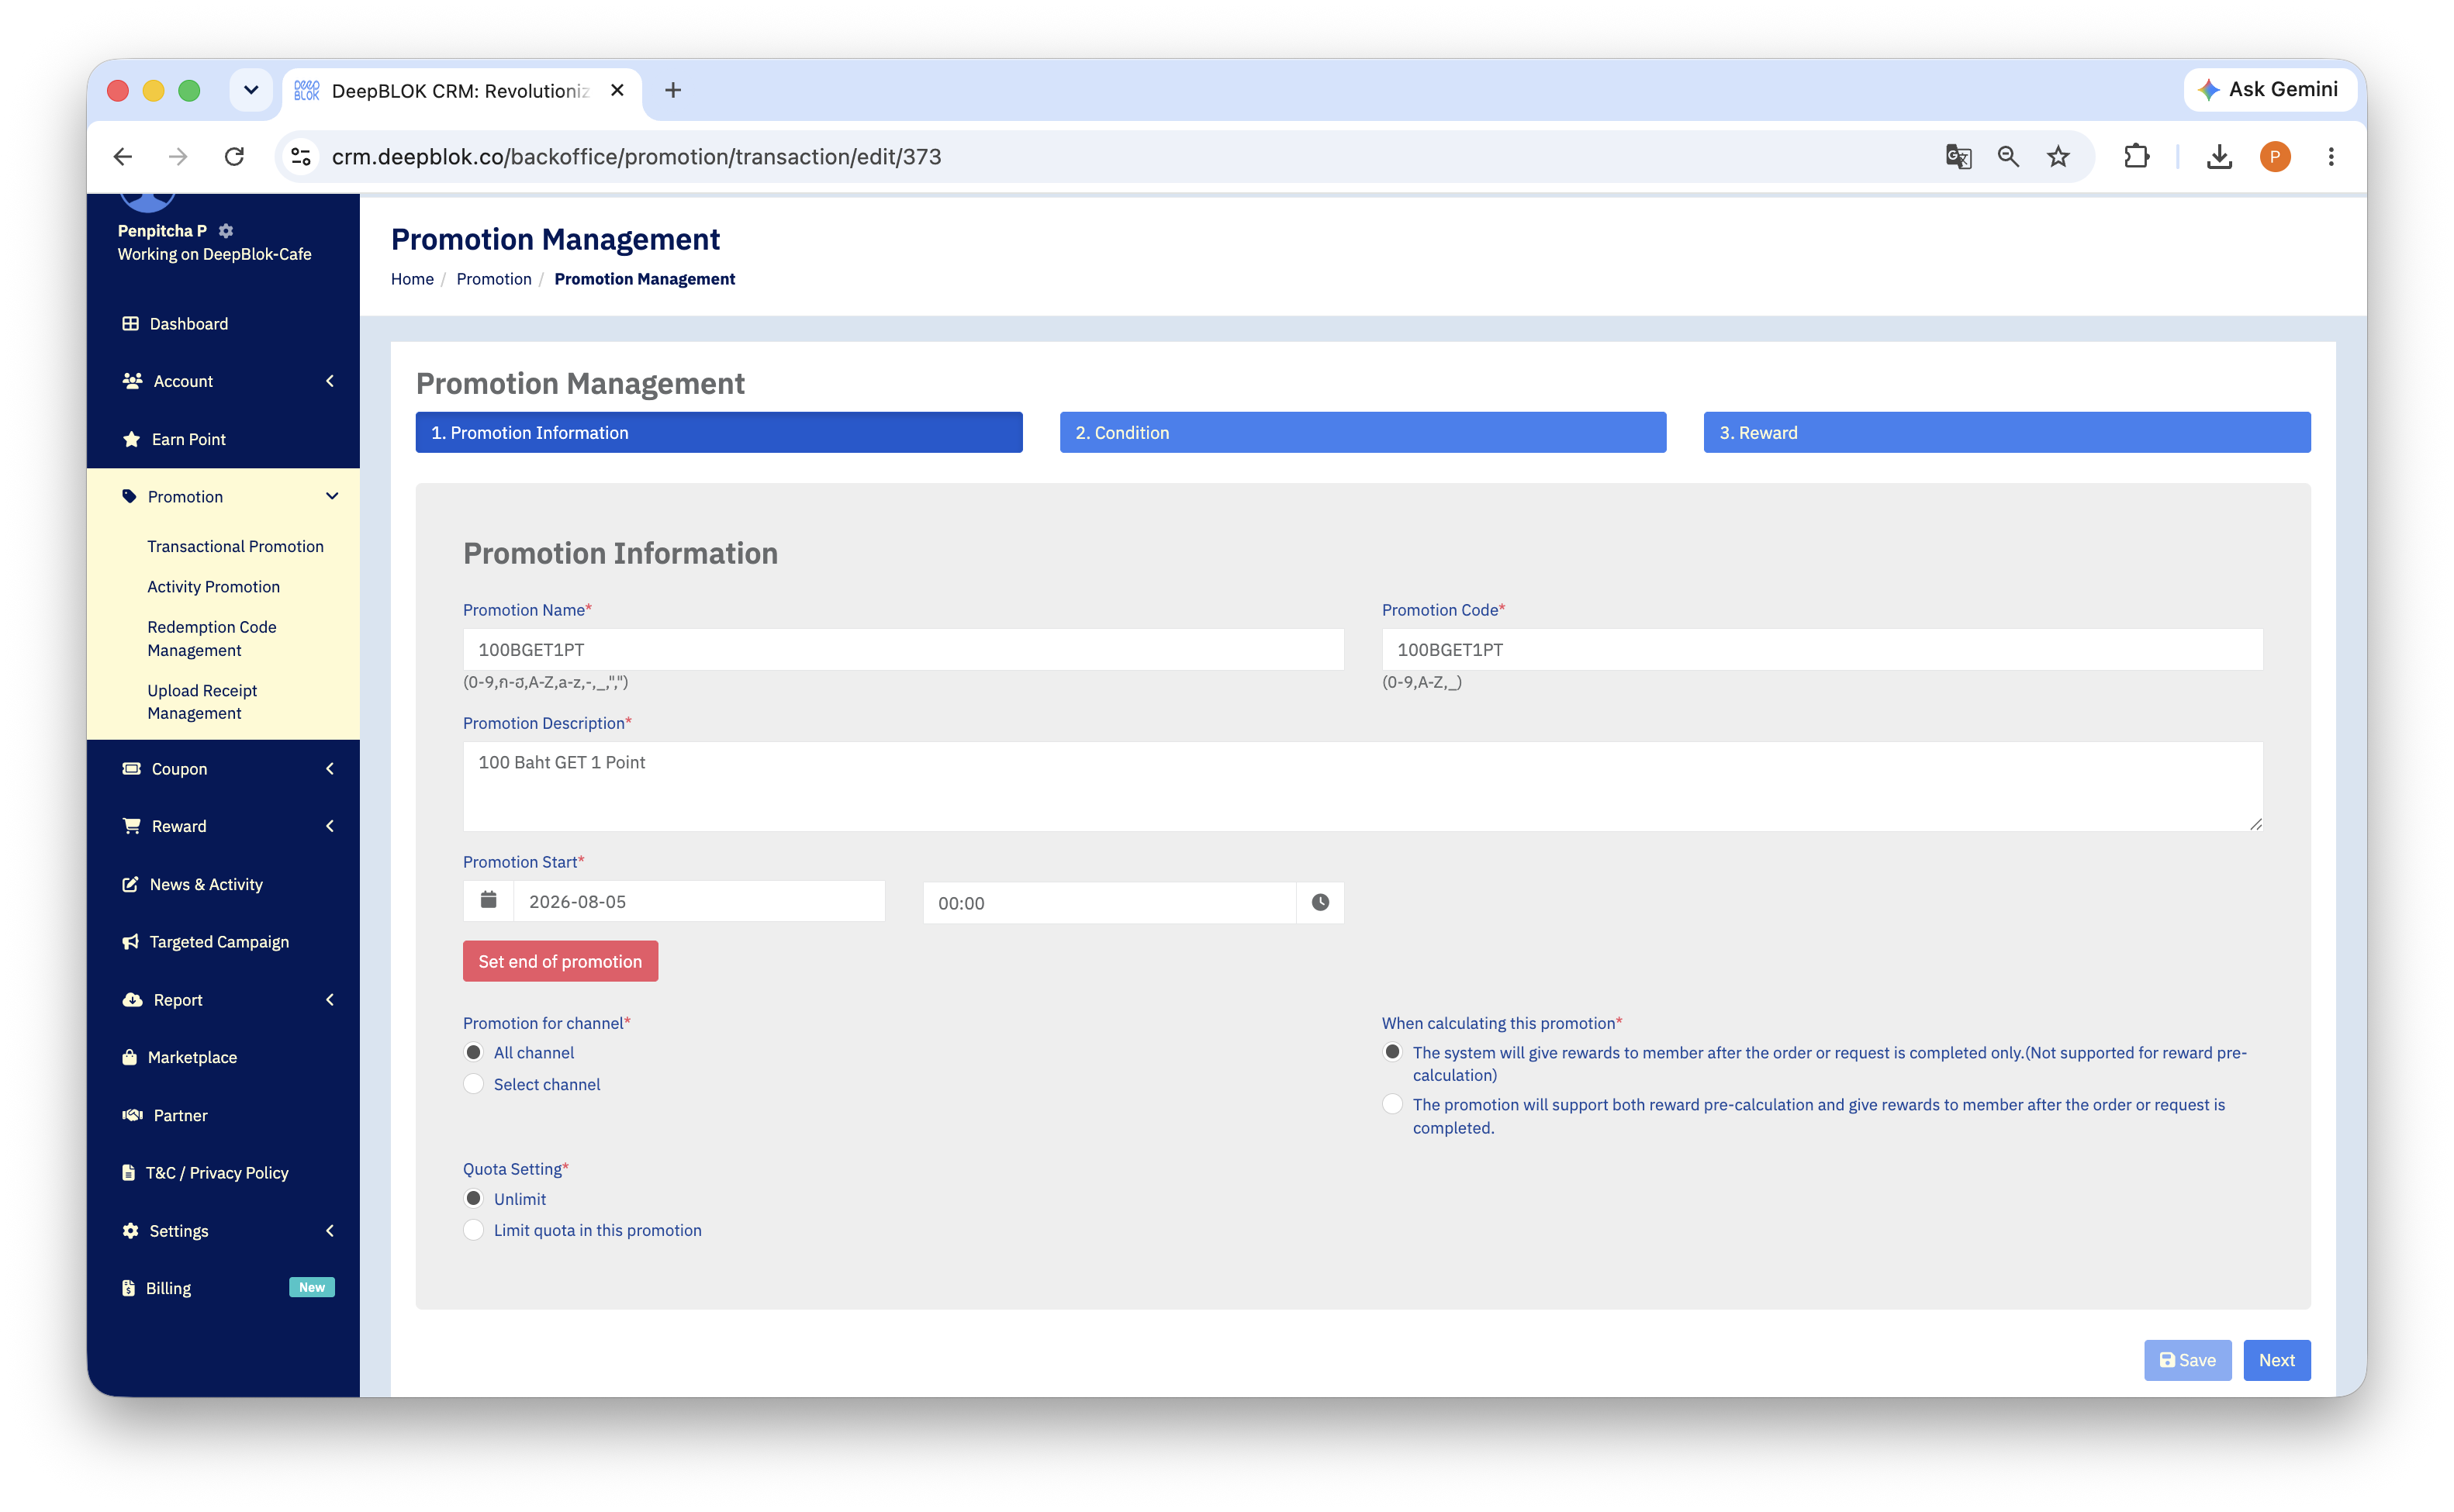
The promotion create page is split into 3 tabs across the top of the page: 1. Promotion Information, 2. Condition and 3. Reward. The tab you're on is dark blue. The thing that makes this much easier to follow is knowing that each tab answers a different question.
Put as briefly as possible: step 2 is the words "spend ฿100", and step 3 is the words "earn 1 point". Pair them up that way and none of the 3 screens is confusing.
Set your point-earning rule in 5 steps
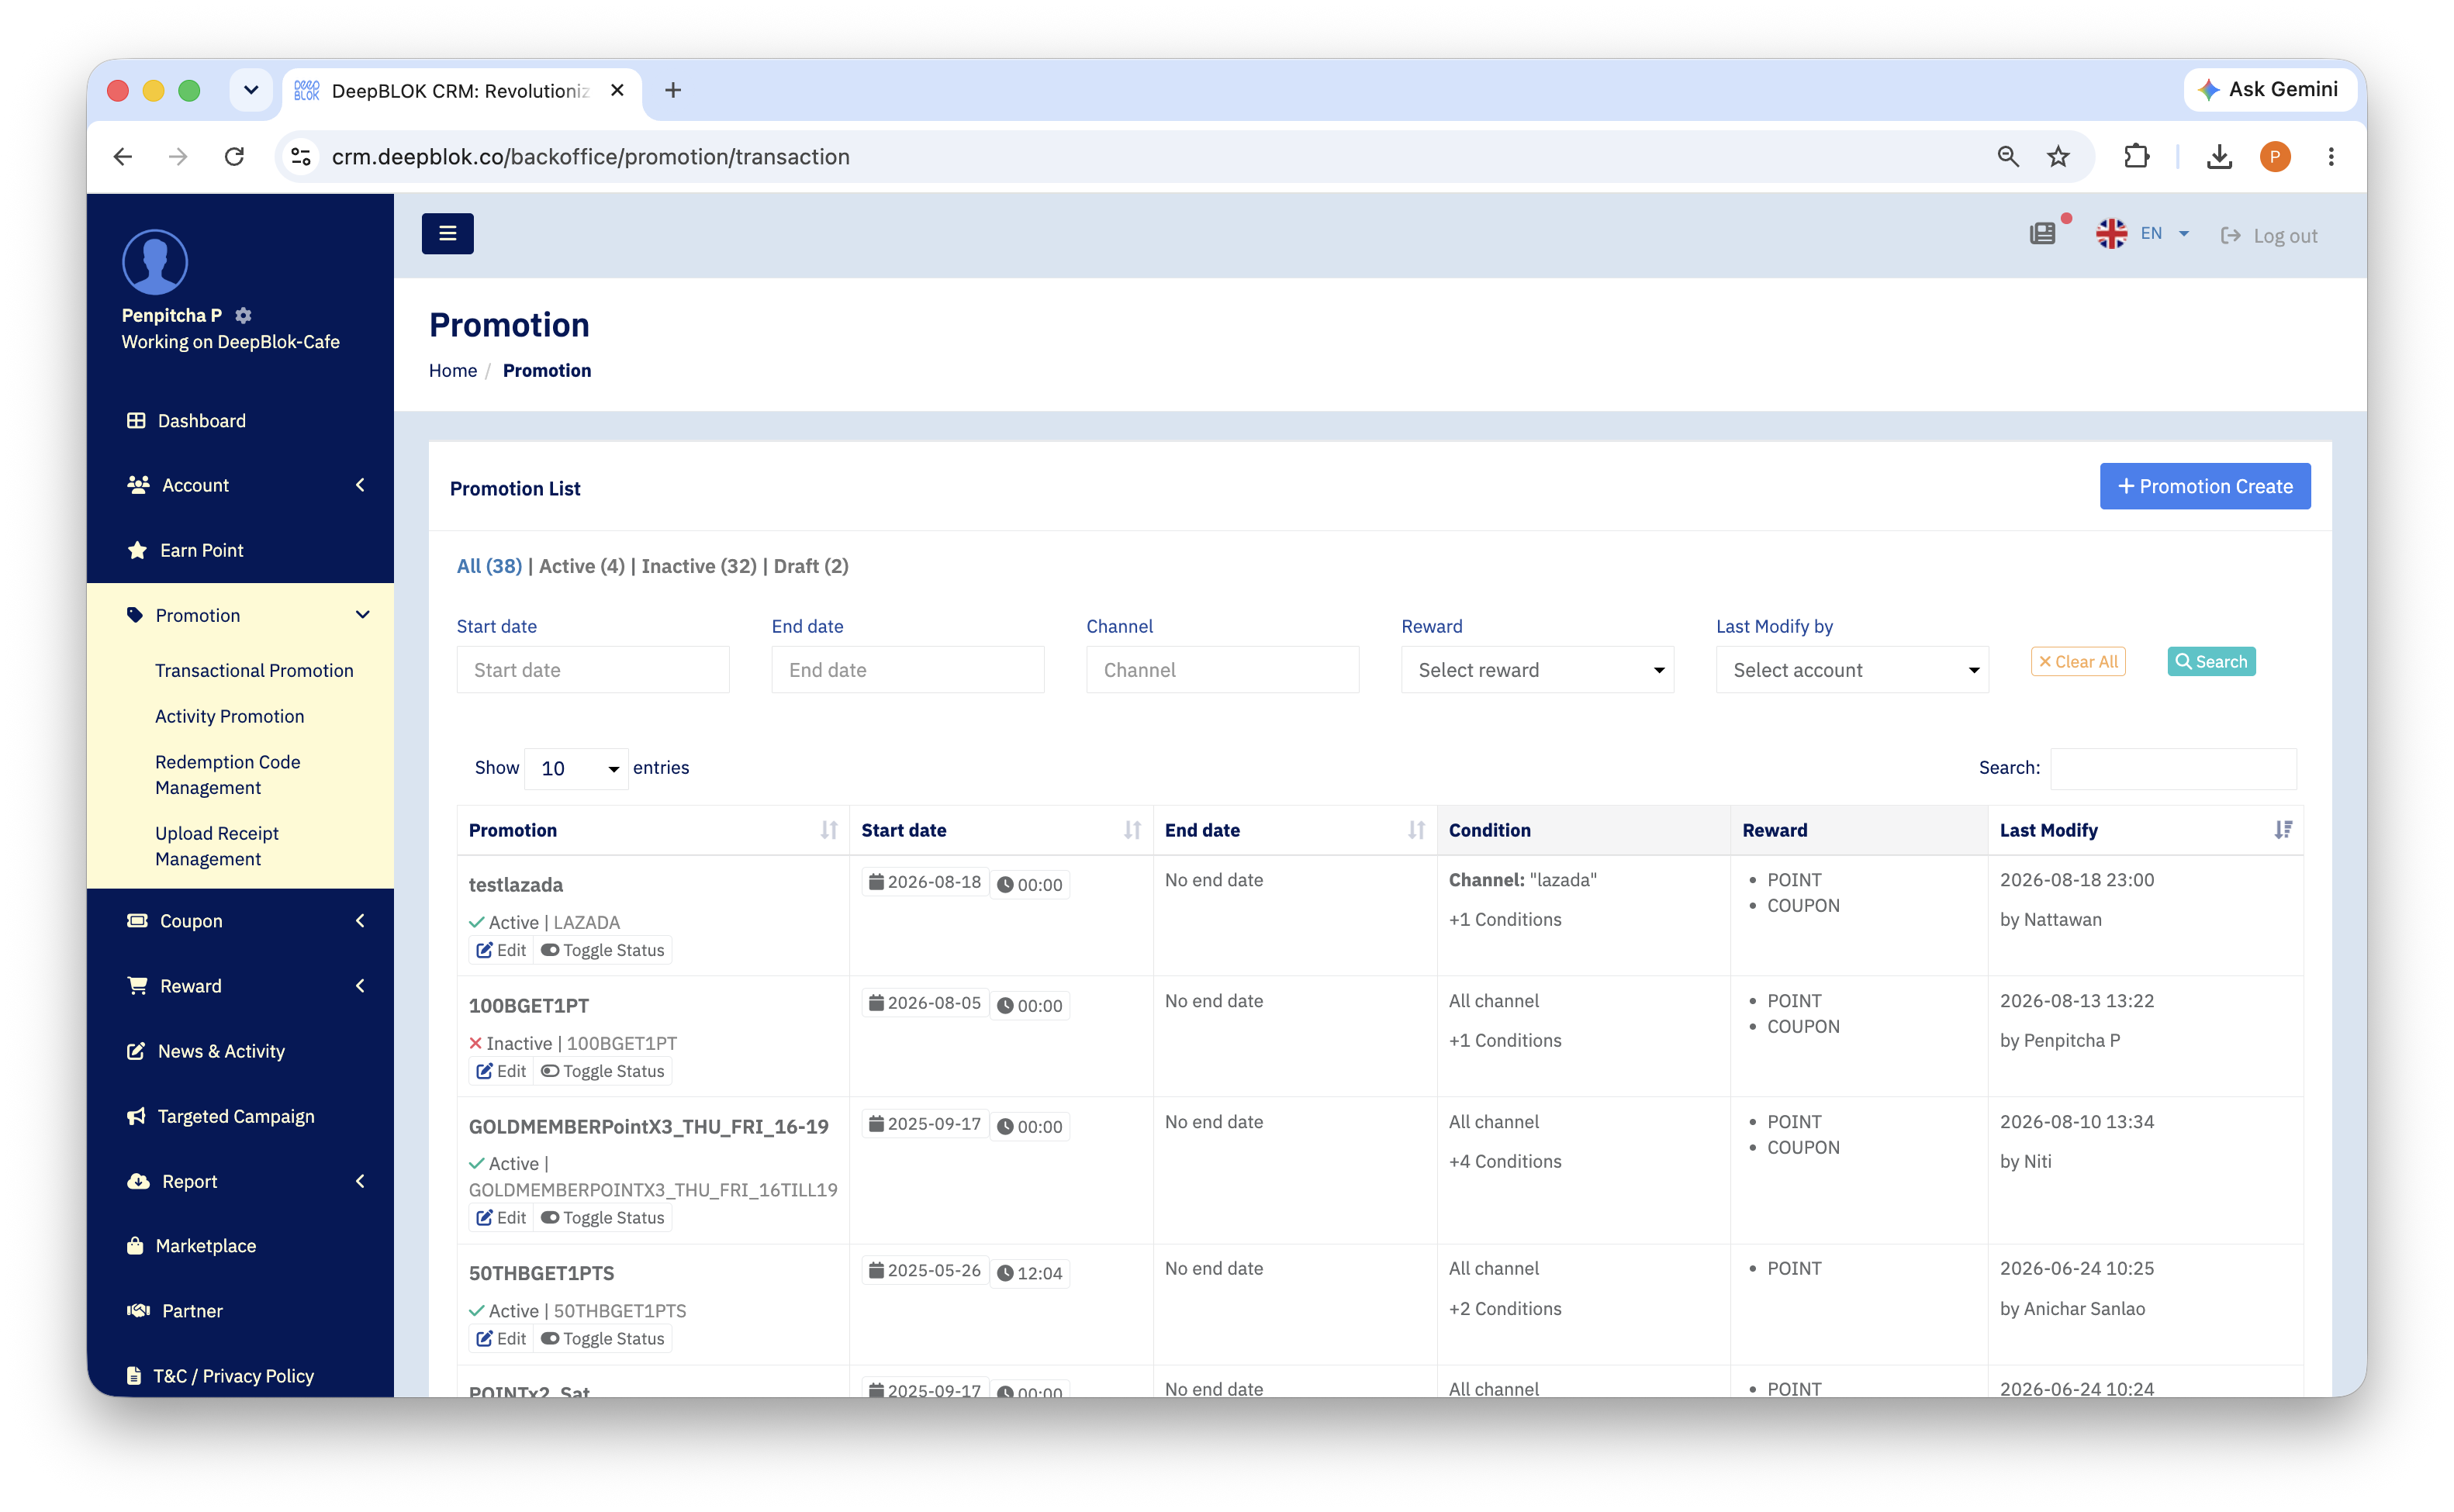
Step 1: Open the Promotion menu and click Promotion Create
Click Promotion in the left sidebar. The system opens the Promotion Management page, which already lists every promotion your brand has.
In the top-right corner of the list is a blue + Promotion Create button. Click it to start a new rule.
Step 2: Fill in the promotion details
The system opens the 1. Promotion Information tab for you. Fields with a red asterisk are required.
Once everything is filled in, click the blue Save button in the bottom-right corner and the system moves you to the next tab.
📌 Good to know:
Quota Settingcan cap usage at promotion level, brand level, branch level and per individual customer. If you're setting up a basic earning rule where customers should get points on every purchase, chooseUnlimit.
Step 3: Create the condition
The 2. Condition tab is where you define the words "spend ฿100".
- Click the blue
+ Add new conditionbutton. - The
Condition managementwindow opens with aSelect a conditiondropdown. - Open the dropdown and pick the condition in the
Paymentgroup that keys on the payment amount. There's a search box at the top of the dropdown — typePaymentto narrow the list down. - Enter
100as the minimum amount, then save the condition.
Saved conditions stack up under the Promotion Condition List heading as a numbered list, each summarised as a sentence you can read back, with a ⋮ menu at the end of the row for editing or deleting.
Once your conditions are in place, click Next in the bottom-right corner.
📌 Good to know: the system always requires at least one condition before it lets you move on. This dropdown offers more than 18 conditions grouped under
Brand & Branch,Item Purchase,Member info.andPayment. For a basic earning rule, one condition from thePaymentgroup is all you need — combining several conditions is covered in the Promotion system limits you should know before you configure article and the How to Create Advanced Rule-Based Promotions article.