

Reward images live in the Images Setting panel of the reward's edit page, under the Reward menu. Each reward uses 4 files — a cover image and a detail image, each with a separate Thai and English version — and all 4 use the same dimensions, 750 × 520 px.
⚡ Quick Path:
Reward→ the group'sReward List (n)button → pick the reward →Edit→Images Settingpanel → uploadThumbnail/Banner(EN + TH) → uploadDetail Image(EN + TH) →Savein the panel →Save all
Requirements before you start
- An account that can see the
Rewardmenu — if it isn't in your left sidebar, ask an Admin on your team to grant access first. - A reward or privilege that already exists — this article covers adding images to a reward you've already created. If you haven't created one yet, see the article on creating your first reward first, then come back.
- 4 image files per reward — cover (Thai + English) and detail (Thai + English). All 4 use 750 × 520 px and accept JPEG or PNG, up to 1 MB per file.
- If you don't have English artwork yet, prepare a file with no text on it and use the same file in both fields for now. That beats leaving either field empty.
The image sizes you need to prepare
Every field states that the file must be 1 MB or less and in JPEG or PNG format.
📌 Good to know: the cover and the detail image are both 750 × 520 px, yet they do different jobs, so don't use the same file for both. The cover is scaled down for the list, so it should be a clean shot of the item with no small text. The detail image is shown at full width, so it can carry details or terms inside the artwork.
Upload reward artwork in 5 steps
1. Open the reward list for the group you want
In the left sidebar, click Reward. This opens the Reward List page, which is not yet a list of individual rewards — this page lists reward groups.
Find the row for the group your reward belongs to, then click the light-blue outlined Reward List (n) button in the Reward List column of that row. The number in brackets is how many rewards are in the group. The same row also has a Category List (n) button, which goes to categories rather than to the rewards themselves.
📌 A note on the page name: this page is titled
Reward List, but what's in the table is reward groups, not individual rewards. Use the column names to tell: if you can seeReward Group CodeandReward Group Status, you're on the group list, so clickReward List (n)to go one level deeper.
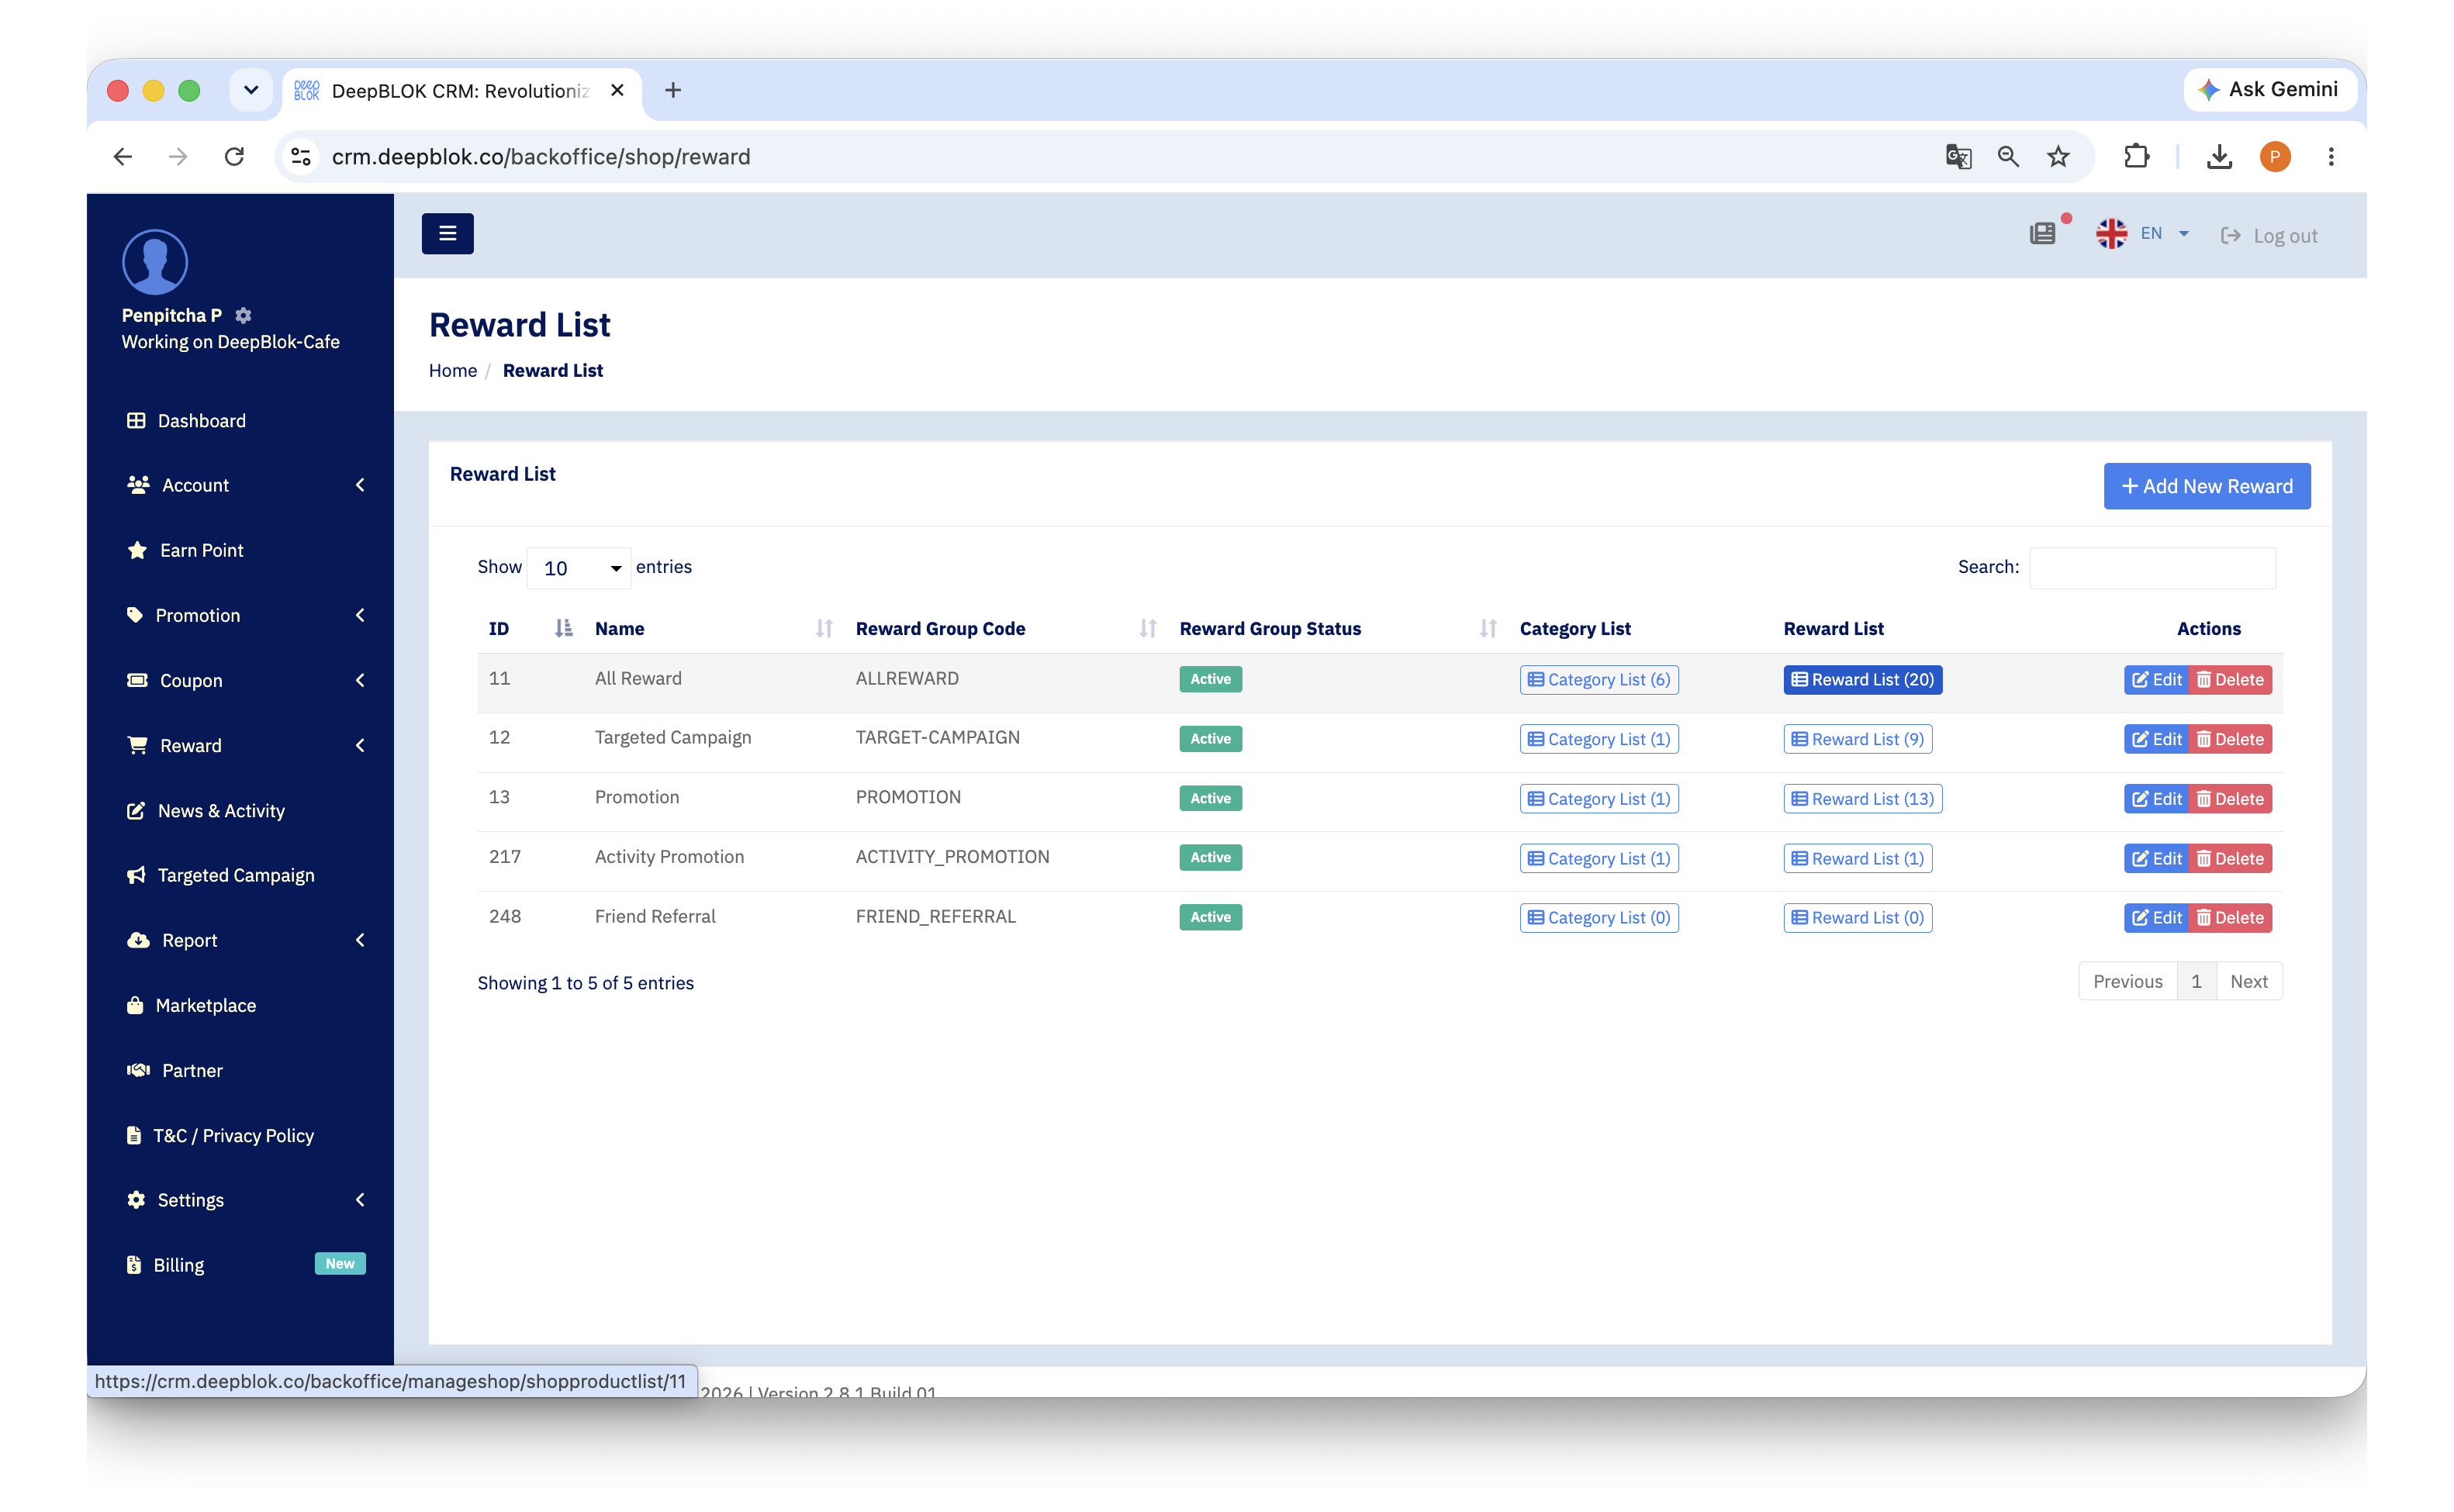
2. Open the reward's edit page
The page that opens is headed Reward Group Name: <group name>. Find the row for the reward you want, then click the blue Edit button in the far-right column. The row also carries Active or Inactive for turning display on and off, a red Delete, and View Report — Edit is the only one that takes you to the image fields.
The Images column in this table is the best way to check your work. It's subtitled Thumbnail | Detail and shows a thumbnail of both fields; any empty field reads No Image. One pass down that column tells you which rewards are still missing artwork, before you open them one by one.
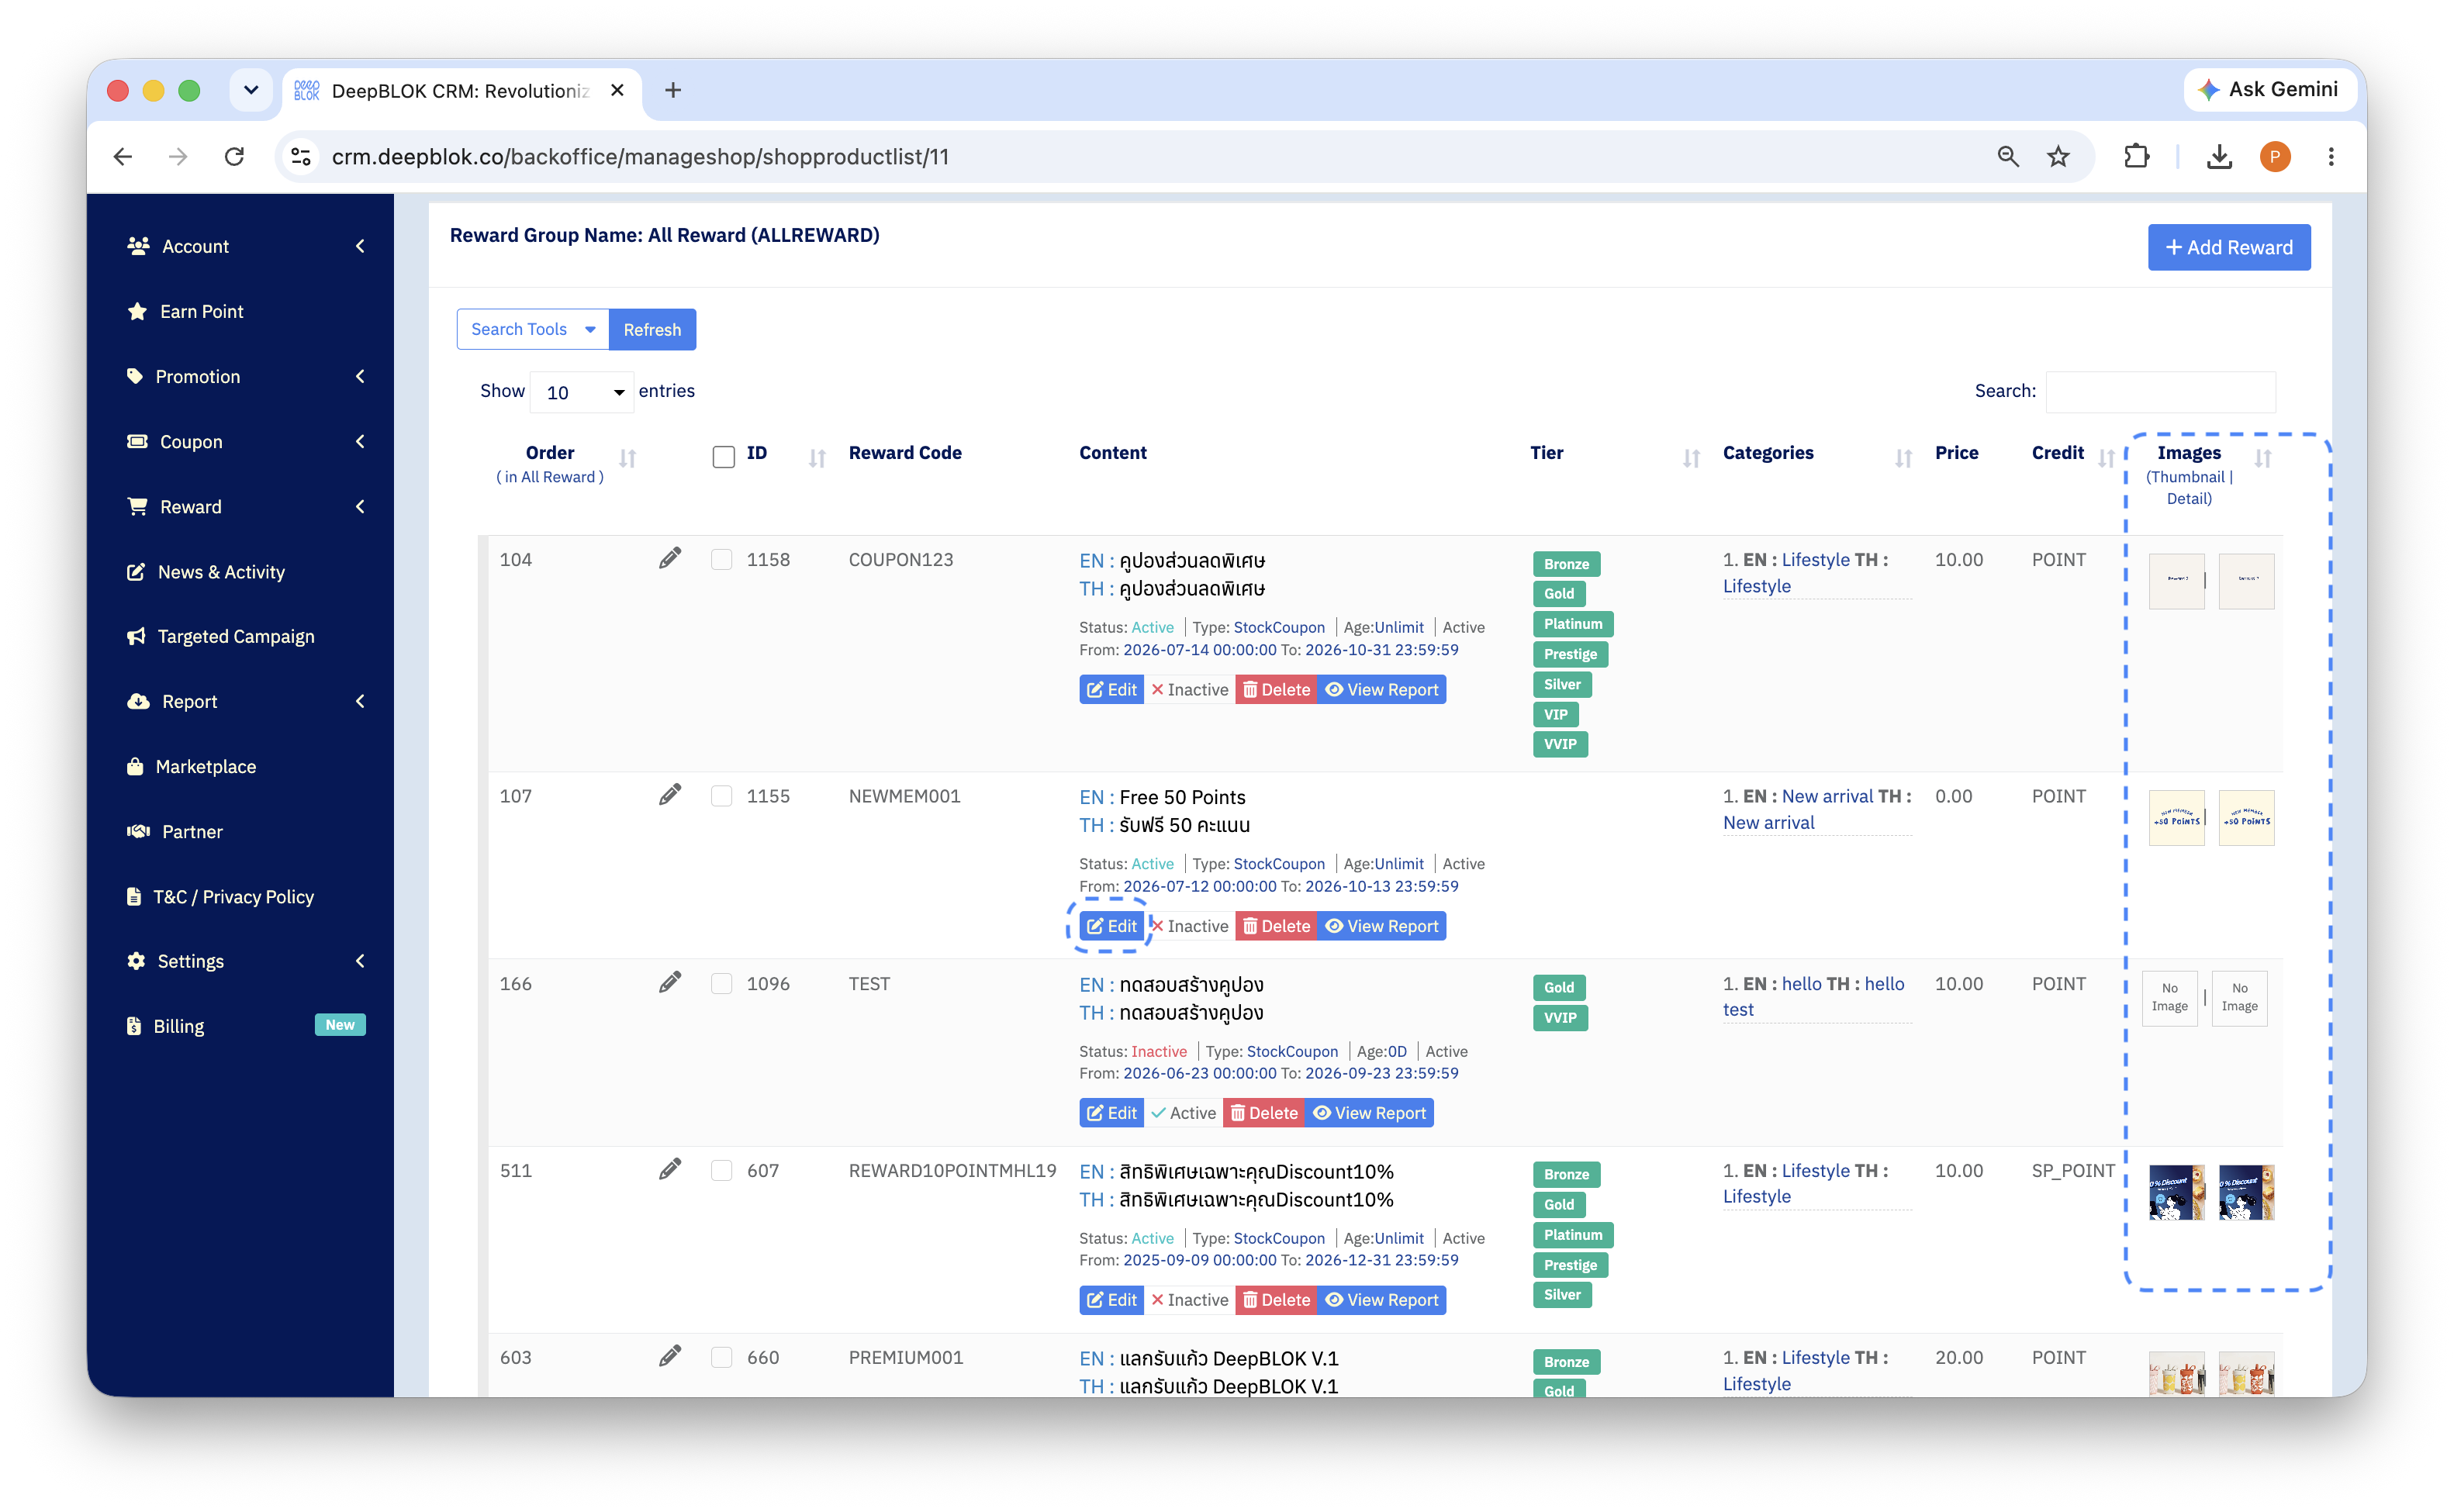
3. Scroll down to the Images Setting panel
The page that opens is headed Edit Reward <reward name>, taking its value from the Reward Name field rather than Reward Code. The whole page sits on the Reward Info & Setting tab and is divided into collapsible panels, stacked in order.
The first panel is Reward Info, which holds the reward's details — Reward Code, Reward Name, Reward Title (EN) / (TH), the Reward Status checkbox, and the Active Date range. Those last 2 decide whether customers see this reward at all, so note where they are: if you fill in every image and customers still can't see the reward, this is where to come back to.