

A reward is an item customers see in the membership app and redeem with their points. You build one from the Reward menu in the left sidebar, and the order matters: open the reward group first, then press Add Reward from inside that group. A newly built reward starts in Draft status, which customers cannot see, until you publish it. The whole thing
⚡ Quick Path:
Reward→Reward Group List→View Rewards→+ Add Reward→ fill in the 6 required fields →Save Draft→ set up tabs 2 to 4 →Publish
📌 Good to know: if this reward hands the customer a coupon to show at the counter, build the coupon bucket first, before you start the steps in this article. The Coupon bucket field only offers buckets that already exist, and the bucket is one of the things the publish check looks for. A link to the coupon-bucket article is in the last section.
Requirements before you start
- Access to the
Rewardmenu, and edit rights — if you can see the menu but there is no+ Add Rewardbutton and noEditbutton on the rows, that account has read-only access. Ask an administrator on your team to grant edit rights first. - 6 decisions made in advance — the reward code, the name your team uses internally, the brand or partner that owns the reward, the customer-facing name in both Thai and English, and the balance customers spend. Miss any of these and
Save Draftwill not go through. - 4 image slots — the
Imagestab holds a cover image and a detail image, each split by language. The page recommends 750 × 520 px, a file no larger than 1 MB, and JPEG or PNG only. - A coupon bucket, for rewards that carry a coupon — build it first, as noted above.
The 5 reward groups the system provides
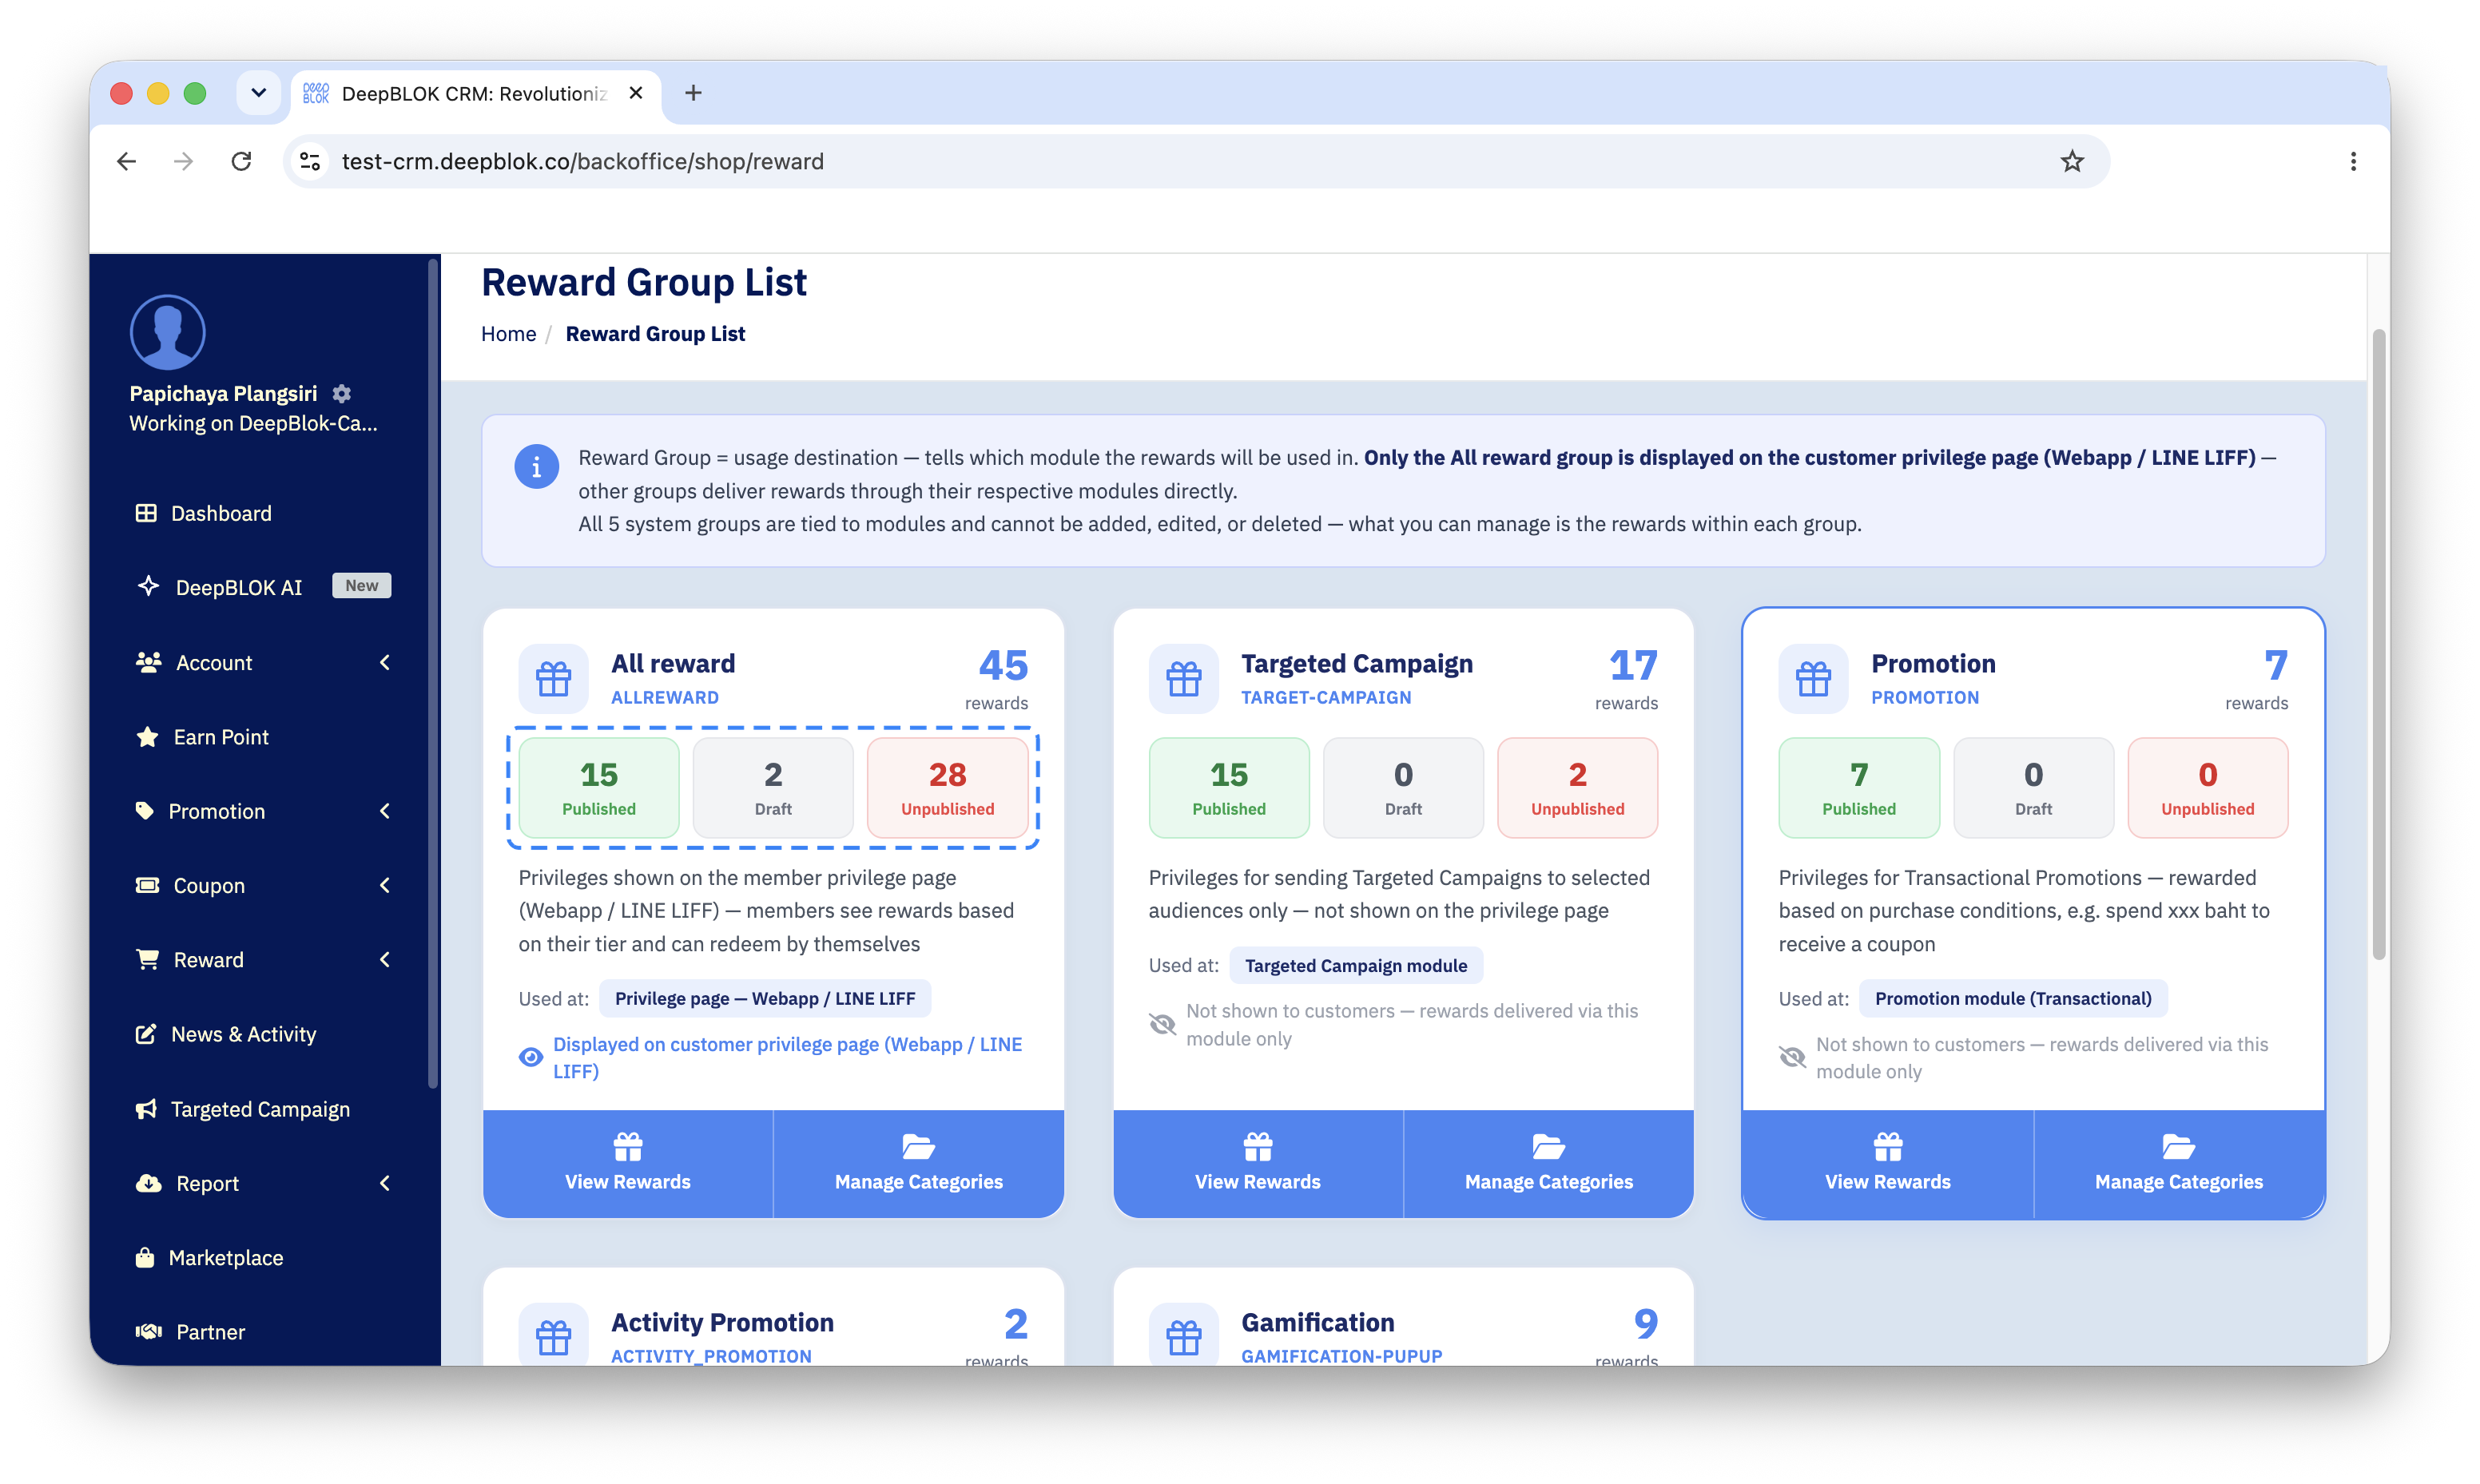
Go to Reward → Reward Group List and the page shows a card for each of the 5 groups the system provides. The group decides which module of the system the reward is used in, so pick the one that matches how you intend to use the reward from the start.
All reward — shown on the customer privilege page for customers to redeem themselves. Most first rewards belong here
Targeted Campaign — sent only to an audience you select
Promotion — given against a purchase condition
Activity Promotion — given automatically on a customer event, such as registering
Gamification — for activities run through the gamification module
📌 Good to know: only the All reward group is displayed on the customer privilege page; in the other 4 the reward reaches the customer through that module directly. None of the 5 groups can be added, edited or deleted — what you manage is the rewards inside them.
Each card carries the reward count split into Published, Draft and Unpublished, and a View Rewards and a Manage Categories button at its foot.
Building a reward in 4 steps
Step 1 Open the group with View Rewards
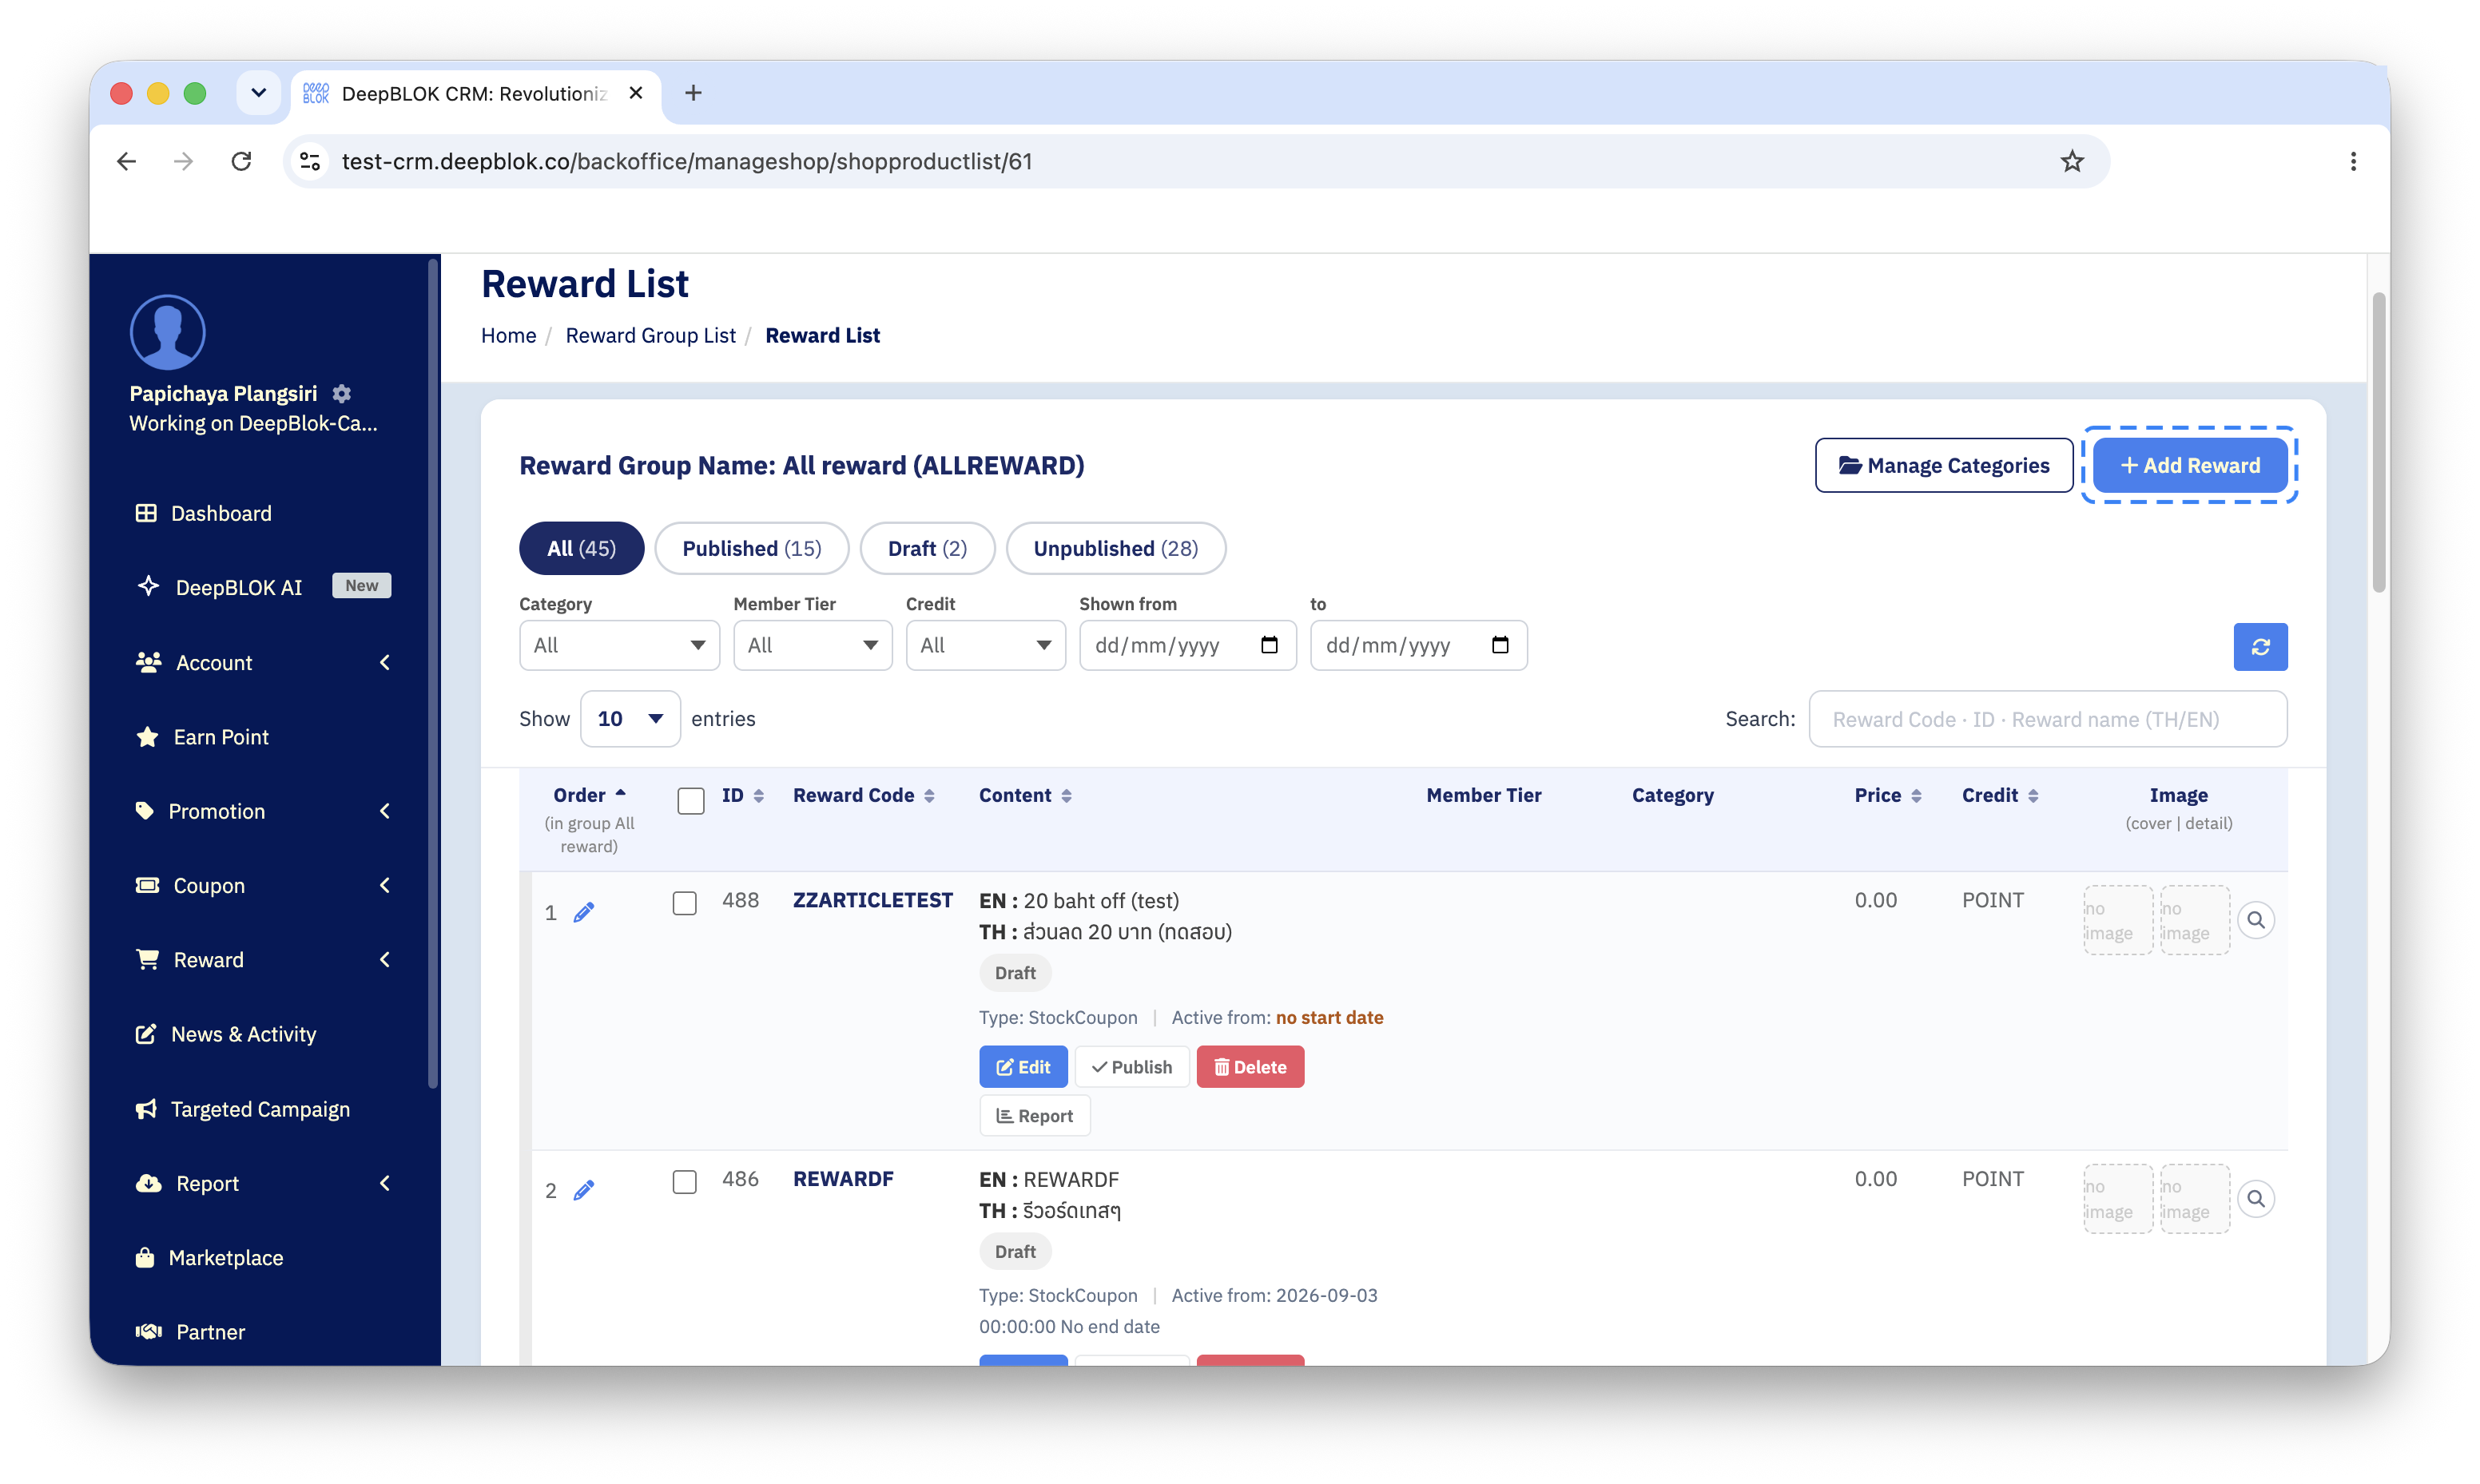
On the Reward Group List page, find the card for the group you want and press View Rewards on the bar at the foot of the card. The system opens that group's Reward List page. To confirm you are in the right place, look at the heading above the table: it reads Reward Group Name: followed by the group name and its code in brackets.
The Reward List page carries 4 status filter buttons under that heading — All, Published, Draft and Unpublished — each with a count in brackets. They tell you at a glance how many rewards in this group customers can see, and how many are sitting unfinished as drafts.
Step 2 Press Add Reward, then save a draft
Press + Add Reward in the top-right corner of the table. The system opens the Create Reward page, which opens with a single tab, Reward Info, and a line beside that tab reading Save step 1 first — steps 2–4 unlock after that. The action bar at the foot of the page therefore holds one button: Save Draft.
The Reward ID field on this page reads — none yet —, with a note saying the system assigns a number after the first draft save.
6 fields are required before Save Draft will go through. Every one of them carries a red asterisk on its label.
Reward Code— the reference code, used to search the table and in reportsReward name (internal)— the name your team uses; customers never see it · a brand connected to Silom POS must follow a set structure, covered in Setting Up Coupons to Calculate Discounts with Silom POSBrand / Partner— who owns the reward. The value appears in reportsReward title customers see, theTHAIandENGLISHboxes — the name on the customer's screen; both are requiredCredit type used— the balance deducted when a customer redeems. The options differ by brand; if you are unsure, check with the DeepBLOK team first
Price sits next to Credit type used, and its label appends the unit of the credit type you picked. It is not required to save a draft but is required to publish. 0 means the reward is free, and a negative value is not accepted.
With all 6 filled in, press Save Draft. If anything is still missing, a red notice appears at the bottom centre of the page, every missing field turns red-bordered, and a message appears under each one.