

4 Methods to earn points on an order
Choose the ones that fit how your brand sells:
💡 Good to know: for other channels you connect over the API, such as your own website or a kiosk, you can talk to one of our specialists on DeepBLOK Line Official.
This article covers method 3 — the channel for purchases made through a sales channel that is not connected to your point-of-sale system, so no points move on their own. The customer sends in a photo of the receipt together with the bill details, and your team reviews it before awarding.
📌 Good to know: this channel does not award points automatically. The system tells customers they will receive their points within 1–3 working days, which means somebody has to review the incoming queue every day. Line that person up before you switch it on.
⚡ Quick Path:
Settings→Earn Point Mechanic→ turn on the Upload Receipt card and clickSaveon that card →Upload Receipt Management→ theSettingstab → add the images → clickSAVEon each section → review theReceipt Listtab daily
📌 Good to know: the member app runs in English or Thai — the customer switches it in their own account, and the labels below are quoted as they appear on screen. The confirmation dialog after a receipt is sent is still shown in Thai, so read it to the customer exactly as written.
Requirements before you start
- Access to
Settings,Promotionand the points menu — this round of work uses 3 menus. Missing one leaves you unable to finish the setup, or able to review but not to award - A complete and correct branch list — customers pick their store from a dropdown fed by your branch list. A branch that is not in the system is not offered, so a customer who bought there cannot submit their receipt at all
- 2 sets of artwork — the hero banner for the receipt-upload page (needed in English and Thai) and an example receipt image showing customers where the receipt number and total sit on your bill. The specs for each are in steps 2 and 4
- Somebody responsible for reviewing receipts daily — because the promise the system makes to customers is 1–3 working days
- An agreed award rule and an agreed rejection rule — e.g. 1 point per 50 THB, and no points when the image cannot be read, so that every reviewer decides the same way
How each receipt is awarded
1. The customer sends the receipt from LINE They fill in 4 bill fields, attach a photo of the receipt and submit. The system immediately tells them the points will arrive within 1–3 working days.
2. The entry waits in the Receipt List tab Every submission becomes one row in the table, with the receipt image available to view and download as evidence.
3. Your team reviews it and awards the points The receipt list page is for reviewing and keeping evidence; adding points to the customer's account happens in the points menu. That means one round of work uses 2 screens.
Set it up in 4 steps
Step 1: open the Earn Point Mechanic page
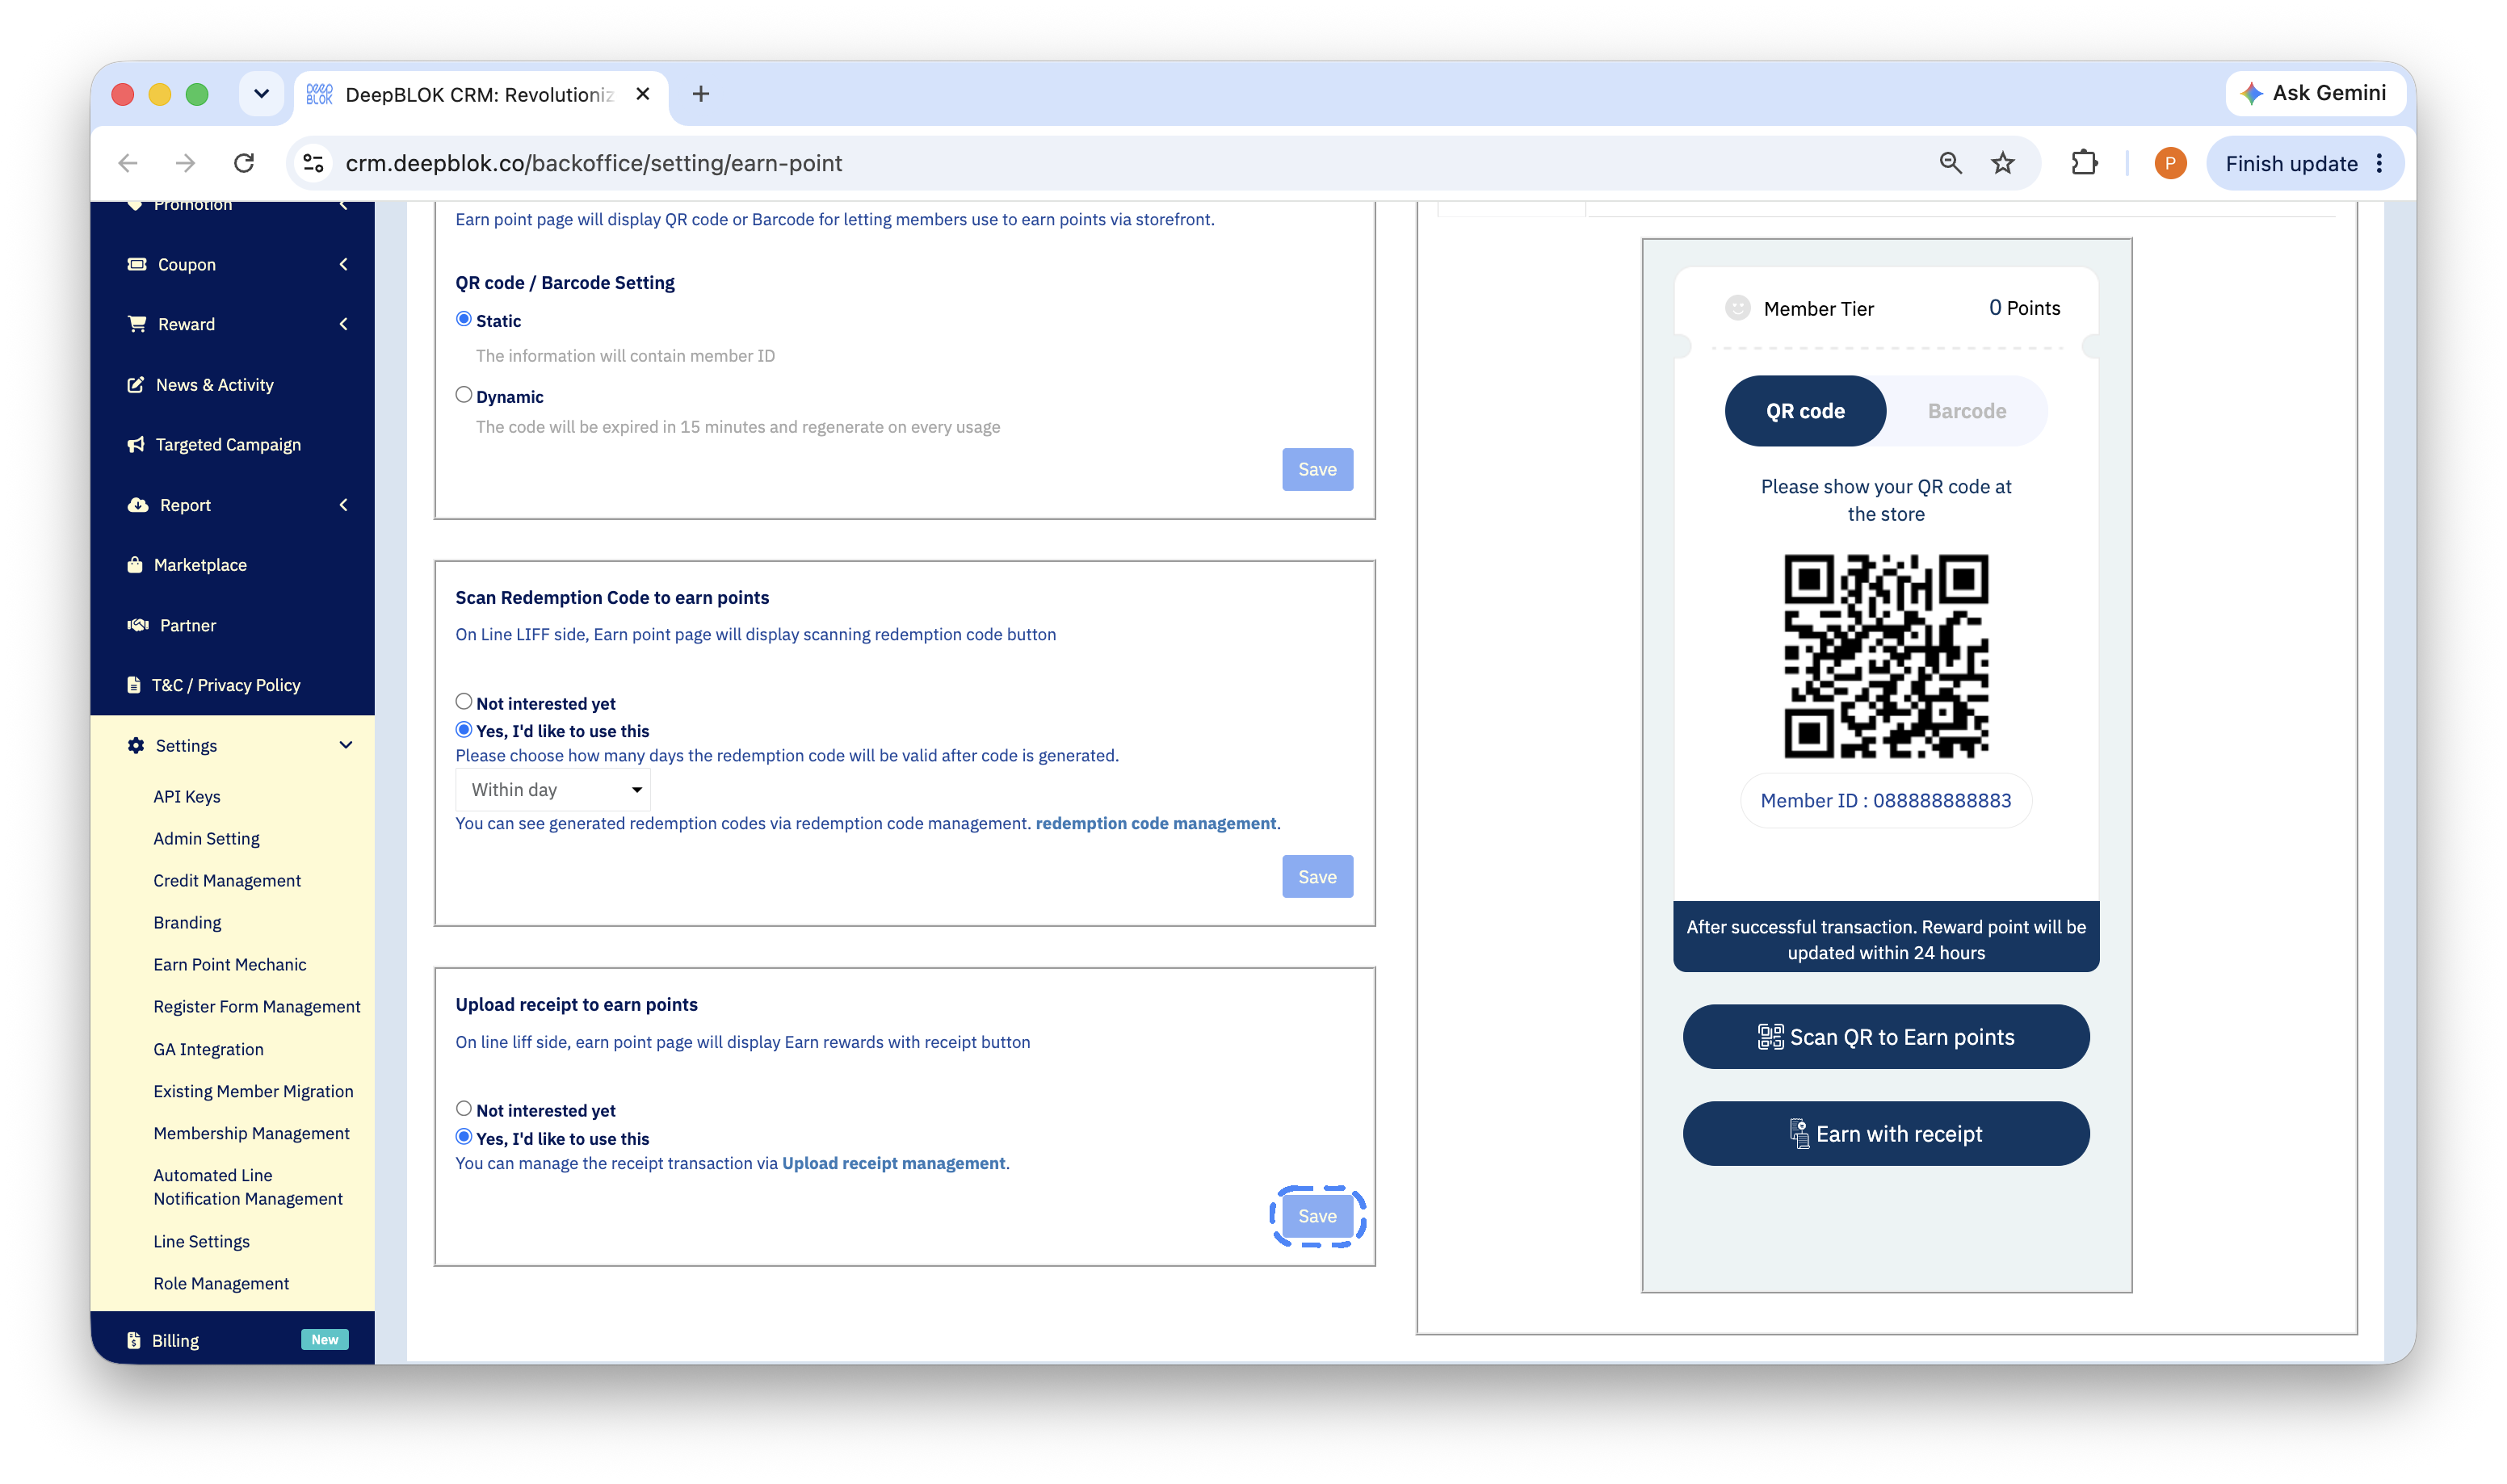
Open Settings in the left menu, then Earn Point Mechanic. Scroll to the Upload Receipt card, pick Yes, I'd like to use this, then click the blue Save button at the bottom right of that card.
⚠️ Watch out: every card on this page has its own
Savebutton, and the page has no page-wideSave. Editing one card and then clickingSaveon another leaves your edit unsaved.
Once saved, the card shows an Upload receipt management link straight through to the management page — you can also reach it from the Promotion menu. That page has 2 tabs: Settings for configuration and Receipt List for what customers have sent in. The next 3 steps happen on the Settings tab.
Step 2: add the hero banner for the receipt-upload page
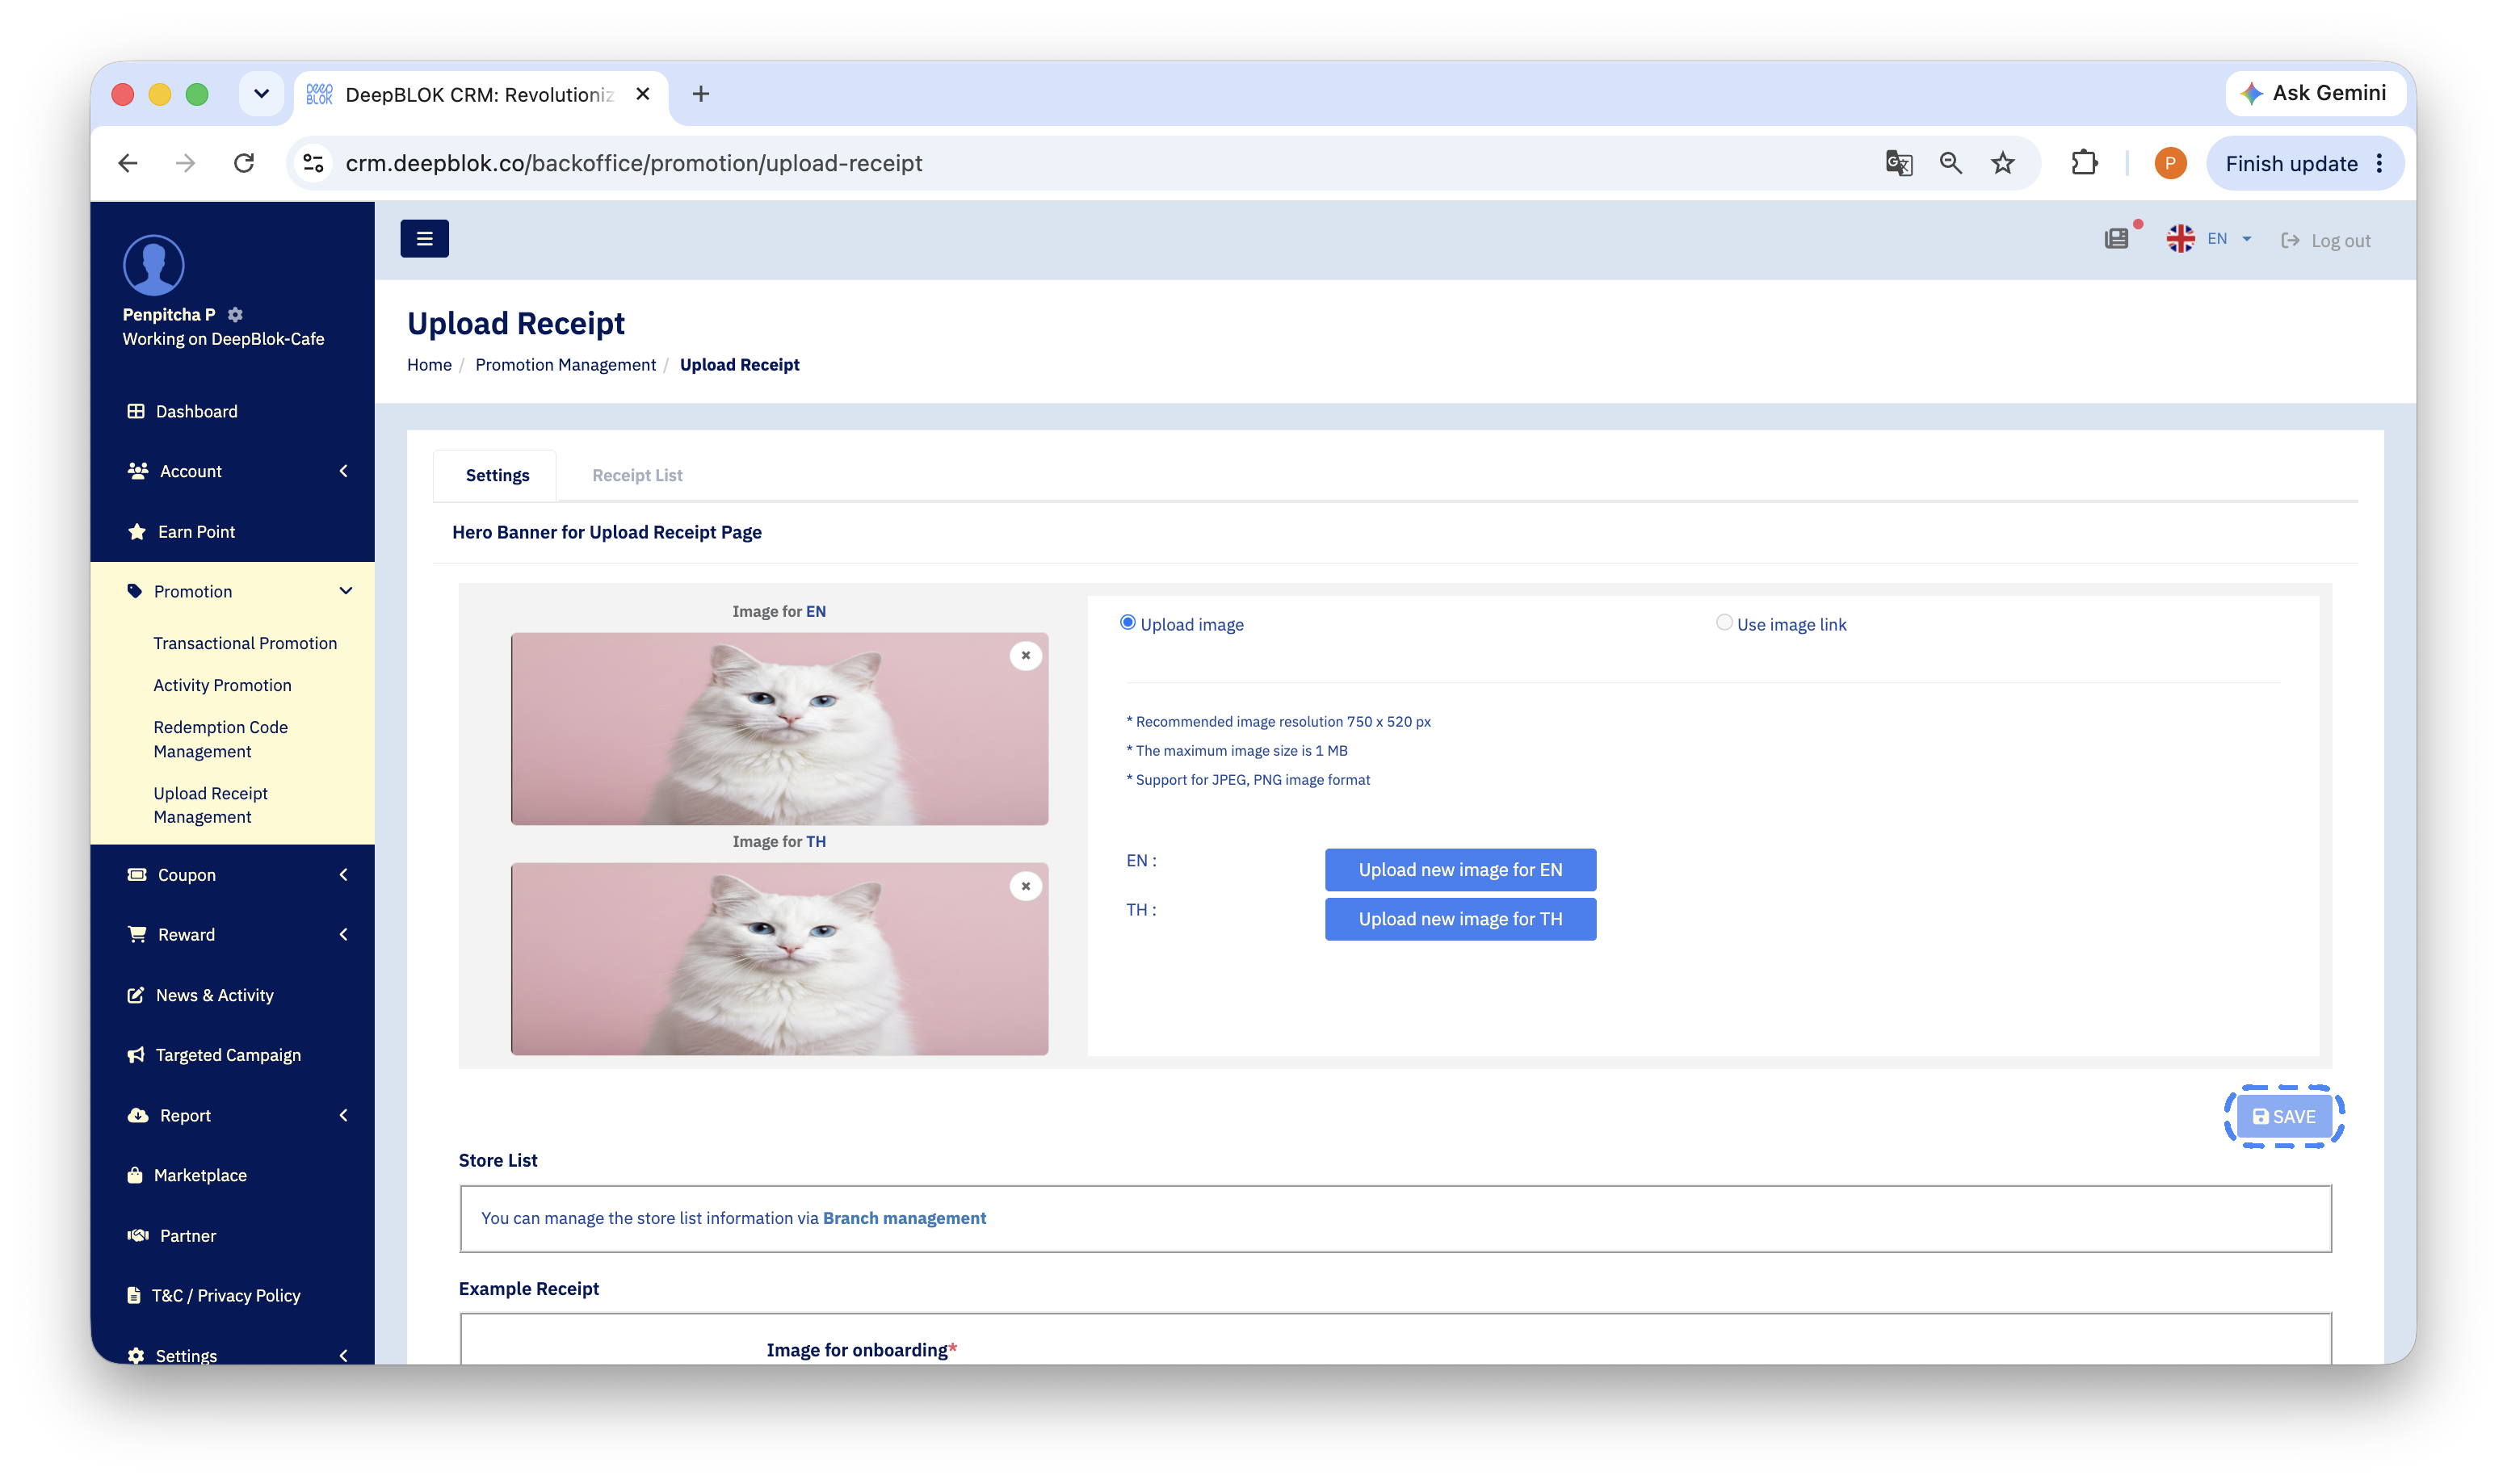
The first section of the Settings tab is Hero Banner for Upload Receipt Page — the header image customers see on the receipt-upload page in LINE. This section takes 2 images, one per language.
At the top are 2 options for how to supply an image: Upload image for a file, and Use image link for an image that already lives somewhere. Then click the blue Upload new image for EN and Upload new image for TH buttons one at a time, and click SAVE at the bottom right of this section.
Step 3: check the branch list is complete
Scroll down to the Store List section. Nothing is edited here, but there is a blue Branch management link through to the branch list.
This is the list behind the Store Name dropdown the customer must choose from when filling in their receipt details. If the branch they bought from is not on the list, they cannot submit the receipt at all. Check that every trading branch is present, and that the names are ones customers recognise rather than internal team codes.
Step 4: add the example receipt image, then save
The last section is Example Receipt, with a single field, Image for onboarding, carrying a red asterisk — so it is required. This is the image the customer sees before filling in the form; it shows where the receipt number and total sit on your brand's bill.
Click the blue Upload image button to add it, then click SAVE at the bottom right of this section.