When you already hold discount coupons — from a partner, or in a file your team built — there is no need to have the system generate new ones. They can be imported straight into an existing bucket as a CSV. This article covers finding the upload icon, downloading the sample template to see the column headings, and the rules the codes have to meet. One lot takes about 3 minutes.
⚡ Quick Path:
Coupon→Coupon Bucket→the upload icon in that bucket's
Actionscolumn → fill inDescription→Choose File→Save
📌 Good to know: the bucket has to exist first, because importing fills an existing bucket rather than creating one. If you have no bucket yet, create it and come back — the article is linked at the end.
Requirements before you start
- A bucket that already exists — and knowing which one you are filling, since the upload icon sits on that bucket's own row.
- The coupons as a
.csvfile — the system takes that extension only, and no more than 100,000 rows per file. - Codes you have checked against the rules — English letters and numbers only, no special characters. The detail is in its own section below.
Importing coupons in 4 steps
Step 1 Press the upload icon on the bucket's row
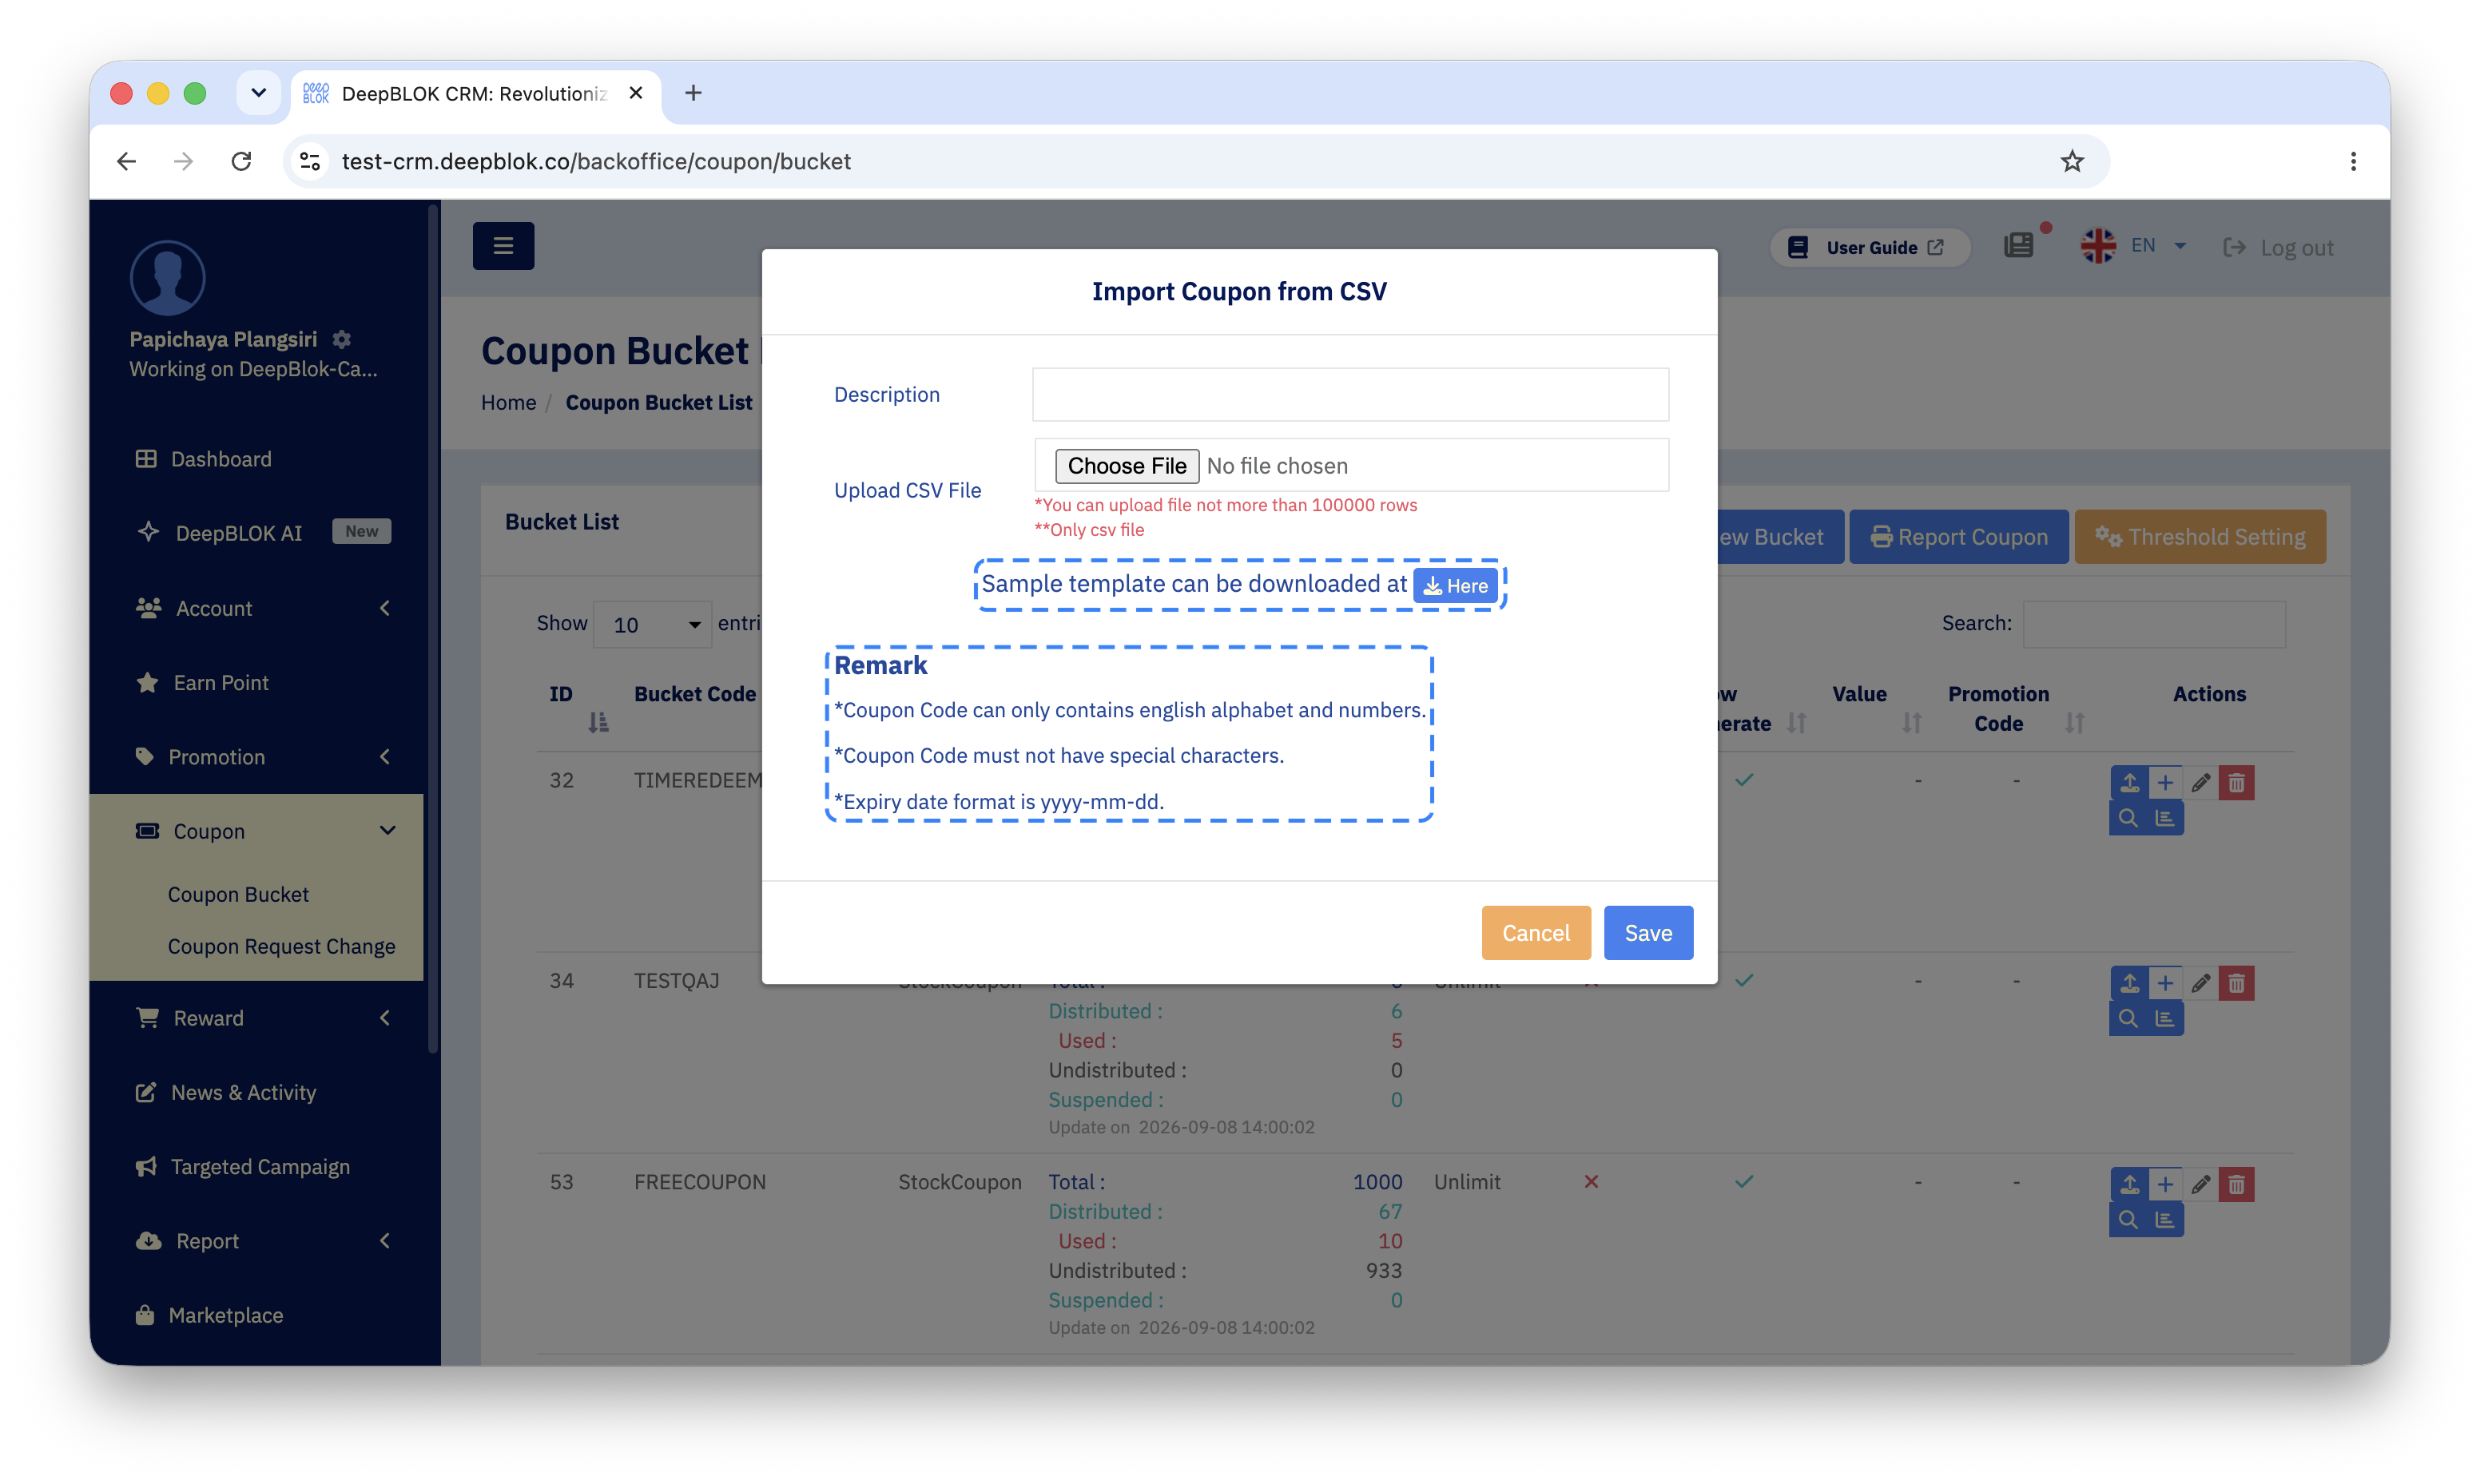
Open Coupon → Coupon Bucket and find the row of the bucket you are filling. In the Actions column at the end of the row, press the upload icon, the first of the 6. The system opens a dialog titled Import Coupon from CSV.
⚠️ Watch out: all 6 icons sit side by side, and the second one has the system generate new coupons — a different job entirely. We recommend reading the title of the dialog that opens before filling anything in. Import Coupon from CSV means you are in the right place; Generate Coupon in Bucket means you should press Cancel and go back to the first icon.
Step 2 Download the sample template before preparing your file
In the middle of the dialog is the line Sample template can be downloaded at with a blue Here button. Press it to download the sample, which is the fastest way to see what column headings the file needs and in what order.
The file you get has 3 columns, with the first row as the headings.
Put each code's expiry date in DateExpire as yyyy-mm-dd.
We recommend using the sample as the template and replacing the data inside it, rather than building a file from scratch — mismatched column headings are the most common reason an import fails.
Step 3 Describe the lot and choose the file
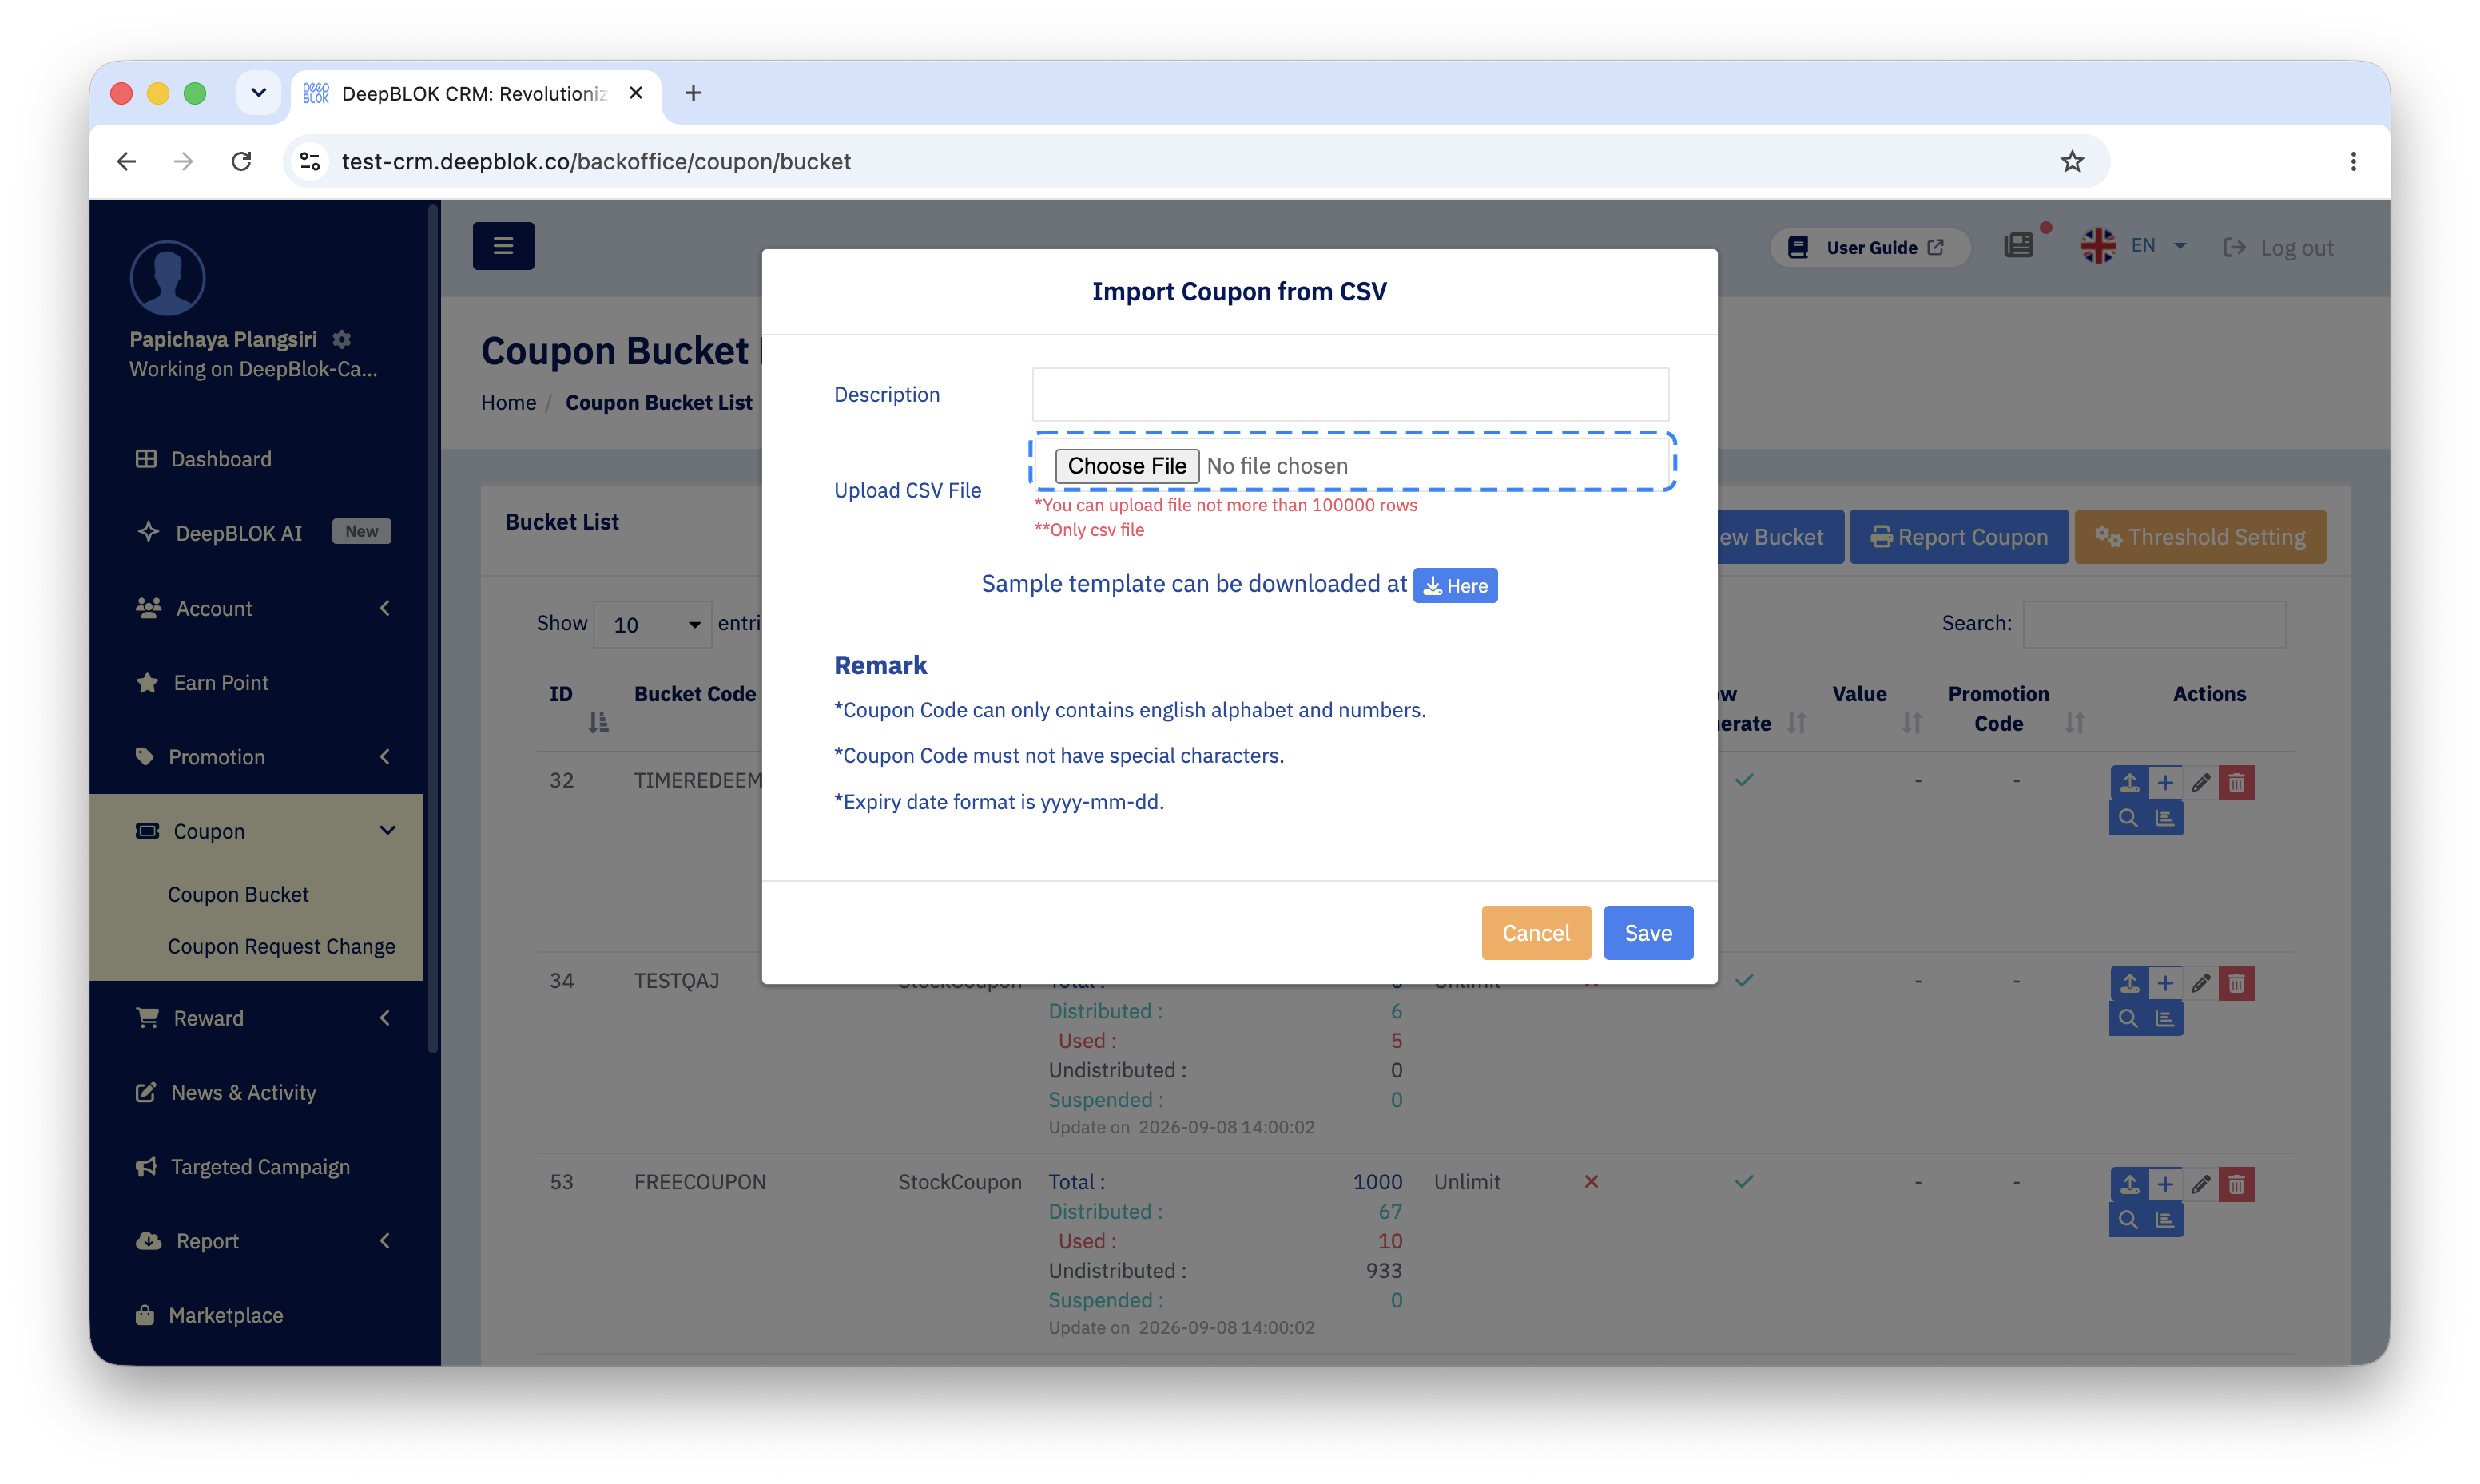
The dialog has 2 fields to complete.
1. Description Details of this lot of coupons — where they came from, or the campaign they are for. It is what lets you tell later which batch arrived when, once a bucket holds coupons from several lots.
2. Upload CSV File Press Choose File and select the .csv you prepared. The chosen filename appears beside the button. 2 red lines beneath the field state the rules: files of no more than 100,000 rows, and .csv only.
Step 4 Save
Press the blue Save at the bottom right of the dialog. The orange Cancel beside it closes the dialog without importing.
✅ Confirm it worked: back on the Bucket List table, check that bucket's Coupon Count column. Total should have risen by the number of rows in your file, and Waiting for update data should have become an update timestamp. If the figure has not moved, reload the page before concluding the import failed.
The rules a code has to meet
The import dialog carries a Remark heading with the rules for the coupons themselves, in blue. These 3 account for almost every failed import.